博客

  • Peach Sheet Cake with Brown Butter Frosting

    Peach Sheet Cake with Brown Butter Frosting

    There’s a window, maybe three weeks long, when peaches are so good you question your life choices for eating anything else. This year that window opened right on schedule, and I spent the whole of it thinking about one thing: how to get a box of the best peaches I could find into a single, easy cake.
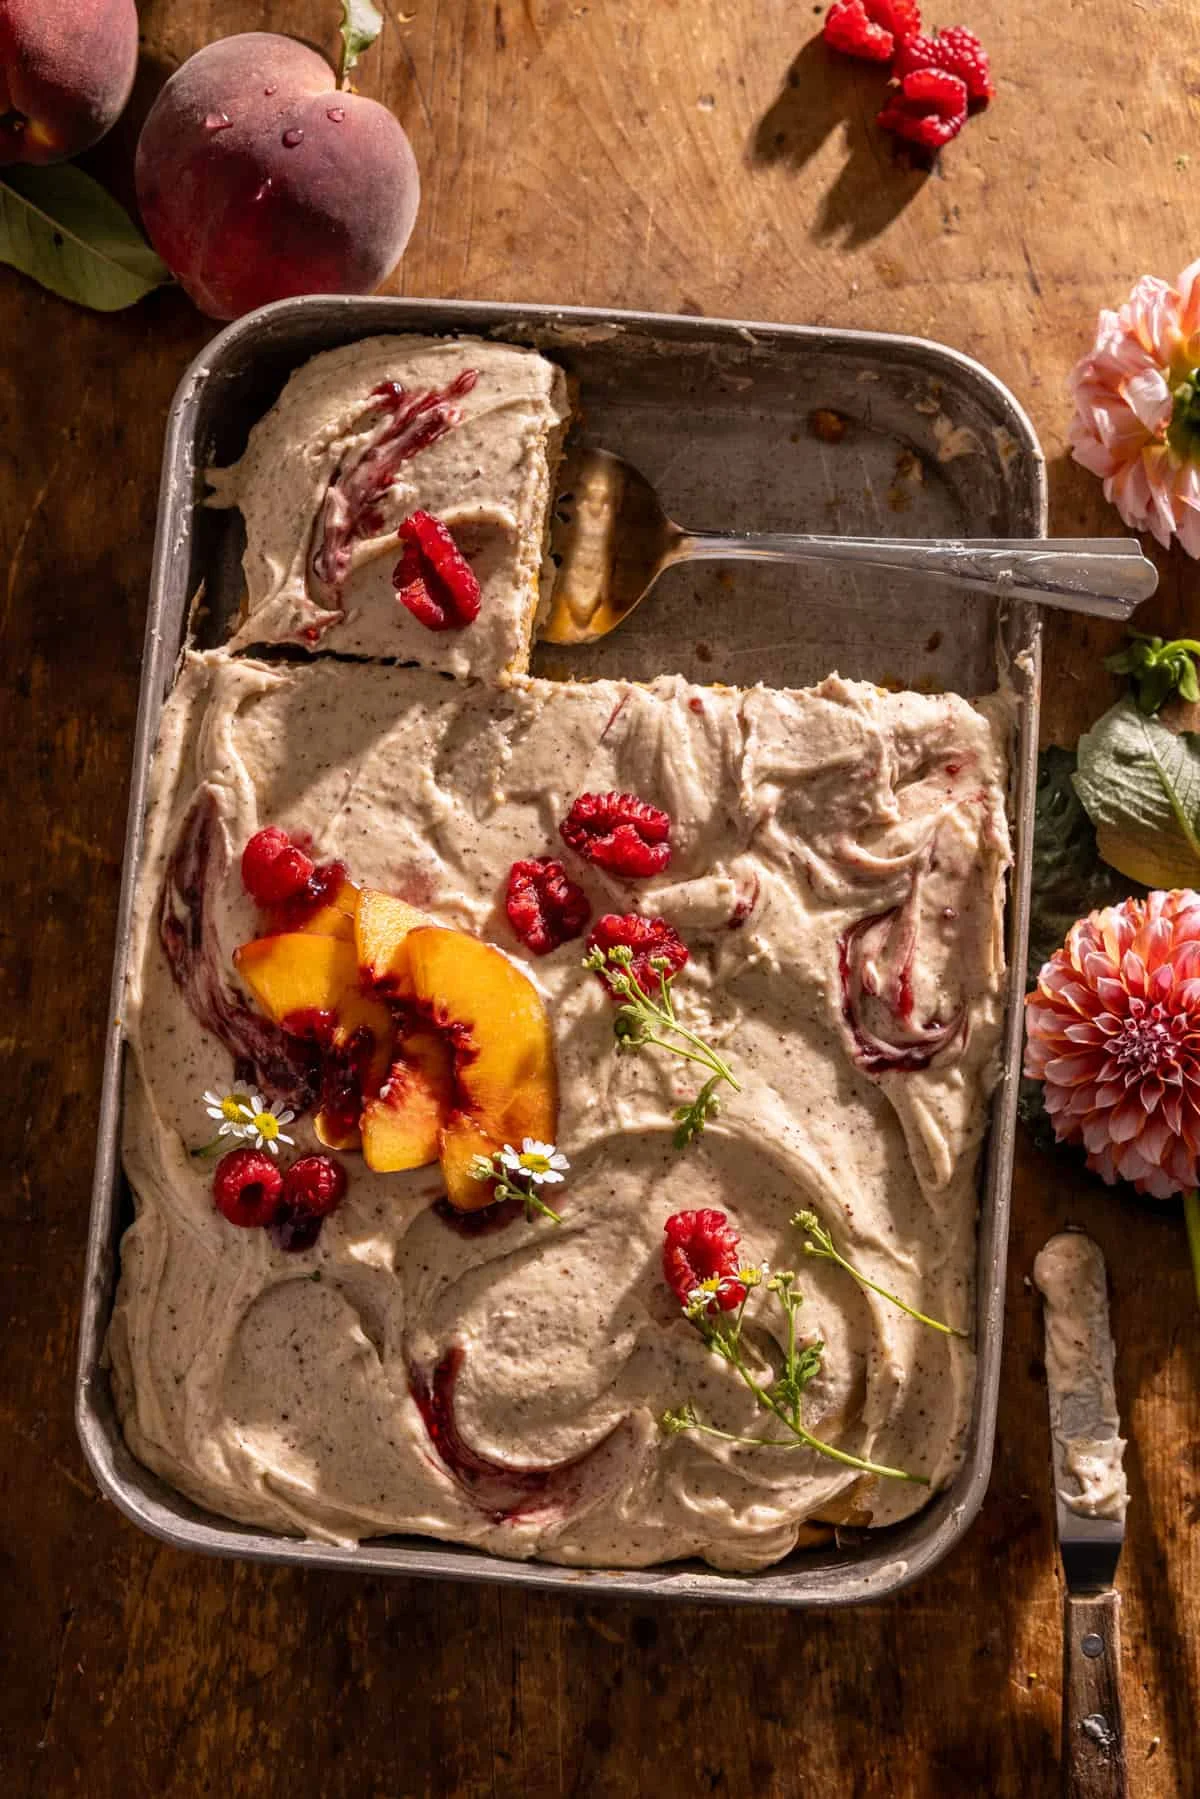
    Peach sheet cake with brown butter frosting in a metal pan

    The answer came from an old layered peach cake I’d had tucked in the back of my mind for years. I wanted all of those same flavors, but in a format that doesn’t take over a weekend. A sheet cake. Something that still tastes like the good version, even on a week when I’ve already given too much of myself away.

    Frosted peach cake topped with peach slices and raspberries

    It worked. The base is a soft vanilla cake, lightly sweetened with brown sugar, with juicy peaches and little swirls of raspberry jam worked all the way through. On top goes a brown butter frosting — rich, nutty, sweetened with maple syrup — the kind you’ll want to test with a spoon before it ever makes it onto the cake. Honestly? Do it. Nobody’s counting.

    Why this cake

    It’s the kind of dessert that shows up when you actually want to host: it feeds a crowd, it keeps well, and it photographs itself. But it’s also the kind I can make when the kitchen is already a mess and I just need something sweet at the end of a long day. The whole thing is about an hour and a half, most of it hands-off.

    I’ve tested this one in my own kitchen a few times, and it passed the Tuesday test — no special equipment, no tempering, no second trip to the store. The peaches just need to be ripe.
    Chopped fresh peaches with sugar and cinnamon in a glass bowl

    What you’ll need

    Peach filling

    • 2 1/2 cups (600 g) chopped fresh or frozen peaches, about 5 peaches
    • 1 tablespoon (12 g) granulated sugar
    • 1 teaspoon (2 g) ground cinnamon
    • 1/3 cup (80 g) raspberry jam
    • very tiny fresh or frozen raspberries, for finishing

    Cake

    • 1 cup (237 ml) melted coconut oil
    • 1/2 cup (120 g) sour cream, at room temperature
    • 3 large eggs, at room temperature
    • 3/4 cup (150 g) granulated sugar
    • 3/4 cup (150 g) packed brown sugar
    • 1 tablespoon vanilla extract
    • 1 cup (240 ml) milk, at room temperature
    • 3 cups (375 g) all-purpose flour
    • 1 1/2 teaspoons baking powder
    • 1/2 teaspoon baking soda
    • 1 teaspoon salt

    Brown butter maple frosting

    • 2 sticks (227 g) salted butter, cubed
    • 3 ounces (85 g) cream cheese, at room temperature
    • 2 to 3 cups powdered sugar
    • 1/3 cup (80 ml) real maple syrup
    • 2 teaspoons vanilla extract

    Room-temperature notes matter more than they sound. Eggs, sour cream, and cream cheese all come out of the fridge with the rest of us, so give them a head start.
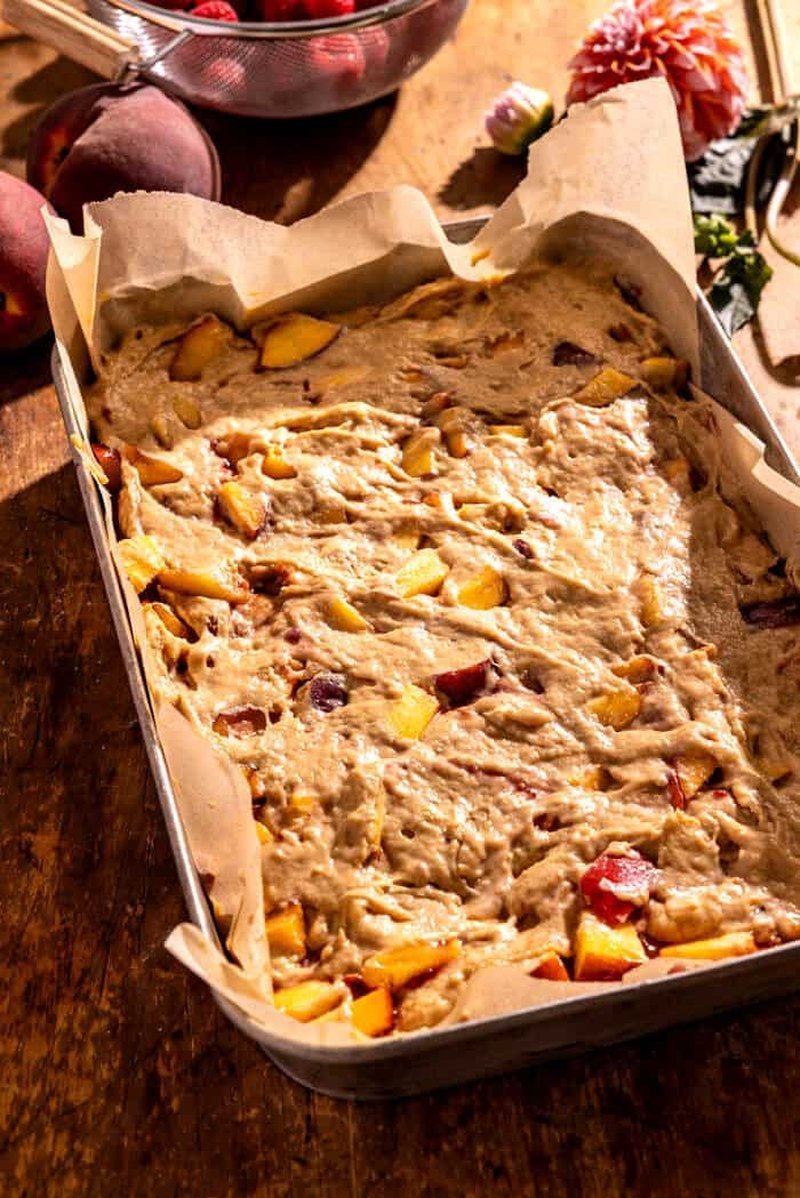
    Unbaked cake batter studded with peaches in parchment-lined pan

    How to make it

    Prep the peaches. Toss the chopped peaches with the sugar and cinnamon, then stir in a few spoonfuls of the raspberry jam — save the rest for the top. Let them sit and get extra juicy while you mix the batter.

    Don’t peel the peaches. The skin adds color and flavor, plus a lot of the fruit’s natural fiber. And if your peaches are especially ripe, don’t pour off those juices — they bake right into the cake and make every slice more moist.

    Mix the batter. Whisk together the coconut oil, sour cream, eggs, both sugars, the vanilla, and the milk until smooth. Add the flour, baking powder, baking soda, and salt, and mix just until combined. A few small lumps are fine — overmixing is what gets you a tough cake, and this one should be soft.

    Layer it. Preheat the oven to 350°F (180°C) and line a 9×13-inch (23×33 cm) pan with parchment paper. Spread one-third of the batter in the pan, top it with half the peaches and their juices, add another third of the batter, then the remaining peaches and the last of the batter. Smooth the top, or don’t. Some peaches will peek through and that’s part of the charm.

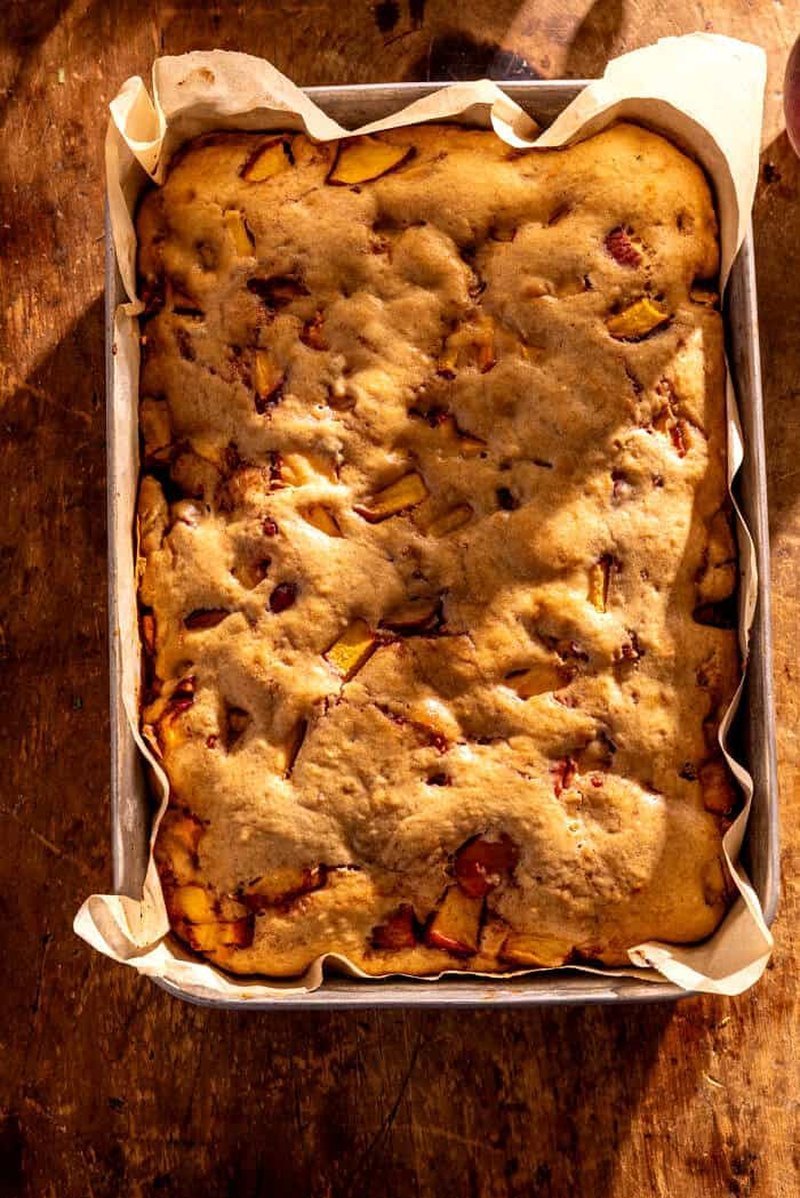
    Bake. Forty to fifty minutes, until the center is just set and a toothpick comes out clean. Then comes the part that separates frosted cake from sad cake: wait until it’s completely cool.

    Use that time to make the frosting. Brown the butter in a skillet until it smells rich and nutty — and don’t scrape out the browned bits at the bottom of the pan, that’s where all the good flavor lives. Let it cool back to room temperature, then beat it with the cream cheese, powdered sugar, maple syrup, and vanilla until light and fluffy. Add more powdered sugar a little at a time if you like it stiffer.

    Finished cake with jam swirls, peach slices, and daisies

    Frost and finish. Spread the frosting over the cooled cake, dollop the remaining raspberry jam over the top, and swirl it gently with a knife. Finish with fresh peach slices and the tiniest raspberries you can find. Frozen raspberries work just as well if fresh ones aren’t around.

    Make it your own

    Swap the raspberry jam for peach preserves or apricot jam if that’s what’s in your pantry. Nectarines work beautifully if the market is out of peaches. And if you want a little crunch, sprinkle chopped cinnamon pecans over the frosting before serving.

    For entertaining

    Sheet cakes have always reminded me of my grandmother, whom we called Nonnie. She liked to set the cake right in the middle of the table so everyone could help themselves, and I still do the same, especially for Sunday dinner. Serve each slice with a scoop of vanilla ice cream or a soft dollop of whipped cream — she always did that for my grandpa, and it’s exactly the kind of small touch that made her baking feel like a ritual.

    Don’t worry if every slice looks a little different. Embrace the perfectly imperfect beauty of this cake. That’s the whole point of a home-baked sheet cake: no two slices are the same, and every one of them tastes like summer.

    Storing leftovers

    Cover and refrigerate. I actually think this cake is better the next day, once the peaches have settled into the crumb and the frosting has had time to chill.

    Nutrition per serving (about 448 kcal, serves 18): an estimate only — your peaches will weigh a little differently than mine, so don’t quote me on it.

    A note from Nora

    The first time I made this, I frosted it while the cake was still warm because I was impatient, and the frosting slid off in a slow, sad slide. The cake still tasted great, but the lesson stuck: the waiting is part of the recipe. If I can make it on a Tuesday, it’s a keeper — and this one, I expect to be making until the peaches run out.

    Keep Reading

  • Steak Fajita Salad

    Steak Fajita Salad

    There’s a stretch of summer evenings when the grill is already going, the kids are outside, and the last thing I want is to fire up the oven for something that could just as well be a salad. That’s when this steak fajita salad earns its keep.

    I first tried it on a warm July night, mostly because Sam loves fajitas and I wanted something that felt like a proper meal without the whole flour-tortilla-and-rice routine. The steak comes off the grill still juicy, the peppers and onions have that nice char, and the honey lime dressing ties it all together. It passed the Tuesday test the very first time.

    Grilled steak fajita salad topped with avocado and honey lime dressing

    Why this salad works

    It’s a low-carb, high-protein dinner that keeps the whole table happy. A few things I love about it:

    • A lean, low-carb take on a Tex-Mex favorite
    • Everything cooks on the grill, so the kitchen barely gets messy
    • 29 grams of protein per serving — you’ll actually be full
    • On the grill, it’s done in about 15 minutes of active time
    • Great on a hot night, at a camping trip, or any time you don’t want to be near the stove
    Close-up of charred grilled peppers and onions on the grill

    Ingredients you’ll need

    Most of this is stuff I already keep in the fridge. The only things worth specifically shopping for are a good sirloin and fresh limes.

    • 1 pound sirloin steak — lean, forgiving, and perfect for fajitas. Let it sit at room temperature for 30 minutes before cooking.
    • Red, yellow, and poblano bell peppers, cut into large planks
    • 1 red onion, sliced into 1/2-inch rings
    • 2 teaspoons olive oil, divided
    • 1 teaspoon cumin, kosher salt, and freshly ground black pepper
    • 5 cups chopped romaine hearts
    • 5 ounces avocado, diced (about 1 medium)
    • Cilantro leaves, for garnish

    For the honey lime dressing:

    • 1/4 cup extra virgin olive oil
    • Juice of 2 large limes
    • 1 1/2 teaspoons honey
    • 3/4 teaspoon cumin
    • 1/2 teaspoon kosher salt
    • 1/4 teaspoon black pepper
    Raw sirloin steak and sliced peppers ready for the grill

    How to make it

    The whole thing happens on the grill, which is half the appeal. Here’s the order that works for me.

    1. Make the dressing. Whisk all six ingredients together in a small bowl and set it aside. It’s the one thing worth doing ahead of time.

    2. Season the steak. Spray the sirloin with the olive oil and season both sides with 1 teaspoon salt, pepper, and the cumin.

    3. Toss the vegetables. Add the peppers and onion to a bowl with the remaining 2 teaspoons of oil. Toss to coat, but try to keep the onion rings in one piece — they’re much easier to grill intact.

    4. Grill the steak. Preheat the grill to medium-high and lightly oil the grates. Lay the steak on one half and cook 5 to 7 minutes per side until it hits 125°F (52°C) in the center. Pull it off and let it rest for 10 minutes before slicing.

    5. Grill the vegetables. While the steak cooks, spread the peppers and onions in an even layer on the other half of the grill. Cook, turning as needed, until charred and soft, about 10 minutes.

    6. Build the salad. Slice the peppers into strips and pile them over the chopped romaine. Separate the onion into rings and layer on top. Slice the steak against the grain and shingle it over the vegetables. Top with avocado and cilantro, then drizzle generously with the dressing.

    Sliced grilled steak layered over a bed of romaine lettuce

    Swaps and variations

    • Protein: Flank or skirt steak works beautifully too. No red meat? Swap in chicken or shrimp.
    • More vegetables: Cucumber and cherry tomatoes both do well here.
    • Heat: Grill a jalapeño or serrano alongside the peppers if you want a kick.
    • No cilantro? Leave it out. No judgment.
    • Vegetarian or extra fiber: Add canned black beans — it works as a meat-free fajita salad on its own.
    • Guac instead of dressing and diced avocado? Absolutely, that’s a fine move.
    • Some cheese: Shredded cheddar or crumbled cotija on top.

    Without a grill

    Use a cast-iron skillet or grill pan on the stove over medium-high heat. Cook the steak and vegetables separately, following the same timings. You’ll lose a little of the char, but it’s still a great weeknight dinner.

    Meal prep and storage

    You can do most of the prep a day ahead: season the sirloin, cut the peppers, onions, and lettuce, and make the vinaigrette. Just keep the parts separate until you’re ready to eat, or the lettuce turns sad.

    • Store the grilled meat and vegetables in one container and the lettuce in a larger one. The vinaigrette goes in its own small jar.
    • Slice the avocado right before serving.
    • Refrigerate the sirloin, peppers, and onions for up to 4 days.
    • Freeze in an airtight container for up to 3 months. Thaw in the fridge and assemble when you’re ready to eat.
    • Reheat the meat and vegetables in the microwave, or eat them cold straight off the salad.

    Serving suggestions

    Chips and salsa on the side make this feel like a real dinner. If you’re hosting, a simple cocktail or mocktail rounds it out nicely.

    A note from Nora: the first time I made this, I let the onions separate before grilling and they scattered across the whole grill in a way that was not elegant. Keep the rings intact and you’ll thank me later. Sam asked for this on a Tuesday two weeks after I first made it. If I can make it on a Tuesday, it’s a keeper.

    Keep Reading

  • Birthday Cake Protein Balls (No Food Processor!)

    Birthday Cake Protein Balls (No Food Processor!)

    There’s a specific kind of 3 p.m. I know too well: Sam’s in the middle of grading papers, our daughter has just discovered that chairs can be stacked, and I want cake. Actual birthday cake. With sprinkles. I don’t want a ‘healthy’ snack that tastes like cardboard with ambition — I want the licking-the-bowl feeling.

    So I make these.

    Birthday cake protein balls dusted with rainbow sprinkles on a dark plate alt=”Birthday cake protein balls dusted with rainbow sprinkles on a dark plate”>

    These birthday cake protein balls taste like funfetti cake batter — almond extract, vanilla, and a handful of rainbow sprinkles folded into a simple oat-and-nut-butter base. One bowl, no food processor, no oven. They come together in about ten minutes, and each ball packs 6g of protein. They’ve been a go-to in this house for years, and they pass the Tuesday test with room to spare.

    Why these earn a spot in my freezer

    Pile of birthday cake protein balls with rainbow sprinkles on a wooden board alt=”Pile of birthday cake protein balls with rainbow sprinkles on a wooden board”>

    I’ve made these both blended in a food processor and mixed by hand in a single bowl, and honestly the one-bowl method won every time. Here’s what keeps me coming back:

    • No food processor needed. One bowl and a spoon. No blending, no cleanup hassle — which matters when the rest of the kitchen is occupied by a two-year-old.
    • They taste like real cake batter. The almond extract, vanilla, and sprinkle combo is the flavor trick. It’s the bowl you used to lick as a kid, not a “healthy” stand-in.
    • 6g protein per ball. A satisfying snack that actually holds you over, not just a sugar hit.
    • Freezer-friendly. I keep a batch in the freezer for when the sweet tooth hits mid-afternoon. They satisfy the craving without derailing anything.

    What you’ll need

    You only need six ingredients, and I’d bet most of them are already in your pantry:

    • Cashew butter — the mildest-flavored nut butter, so it lets the cake batter flavor shine. Make sure it’s drippy; a stiff, cold jar is the number one cause of a stiff dough.
    • Rolled oats — fiber, a nice bite, and they soak up moisture so everything binds together.
    • Maple syrup or honey — the sweetener and the glue. Don’t skip it.
    • Vanilla protein powder — I like a vanilla whey for texture, but plant-based works too. It just tends to make a drier dough, so you may need a splash of extra liquid.
    • Almond extract — the ingredient that makes these taste like actual cake instead of plain vanilla. Non-negotiable if you want real birthday cake flavor.
    • Rainbow sprinkles — is it really birthday cake anything without them? The long skinny kind (jimmies) hold their color best, but dye-free sprinkles are a nice swap if you’re avoiding artificial dyes.

    One thing worth knowing: different protein powders absorb moisture differently. That’s why the same recipe can look dry in one batch and wet in the next — it’s not you doing anything wrong, it’s just the protein powder.

    How to make them

    Rolled protein balls dusted in sprinkles stacked on a wooden surface alt=”Rolled protein balls dusted in sprinkles stacked on a wooden surface”>

    It really is as simple as it sounds — three steps: mix the dough in one bowl, scoop and roll it into balls, then roll each ball in extra sprinkles.

    Ingredients:

    • 1 cup all-natural drippy cashew butter
    • 1/2 cup vanilla protein powder
    • 1/2 cup rolled oats
    • 1 tablespoon honey
    • 2 tablespoons rainbow sprinkles, + more for rolling
    • 1 teaspoon vanilla extract
    • Water, as needed

    Steps:

    1. Place all ingredients in a medium bowl.
    2. Stir with a wooden spoon until combined. Eventually it’s easier to knead with your hands. The dough should be malleable and a little bit oily — if it isn’t, add water by the teaspoon until it turns into a cookie-dough-like dough.
    3. Use a 1 tablespoon cookie scoop (or just your hands) and roll the dough into balls between your palms.
    4. Set out the extra rainbow sprinkles on a plate, roll each ball in them, then give it one more roll between your palms. Place on a plate and eat — or straight to the freezer.

    When the dough goes sideways

    I learned this one the hard way. The first time I made these with a new plant-based protein powder, my dough turned into a crumbly mess that wouldn’t hold together no matter how much I kneaded it. That brand soaked up far more liquid than the whey I normally use. Now I add my wet ingredients gradually and check the dough’s texture before dumping in all the powder at once — it’s a lot easier to add more powder than to fix an overly dry dough.

    For reference, the full troubleshooting:

    • Dough too dry or crumbly? Add liquid (maple syrup, honey, or a splash of milk) one teaspoon at a time until it holds together when pressed. Common with drier protein powders or if your nut butter isn’t very runny.
    • Dough too wet or sticky? Add more protein powder or oat flour, one tablespoon at a time, until it firms up.
    • Cold nut butter? Warm it slightly before mixing — cold cashew or almond butter is the number one cause of a stiff, hard-to-roll dough.
    • Substituting cashew butter? Almond or peanut butter both work, though they add a slightly nuttier flavor that’s a bit less “cake batter.” For a nut-free version, sunflower seed butter is the best swap.

    Ways I spin it

    One of my favorite things about this recipe is how easy it is to customize:

    • Chocolate chip birthday cake: fold in mini chocolate or white chocolate chips along with the sprinkles.
    • Nut-free: swap the cashew butter for sunflower seed butter.
    • Extra funfetti: roll the finished balls in a second coat of sprinkles for maximum color and crunch.
    • Seasonal: Christmas, Halloween, or Easter-colored sprinkles turn these into a treat for any occasion.

    The extra funfetti version is the one I make most often for our family’s birthdays — a double coat of sprinkles makes them feel extra celebratory without any extra effort. I’ve also rolled this same dough into egg shapes and dipped them in white chocolate for an Easter version, which is basically just my protein cake pops in a different shape.

    Storing them

    Store them in an airtight container in the fridge for up to 1 week, or in the freezer for up to 2–3 months. For the best texture, let them sit at room temperature for a few minutes before eating — they’re noticeably firmer straight out of the fridge or freezer.

    Questions I actually get asked

    What do they actually taste like? Like funfetti cake batter. The almond extract, vanilla, and sprinkles do all the work — people constantly ask if there’s actual cake mix in them. Nope. It’s all in the extract combo.

    Can I really make these without a food processor? Yes — that’s the whole point. Everything mixes together in one bowl with a spoon (and your hands toward the end).

    Can I freeze them? Yes — freeze them in a single layer until solid, then transfer to a freezer-safe bag or container for up to 2–3 months. Thaw in the fridge, or let them sit a few minutes at room temperature.

    Are they gluten-free? Yes, as long as you use certified gluten-free oats (or oat flour) and check that your protein powder and sprinkles are labeled gluten-free — some sprinkles are processed in facilities that handle wheat.

    A note from Nora

    These aren’t a dessert in the “occasion” sense. They’re the thing I keep in the freezer drawer so that an ordinary Tuesday can still have a little cake in it. Maybe that’s the whole point of small rituals like this — they don’t fix anything, but they remind you that even a messy afternoon can hold something sweet.

    If I can make it on a Tuesday, it’s a keeper.

    Keep Reading

  • Cucumber Tomato Salad with Mint

    Cucumber Tomato Salad with Mint

    For years, my mint has lived in a potted prison. I keep it in its own container so it doesn’t spread and swallow the rest of the herb planter, and every spring it comes back greener and more determined than the last. The basil got the pesto. The chives got the eggs. The mint just… grew.

    That changes this summer, because this cucumber tomato salad made me finally take it seriously. Just enough mint to make the cucumbers taste like cucumbers, just enough acid to make it all sit up and pay attention. It’s the kind of thing that goes with grilled chicken, grilled fish, ribs — honestly, whatever Sam is dragging off the grill.

    And here’s the thing I love about it: there is no dressing. You throw everything into one bowl. Fifteen minutes, start to finish. After a long day, that’s not a salad, that’s a victory.

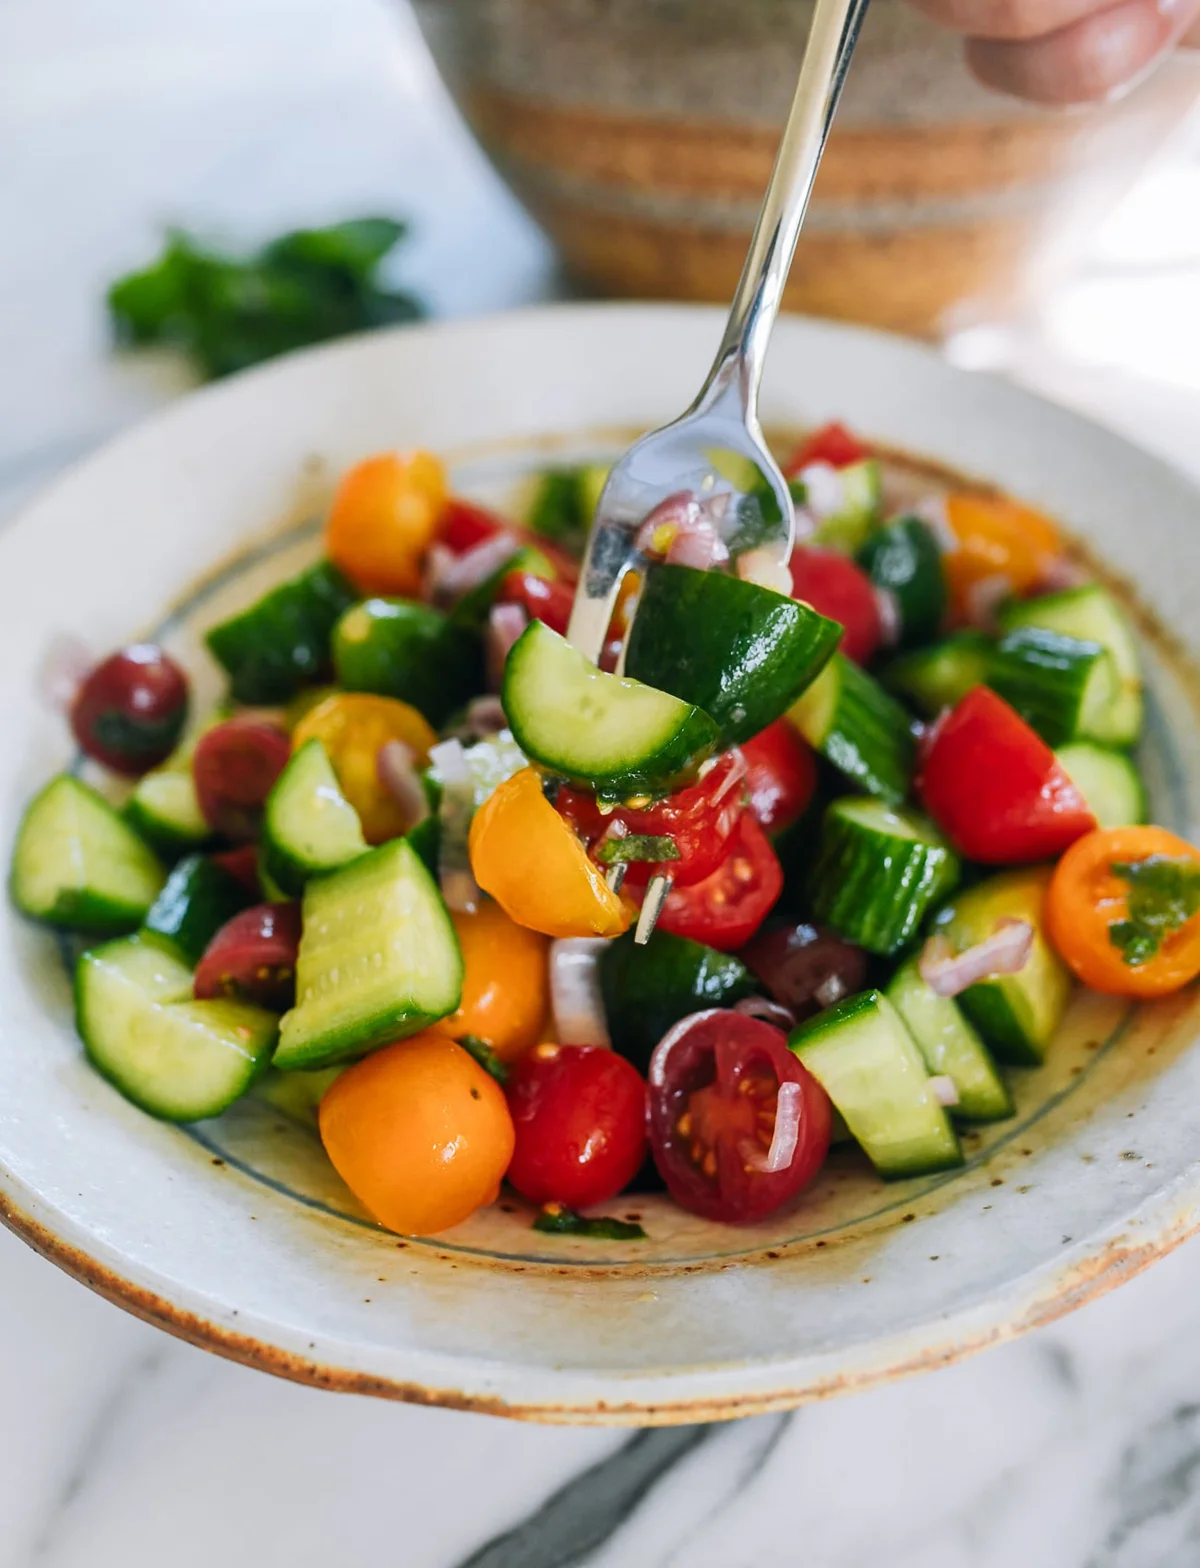
    Cucumber tomato salad with mint in a bowl, fork lifting a portion

    Why this salad earns its place all summer

    When the heat waves come, we want food that feels cold and crisp. Persian cucumbers straight from the fridge, halved grape tomatoes, a little shallot, and torn mint — it keeps the whole table cool without anyone needing to fire up the oven. It’s the salad I’d make on a Tuesday after the kids are done with the pool, and the one I’d pull out for a weekend barbecue without thinking twice.

    The other quiet win: it’s the perfect emergency for the herb garden. When the parsley and basil look a little sad after last night’s pesto and need a few days to recover, this is the moment mint gets to step in. Every pot in the garden needs one recipe like this to justify its existence.

    Finished cucumber tomato salad in ceramic bowl on marble

    What you need

    • 1 pound Persian cucumbers
    • 1 pound grape or cherry tomatoes
    • 1 large shallot
    • 2 tablespoons finely julienned mint
    • 2½ tablespoons white wine vinegar
    • 3 tablespoons extra virgin olive oil
    • 1 teaspoon honey
    • ½ to ¾ teaspoon sea salt

    That’s the whole list. The quantities come from the recipe I keep on my fridge, and it serves 6.

    How to make it

    1. Halve the cucumbers lengthwise, then cut them into half moons. Halve the grape tomatoes.
    2. Thinly slice the shallot, then run your knife through it a few times to roughly chop.
    3. Put the cucumbers, tomatoes, shallot, and mint in a mixing bowl. Add the white wine vinegar, olive oil, honey, and salt.
    4. Stir everything together until it’s coated. Taste, and add more salt if you want.
    Grape tomatoes being washed in a metal colander

    Which mint to use

    For most cooking, reach for spearmint — it’s the sweet, mild, versatile kind you’ll find in most grocery stores, and it’s what most of you will be grabbing. I’ve also used the apple mint that grows along the edge of my herb planter; the leaves are a little fuzzy, but after rinsing and cutting it into the salad, you’d never know. Both work. Use whatever you have.

    Swaps and honest notes

    No mint? Chopped basil gives it an Italian lean, and flat-leaf parsley or dill each give it a different personality entirely. Experiment — none of them are wrong.

    Making it ahead? Pre-cut everything and only toss with the vinegar, oil, and salt right before you serve. Cucumbers release water the longer they sit, and I’d rather keep them crunchy than sorry.

    The 15-minute trick: I like this best straight from the bowl, but if you’ve got time, give it 15 minutes in the refrigerator first. The flavors settle in and it tastes more like itself.

    Sumac, if you have it: a teaspoon of sumac sprinkled on top is a lovely finish. Despite the red color, it’s not spicy — it’s tart and bright. I didn’t include it in the base recipe because it’s not in every kitchen, but if it’s in yours, use it.

    The recipe

    Cucumber Tomato Salad with Mint — serves 6, 15 minutes total.

    1 pound Persian cucumbers, 1 pound grape or cherry tomatoes, 1 large shallot, 2 tablespoons finely julienned mint, 2½ tablespoons white wine vinegar, 3 tablespoons extra virgin olive oil, 1 teaspoon honey, ½ to ¾ teaspoon sea salt.

    Halve the cucumbers lengthwise and cut into half moons. Halve the grape tomatoes. Thinly slice the shallot and roughly chop it. Add everything to a bowl with the mint, vinegar, olive oil, honey, and salt. Mix well, taste, and adjust the salt. Serve right away, or chill for 15 minutes first.

    A note from Nora: the first time I made this, I used too much vinegar and Sam quietly finished half his plate with a face that said he wanted to negotiate. The second batch, with the honey in, he asked for seconds. Small rituals like this are what make the kitchen feel like ours — not perfect, just repeated until it’s right. If I can make it on a Tuesday, it’s a keeper.

    Keep Reading

  • Fluffy Egg White Omelette (Soufflé Style)

    Fluffy Egg White Omelette (Soufflé Style)

    One morning in Venice, at a five-star hotel, I watched a waiter set down a breakfast that looked like it had been lifted straight out of a cloud. It was an omelette made entirely of egg whites — tall, puffy, soufflé-style, almost impossibly light. I remember thinking, I can make that. I just don’t know how yet.

    Turns out it takes four ingredients and about 10 minutes, once you know the trick: whip the egg whites to soft peaks, then cook them gently under a lid. It’s high protein, low-carb, low fat — and it made my list of breakfasts worth remembering. This one passed the Tuesday test, so it’s staying.

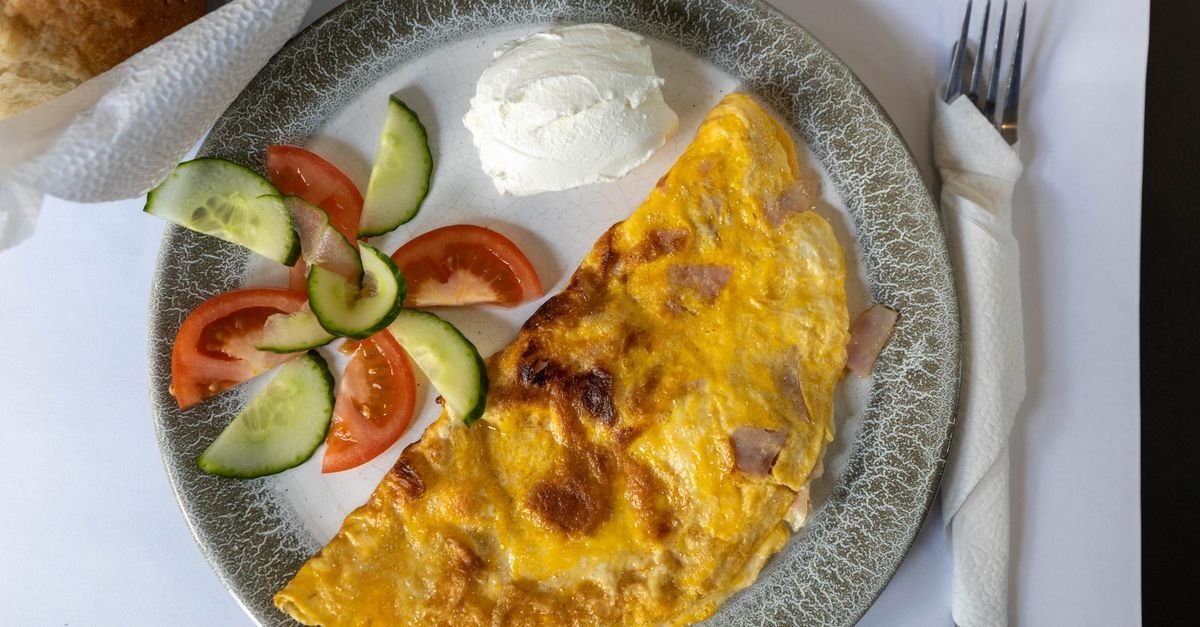
    Folded omelette on a ceramic plate with fresh vegetables

    Why this omelette is worth the fuss

    Compared to a traditional omelette, the egg white version is lighter and leaner — 10 grams of protein in an 83-calorie dish — and it feels special in a way that a plain scramble never quite manages. The texture is the whole point: it puffs up in the pan and melts in your mouth, like a soufflé that doesn’t demand an oven or 20 minutes of standing by it.

    And it’s fast. Ten minutes total, start to finish. Want to feed two? Run two skillets at once — it’s one of those rare recipes that scales without any drama.

    What you’ll need

    • Egg whites — 3, from 3 large eggs. Worried about wasting the yolks? They’re great in homemade ice cream, hollandaise sauce, angel wing cookies, or crème brûlée. There’s no reason to pour them down the sink.
    • Pinch of salt — seasons the whites and rounds out their mild flavor.
    • Pinch of cream of tartar — a tasteless white powder from the spice aisle that stabilizes the foam so the omelette holds its height.
    • 1 tsp butter — keeps everything from sticking and gives that golden color. For dairy-free, swap in avocado oil or a light olive oil (or a dairy-free butter).

    Metric-friendly: 3 large egg whites is about 110 g, and 1 tsp butter is about 5 g. Everything else is by pinch.

    How to make it

    1. Whip the egg whites. Put the egg whites, salt, and cream of tartar in a spotless bowl — any trace of grease kills the foam. Beat on medium with an electric mixer until foamy, then up to medium-high until glossy soft peaks form. The peaks should hold for a moment and curl over at the tips. Stop there. Over-beaten whites look dry and grainy, and they lose their volume in the pan.
    2. Heat the skillet. Set a 10-inch non-stick pan over medium-low heat. Melt the butter and brush it over the bottom and sides until it’s bubbling — light bubbling, not browning.
    3. Cook the omelette. Drop the heat to low, pour in the whipped whites, and spread them gently into an even layer, about 1 inch thick. Cover with a lid and cook 5 to 6 minutes. The lid traps steam and cooks the whites through, so there’s no flipping. It’s done when the bottom is lightly golden and the top is mostly set, barely sticky to a touch. Don’t overcook — that’s what makes it deflate.
    4. Fold and serve. Slide it onto a plate with a spatula and fold it in half right away, holding it in place for a few seconds so the fold sticks. It will settle a little on the plate — that’s normal. Top with chives and whatever else you’re after, and serve immediately, while it’s still tall and warm.

    How do I know the whites are beaten right?

    This is the step people get wrong, so here’s the test: tip the bowl sideways for a second. The whites should slowly slide, not pour out. The peaks should stand up and bend over at the tip — soft peaks, not stiff ones. If they look dry, grainy, or stand up straight like meringue, you’ve gone too far, and the omelette will lose its height in the pan.

    Worth topping

    These are built for toppings — they add flavor, color, and a bit of flair. My go-tos:

    • Avocado or guacamole
    • Tomatoes, pico de gallo, or salsa
    • Chives or green onions
    • Shredded cheese
    • Sautéed mushrooms or caramelized onions
    • Sour cream or crème fraîche
    • Crumbled bacon

    It’s also a natural brunch anchor — serve it alongside muffins, pancakes, breakfast potatoes, sautéed apples, waffles, or bacon, and you’ve got a full spread for the price of a few pantry staples.

    Tips for the best soufflé omelette

    • Soft peaks are the sweet spot. Under- or over-whipped whites both cost you height.
    • Use a clean bowl. Metal or glass, completely grease-free. One drop of yolk or butter and the foam gives up.
    • Use an electric hand mixer. A hand whisk can get you there, but it will take a long time and a lot of muscle. The mixer is a two-minute job.
    • Cook immediately after whipping. Whipped whites start to liquidify as they sit — get them into the pan right away.

    Storage notes

    Honest truth: this is a make-it-and-eat-it-now breakfast. It’s at its best while tall, warm, and airy, and it will deflate and turn denser as it sits. If you have leftovers, let it cool briefly, then refrigerate in an airtight container within 2 hours of cooking and eat it within 1 to 2 days. To reheat, nuke it in short 15- to 20-second intervals until warm. Skip the freezer — thawed omelettes turn watery or rubbery.

    Per serving (1 omelette): 83 calories · 10 g protein · 4 g fat · 1 g carbs · 11 mg cholesterol · 182 mg sodium

    A note from Nora

    The first time I made this, I over-whipped the whites by about thirty seconds and got a beautiful, deflated pancake of disappointment. Lesson learned, written into this recipe: stop at soft peaks. Now Sam asks for it on weekends, our daughter thinks the puffy height is hilarious, and Biscuit supervises from the floor. A cloud you can eat, in 10 minutes. If I can make it on a Tuesday, it’s a keeper.

    Keep Reading

  • Easy Fattoush Salad (1 Bowl, 20 Minutes)

    Easy Fattoush Salad (1 Bowl, 20 Minutes)

    My kitchen counter gets a little sad after 6 p.m. on school nights. Homework, reheated rice, general exhaustion — you know the thing. So when a salad promised 20 minutes and one bowl, I took the bet.

    I made it twice last month before writing this down. The first round used a soup-y grocery store cucumber and I hated it. The fix was a Persian cucumber, better salt balance, and store-bought pita chips instead of pretending I’d have day-old flatbread lying around. What follows is the version that stuck around: crisp, bright, and a little tart-sweet in the best way.

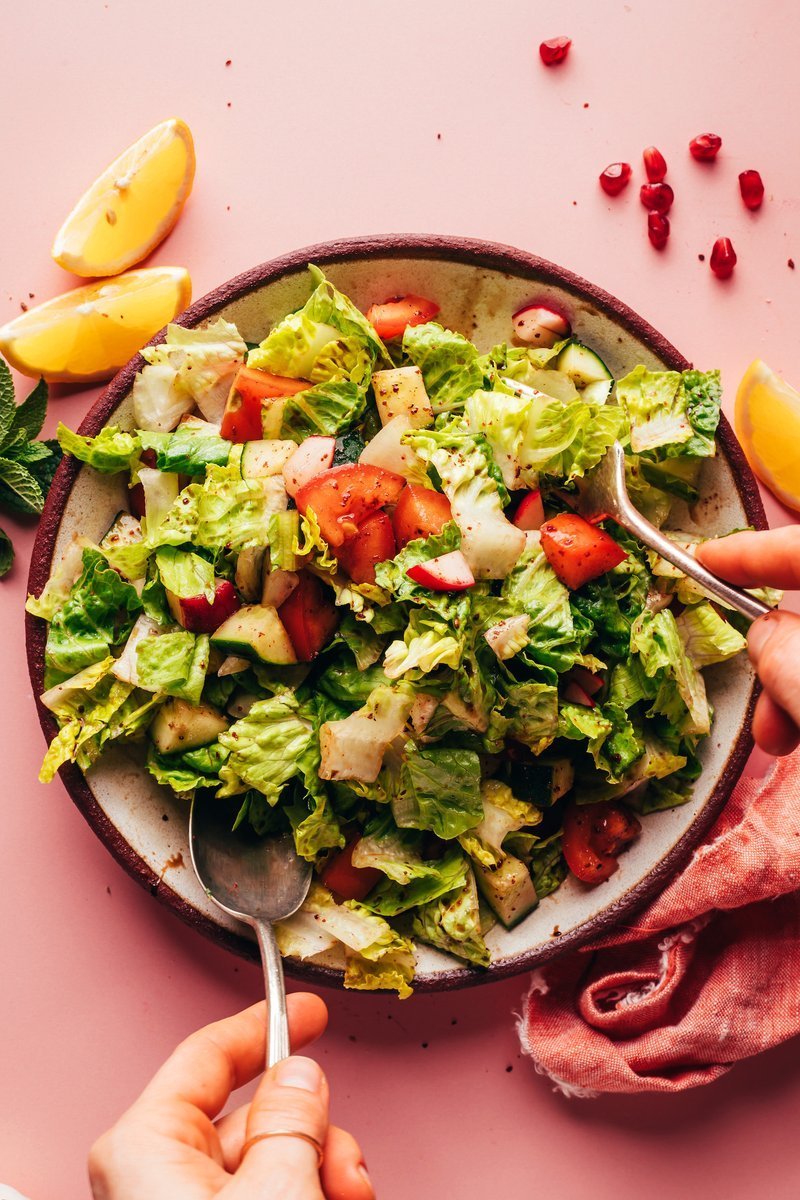
    Fattoush salad in a bowl with mint and pita chips

    Why this dish

    Here’s the honest math: a side dish that takes 20 minutes and one bowl means less cleanup on the nights when there’s no energy for either. Fattoush comes from the Levant — that Eastern Mediterranean corner of the Middle East — and the classic version is built on fresh vegetables, toasted flatbread, and sumac, that bright, lemony-spicy red spice. Pomegranate molasses is the other signature ingredient, and it’s what gives the dressing its deep, jammy tartness.

    This is my easy, inspired take: the same bright flavors and crunchy textures, plus a gluten-free option if that’s on your plate too.

    It works as a side alongside anything Mediterranean or Middle Eastern you’re throwing together, or toss in a can of chickpeas and it becomes a light meal on its own. Hot evenings, it’s a lot.

    What you need

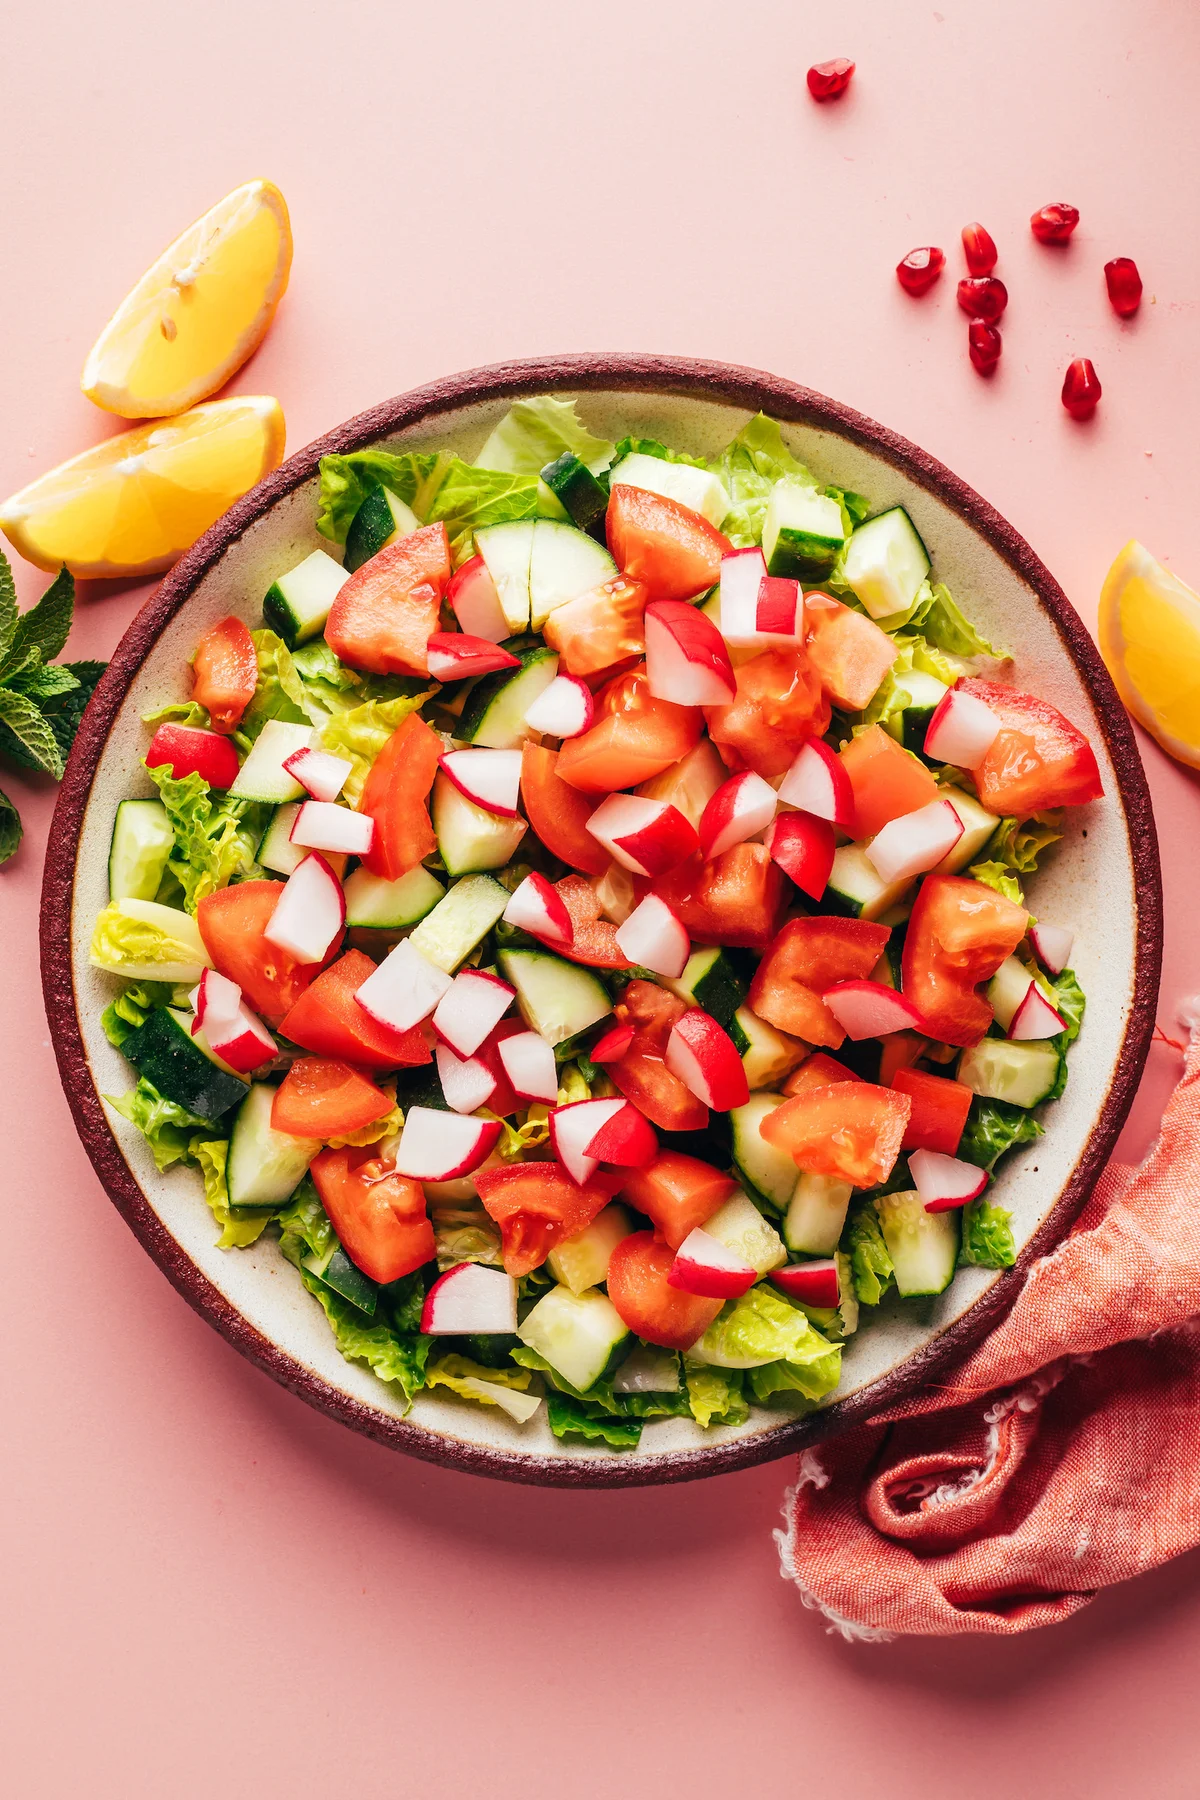
    For the salad, you’re starting with romaine. I like it for the crunch and the neutral flavor — it lets the dressings lead. Then it’s fresh crunchy vegetables: cucumber, tomato, radish, whatever seasonal stuff is actually good that week. I’ve had homegrown tomatoes from a neighbor’s garden in this exact salad and it took the whole thing up a level, but honestly, the dressing is forgiving.

    Chopped cucumber, tomato, and radish ready for the bowl

    The dressing is the part that makes it fatouesh instead of a generic green salad: lemon juice, pomegranate molasses, sumac, salt, and pepper, tossed right in the bowl where the salad lives. No mixing bowl, no whisk, no extra dishes. Search snippet confirmed the recipe is being covered on a bunch of food copy sites right now — apparently the one-bowl-20-minute framing struck a chord. I’ll take that as validation.

    Maple syrup and extra-virgin olive oil are both optional balance. I’ll be specific: if your pomegranate molasses is on the sweet side (I’ve had one over there where I skipped the syrup entirely), you may not need it. And the olive oil — use good oil, and use less than your instinct says. I once drizzled too much of a standard grocery-store oil and the whole bowl turned bitter. Not my proudest moment.

    Step by step

    Pita chips. Store-bought saves you the most time and this recipe is designed around that. If you have day-old pita or flatbread you’d otherwise compost, here’s the homemade route: 1 1/2 cups pita bread cut into small triangles (roughly 1/2-inch by 1/2-inch by 1-inch, separated so each chip is a single layer), 1 1/2 tablespoons olive oil, 1/4 teaspoon sea salt, and if you like, 1/2 teaspoon dried oregano and 1/2 teaspoon sumac. Preheat the oven to 350°F (180°C), line a baking sheet with parchment, toss the triangles with oil and seasonings, and bake 8–12 minutes until the edges just start to brown and crisp. Watch them after 8 — they go from crisp to toast in a hurry, and it depends a lot on how fresh and thick your pita is. Let them cool on the pan; they crisp up a lot more as they cool.

    The salad. In whatever large mixing bowl or serving platter you’re feeling, add 3 cups chopped romaine (about half a head), 2 cups chopped crunchy vegetables (I’d do about 1 cup cucumber, 3/4 cup chopped tomato, 1/4 cup radish, or whatever the crisper smells like that day), 1 tablespoon lemon juice, 1 tablespoon pomegranate molasses (balsamic is your non-traditional fallback), 3/4 teaspoon ground sumac, and a good pinch of salt and pepper. Toss hard. Taste. Then adjust: more lemon for brightness, more molasses for that deep tart richness, a little maple syrup if it needs sweetness, or a light drizzle of good olive oil for richness. This is the part where you stop being a recipe-following machine and just cook.

    Hands tossing romaine and vegetables with pomegranate dressing

    To serve. Right before it goes on the table, scatter over 1/3 cup fresh mint leaves (I like keeping them whole for the pop of green and shape), 1 1/2 cups pita chips slightly crushed, and 1/4 cup pomegranate seeds (sliced strawberries work in season if you can’t face a pomegranate — not traditional, but honest). If you’re serving it as a meal, drain and rinse a 15-ounce can of chickpeas and toss those in too.

    Serve immediately. This is the one salad where the pita chips start going soft the moment they touch the dressing, and you don’t want that. It’s best fresh, and leftovers keep fine for 2–3 days if you store the dressing and the chips separately — the greens will last, the texture will not.

    Swaps, honestly

    Persian or Lebanese cucumbers are the ones to chase — they have the flavor you actually want here. English cucumbers are the next best, and if that’s all your store stocks, peel and seed them for better flavor and texture. The balsamic swap works in a pinch but it’s not the same thing at all, and the strawberry swap is a season-only move for the same reason.

    Nutrition per serving (makes 4 side servings, or serve half for a proper entrée): 127 calories, 21.6g carbs, 2.8g protein, 4.1g fat, 138mg sodium, 4g fiber, 7.5g sugar, 14mg vitamin C. Rough estimate, calculated with a store-bought pita chip and the optional chickpeas left out. Nothing dramatic, just a light bowl.

    A note from Nora

    Sam ate half the bowl before I even got it to the table and then asked if I’d made a huge batch, which was the first time I’d earned a standing ovation from that man in six years. Biscuit got under the table and got into one aril, got the sour face he always gets. I made it again the next night, and again on the weekend, and I think that’s the whole point of a dish like this: it doesn’t fix anything, but on a Tuesday it makes the kitchen feel like a warm, well-lit place. If I can make it on a Tuesday, it’s a keeper.

    Keep Reading

  • Maple Butter: 3 Ingredients, 5 Minutes, Infinitely More Than Butter

    Maple Butter: 3 Ingredients, 5 Minutes, Infinitely More Than Butter

    Our daughter learned syrup before toast. The first time she reached into her high chair, found the neck of the maple bottle, and took a sip straight from it, I realized two things: she was reclaiming my Saturday mornings, and she was right to approve of them.

    There is something about maple syrup that makes a breakfast feel cozy before the food even arrives. Slow mornings, stacks of pancakes, the smell of it hitting a hot pan. I’ve been trying to bottle that feeling in a jar ever since.

    Whipped maple butter in a glass bowl drizzled with maple syrup

    Maple butter is what happened. Three things in a bowl, a few minutes with the mixer, and suddenly that syrup smell has a texture you can spread on warm sourdough, biscuits, or a stack of pancakes. It feels fancier than it is, which is probably why I keep making it even when the error on the side of too much butter in the house.

    What goes in it

    Softened butter and maple syrup ready for mixing
    • Butter — half a cup, fully softened. Cold butter fights you; soft butter goes fluffy. Salted or unsalted both work.
    • Pure maple syrup — 3 tablespoons. Real grade, not the pancake-syrup stuff. Richer syrup, richer butter.
    • Salt — a pinch. It’s what wakes up the maple flavor, trust it.

    All you need is a mixing bowl, a whisk or hand mixer, and a measuring spoon. This is a dishwasher-and-you-and-one-jar kind of recipe.

    How to make it

    Step 1. Put the softened butter in a bowl, pour in the maple syrup, and add the salt.

    Maple syrup being poured into softened butter in a mixing bowl

    Step 2. Beat with a hand mixer, stand mixer, or a vigorous whisk until smooth and fluffy. Then keep whipping for another minute or two until it turns light and airy. If it looks like it’s separating at first, don’t panic — it comes together.

    Stand mixer whipping butter and maple syrup together

    Step 3. Transfer it to a jar or a serving dish. Eat it straight away, or pop it in the fridge.

    Ready. Total time from counter to jar: about 5 minutes. The only real failure mode is impatience — give it those last extra minutes of whipping if you want that cloud texture.

    Little mistakes, honestly

    • First batch, I used butter that was only a little too cold and was still working the stuck spots. No one ate it; I did. Soften properly.
    • I went too heavy on the syrup once and it turned more custard than butter. It kept, it tasted fine, but it spread differently. Keep the pinch of salt and adjust to taste.
    • Temp of the too-warm soft butter still pushed the whisk. A little softer, a little longer. It’s forgiving, just not instantly.

    The fix for all of it is the same: softened butter, a few extra minutes of whipping, taste the salt, done. This one passed the Tuesday test, which for a condiment basically means “worth making in a hurry.”

    What to do with it

    Finished maple butter in a glass bowl with syrup drizzle

    The real question was never if, it’s whether we make this whole thing on bread. The short answer: yes.

    • On bread — warm sourdough, whole wheat sandwich bread, biscuits, scones, cornbread, dinner rolls, French toast, toast, muffins, English muffins, banana bread. Warm bread is involved in almost all of them, which might be a pattern, or might just be mathematics.
    • On the sweet side — pancreatic soft potatoes, waffles, custard oatmeal, warm muffins, a holiday breakfast board. A spoonful melting into oatmeal is dangerously good.

    Keep one spoonful in the freezer for the Sunday SPA board. It comes out, it sits for a few minutes on the counter, and it’s soft again. I don’t fully trust that I won’t eat it straight from the spoon.

    Make it your own

    • Cinnamon — ½ teaspoon for a cozy, autumn twang.
    • Vanilla — ¼ teaspoon knocked against the side of the bowl.
    • Honey — swap some of the maple for honey. It gets interesting.
    • Pumpkin pie spice — a pinch. Fall lives in your bread box until December.
    • Brown sugar — a tablespoon in place of some of the syrup, if you want extra depth.

    Storage

    An airtight jar in the fridge — I use mason jars, mostly because I have an unreasonable number of them — keeps it for up to 2 weeks. Freeze it and that stretches to 3 months. Take it out and let it sit at room temperature for a few minutes before spreading; it’ll return to that right texture on its own.

    Questions, answered

    Salted butter? Yes, fine — just cut or skip the extra salt.

    Make it ahead? It’s basically built for that. Batch it up on the weekend, keep it on the breakfast shelf, and Tuesday’s you will say thank you.

    Why did mine turn out runny? Butter was too soft, or too much syrup went in. Fridge it for a bit and it firms right back up.

    Can I use pancake syrup? You can, but pure maple is what gives that actual maple flavor, so I’d keep the real one in the bottle.

    How sweet is it, really? Lightly, sweet, and balanced — not dessert-sweet. Add a little more syrup if that’s your freelance rhythm.

    A note from Nora

    I made this the night after I wrote it, which is the only reason I’m confident about the timing. My daughter asked for toast “with the cold cream” — she has a many-word system for everything and I’m not changing her. If you can make it on a Tuesday, it’s a keeper. If you can make it while a toddler drinks your cooking ingredients, it might be a great one.

    Keep Reading

  • Chewy Browned Butter Sourdough Chocolate Chip Cookies

    Chewy Browned Butter Sourdough Chocolate Chip Cookies

    There is a jar on my counter that has been sitting there for two weeks, and I keep pretending to forget about it. Sourdough discard. I feed my starter every few days, and the extra just… accumulates. For a long time I treated it like a chore I was avoiding, the kind of thing you can only face on the weekend.

    Then one of those slow Saturday afternoons I decided to finally use it up, and these cookies came out of the oven with crisp golden edges, soft centers, and a depth of flavor I honestly didn’t expect. The browned butter is what changed everything.

    Freshly baked browned butter chocolate chip cookies cooling on a wire rack

    They look like a bakery cookie. They taste like one. And the recipe uses the exact ingredients I already keep in the pantry. This one passed the Tuesday test — if I can make it on a Tuesday, it’s a keeper.

    Why you’ll love these

    • Thick, bakery-style cookies with crisp edges and soft chewy centers
    • Rich, nutty caramel flavor from browned butter
    • A genuinely useful way to use sourdough discard (or active starter — both work)
    • Simple pantry ingredients, one extra step worth doing
    • Can be baked right away, or long fermented for even deeper flavor
    • Freeze beautifully, baked or as dough

    I make a double batch and freeze half. Around here they do not survive the weekend.

    The ingredients

    A few of these matter more than the rest:

    • Browned butter. This is the whole point. Browning it takes one extra step and gives the dough a deep, nutty, caramel flavor that plain butter just can’t. Absolutely worth it.
    • Brown sugar. Keeps the cookies soft and chewy and adds a subtle caramel note that plays beautifully with the browned butter.
    • Vanilla extract. A good quality one — it deepens all the warm flavors in the dough.
    • Sourdough discard. Adds a gentle tang that balances the sweetness without making the cookies taste sour, and helps with that chewy texture. Active starter works just as well.
    • All purpose flour. Gives the cookies structure while keeping them tender.
    • Baking soda. Does the rising, and helps create those crisp edges and soft centers.
    • Chocolate chips. I use semisweet. Dark chips or chopped chocolate work great too if you like a richer chocolate flavor.
    • Flaky sea salt, optional. A light sprinkle after baking makes the chocolate and browned butter sing, and gives them that bakery finish.

    Full measurements are in the recipe card below.

    Tips for actually-chewy cookies

    • Don’t overmix once the flour goes in. Stop as soon as it’s combined.
    • Chill the dough before baking — it keeps the cookies thick instead of spread flat.
    • Don’t overbake. The centers should still look slightly underdone when they come out of the oven. They keep baking on the hot sheet while they cool.
    • Cornstarch in the dough is the secret to a thicker, chewier cookie — it cuts down on gluten and absorbs liquid.

    Tools, if you’re wondering: a medium saucepan, a stand mixer with a paddle attachment (or a strong arm and a bowl), a cookie scoop, baking sheets, and parchment paper.

    How to make them

    Step 1: Brown the butter. Melt the butter in a medium saucepan over medium heat, stirring often as it melts and foams.

    Step 2: Keep cooking until the milk solids turn golden brown and the butter smells rich and nutty. Pull it off the heat and let it cool completely to room temperature before using it — warm butter will cook your eggs.

    Step 3: In a large bowl or stand mixer bowl with a paddle attachment, combine the browned butter, brown sugar, and granulated sugar until smooth.

    Step 4: Add the eggs, vanilla extract, and sourdough discard, and mix until fully combined.

    Step 5: Whisk the flour, cornstarch, baking soda, baking powder, and salt together in a separate bowl. Slowly add the dry ingredients to the wet and mix until just combined.

    Step 6: Fold in the chocolate chips.

    Step 7: Scoop dough balls onto a parchment-lined baking sheet, leaving plenty of room — they spread a little. If you’re using a small scoop, press two scoops together to get the right size. Cover and freeze for at least 30 minutes, or refrigerate for 1–2 hours. Want deeper flavor? Refrigerate the dough for up to 3 days before baking — the long ferment makes the cookies noticeably richer.

    Step 8: Bake at 350°F for 18–20 minutes for large cookies, until the edges are golden and the centers are just set. Small cookies take 10–12 minutes.

    Step 9: Let the cookies cool on the baking sheet for about 10 minutes before moving them to a wire rack.

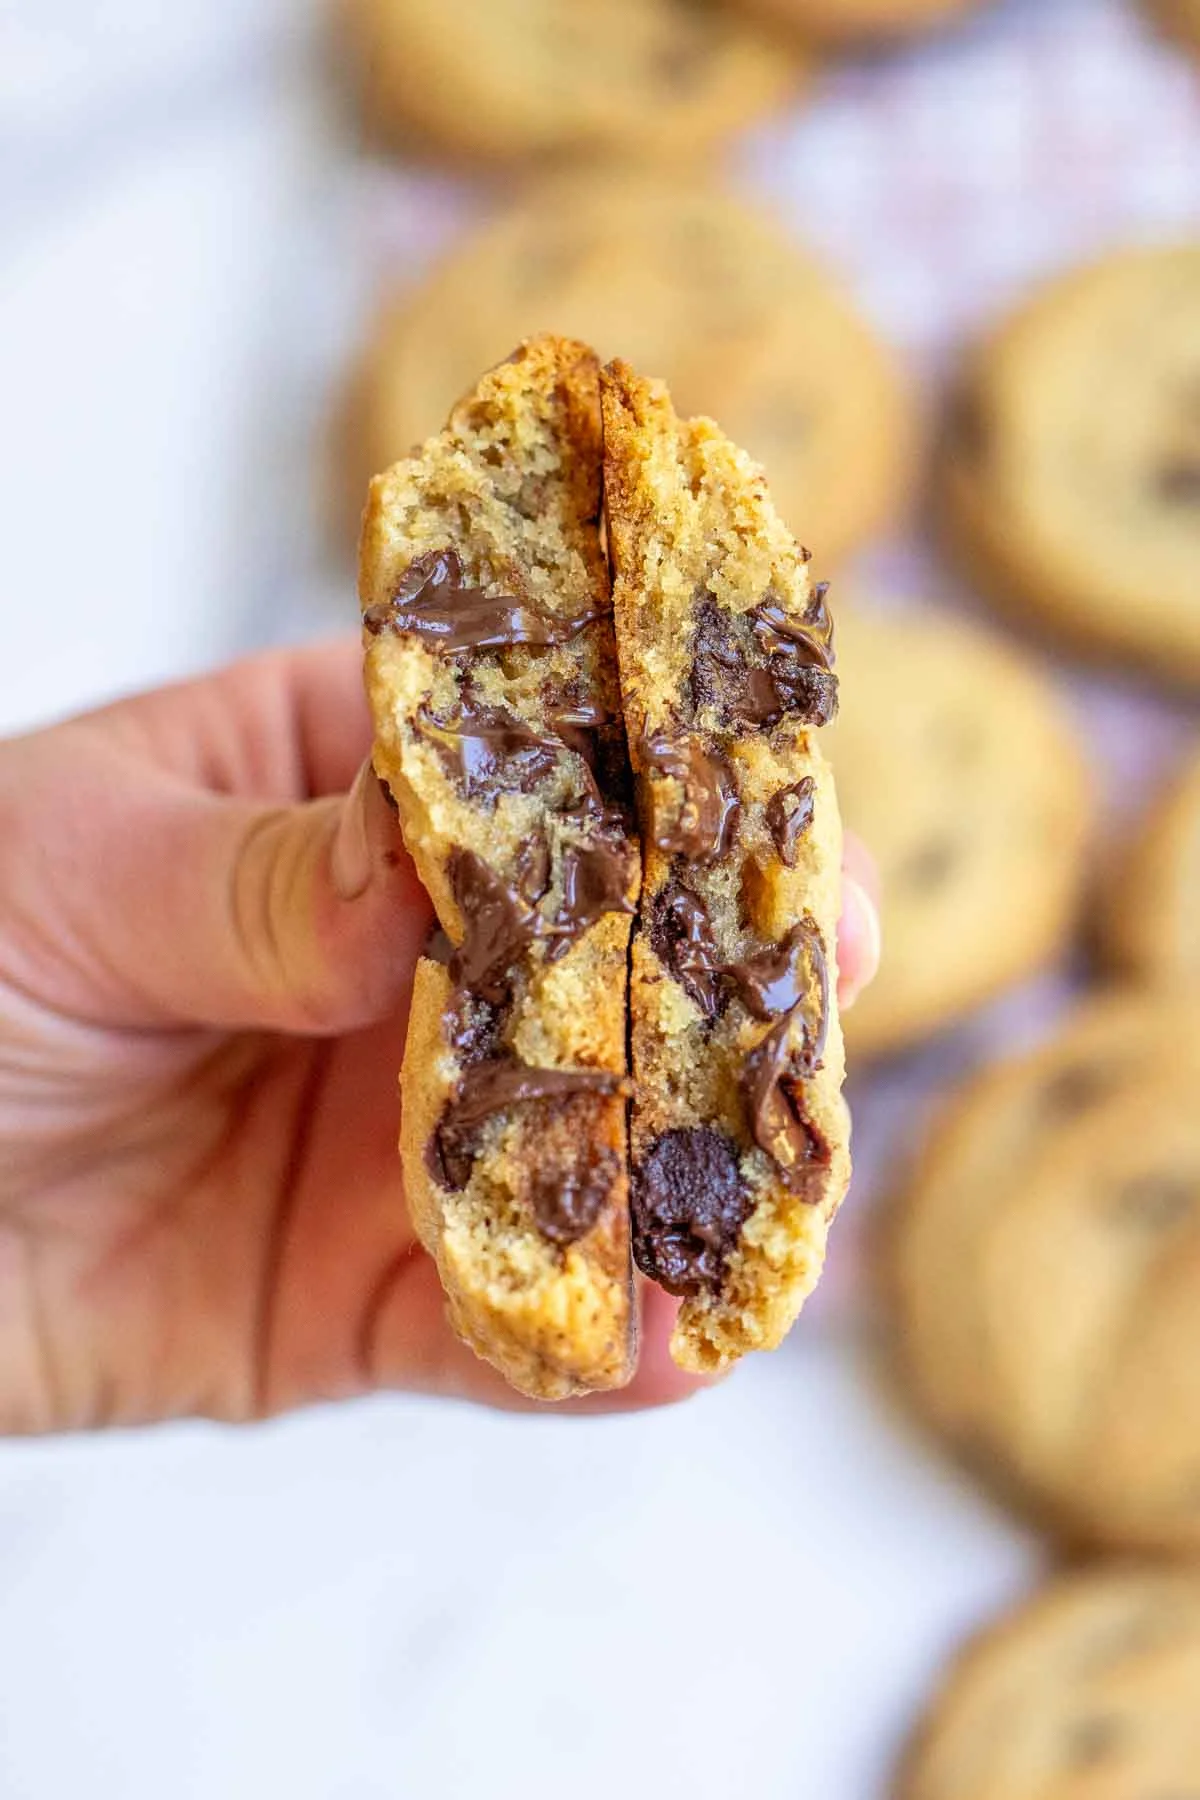
    Broken open cookie showing soft chewy interior and melty chocolate

    Ways to make them yours

    • Dark chocolate chunks instead of chips
    • Chopped pecans or walnuts
    • Toffee bits for extra caramel flavor
    • A sprinkle of flaky sea salt after baking
    • White chocolate chips mixed in for a sweeter version

    Storage

    • Baked cookies keep in an airtight container at room temperature for up to 5 days.
    • Freeze baked cookies for up to 3 months.
    • You can also freeze scooped dough balls in a freezer-safe bag and bake straight from frozen — just add an extra minute or two to the baking time.

    FAQ

    Can I use active sourdough starter? Yes — active starter and discard both work well in this recipe.

    Why brown the butter? It develops a deep caramel and nutty flavor that makes the cookies extra rich. It’s the step that takes a good cookie to a great one.

    Can I make the dough ahead? Absolutely. Refrigerate it for up to 3 days before baking — the flavor gets better, not worse.

    Why freeze the dough? Cold dough bakes up thick instead of spreading thin. And frozen dough balls keep for up to 3 months, which is handy for cookie emergencies.

    Can I make smaller cookies? Yes — scoop smaller portions and bake for 10–12 minutes.

    Nutrition per cookie: 376 kcal, 53g carbohydrates, 4g protein, 17g fat.

    Chewy Browned Butter Sourdough Chocolate Chip Cookies

    Yields 17 large cookies · Prep 10 minutes · Bake 18–20 minutes

    Equipment

    • Stand mixer with paddle attachment
    • Baking sheets

    Ingredients

    • 1 cup unsalted butter, softened
    • 1 cup brown sugar
    • ¾ cup white sugar
    • ½ cup sourdough starter discard (active starter works too)
    • 2 teaspoons vanilla extract
    • 2 large eggs
    • 2 ¾ cups all-purpose flour
    • 1 tablespoon cornstarch
    • 1 teaspoon baking soda
    • ½ teaspoon baking powder
    • 1 teaspoon salt
    • 2 cups chocolate chips (a 12 oz bag)

    Instructions

    1. Brown the butter: melt it in a medium saucepan over medium heat, stirring often. Cook until the milk solids turn golden brown and it smells nutty. Cool completely to room temperature.
    2. Combine the browned butter, brown sugar, and white sugar in a large bowl or stand mixer bowl until smooth.
    3. Add the eggs, vanilla, and sourdough discard until fully combined.
    4. In a separate bowl, whisk together the flour, cornstarch, baking soda, baking powder, and salt.
    5. Slowly add the dry ingredients to the wet until just combined. Fold in the chocolate chips.
    6. Scoop onto a parchment-lined baking sheet, leaving space between the dough balls. Freeze for at least 30 minutes, refrigerate 1–2 hours, or long ferment up to 3 days for deeper flavor.
    7. Bake at 350°F for 18–20 minutes for large cookies (10–12 minutes for small), until the edges are golden and the centers are just set.
    8. Cool on the baking sheet for about 10 minutes before transferring to a cooling rack.

    Notes

    • Don’t skip browning the butter — it’s where the flavor comes from.
    • Let the browned butter cool before mixing it with the sugars.
    • Chilled dough is the difference between thick chewy cookies and flat ones.
    • Don’t overbake — the centers should look slightly soft when they leave the oven.
    • Long fermenting the dough for up to 3 days makes them even richer.

    A note from Nora: The first time I made these, I got impatient with the cooling step and used butter that was still warm. The result was cookies that spread flat and tasted like my very first attempts at anything. The second batch, with the butter fully cooled, came out exactly right — crisp, thick, a little melty in the middle. Sam declared them better than the bakery ones, which he says on purpose, so count that as a win. If I can make it on a Tuesday, it’s a keeper — and this one can wait up to three days in the fridge if you’re feeling like a weekend project instead.

    Keep Reading

  • Angel Hair Pasta with Garlic & Lemon (15-Minute Weeknight Dinner)

    Angel Hair Pasta with Garlic & Lemon (15-Minute Weeknight Dinner)

    The week was one of those long ones. School lunches to pack, a grocery run that turned into two, and a kitchen that felt more like a drop zone than a place to cook. By Wednesday, I was done pretending I had time for anything with more than three ingredients.

    Then I made this.

    Angel hair pasta — capellini, if you’re feeling fancy — with garlic, lemon, a little butter, and Parmesan. It takes about 15 minutes, most of which is the pasta boiling, and it makes the kind of dinner that feels like a small reward instead of a chore. No special skills, no fancy pans, nothing you can’t find in a normal grocery store on a Tuesday.

    It passed the Tuesday test, and I’ve been making it every week since.

    What you need

    8 ounces angel hair (capellini) pasta — in the US that’s usually about half a standard 1 lb box

    2 tablespoons extra-virgin olive oil

    2 tablespoons butter (I like grass-fed; you can also use all olive oil or all butter)

    About 3 cloves garlic, pressed, minced, or grated

    1 lemon — you’ll use both the zest and the juice, and fresh juice really matters here

    1/2 cup freshly grated Parmesan, plus more for the table

    About 1 cup cherry or grape tomatoes, halved (optional, but nice if you have some)

    Fresh herbs if you have them — basil, parsley, chives — or a little dried Italian seasoning

    Kosher salt and freshly ground black pepper

    Why this pasta

    Angel hair is the thinnest of the long pastas, which is exactly why it works for a fast dinner. It cooks in 2 to 3 minutes, so there’s no standing over a pot. It’s also the right thickness for a light sauce — butter, olive oil, a fresh grated tomato sauce, a light cream. A heavy meat sauce would just weigh it down.

    It’s also a good side. If you’re making grilled chicken or fish, this goes beautifully alongside as a light, easygoing element of the meal.

    Before you turn on the stove

    Get everything chopped and prepped first. Halve the tomatoes, mince the garlic, zest and juice the lemon, grate the cheese. When the water hits a boil, you want zero decisions left to make.

    Two more things that make the difference:

    • Make the sauce in a big skillet before the pasta is ready, so the cooked noodles have somewhere to land.
    • Reserve at least 2 cups of the starchy pasta water before draining — that’s what turns the oil and butter into an actual sauce.

    How to make it

    1. Bring a large pot of well-salted water to a boil. While it heats, set up a large skillet or saute pan — big enough to hold all the pasta.
    2. Over medium heat, warm the olive oil and butter in the pan. Add the tomatoes (if using) with a big pinch of salt and cook 3-4 minutes, until they start to give off some of their red color to the oil. Add the garlic and cook 1 minute, just until fragrant — you don’t want it burning.
    3. Turn the heat to low. Lift the tomatoes out onto a plate to use as a topping, leaving as much garlic and oil in the pan as you can. Stir the lemon zest, 1 teaspoon of salt, and at least 1/2 teaspoon of freshly ground black pepper into the oil. If the pan looks dry, add another tablespoon of oil.
    4. By now the water should be boiling. Drop in the pasta and set a timer for 2-3 minutes — check the package. Set a large mug or a 2-cup measuring cup nearby to catch pasta water.
    5. When the pasta is done, transfer it to the pan with 1/2 cup of the reserved cooking water. Toss with tongs until every strand is coated, adding more water a few tablespoons at a time. Turn off the heat.
    6. Stir in the lemon juice, the Parmesan, and the herbs. Toss again, loosening with a little more pasta water if it feels dry.
    7. Plate it, top with the reserved tomatoes, and add more cheese or herbs at the table if you want.
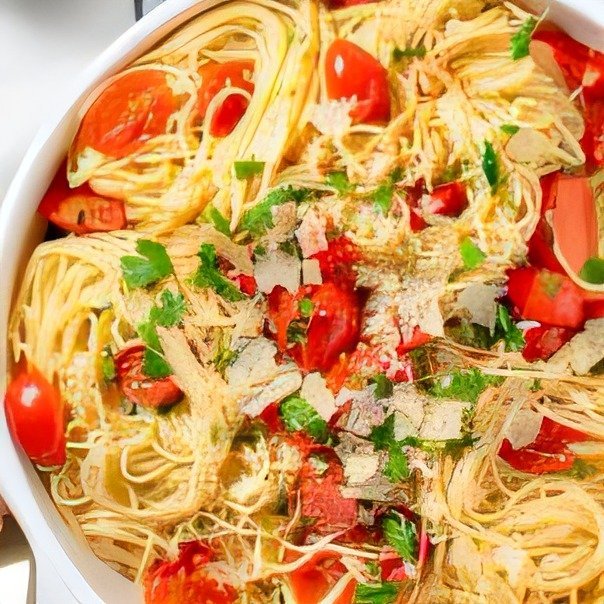
    Bowl of angel hair pasta with cherry tomatoes and herbs

    Ways to make it yours

    Make it creamy: a splash of heavy cream or a spoonful of ricotta goes in with the lemon and Parmesan for a richer version. Add protein: grilled chicken, shrimp, or sauteed vegetables on top turns this into a full meal. Spice it up: a pinch of red pepper flakes or some Calabrian chilis with the garlic gives it a little heat. Swap the pasta: whole wheat or a gluten-free version works fine if that’s what you have.

    Leftovers

    Refrigerate covered for up to 3 days. This is one of the few thin pastas that actually reheats well, and the reason is the sauce — the olive oil and butter coat each strand and keep it from turning gluey the way a cream sauce would. To reheat, warm it in a skillet over medium-low with a splash of water or olive oil, tossing just until it’s hot again.

    I wouldn’t freeze it. Angel hair is too delicate to come back from a thaw.

    A note from Nora

    The first time I made this I went heavy on the garlic and it was a little much — the kind of much that makes you sip water while you eat. Since then I’ve been more careful, and the balance of lemon and butter is where the whole dish lives for me. Sam has started asking for it on Thursdays, which I’ve decided to count as a win. And if a dish can survive a week of school lunches and still feel like a treat, it’s a keeper.

    Keep Reading

  • The 10 Cookie Baking Tools I Actually Use

    The 10 Cookie Baking Tools I Actually Use

    Every few weeks the kitchen smells like brown sugar and warm butter, and for about an hour the whole house feels like it’s holding its breath. Baking is my weekend reset, and over the years I’ve learned the hard way that the right tools matter more than any single recipe. The wrong pan will ruin cookies that the recipe promised would be perfect.

    Tray of freshly baked chocolate chip cookies cooling on a rack

    So I put together this list from everything I actually own and reach for again and again. Not a single item is a brand’s gift or a sponsorship deal. If you’re just starting to bake, building a registry, or shopping for the cookie-obsessed person in your life, these are the tools that have genuinely earned their place in my cabinet.

    1. A Real Half Sheet Pan

    If you only buy one cookie tool, make it a sturdy baking sheet. Thin, flimsy pans warp in the oven, and dark pans scorch the bottoms before the centers are even done. I’ve baked on both Nordic Ware and USA Pan half sheet pans and they’re the ones I reach for every single time. Sturdy, even-baking, and they last for years if you treat them kindly. I use them for roasting vegetables, homemade toffee, and sheet cakes too.

    Keep at least two on hand so there’s always a cool one ready for the next batch. Never plop cookie dough onto a hot pan.

    Nordic Ware half sheet pans and the USA Pan set of two are both solid choices.

    2. Silicone Baking Mats or Parchment Sheets

    Line every pan before the dough goes on. A silicone baking mat or parchment paper keeps things from sticking, promotes even browning, and makes cleanup almost too easy. Skip the nonstick spray or butter. It leaves a greasy surface and encourages cookies to spread past the edges.

    I go to silicone mats first because they give just enough grip to help cookies hold their shape while they bake. Pre-cut parchment sheets are a great backup and they fit standard half sheet pans perfectly. Look for 11×16-inch mats or sheets, which is about 28×40 cm and fits a standard half sheet pan.

    Silpat silicone baking mats are the ones I recommend, and pre-cut parchment sheets like these Comfylife sheets are my go-to backup.

    3. Cookie Scoops

    A cookie scoop makes dividing and shaping dough so much easier, and it’s the difference between a tray of evenly baked cookies and one where half are burnt and half are raw in the middle. Uniform dough portions bake more evenly, period.

    They double up for cupcake batter, muffin batter, pancakes, meatballs, and even scooping ice cream. For most cookie recipes I use the medium scoop, which holds 1.5 tablespoons of dough.

    OXO medium cookie scoop is the one I use for uniform cookies every time.

    4. Cooling Racks

    Most recipes tell you to let cookies rest on the pan for a few minutes, then move them to a wire rack. Air needs to circulate underneath so they cool evenly and don’t turn out soggy on the bottom.

    They’re inexpensive and last for years, which is exactly why I’d recommend owning at least two. One for the batch that’s cooling, one ready for the next.

    Wilton cooling racks and the Williams Sonoma gold cooling racks both work beautifully.

    5. A Stand Mixer

    You can absolutely make cookie dough with a hand mixer, but if you bake often a stand mixer is worth every penny. It handles thick cookie dough without a fight and frees up your hands while everything comes together. I prefer the 5-quart size, about 4.7 liters, because it handles a majority of standard recipes with room to spare. It’s also my workhorse for muffins, cakes, bread dough, and whipped cream.

    KitchenAid stand mixer is the one I keep coming back to for big batches and thick doughs.

    6. Measuring Cups and a Digital Scale

    Good measuring cups matter, but if you want consistent results, the digital scale is the real upgrade. A gram always weighs a gram. A cup can vary wildly depending on how it’s filled. That’s why I write my recipes with both weight and volume measurements. If you’re measuring with cups, take the time to do it properly. The difference shows up in the final cookie.

    OXO measuring cups and spoons are practical and the magnetic handles keep them from getting lost, and a good OXO food scale is the most important baking tool on this entire list.

    7. A Rolling Pin

    Don’t underestimate the rolling pin. It shows up in so many recipes beyond cookies. Sugar cookies, pie dough, homemade crackers, cinnamon rolls. A quality one is the kind of tool you use for years and years. Mine is wooden, feels balanced in my hands, and it’s held up beautifully through a lot of very frequent baking.

    J.K. Adams rolling pin is a simple, sturdy choice.

    8. Sturdy Cookie Cutters

    Not all cutters are created equal. Thin, flimsy ones bend under pressure and leave ragged edges in the dough. I look for sturdy metal cutters with sharp edges that make clean cuts. Ann Clark makes a huge variety of shapes, so it’s worth picking up a set or two for a good range. And if spritz cookies are part of your holiday tradition, a cookie press makes them so much easier.

    Ann Clark cookie cutter sets are my top choice for cookie cutters across the seasons.

    9. Silicone Spatulas

    A good silicone spatula should feel sturdy, flexible, and comfortable to hold. I probably use them more than any other tool in my kitchen. They’re perfect for scraping every last bit of dough out of the bowl, folding ingredients, stirring, and frosting. I keep several sizes on hand because they’re constantly in use.

    Williams Sonoma silicone spatula is a great quality must-have, and a ChefAide set of silicone spatulas covers every size I need.

    10. A Dessert Carrier

    Homemade cookies deserve to arrive looking as good as they tasted when they left your kitchen. If you’re bringing treats to a friend or gifting them, a sturdy carrier keeps everything protected on the way over. My favorite trick is a cupcake carrier with the tray flipped upside down, because it holds stacks of cookies beautifully. For larger batches I use a half sheet pan with a fitted lid or a 9×13-inch pan, about 23×33 cm, with a lid that fits.

    Snapware cupcake carrier works for transporting cookies too, and the Nordic Ware 9×13-inch pan with lid is perfect for storing or traveling with bigger batches.

    Now that your kitchen is stocked, all that’s left is the fun part. Pick a recipe, preheat the oven, and let the whole house fill up with that warm, buttery smell. If I can bake a tray of cookies on a busy weekend afternoon, you can too. And if the first batch doesn’t turn out exactly the way the recipe promised, that’s what a second try is for. The right tools make the second one so much more likely to be the keeper.

    Keep Reading