博客

  • White Sangria: My 1-Hour Summer Pitcher

    White Sangria: My 1-Hour Summer Pitcher

    I’ve been thinking lately about the drinks that make a backyard evening feel like a real occasion. Not the complicated ones — not the stuff that needs a cocktail shaker, a juicer, or forty-five minutes of your attention. Just something you can hand people as they drift in from the grill, something that tastes like summer decided to be helpful.

    That’s the job this white sangria does for us. It’s fresh, sparkly, and honestly the easiest thing I make for gatherings. And the part I love most: it doesn’t need to sit overnight to taste good. About an hour in the fridge, and it’s ready.

    A tall glass of white sangria with peaches and mint

    This is the drink I reach for on warm nights when friends come over and the plan is mostly ‘sit outside and eat until you can’t.’ Sam usually handles the grilling, Biscuit patrols the patio, and I keep the pitcher topped off. It’s one of those small rituals that makes our kitchen feel like a place people actually want to be.

    Why this sangria works

    A few things make this my default for summer:

    • Ready in about an hour. Traditional sangrias benefit from sitting for hours to develop flavor. This one is fruit-forward and bright from the start — chill it, pour it, done.
    • Light and not too sweet. White wine, peach nectar, and berries keep it crisp instead of cloying. There’s a citrusy lift that makes it feel like a cold drink on a hot night, even when it’s really just wine and fruit.
    • Easy to make your own. Swap the berries, go with rosé instead of white, top it with sparkling water if you’re not drinking. It’s a base, not a rulebook.

    I make it all summer, and I’ve found it works just as well in early fall — the peach and berries hold up fine when the evenings turn cooler and you want something a little festive without going full apple cider.

    White sangria glass on a summer patio table

    What you’ll need

    Everything is the kind of thing you’ll already have or can grab in one store trip:

    • White or rosé wine — a crisp, dry bottle that you’d actually pour a glass of on its own. That’s the base, so don’t reach for the cheapest shelf.
    • Peach nectar — from concentrate is fine. It adds a concentrated peachy sweetness and depth without taking over the wine.
    • Grand Marnier or Cointreau — just a splash of orange liqueur. It’s what balances the sweetness of the fruit and gives the drink a little warmth. If you don’t have either, see the swaps below.
    • Peaches, berries, lime, lemon-lime soda, and fresh mint — the stuff you can see, smell, and photograph.

    The recipe

    Yield: 6 servings · Prep: 10 minutes · Chill: about 1 hour

    Ingredients

    • 2 peaches, sliced thin
    • 1 cup berries — blueberries, raspberries, or sliced strawberries
    • 1 lime, thinly sliced
    • 1 bottle crisp white wine, or rosé
    • 1 cup peach nectar, from concentrate
    • ⅓ cup Grand Marnier, or Cointreau
    • Lemon-lime soda, for topping
    • Fresh mint leaves, for garnish

    Instructions

    1. In a pitcher, combine everything except the lemon-lime soda.
    2. Cover and chill about 1 hour.
    3. Pour into glasses, leaving room for soda and ice.
    4. Top each glass with about ¼ cup of lemon-lime soda.
    5. Add ice, garnish with a mint leaf, and serve immediately.

    Swaps that actually work

    I test these in my own kitchen before I promise they’re good, so here’s what I stand behind:

    • Wine: a crisp white like Sauvignon Blanc or Pinot Grigio is light and refreshing. Rosé gives you a prettier blush color and more fruity depth. If you like something sweeter, Moscato or a lightly sparkling Prosecco works.
    • Fruit: peaches and berries are the classic here, but feel free to mix in whatever’s ripe — nectarines, mango slices, pineapple chunks, orange rounds. This recipe doesn’t mind improvisation.
    • Liqueur: Grand Marnier and Cointreau are what I use, but triple sec, peach schnapps, or even a splash of Chambord all work.
    • No peach nectar? Mango nectar works, and honestly even white grape juice gets you close enough.
    • No alcohol? Swap the wine for alcohol-free white wine, white grape juice, or apple juice, and trade the orange liqueur for fresh orange juice. It’s a perfectly good mocktail.
    Pitcher of white sangria with sliced peaches and berries

    Prepping ahead

    This is where the recipe earns its keep. You can combine the wine, peach nectar, liqueur, and fruit in the pitcher up to 1 day in advance — cover it and chill it in the fridge. The flavors mingle while the fruit soaks up the sangria, and it’s better for it.

    The one rule: keep the lemon-lime soda out of the pitcher. Add it right before serving so the fizz is still alive. If it goes flat, the whole drink feels tired.

    How long it keeps

    Mixed without soda, it’s good in the fridge for up to 24 hours. With soda and ice, drink it right away. Leftovers? You can freeze the sangria (no soda, no fruit) for up to 1 week, then add fresh soda and fruit when you’re ready to serve.

    What to serve with it

    Keep the food simple — the drink is the show. A few things that work well with this:

    • Something with peaches: a caprese-style salad with fresh peaches and basil echoes the flavors in the glass.
    • A cheese board — crackers, fruit, and charcuterie are an effortless match.
    • Grilled shrimp is a great pairing; something fast and light that doesn’t fight the drink.

    A note from Nora

    The first time I made this, I added the soda to the pitcher an hour early because I was in a hurry. By the time guests arrived, it had gone flat and the peaches had gone pale. I’ve made it properly every time since — thin slices, soda last, mint on top. If I can make it on a Tuesday, it’s a keeper, and this one is the kind of Tuesday drink you’ll make all summer long.
    Keep Reading

  • Crockpot Chicken Fajitas

    Crockpot Chicken Fajitas

    One Tuesday night last winter Sam got home from teaching early and found me staring into an almost-empty fridge like it owed me money. The only things that looked edible were a bag of bell peppers, an onion, and two chicken breasts I’d meant to cook three days ago.

    That is how these Crockpot Chicken Fajitas usually start for me: with whatever the slow cooker can rescue before dinner time arrives.

    Why this recipe works

    I first made this dish years ago and it has been a repeat ever since. Five minutes of prep, four simple ingredients plus pantry spices, and then the slow cooker does all the heavy lifting. This one passed the Tuesday test without even trying.

    Close your eyes for a second and picture the sizzling fajitas at a Mexican restaurant — spicy chicken, sweet peppers, soft onions. That is exactly what fills my kitchen when I walk in from whatever the day threw at me.

    Ingredients

    • 3 medium red bell peppers
    • 1 medium yellow bell pepper
    • 1 medium green bell pepper
    • 1 medium onion
    • 1 pound (~450 g) skinless, boneless chicken breasts (or thighs)
    • ½ cup (~120 ml) chicken broth
    • 1 packet taco or fajita seasoning (homemade blend below if you prefer)
    • 8 flour tortillas, fajita or soft taco size
    • Toppings: shredded cheese, sour cream, guacamole, salsa, fresh cilantro

    How to make them

    1. Slice the bell peppers and onion into ¼ inch (~6 mm) strips. This can be done ahead of time — I keep sliced veggies in zip-top bags in the fridge on busy days.
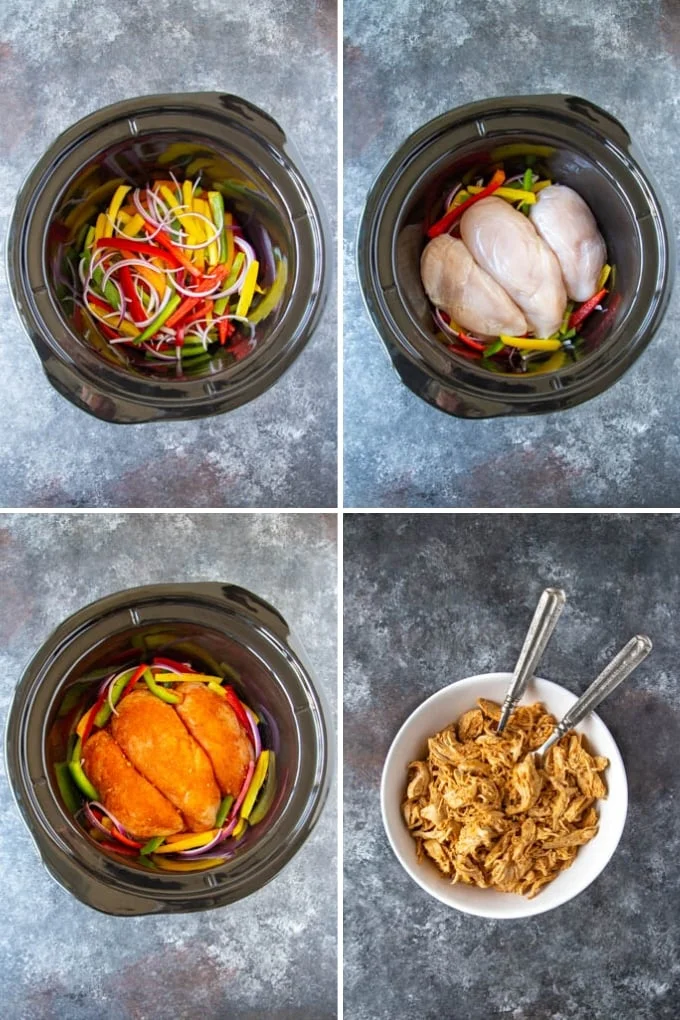
    2. Place the peppers and onions at the bottom of the crockpot.
    3. Pour in the chicken broth, layer the chicken breasts on top, and sprinkle with the seasoning. Cover and cook on high for 3–4 hours or low for 4–6 hours.
    4. Remove the chicken and let it cool for a few minutes. Shred it with two forks (or slice into strips if you prefer) and mix it back in with the peppers and onions.
    5. Serve over warm tortillas with your choice of toppings.
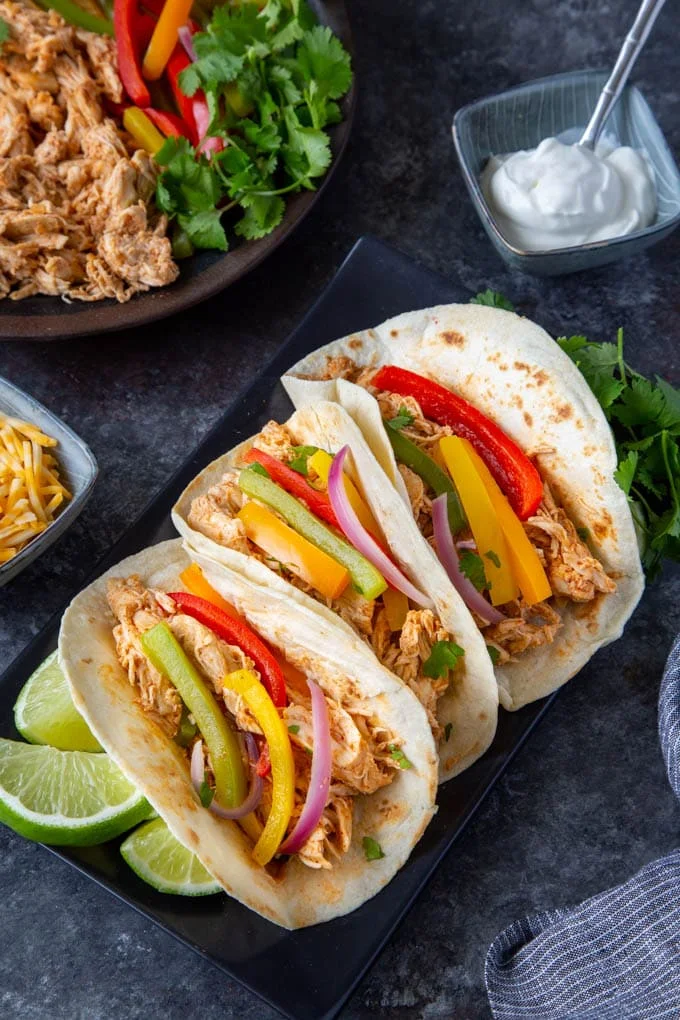
    Crockpot Chicken Fajitas - photo 1

    Homemade taco or fajita seasoning

    If you do not keep a packet on hand, this blend takes about thirty seconds to throw together:

    • 1 tablespoon chili powder
    • 1 teaspoon cumin
    • ½ teaspoon paprika
    • ¼ teaspoon garlic powder
    • ¼ teaspoon onion powder
    • ¼ teaspoon red pepper flakes
    • 1 teaspoon salt
    • 1 teaspoon black pepper
    Crockpot Chicken Fajitas - photo 2

    Serving ideas and sides

    We serve these in tortillas most nights, but they work just as well over rice or quinoa, tucked into a burrito bowl with beans and sliced avocado, or even atop chopped greens for a lighter version.

    For sides, roasted corn, black beans, refried beans, or a quick watermelon salad all pair nicely. A squeeze of lime on top is the one thing I never skip.

    A few tips from my kitchen

    Crispier veggies. If you prefer your peppers to hold their shape, add them partway through cooking instead of at the beginning. Put onion, broth, chicken, and seasoning in the crockpot first, then layer the bell peppers on top about 15–30 minutes before serving.

    Frozen chicken. I recommend thawing the chicken before slow cooking. The USDA says chicken needs to reach an internal temperature of 165°F (74°C) for safe consumption, and frozen chicken can spend too much time in the danger zone — that is the range between 40–140°F (4–60°C) where bacteria grow most rapidly. Thawing first keeps things on the safe side.

    Tomatoes. Yes, you can add them. Use one 14 oz (~397 g) can of diced tomatoes and omit the chicken broth entirely.

    Crockpot Chicken Fajitas - photo 3

    If I can make it on a Tuesday, it is a keeper. And these fajitas are exactly that — simple enough for a night when everything feels slightly behind schedule, but still worth setting the table for.

    A note from Nora: The first time I made this recipe I forgot to add any seasoning at all and discovered my mistake only after shredding what amounted to very mild chicken. Sam was diplomatic. Our daughter just smiled, which she always does, so it did not help much. Since then the spice packet lives right next to the slow cooker — no more forgetting.

    Keep Reading

  • Mexican Street Corn Pasta Salad

    Mexican Street Corn Pasta Salad

    There is something about the middle of July when the grill stops being optional and starts feeling like a commitment. I had corn on the cob cooling on the counter, still warm from the grates, and it hit me: elote would make an incredible pasta salad.

    I threw together a bowl that night. Sam took one bite and said “Wow.” That has always been my barometer for success in this kitchen.

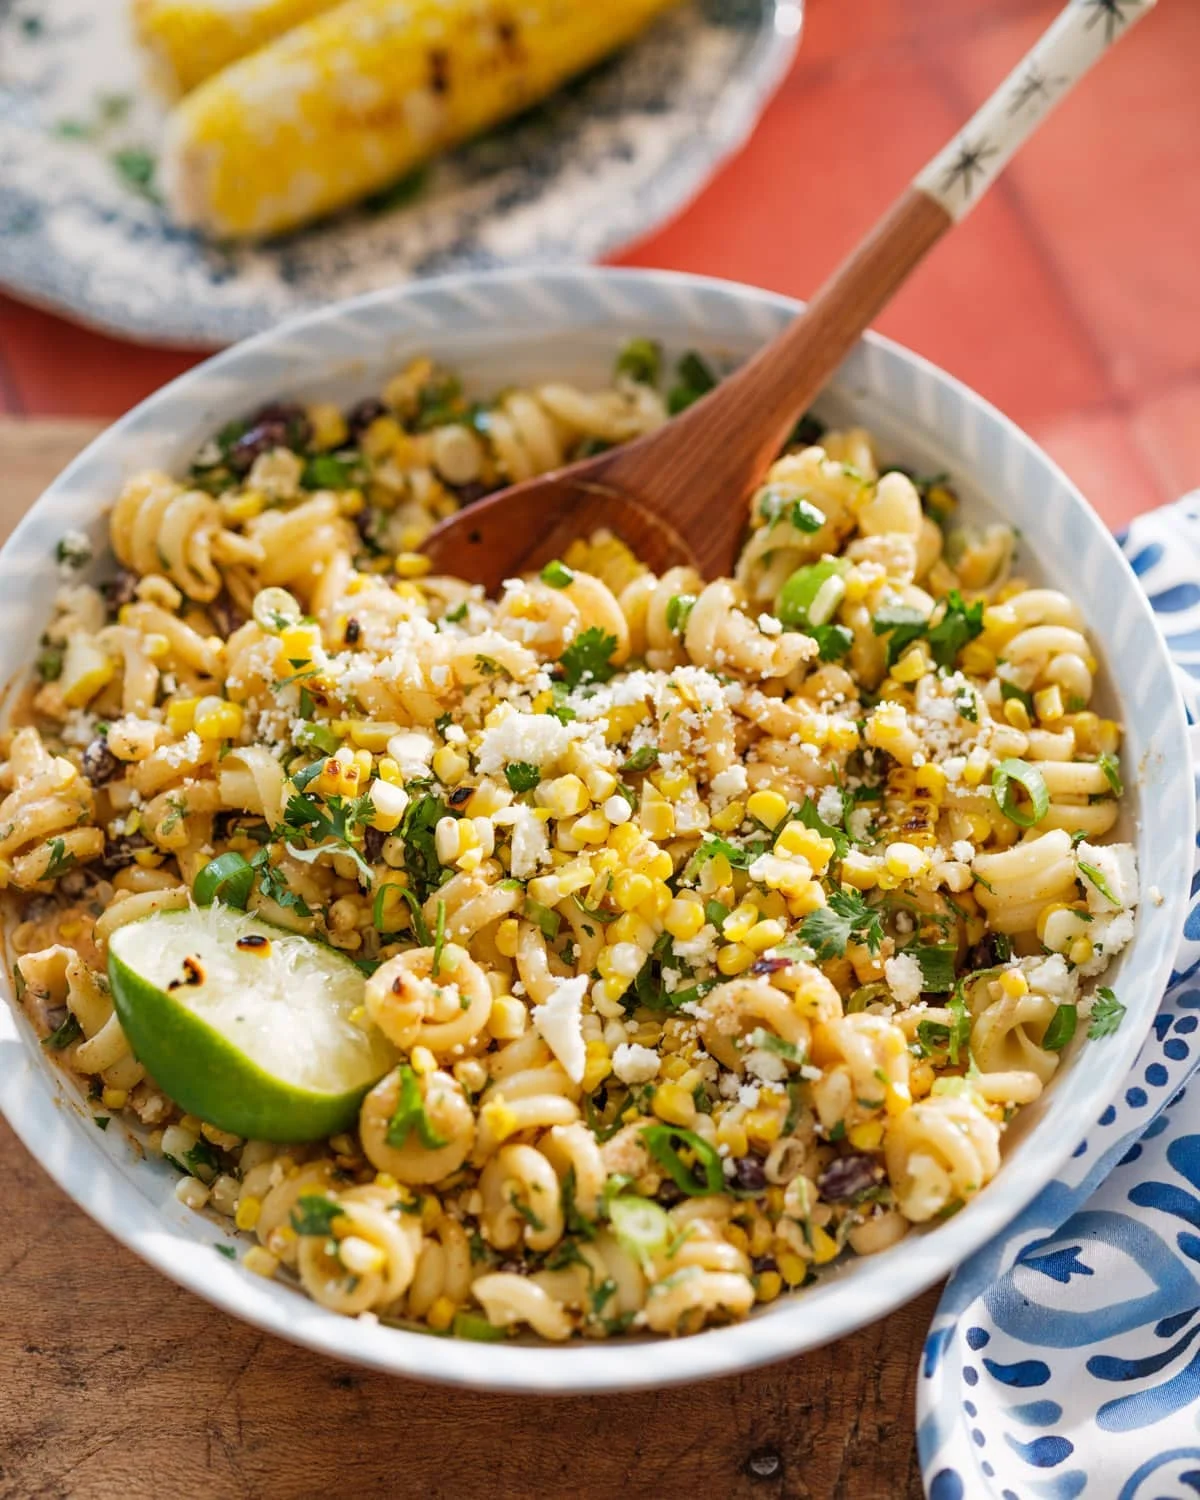
    Mexican Street Corn Pasta Salad - photo 1

    Why This Recipe Works

    The smoky char from grilled corn, bright lime, a touch of chili powder and cumin, and that salty crumbled cotija — it all layers into something that feels special without any complicated technique. It is veggie-forward, too: more vegetables than pasta, and just enough mayo in the dressing to coat everything without weighing it down.

    This one passed the Tuesday test, and it has become my go-to for potlucks and barbecues all season long.

    What You Will Need

    The full quantities are in the recipe card below. Here is why I chose each ingredient:

    • Bowtie, cavatappi, or fusilli pasta — Short shapes with ridges and twists catch the dressing better than long noodles. A fun shape also makes the salad feel more interesting on the plate.
    • Fresh corn on the cob — Grilling gives it that charred flavor you cannot fake. Frozen or canned works in a pinch, but fresh is worth it.
    • Black beans — Not traditional elote territory, but they add fiber and extra vegetables to every forkful.
    • Green onions and cilantro — Fresh, bright finishing notes that lift everything.
    • Cotija or feta cheese — Cotija is a Mexican cheese: salty, crumbly, and essential. Feta works if you cannot find it.
    • The dressing — Just mayo, lime juice, chili powder, garlic powder, cumin, and salt. Simple, but it tastes homemade.

    How to Cook the Corn

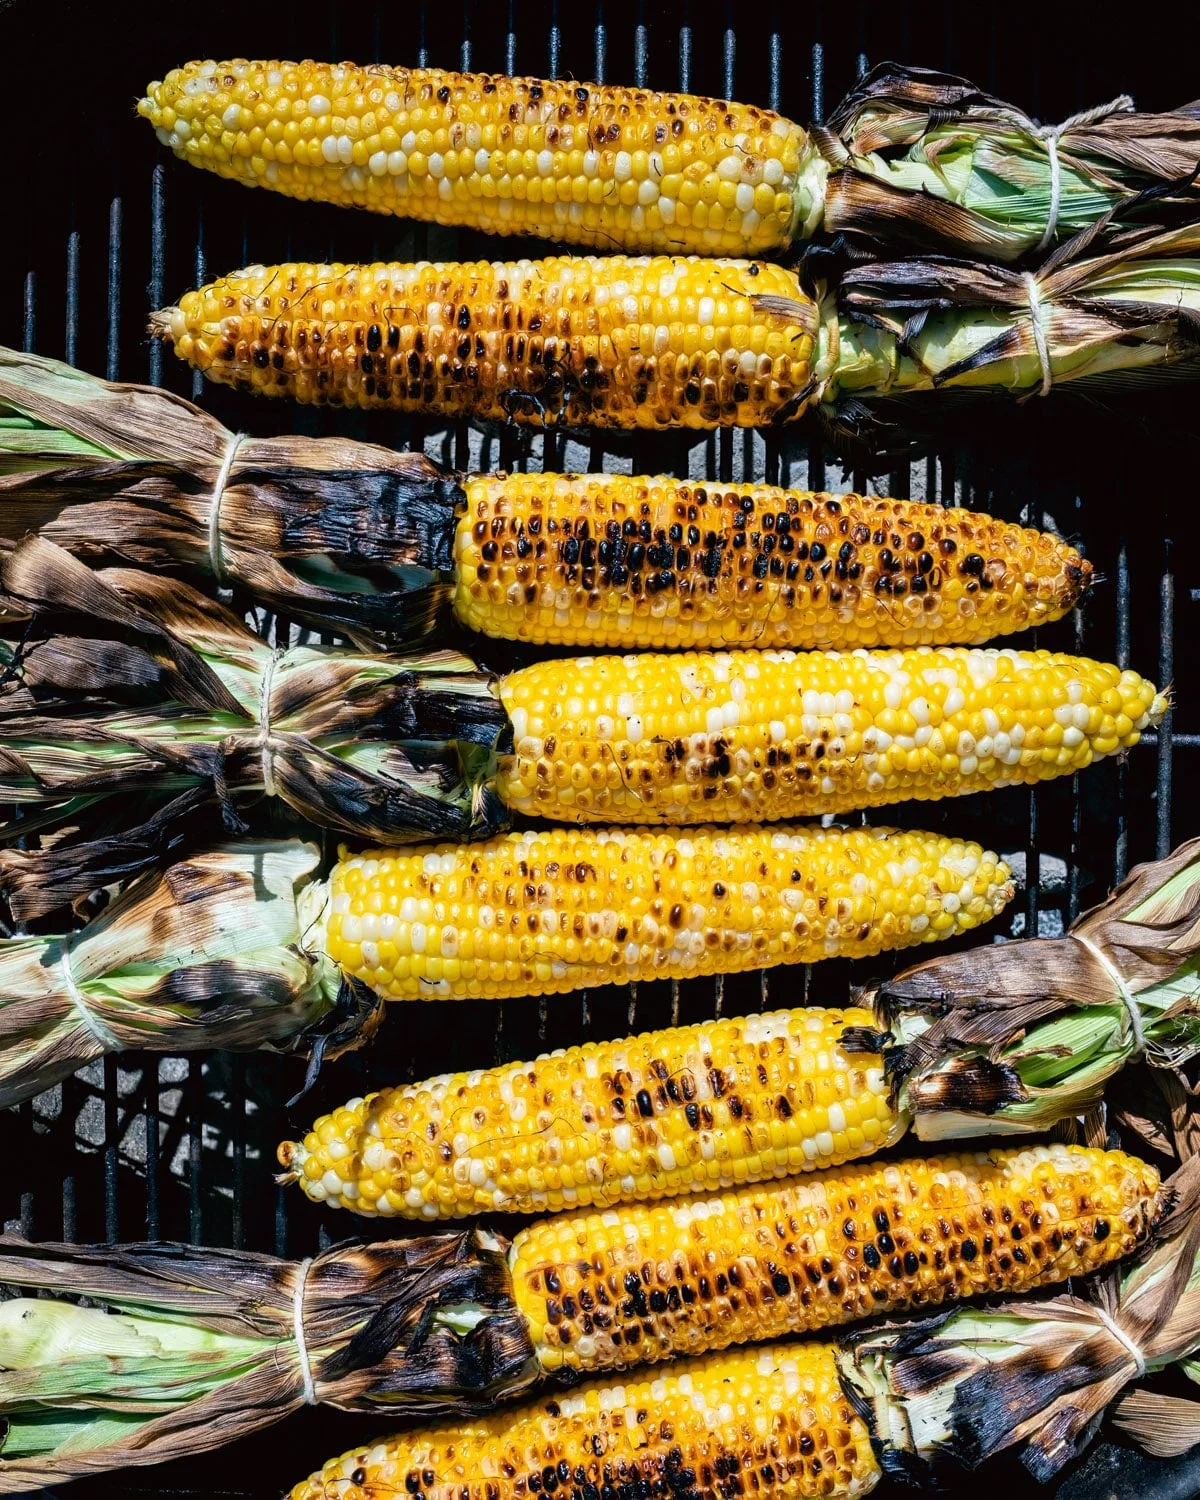
    Do not skip the grill if you can help it. Mexican street corn is supposed to be charred — those slightly bitter, caramelized edges are exactly what makes elote taste like elote.

    Mexican Street Corn Pasta Salad - photo 2

    I shuck the corn, rub each cob with olive oil, and place them on medium-high grill grates for 12 to 15 minutes, turning until blackened on all sides. The grill should be at 375 to 450°F (about 190 to 230°C).

    Without a grill? Sauté fresh, frozen, or canned corn kernels in butter or olive oil for a few minutes. It is not quite as deep-flavored, but it works.

    Tips for the Best Pasta Salad

    • Cook the pasta to true al dente, or even a minute under. It firms up as it chills — you really do not want mushy noodles.
    • Rinse it cool. This is one of those times when rinsing pasta is actually correct. It stops the cooking and washes off excess starch.
    • Drain the beans well. Wet black beans will make a thinner dressing, so shake off as much liquid as you can.
    • Save a spoonful of cotija for the top so the finished bowl has visible cheese crumbles scattered across it.

    Variations and Substitutions

    If you want to mix things up, here are a few ideas:

    • Make it more filling: Add shredded grilled chicken, grilled shrimp, or diced avocado.
    • Make it spicy: Stir minced jalapeño into the dressing or add a pinch of chipotle chili powder.
    • Make it vegan: Use vegan mayo and dairy-free feta (or nutritional yeast) instead of cotija.
    • Swap the beans: Pinto beans work just as well as black beans.
    Mexican Street Corn Pasta Salad - photo 3

    What to Serve with It

    This salad fits almost any summer table. I have served it alongside chicken burgers, grilled shrimp skewers, and my favorite grilled vegetables. A pitcher of margaritas or limeade makes the whole thing feel like a proper gathering. Tortilla chips with black bean hummus are another easy pairing.

    Make Ahead and Storage

    You can make this salad up to 1 day in advance and keep it refrigerated. I prefer to chill the dressing separately and fold it in right before serving — that way the pasta stays fresh-tasting. Leftovers last up to 3 days in the fridge. The pasta keeps absorbing dressing as it sits, so if things feel dry, just stir in a light spoonful of mayo or a squeeze of lime juice.

    Dietary Notes

    This salad is vegetarian and easily made vegan. For gluten-free, use your favorite GF or legume-based pasta and cook it slightly under the package directions — gluten-free pasta tends to soften even more as it chills.

    Mexican Street Corn Pasta Salad - photo 4

    Recipe Card

    Prep time: 20 minutes · Cook time: 10 minutes · Total time: 30 minutes · Servings: 6

    Ingredients

    For the pasta salad:

    • 6 cobs corn (about 2 cups grilled corn kernels)
    • 1 tablespoon olive oil, for the corn
    • 8 ounces bowtie, cavatappi, or fusilli pasta
    • 3 green onions, thinly sliced
    • ¼ cup cilantro, finely chopped
    • ¾ cup black beans, drained and rinsed
    • ½ cup cotija or feta cheese, crumbled

    For the dressing:

    • ⅓ cup mayonnaise
    • 2 tablespoons lime juice
    • 1 teaspoon chili powder
    • ½ teaspoon each garlic powder, cumin, and kosher salt

    Instructions

    1. Cook the corn. Heat a grill to medium-high (375 to 450°F / 190 to 230°C). Shuck the corn, rub with olive oil, and place on the grates. Cook for 12 to 15 minutes total, turning until blackened on all sides. Cut the kernels off the cob.
    2. Cook the pasta. Bring a large pot of well-salted water to a boil. Cook the pasta until al dente per package directions. Drain and rinse under cool water until room temperature.
    3. Make the dressing. Whisk together mayonnaise, lime juice, chili powder, garlic powder, cumin, and kosher salt in a medium bowl.
    4. Assemble. In a large bowl, toss pasta, grilled corn, green onions, cilantro, black beans, cheese, and dressing until evenly coated. Taste and add more salt if needed. Serve topped with extra crumbled cheese.

    A Note from Nora

    The first time I made this salad, our daughter asked for seconds before she even finished her first bowl. That is about as high a compliment as we get in this house. Sometimes the simplest combinations — corn and pasta and a little bit of lime — are exactly what an ordinary weeknight needs.

    Keep Reading

  • Grinder Salad (Italian Sub Salad)

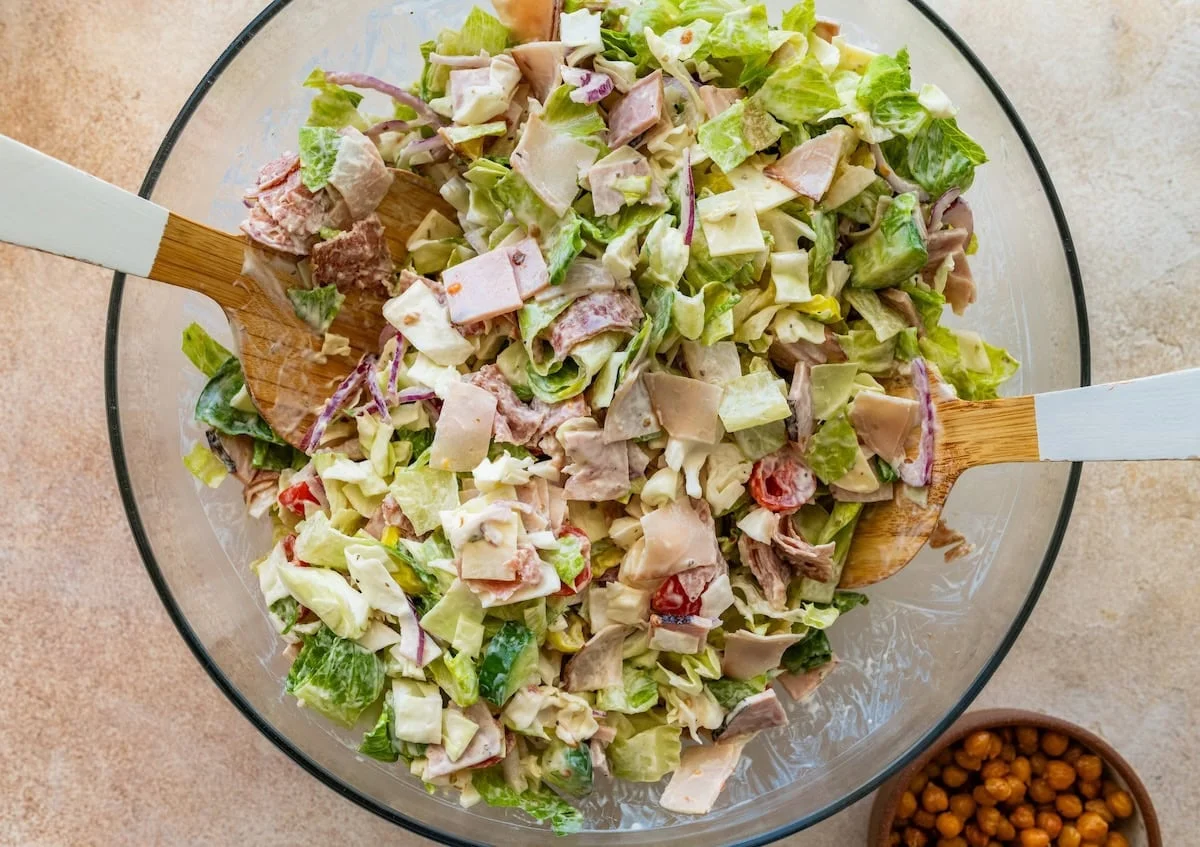
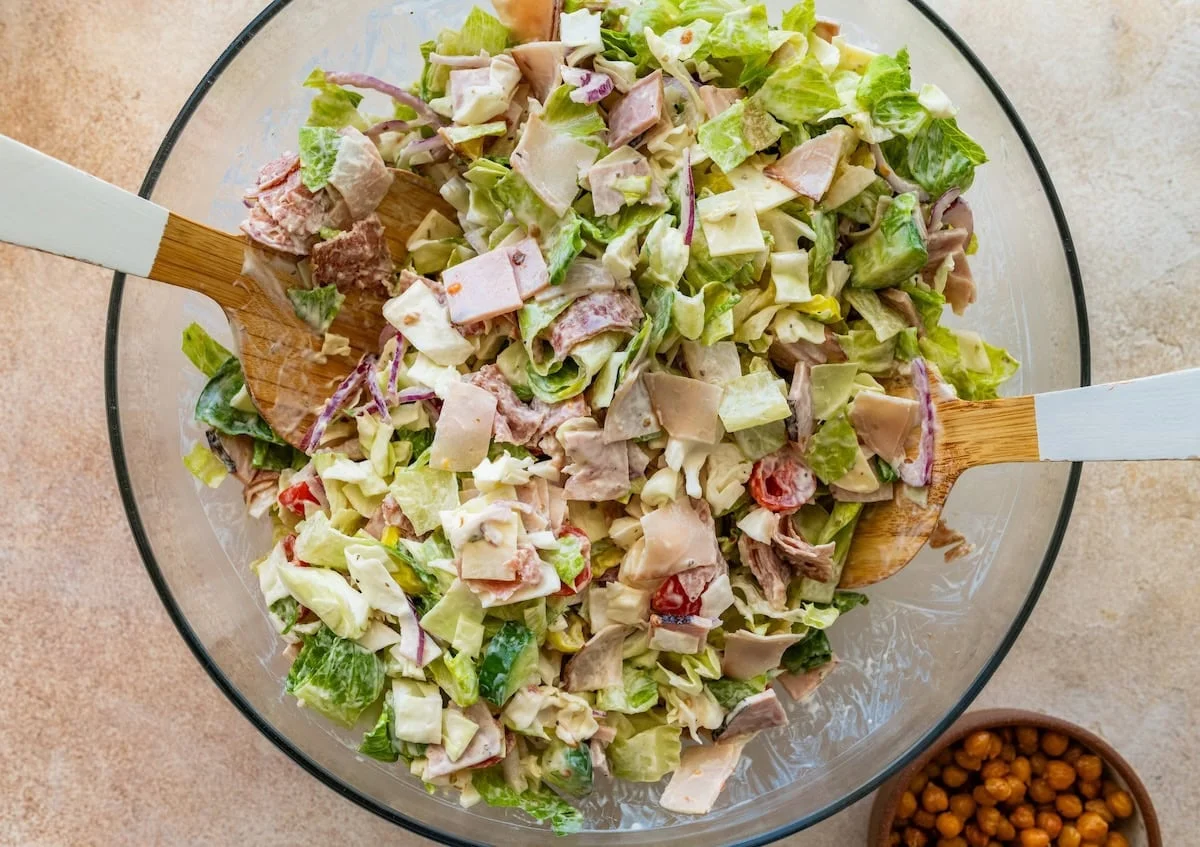
    Grinder Salad (Italian Sub Salad)

    I was scrolling through my feed one evening last week when yet another photo of this grinder salad popped up — layers of deli meat, cheese, and crisp greens drowning in tangy dressing, served right out of a bowl instead of stuffed into a roll. If you are not from New England, “grinder” is just another word for an Italian sub or hoagie, but the concept makes sense everywhere: all those sandwich flavors without the bread.

    It took me about three seconds to decide I needed this on my kitchen counter.

    This one passed the Tuesday test. No cooking, no trips to the deli counter, just chopped-up leftovers from the fridge whisked together with a dressing that takes two minutes. Sam ate it for lunch and asked if we could keep a version of this in rotation all summer.

    Why this works

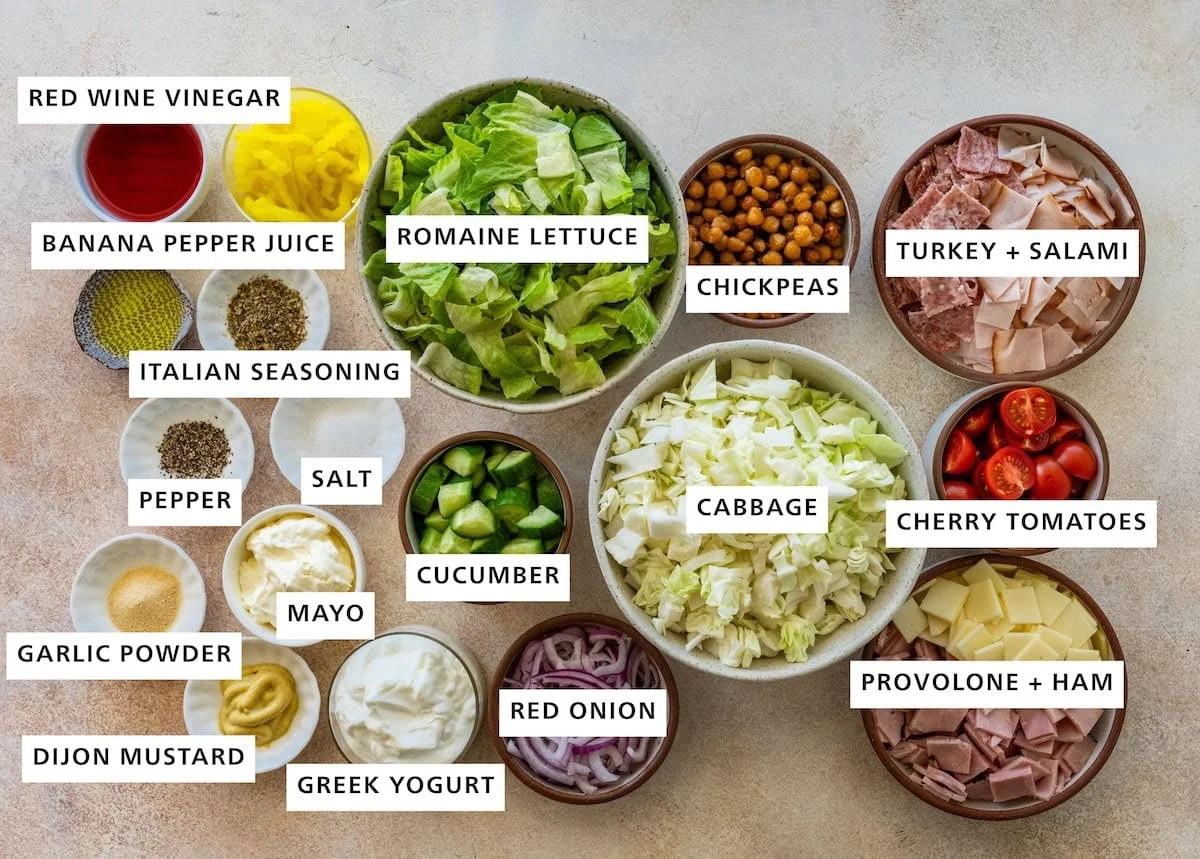
    The trick is not the ingredients — they are straightforward: turkey, ham, salami, provolone, romaine, cabbage, cherry tomatoes, cucumber. The trick is the dressing and the crunch factor.

    I use plain Greek yogurt as the base with just a touch of avocado oil mayo. Then red wine vinegar, Dijon mustard, Italian seasoning, and something that sounds odd but really anchors it — banana pepper juice. That tangy brine from the jar gives the whole salad that deli-counter brightness you cannot quite replicate with lemon alone.

    And crispy roasted chickpeas on top for crunch. You can skip them or use croutons, but I keep a bag of Biena roasted chickpeas in the pantry and they disappear into this bowl faster than anything else in that bag.

    The ingredients

    Grinder Salad (Italian Sub Salad) - photo 1

    Romaine lettuce — sturdy enough to hold dressing without turning soggy. That is why it makes the cut over iceberg here.

    Green cabbage — adds extra bulk and a crunch that romaine alone cannot deliver. Together they make this salad feel substantial, not like a side dish pretending to be lunch.

    Cherry tomatoes — halved, scattered through for bursts of sweetness against all the savory meat.

    Cucumber — English cucumber works fine since you do not need to peel it. Keeps things light and fresh.

    Banana peppers — this is non-negotiable in my book. They bring a mild heat and tang that makes the salad taste like an actual grinder instead of just chopped cold cuts on lettuce. And we use their brine in the dressing, so open the jar either way.

    Deli meats — turkey for lean protein, ham for salty depth, salami for that bold slightly fatty bite you crave from a real Italian sub. Three ounces each is generous and makes this truly filling.

    Provolone cheese — the traditional grinder cheese. It gets soft once dressed and adds just enough creaminess to balance all those sharp flavors.

    Variations worth trying

    This salad is forgiving, so treat it like building your own sub:

    • Different meats: Pepperoni, capicola, prosciutto, or roast beef all work. I have done a half-and-half of salami and pepperoni on a whim and loved it.
    • Cheese swaps: Fresh mozzarella, fontina, or shaved Parmesan are all delicious here. A mix of provolone and Parmesan is my personal favorite variation.
    • More veg: Bell peppers, black olives, roasted red peppers, artichoke hearts — pile on whatever you have in the crisper drawer.
    • Pasta version: Skip the romaine entirely and toss everything with cooked rotini for a grinder pasta salad. Travels even better to potlucks or school lunches.

    How to make it

    Grinder Salad (Italian Sub Salad) - photo 2

    1. Whisk the dressing. In a small bowl, combine Greek yogurt, avocado oil mayo, red wine vinegar, banana pepper juice, Dijon mustard, Italian seasoning, garlic powder, salt, pepper, and crushed red pepper flakes if you like heat. Whisk until smooth. Taste it — adjust with more vinegar or salt if needed. It should be tangy enough to make your jaw tighten slightly.
    2. Combine the salad base. In a large bowl, add chopped romaine, green cabbage, cherry tomatoes, cucumber, red onion, and banana peppers.
    3. Add the meats and cheese. Chop everything into roughly the same size — this is the one step that genuinely matters. You want each bite to hit you with a bit of turkey, a bit of ham, a bit of salami, cheese, and veg. Otherwise it just feels random in your mouth.
    4. Dress and toss. Pour the dressing over everything and toss really well until nothing is hiding dry at the bottom of the bowl.
    5. Serve or chill. Eat it right away topped with crispy chickpeas, or let it sit in the fridge for 10 to 15 minutes first. The flavors meld together beautifully when they have time to talk to each other.

    A few things I learned

    Chop everything uniform. This is not optional if you want the salad to taste right. Bite-sized pieces of meat, cheese, and veg — all roughly the same size — make every forkful balanced instead of a guessing game.

    Let it rest. If your schedule allows 10 or 15 minutes after tossing, put the bowl in the fridge. The dressing penetrates deeper and the whole thing tastes more cohesive.

    Add crunch last. Crispy chickpeas or croutons go on right before serving. They soften fast once they touch that yogurt dressing, so keep them separate until you are ready to eat.

    Storing leftovers

    This keeps well in an airtight container for up to three days. The romaine and cabbage hold up better than most salad greens — this is one of the few salads I actually enjoy on day two or three if I made it for meal prep.

    If you are planning ahead, store the dressing separately and toss right before serving. That keeps everything crisp all week long.

    Questions

    What is a grinder salad? It takes every ingredient from a classic Italian grinder sandwich — deli meats, provolone, peppers, tangy dressing — and serves them in a bowl instead of on bread. It went viral on TikTok because it is genuinely satisfying and comes together in minutes.

    Can I put this back into a sandwich? Yes. Pile the dressed salad onto a toasted sub roll for the full experience. It is messy, but in the best possible way.

    What deli meats work best? Turkey, ham, and salami give you that classic grinder combo. But pepperoni, capicola, or any Italian meat from your local deli works fine.

    Can I make it without mayo? The dressing is mostly Greek yogurt with just two tablespoons of mayo. Swap those for extra yogurt if you want to skip it entirely — the dressing will be tangier but still delicious.

    The recipe

    Italian Grinder Salad

    Prep time: 15 minutes | Serves: 4 | Protein: 25 g per serving

    For the salad:

    • 3 cups chopped romaine lettuce
    • 3 cups chopped green cabbage
    • 1 cup cherry tomatoes, halved
    • 1 cup chopped cucumber
    • ½ red onion, chopped
    • ½ cup banana peppers, sliced
    • 4 oz deli turkey, chopped
    • 4 oz deli ham, chopped
    • 2 oz salami, chopped
    • 4 slices (about ½ cup) provolone cheese, chopped
    • ½ cup crispy chickpeas or croutons, for topping

    For the dressing:

    • ½ cup plain Greek yogurt
    • 2 tablespoons avocado oil mayonnaise
    • 2 tablespoons red wine vinegar
    • 1 teaspoon banana pepper juice (from the jar)
    • 1 teaspoon Dijon mustard
    • 1 teaspoon Italian seasoning
    • ½ teaspoon garlic powder
    • ¼ teaspoon salt
    • ¼ teaspoon black pepper
    • ¼ teaspoon crushed red pepper flakes, optional

    Nutrition per serving: 357 calories | 20 g carbs | 25 g protein | 20 g fat | 6 g fiber | 1082 mg sodium


    A note from Nora

    Biscuit tried to convince me that the crispy chickpeas were meant for him, not for the salad. He got three before I moved the bowl out of reach and he gave up, which felt like a victory. This recipe has been showing up on our counter every other day since I made it — Sam started packing it for work lunches because “it does not taste sad at noon,” in his exact words. Small rituals that repeat themselves are usually the ones worth keeping.

    Keep Reading

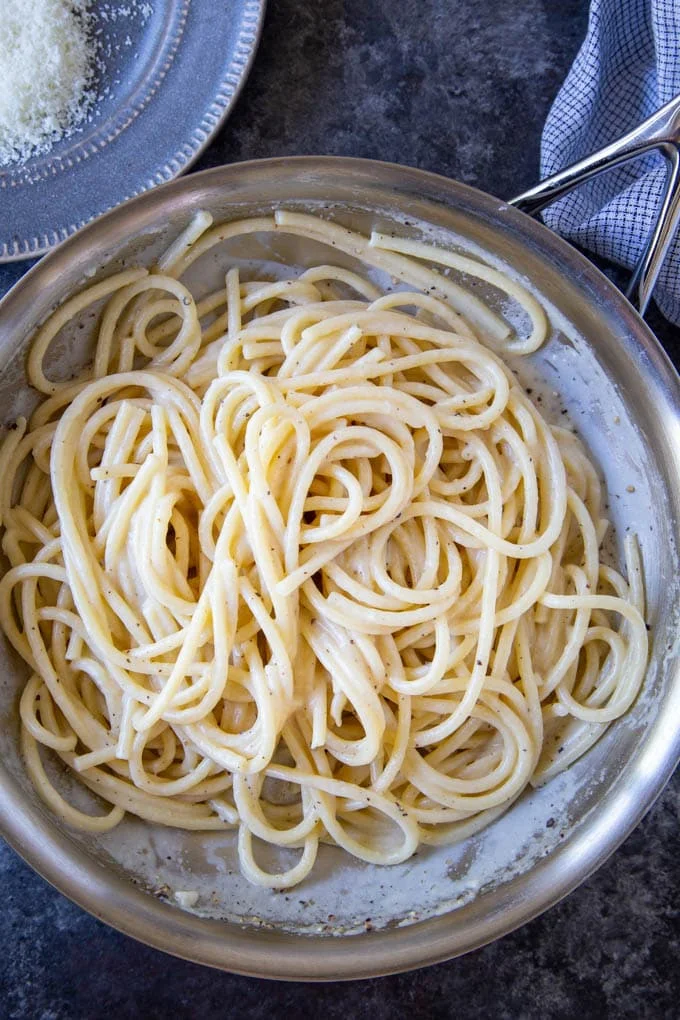
  • Bucatini Cacio e Pepe: A 4-Ingredient Creamy Pasta That Feels Like Rome

    Bucatini Cacio e Pepe: A 4-Ingredient Creamy Pasta That Feels Like Rome

    There is something about a dish that sounds fancy but takes almost no effort to make. Cacio e Pepe is exactly that kind of recipe — Roman, elegant, and built on only four ingredients.

    Bucatini Cacio e Pepe: A 4-Ingredient Creamy Pasta That Feels Like Rome - photo 1

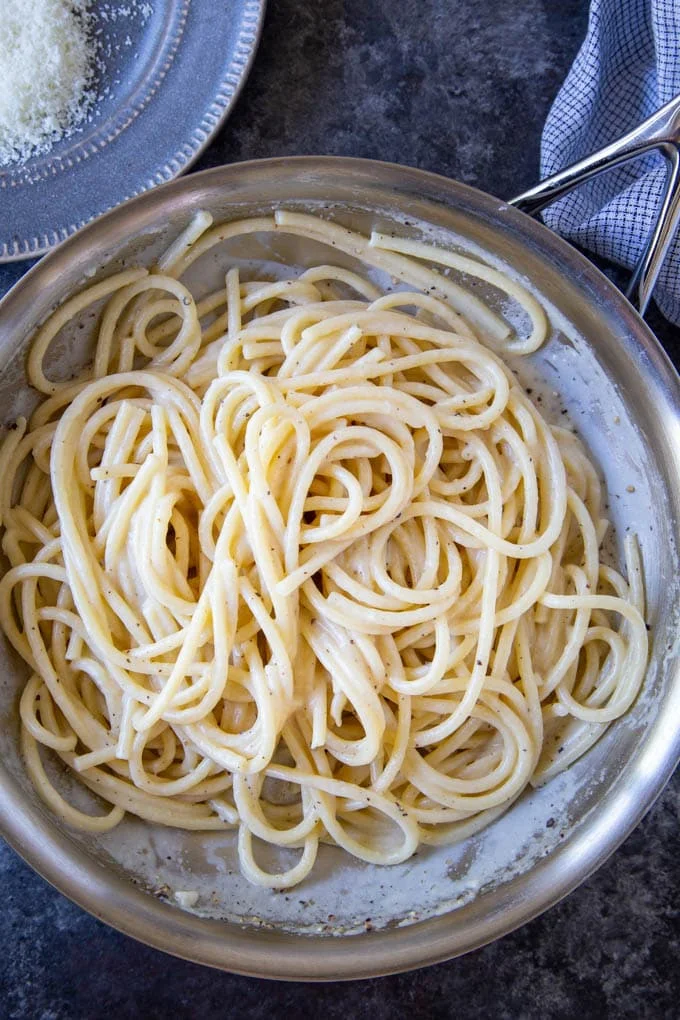
    I made this last week when I needed dinner on the table fast, and it came together in about 20 minutes from start to finish. Sam looked at his bowl, then at me, like he had just witnessed a small miracle. “There’s no cream in this,” he said. There really isn’t.

    What is Cacio e Pepe?

    Cacio means cheese in Italian — pronounced CAH-chee-oh — and e Pepe means and pepper. The original Roman version uses just three ingredients: pasta, cheese, and freshly cracked black pepper.

    The magic comes from the technique. You reserve some of that starchy pasta cooking water and stir it into the pan with hot noodles and pepper before adding in the cheese. The Pecorino melts into a velvety sauce without any cream or butter needed — though I do add a little butter to mine, which I’ll get to.

    Bucatini Cacio e Pepe: A 4-Ingredient Creamy Pasta That Feels Like Rome - photo 2

    How to Make It

    This recipe comes together quickly, so having everything measured and ready before you start is key. Here’s the sequence that works:

    1. Prep first. Grate the cheese. Crack the pepper — a grinder or mortar and pestle work best. Measure out the butter if using.
    2. Cook the pasta. Bring 2 quarts of salted water to a boil in a large pot and cook bucatini until al dente per package directions.
    3. Start the “sauce” while the pasta cooks. Melt butter with cracked pepper in a large saucepan over low heat. Remove from heat and set aside. (Skip this step if making it without butter — just add the pepper to the pan.)
    4. About 3 minutes before the pasta is done, ladle roughly 1/2 cup of pasta water into the saucepan with butter and pepper. Return to low heat.
    5. When there’s about 1 minute left on the pasta, reserve another 1/2 to 1 cup of pasta water, then drain the noodles. Add them to the pan with the warm butter-pepper mixture and previously added pasta water. Stir continuously until most of the water has evaporated — this is where your pasta finishes cooking.
    6. Add the cheese off the heat. Remove the pan from the burner, add all the grated cheese, and stir constantly for 1-2 minutes until fully incorporated. If the sauce feels thick or clumpy, spoon in some reserved pasta water to loosen it. It should be creamy but not watery.
    7. Serve immediately, with extra cheese and pepper on top if you like.
    Bucatini Cacio e Pepe: A 4-Ingredient Creamy Pasta That Feels Like Rome - photo 3

    The Cheese Is the Star

    Classic cacio e pepe calls for Pecorino Romano — a hard Italian cheese made from sheep’s milk. The word pecora means ewe in Italian, which is how you remember it. It has a sharp, tangy flavor that stands up to the black pepper beautifully.

    If you can’t find Pecorino or prefer something milder, Parmesan works as a substitute. It’s made from cow’s milk and has a nuttier, gentler taste. Either way, grate it finely yourself rather than using pre-grated — freshly grated cheese melts far more smoothly into that silky sauce.

    What About the Noodles?

    The traditional Roman pasta for cacio e pepe is Tonnarelli — thick, square spaghetti made fresh. In the United States, bucatini is the closest easy-to-find option: it’s extra-thick spaghetti with a little hole running through the center, which helps catch that creamy sauce.

    Can’t find bucatini? Regular spaghetti, linguine, or fettuccine all work fine.

    To Butter or Not to Butter?

    The classic Roman version doesn’t include butter. I added 2 tablespoons of unsalted butter because my family leans toward butter noodles and mac and cheese — the extra richness feels like a warm hug on a cold night.

    You can absolutely leave it out if you want to stay true to tradition. Both versions are delicious.

    Bucatini Cacio e Pepe: A 4-Ingredient Creamy Pasta That Feels Like Rome - photo 4

    Easy Variations

    This recipe is simple enough that small additions change the whole dish without complicating things:

    • Add vegetables: peas, mushrooms, arugula, or spinach stir right in.
    • Making it gluten-free? Swap regular pasta for your favorite GF noodles.
    • Want some heat? A pinch of red pepper flakes does the trick.
    • Add protein: cooked shrimp, chicken, sausage, bacon, pancetta, or salmon all work well.
    • Finish with a flourish: a dollop of ricotta, a squeeze of lemon juice, or a splash of truffle oil on top.

    The Tuesday Test

    This one passed easily. Four ingredients. About 20 minutes total — 5 minutes prep and 15 minutes cook time. The only real trick is paying attention to the pasta water timing, but once you do it twice, your hands remember.

    Ingredients (serves 4)

    • 8 oz dried bucatini pasta (or spaghetti)
    • 1 teaspoon coarsely ground black pepper
    • 2 Tbsp unsalted butter (optional)
    • 3/4 cup finely grated Pecorino Romano cheese, about 2 oz (Parmesan works too)
    • 1 cup pasta water, divided and reserved while cooking

    Nutrition per serving

    Calories: 307 kcal | Carbohydrates: 42.8g | Protein: 11.1g | Fat: 11.3g (Saturated: 6.6g) | Cholesterol: 28mg | Sodium: 176mg | Potassium: 8.5mg | Fiber: 2.1g | Sugar: 1g

    A Note from Nora

    The first time I made cacio e pepe, the cheese clumped into little white islands and I panicked, thinking I’d ruined dinner. Then I remembered to add pasta water — just a few spoonfuls at a time — and stirred. Within seconds it turned silky. That’s the beauty of this dish: even your mistakes are easy to fix.

    Maybe that is the real gift of simple recipes like this one: they do not demand perfection from you, only attention. And on busy nights, that feels more than enough.

    Keep Reading

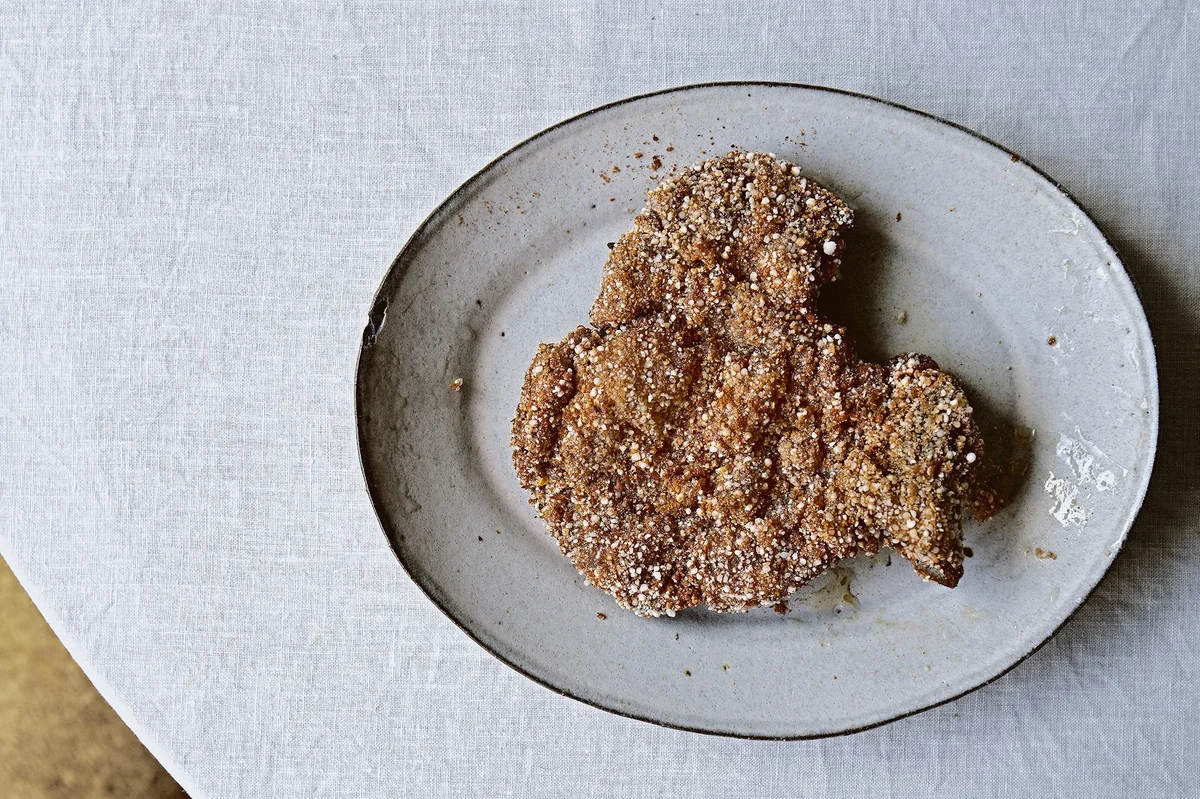
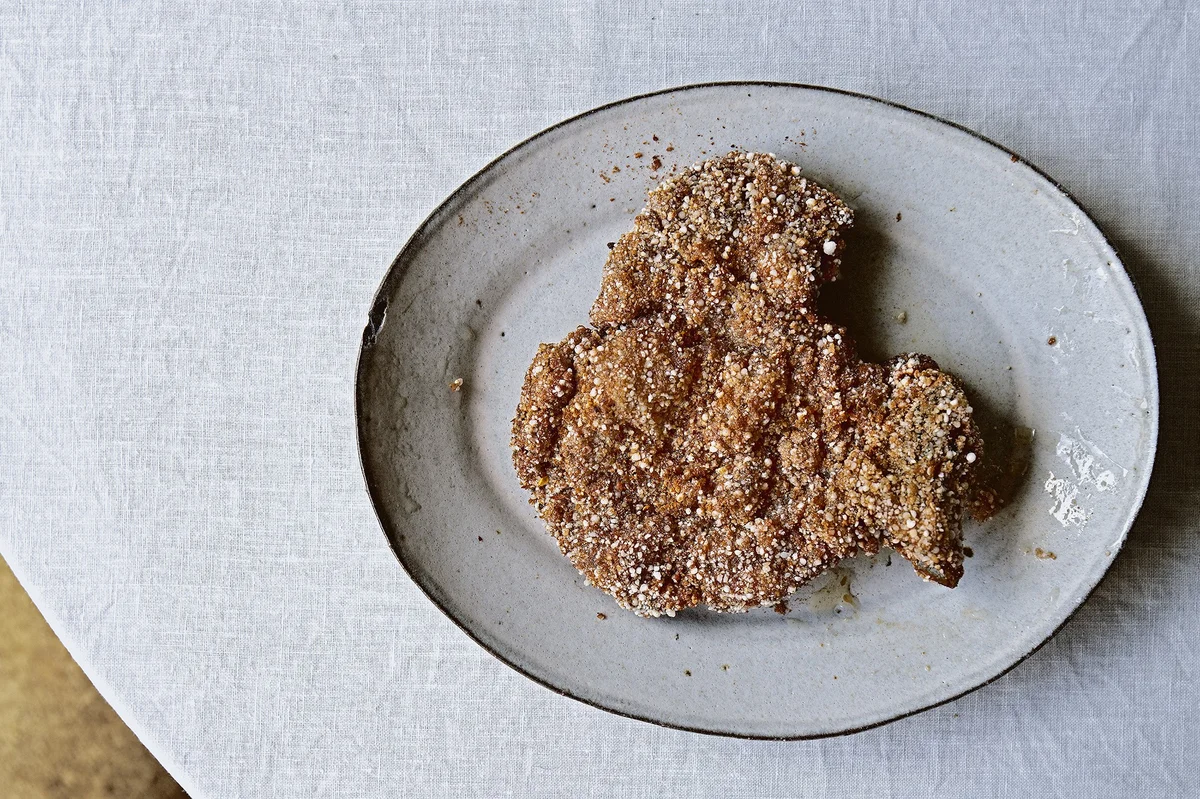
  • Crushed Sago Pearls Are the Next Crust You Need

    Crushed Sago Pearls Are the Next Crust You Need

    I used to think I knew what made certain fried dishes special.

    Not just crispy-on-the-outside special, but that particular kind of crunch where the crust looks almost glittery — those pale, uneven speckles that crackle a little louder than the rest. If you have ever had Taiwanese-style fried chicken poppers or pork chops, you know exactly what I mean.

    For years I chased that texture without really knowing why mine never quite matched. Then one evening, staring at a bag of sago pearls in my pantry, something clicked.

    The secret ingredient (and the hack)

    Taiwanese fried food gets its signature crust from sweet potato starch — a grainy starch that fries up into those unmistakable pale granules. The problem? Sweet potato starch is nearly impossible to find outside of specialty Taiwanese stores. Most recipes, including ones I’ve written myself over the years, substitute tapioca starch or cornstarch instead. They work fine, but they lack those speckles entirely.

    So here’s what changed everything: sago pearls are made from tapioca starch, and if you pulse them in a spice grinder for 8 to 10 times, they break down into something that looks almost identical to sweet potato starch. The same granules. The same crunch. And I can find sago pearls at my local Asian grocery without any trouble.

    You’ll need a spice grinder — a food processor won’t break the pearls efficiently enough, and smashing them in a plastic bag is basically useless. These little things are tough. Pulse 8 to 10 times, then gently shake the grinder so the finer bits settle at the bottom while larger pieces rise. Check that no uncrushed pearls remain; the largest piece should be no bigger than one-third of an original pearl. If you skip this step, your crust can end up unpleasantly hard.

    Once ground, store the crushed sago in a zip-lock bag until you’re ready to use it.

    Crushed Sago Pearls Are the Next Crust You Need - photo 1

    Cooking with crushed sago pearls

    The crushed pearls work as a standalone coating or mixed partially with flour or cornmeal. I’ve used them for Taiwanese chicken popcorns, cutlets, fried calamari — anything where you want that starry, crackling crust.

    Crushed sago pearl crusted pork chops

    This recipe came together one weeknight when I needed something satisfying but not fussy. Four bone-in chops, a simple marinade, and the sago crust. It passed the Tuesday test easily.

    Ingredients

    Crushed sago pearl crust:

    • 1 lb (450 g) small unflavored sago pearls
    • 1 1/2 tsp garlic powder
    • 1/2 tsp salt
    • 1/2 tsp ground black pepper

    Pork chops:

    • 4 bone-in pork chops, each about 3/4 inch (2 cm) thick
    • 1/4 cup soy sauce
    • 1/4 cup water
    • 1 crushed star anise
    • 1 crushed garlic clove
    • 1 tbsp rice wine
    • 1 1/2 tsp granulated chicken bouillon
    • 1 tsp light brown sugar
    • 1/2 tsp ground black pepper
    • 1/2 tsp ground Sichuan peppercorn
    • 1/2 tsp salt
    • 1/8 tsp curry powder
    • 1/16 tsp ground cinnamon
    • Ground white pepper, to dust
    • Canola oil, for frying

    Instructions

    1. Make the crushed sago pearls. Place the sago pearls in a spice grinder (in batches if necessary). Pulse 8 to 10 times, then gently shake. Check that no uncrushed pearls remain — each piece should be no larger than one-third of an original pearl. If not, pulse a few more times and check again.
    2. Marinate the pork chops. In a large container, mix together soy sauce, water, star anise, garlic, rice wine, chicken bouillon, light brown sugar, black pepper, Sichuan peppercorns, salt, curry powder, and ground cinnamon. Use the spiky side of a meat pounder to tenderize and slightly flatten each chop, then drench them in the marinade.
    3. Coat the chops. Mix the crushed sago pearls with garlic powder, salt, and black pepper. Dust each marinated pork chop lightly with white pepper, then press into the sago coating until evenly covered.
    4. Fry. Heat canola oil in a large skillet over medium heat. Fry the chops until golden brown and cooked through on both sides.

    Serve with rice. The crust holds up beautifully even after resting.

    A note from Nora

    Sam came into the kitchen while these were frying and said, “Those smell like they belong somewhere I should visit.” Which is the highest compliment he gives to anything I cook. We ate them over rice on a Thursday that had no particular plans, and Biscuit sat by the counter looking deeply suspicious of crumbs falling to the floor.

    Maybe that’s the thing about small kitchen discoveries — they don’t just change a dish. They turn an ordinary dinner into something that feels like a place you want to come back to.

    Keep Reading

  • How to Simplify Your Meal Planning Routine

    How to Simplify Your Meal Planning Routine

    I will admit something: for the longest time, the phrase “meal planning” made my stomach tighten.

    It is one of those things we know we should do. On paper, it promises an easier life and smoother evenings. But sitting down to actually map out a week’s worth of dinners and build a grocery list? It always felt like homework I was too tired for.

    And then I noticed what happened when I skipped it entirely. Sam and I started eating out almost every night, or ordering from that endless scroll of delivery apps. Our grocery budget ballooned, I gained weight, and somehow the evenings I was trying to protect — the ones at home with our daughter reading on the couch and Biscuit sighing beside her — got eaten alive by takeout containers.

    So I decided to try again, but differently this time. Not rigidly. Not perfectly. Just simply.

    Ten ways I simplified meal planning (without losing my mind)

    1. Schedule it like you would anything that matters

    The truth is, most of us do not plan because we never carve out time to plan. Sunday afternoon has become my ritual: right after lunch, with a glass of tea and my dog at my feet, I flip through recipe books, sketch out the week, and write the shopping list. Once it landed on my regular schedule, meal planning stopped feeling like a chore and started feeling like part of how things run around here.

    2. Build a living list of family favourites

    Your weekly menu does not need to be an experiment every single time — though that is what it often feels like when you sit down with a blank page. Keep a running list of meals your household genuinely loves. Spaghetti. Tacos. A solid steak and potatoes night. Add new discoveries as they happen, especially the easy ones.

    When planning week, pick four or five from that list, then leave room for one or two newer recipes you want to try. If they land? They earn a spot on the favourites list permanently.

    3. Cook simple meals without guilt

    I used to think every dinner deserved to be a gourmet event. It does not. Meat and potatoes is a perfectly good sentence. A hearty soup with crusty bread beside it is not giving up — it is being sensible.

    4. Accept shortcuts where they count

    Making your own almond milk and tomato sauce from scratch feels noble, but chopping vegetables takes time that Tuesday evenings simply do not have in reserve. I buy pre-chopped onions when they are priced right. I keep frozen vegetables on hand — they are flash-frozen at peak harvest and often more nutritious than produce that has sat in transit for weeks.

    Stores like Trader Joe’s, Aldi, and Costco carry solid organic options at prices that make sense. Do not feel guilty about reaching for convenience when it buys you peace of mind.

    5. Theme your nights

    Taco Tuesdays are not just a slogan — they are a strategy. Whether it is pasta on Thursdays or pizza Fridays, having a rhythm removes the daily question of “what’s for dinner?” and keeps your pantry stocked with what you already need.

    Take stir-fry night: once a week, always at home. You keep rice, soy sauce, spices, and brown sugar in the cupboard and swap the protein or vegetables depending on what is on sale. Chicken one week. Tofu the next. Same framework, different ingredients.

    6. Stop fighting leftovers

    Cooking once and eating twice — or three times — is one of the quietest time-savers in my kitchen. I make a big pot of soup on Monday and pack it for lunches through midweek. If cold reheated food is not your thing, you can still cook once and repurpose: roast a chicken for dinner, then use the carcass for stock and the leftovers for sandwiches.

    7. Prep on Sundays

    This one changed everything for me. Setting aside an hour on Sunday to portion breakfasts, bag lunch components, and maybe bake a loaf of bread turns Monday morning from frantic to calm. I even prep dinners now — chopping vegetables ahead or assembling freezer meals means the week starts with momentum instead of stress.

    How to Simplify Your Meal Planning Routine - photo 1

    8. Keep your freezer stocked

    A freezer full of ready-to-go meals is like having a personal chef on standby. I batch-make soups, casseroles, and sauce bases whenever I have an extra hour, then freeze them in portions.

    The real gift? Coming home after a long day and being able to pop something in the oven or let the slow cooker do its work while I help with homework and listen to our daughter recount her day. No hot kitchen, no hungry kids tugging at my apron. Just time together.

    9. Let good ingredients speak

    A simple meal elevated by flavour is almost always better than an elaborate one that falls flat. Fresh herbs from a windowsill pot, a generous grating of Parmesan, a squeeze of lime — these small touches turn plain pork chops and rice into something the table actually talks about.

    Fresh ingredients rarely need much doing to them. Steam some greens, add salt and butter, and let the food be itself. Do not bury it under heavy sauces just because you feel like dinner should be complicated.

    10. Stock your pantry for emergencies

    If pasta shows up on your menu often, keep sauce and noodles in the cupboard. If tacos are a weekly staple, have seasoning, shells, and ground beef ready in the freezer. Diced tomatoes, tomato paste, beans — these shelf-stable basics are your safety net when plans go off track.

    A stocked pantry means you can still cook at home even on the weeks when meal planning gets away from you. And that is exactly when you need it most.


    Quick recap — the ten habits:

    • Schedule a weekly planning date
    • Keep a living list of family favourites
    • Cook simple meals without guilt
    • Accept shortcuts where they count
    • Theme your nights
    • Stop fighting leftovers
    • Prep on Sundays
    • Keep your freezer stocked
    • Let good ingredients speak
    • Stock your pantry for emergencies

    And when nothing works? Grilled cheese and pancakes for dinner are always an option. I have learned that the pressure to cook something extraordinary every night does a disservice to everyone at the table — including the person cooking. Keep it simple, forgive yourself on the off nights, and remember: small rituals do not fix everything, but they remind us that even an ordinary evening can hold something lovely.

    A note from Nora: I tried this whole system last month and Sam said the best dinner was the Tuesday when I made grilled cheese because “the rest of you were actually present.” Fair enough.

    Keep Reading

  • 15 Healthy Dinners from Your Pantry and Freezer

    15 Healthy Dinners from Your Pantry and Freezer

    I stood in my kitchen last week staring at a freezer drawer full of mystery bags and a pantry shelf that definitely held something useful. It happened on a Thursday, which somehow always feels like the hardest night to figure out dinner.

    15 Healthy Dinners from Your Pantry and Freezer - photo 1

    It struck me: I already had enough for a really good meal. Most of us do. A few cans, some frozen chicken or shrimp, pasta, rice — these are the quiet heroes of Tuesday nights.

    I put together fifteen recipes that rely on pantry and freezer basics. No last-minute runs to the store. No panic. Just honest food made from what you already own.

    Sheet Pan Chicken Fajitas

    15 Healthy Dinners from Your Pantry and Freezer - photo 2

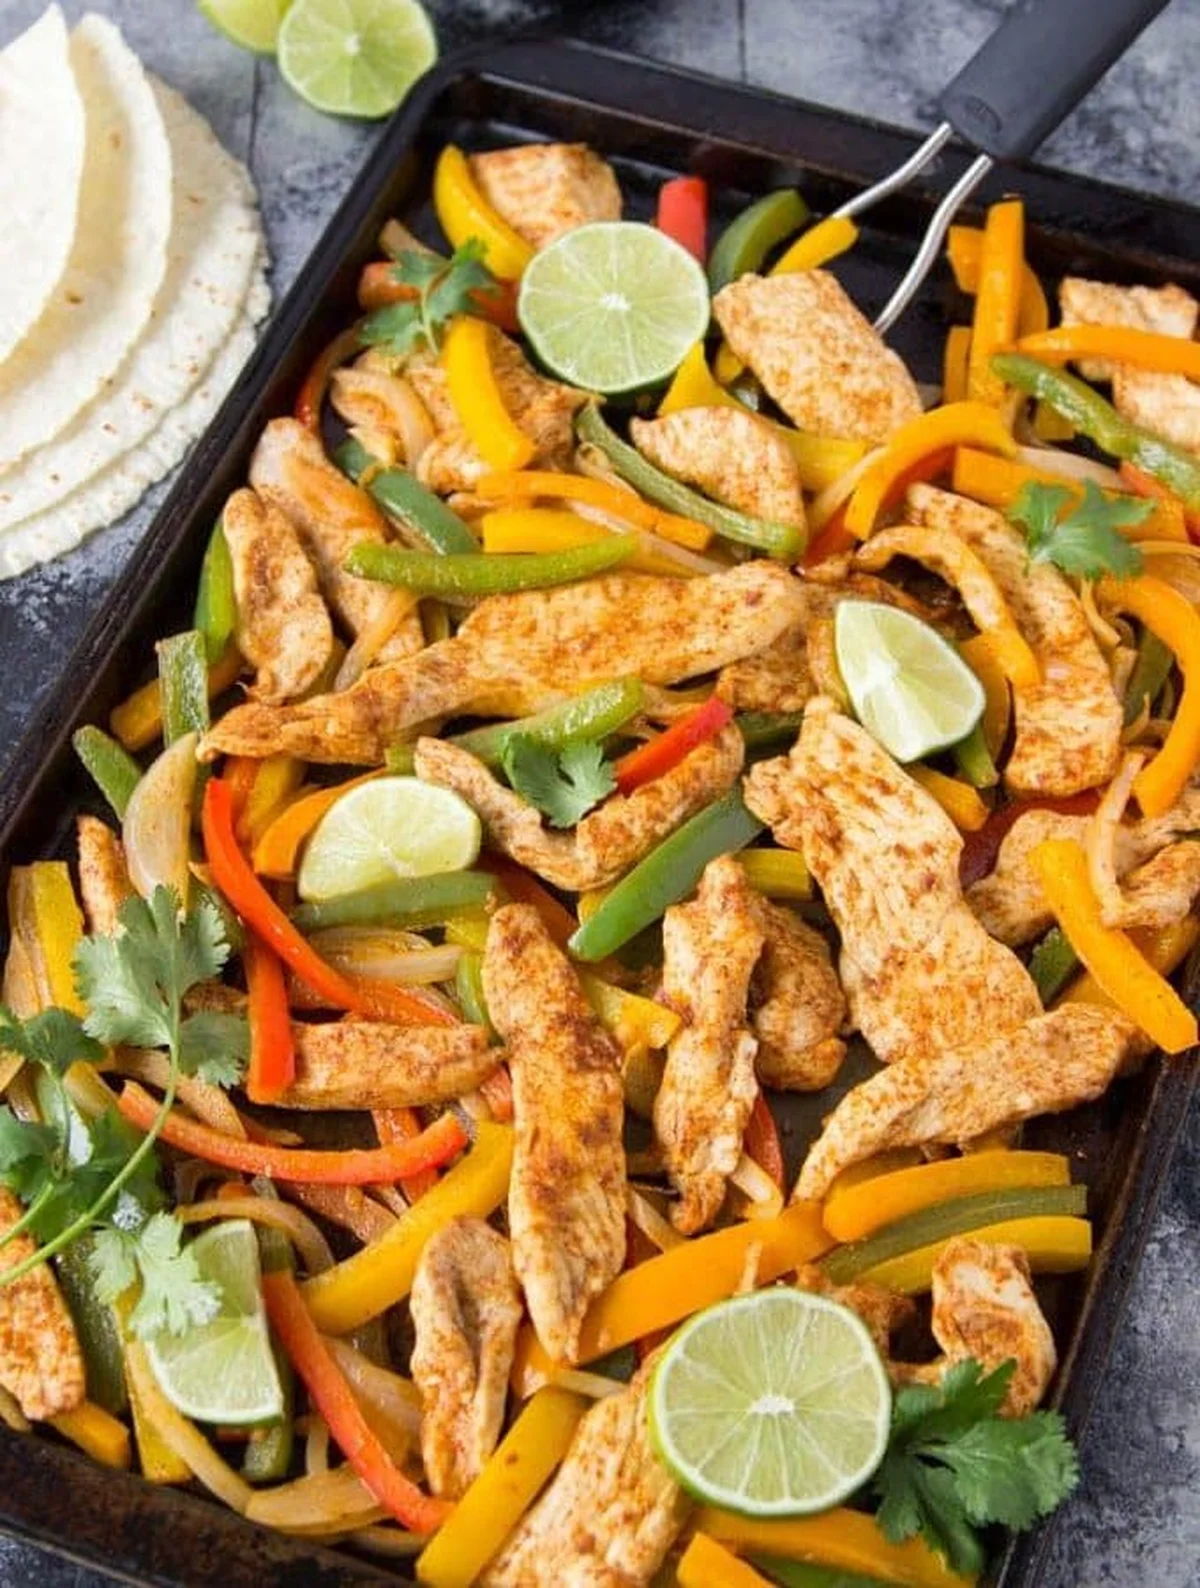
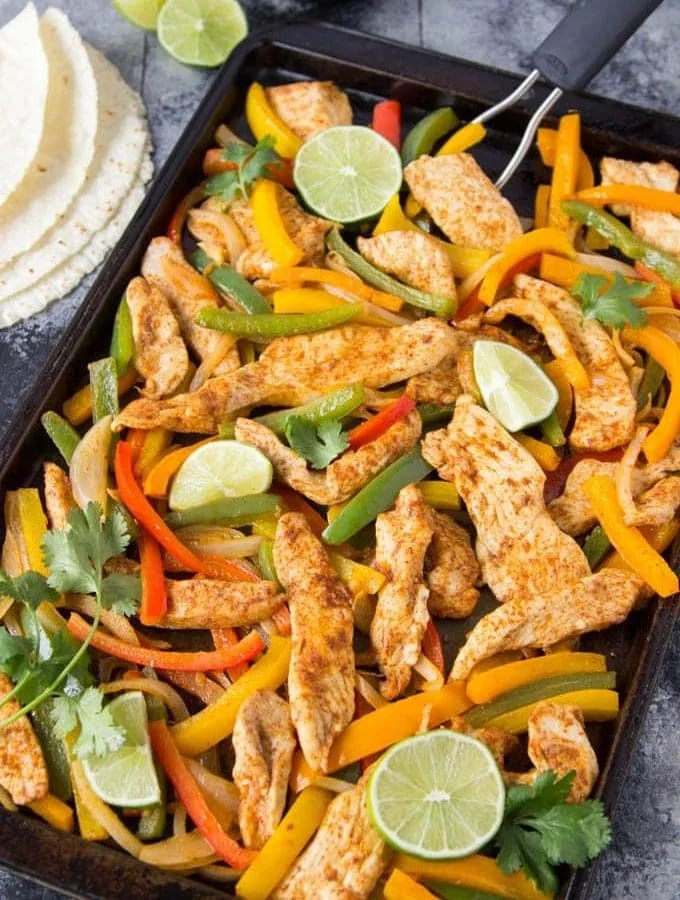
    This one passed the Tuesday test without any effort. Toss chicken and peppers on a single sheet pan, let the oven do its thing for about 20 minutes, and serve with tortillas and lime. If you are using frozen chicken or frozen peppers, just add a few extra minutes to the cook time.

    What you need: Boneless skinless chicken breasts or tenders (fresh or frozen), bell peppers and onion (fresh or frozen), flour tortillas, lime.

    Instant Pot Spaghetti

    15 Healthy Dinners from Your Pantry and Freezer - photo 3

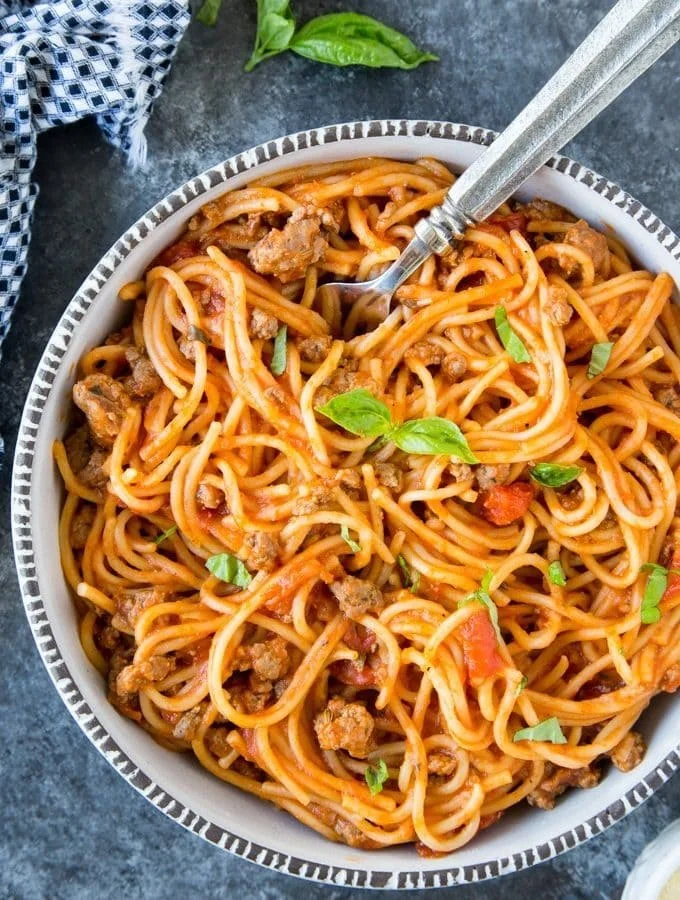
    An already simple meal gets even simpler when everything cooks in one pot. Brown the ground beef, add marinara sauce and diced tomatoes, drop in a package of spaghetti, and let the Instant Pot handle it. I pair this with frozen garlic bread on nearly every occasion.

    What you need: Spaghetti, ground beef (fresh or frozen), jar of marinara sauce, canned diced tomatoes, Parmesan cheese if you have it, pantry spices.

    Korean Beef Bowls

    15 Healthy Dinners from Your Pantry and Freezer - photo 4

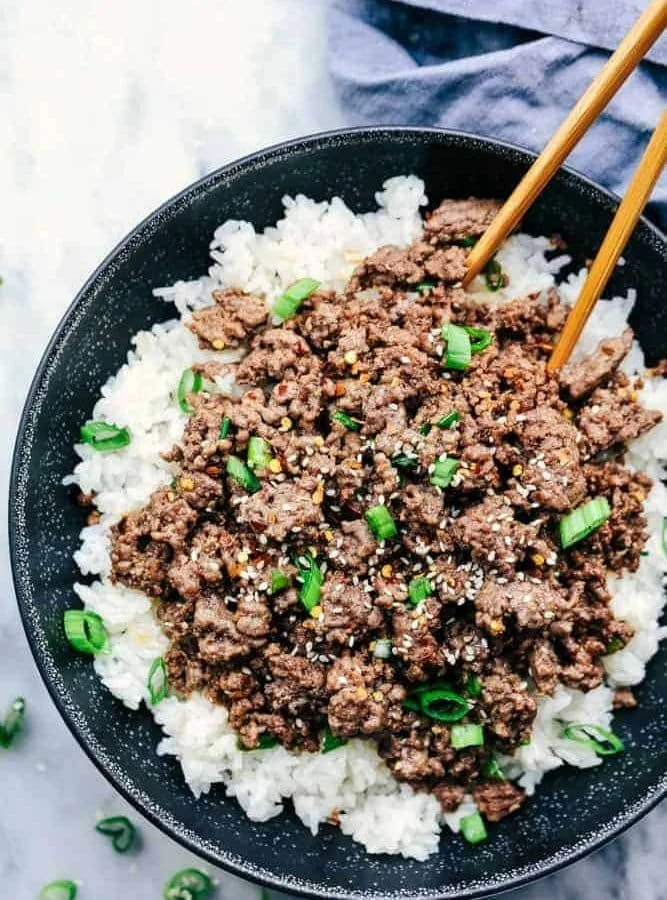
    Recipe and photo by Alyssa at The Recipe Critic. A package of ground beef plus soy sauce, sesame oil, garlic, brown sugar, and rice becomes something that tastes like it took actual effort. It is perfect for those 5 p.m. moments when dinner still feels miles away.

    What you need: Ground beef (fresh or frozen), garlic, low-sodium soy sauce, sesame oil, brown sugar, pantry spices, rice.

    Tip: Sub ground chicken or turkey if you prefer. Frozen microwaveable rice makes this about 15 minutes total.

    Easy Roasted Veggie Tacos

    15 Healthy Dinners from Your Pantry and Freezer - photo 5

    Recipe and photo by Jess at Plays Well With Butter. These are my go-to when I want something colorful without touching a piece of meat. Roasted cauliflower and sweet potatoes go into corn tortillas alongside black beans, then get topped with a chipotle lime cashew crema.

    What you need: Cauliflower (fresh or frozen), sweet potato, avocado, canned black beans, canned chipotle peppers in adobo sauce — that spicy chile paste packed with the peppers themselves, cashews, lime, corn tortillas, pantry spices.

    Tip: If using frozen cauliflower, do not thaw it first. Raise your oven to 450°F and follow the recipe as written. Frozen avocado pieces work in a pinch too — look near the frozen fruit section.

    15-Minute Paprika Chicken

    15 Healthy Dinners from Your Pantry and Freezer - photo 6

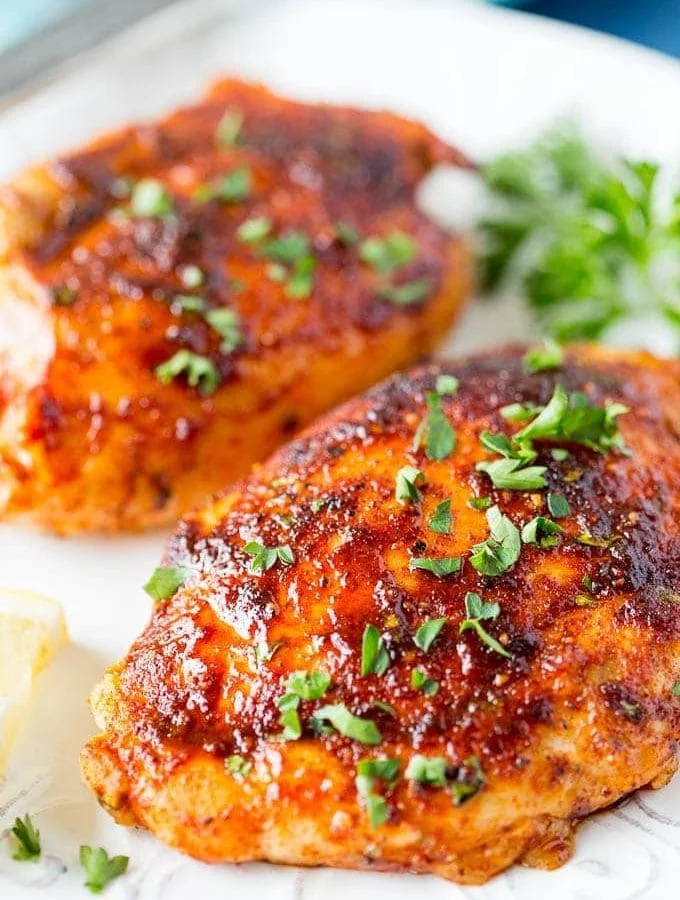
    Boneless skinless chicken thighs rubbed with chili powder, garlic powder, smoked paprika, cumin, and red pepper flakes. Brush them with honey, then broil instead of bake — the high heat creates a crunchy outer crust while keeping everything juicy inside.

    What you need: Boneless skinless chicken thighs (fresh or frozen), honey, pantry spices.

    Serve over rice or alongside roasted potatoes and frozen green beans, peas, or corn.

    Easy Shrimp Scampi

    15 Healthy Dinners from Your Pantry and Freezer - photo 7

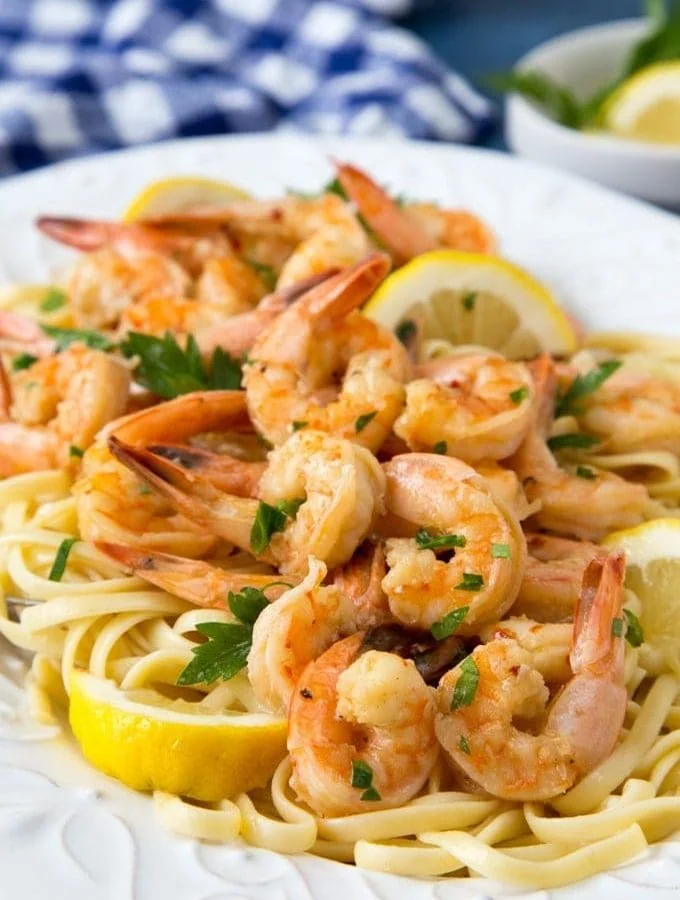
    Fifteen minutes from freezer to table. Sauté shrimp in white wine, butter, garlic, and lemon, then serve over spaghetti or linguine. It sounds like restaurant food but it is genuinely one of the easiest things I cook.

    What you need: Shrimp (fresh or frozen), spaghetti or linguine, lemon, butter, white wine (optional).

    Sweet Potato & Black Bean Chili

    15 Healthy Dinners from Your Pantry and Freezer - photo 8

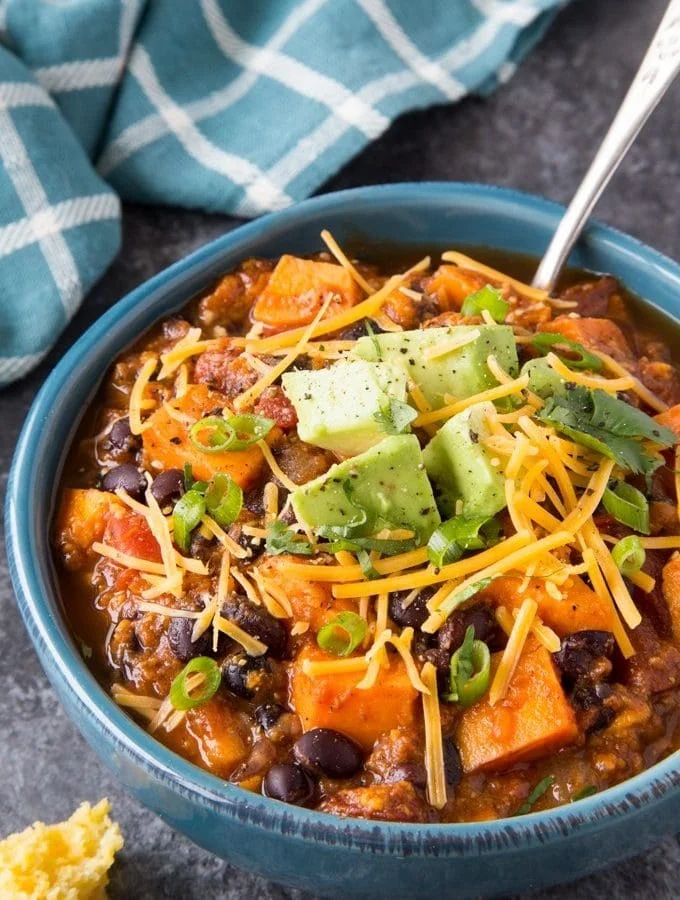
    A steaming bowl of chili in under 30 minutes, thanks to the Instant Pot. Sweet potatoes bring natural sweetness while black beans and tomatoes keep it hearty. I always make a big batch and freeze half for later.

    What you need: Sweet potato, canned black beans, canned diced tomatoes, canned crushed tomatoes, onion (fresh or frozen).

    Salsa Chicken

    Two ingredients. That is it. Chicken breasts and a jar of salsa go into the Instant Pot — or slow cooker if that is your thing — and you end up with the most versatile shredded chicken I know. Use it for tacos, salads, grain bowls, wraps. It serves at least 10 different ways.

    What you need: Boneless skinless chicken breasts (fresh or frozen), jar of salsa.

    Tip: For the slow cooker, use the same ingredient amounts and cook for 1½ to 2 hours on high.

    Curried Cauliflower Rice Soup

    This is a warming, golden soup that feels like it does good things. Curry, turmeric, cauliflower rice, carrots, kale, and coconut milk make it deeply nourishing without being fussy. It is vegetarian and vegan.

    What you need: Cauliflower rice (fresh or frozen), canned coconut milk, vegetable broth, carrots, celery, kale or spinach, onion (fresh or frozen), garlic, olive oil, turmeric, curry powder.

    This recipe bends to whatever vegetables you have. Broccoli, peas, bell peppers, potatoes — all work. Add chickpeas or tofu if you want extra protein.

    Easy Canned Tuna Pasta

    Recipe and photo by Natasha at Salt & Lavender. Six pantry staples and about 15 minutes give you a bright, clean-tasting pasta dish. Olive oil, garlic, lemon, and parsley dress up canned tuna in the best way.

    What you need: Canned tuna, pasta, olive oil, garlic, lemon, parsley.

    White Bean & Tomato Polenta Casserole

    Recipe and photo by Alissa at Connoisseurus Veg. This turns a tube of polenta — that soft cornmeal mush in a shelf-stable tube you find near the pasta aisle — into a proper, hearty dinner alongside cannellini beans, diced tomatoes, and tomato paste.

    What you need: Tube of polenta, canned cannellini beans, canned diced tomatoes, tomato paste, olive oil, onion (fresh or frozen), garlic, white wine, pantry spices.

    Top with mozzarella or provolone for a melty finish, or use your favorite vegan cheese.

    Instant Pot Lemon Garlic Chicken

    Tender chicken thighs cooked in lemon, garlic, and butter until they taste like something from a nice restaurant. A splash of heavy cream (or coconut milk) makes the sauce rich without much effort at all.

    What you need: Chicken thighs (fresh or frozen), butter, garlic, onion or shallot, chicken broth, heavy cream or canned coconut milk, lemon.

    Serve over rice, roasted potatoes, or cauliflower/broccoli rice for a lower-carb option.

    Stuffed Sweet Potatoes with Black Beans & Quinoa

    Recipe and photo by Erin at Well Plated. Baked sweet potatoes filled with black beans, quinoa, and southwest flavors make an all-in-one meatless meal that the whole family eats without complaint.

    What you need: Sweet potatoes, quinoa, canned black beans, onion and bell peppers (fresh or frozen), garlic, lime, cheddar cheese, jalapeño or hot sauce, pantry spices.

    Tip: Cook a big batch of quinoa at the start of the week. Or use boil-in-the-bag quinoa or frozen quinoa to keep things fast.

    Skillet Sesame Orange Beef

    Tender strips of flank steak in a sesame orange sauce made with garlic, ginger, and just a touch of brown sugar. It tastes like takeout but comes together on your stove in about 20 minutes, which feels almost unfair.

    What you need: Flank steak (fresh or frozen), an orange, soy sauce, rice vinegar, garlic, ginger, brown sugar, sesame oil.

    Chickpea Curry

    Recipe and photo by Sonja & Alex at A Couple Cooks. Canned chickpeas, fire-roasted tomatoes, coconut milk, onion, garlic, ginger, and spinach simmer together into something that tastes deeply Indian and takes only 20 minutes.

    What you need: Canned chickpeas, canned crushed fire-roasted tomatoes, canned coconut milk, onion, garlic, ginger, olive oil, spinach (fresh or frozen).


    A note from Nora

    I made the paprika chicken last night and Biscuit sat by my leg for a full eight minutes waiting for something to fall on the floor. Sam said it was the best thing he has had in a while, which coming from him means I am making it again this week.

    There is something quietly reassuring about knowing your pantry already holds dinner. It does not have to be fancy. It just needs to be there.

    Keep Reading

  • My Go-To 4th of July Backyard BBQ Menu

    My Go-To 4th of July Backyard BBQ Menu

    The morning Sam carried the cooler out to the patio, I was already staring at a mental list that refused to stop growing. What if everyone wants something different? What if the potato salad turns to mush by three o’clock? What if I spend the entire holiday chained to the grill while my guests wander around with empty plates?

    I used to let those questions run me in circles. Now I plan backwards from what I know works and build a menu that takes care of itself as much as possible. That is how you actually enjoy your own party.

    Tips for keeping your 4th of July cookout smooth

    Over the years, a few habits have made hosting feel less like managing a small restaurant and more like having friends over on a warm evening:

    • Bring meat to room temperature before cooking. Throwing cold steaks or chicken straight from the fridge onto hot coals makes the protein seize up and cook unevenly. I pull everything out about twenty minutes ahead so it sears properly and stays juicy inside.
    • Add BBQ sauce in the last five minutes. Most sauces — store-bought or homemade — carry enough sugar to burn fast over an open flame. Brushing on at the end gives you that caramelized glaze without the bitter, dark crust.
    • Keep cold dishes genuinely cold. I learned this the hard way after watching a beautiful potato salad soften into something sad by mid-afternoon. Now I fill a large shallow pan with ice and rest the serving bowls right on top. It works every time.
    • Set up a second table away from the grill. When condiments, buns, and drinks are all stacked next to where you’re flipping burgers, the whole zone becomes traffic chaos. A separate prep station on the other side of the yard keeps things moving.

    The morning before — breakfast ideas

    You need energy for a long day of hosting, so I keep breakfast simple but filling:

    My Go-To 4th of July Backyard BBQ Menu - photo 1

    Fluffy pancakes. A mix of baking powder and baking soda gives them real height. The batter is thick enough that the pancakes stay soft inside instead of flattening into rubbery discs in the pan. This one passed the Tuesday test easily — I make a bigger batch on weekends and freeze extras between wax paper for busy mornings.

    My Go-To 4th of July Backyard BBQ Menu - photo 2

    10-minute bagel burger. When I have hours of party prep ahead, this is what I reach for. It’s essentially an entire breakfast cooked into the hole of a bagel, so you skip washing multiple pans. Sam makes these for himself every time there’s a big day coming up — he says it saves him from standing in my way.

    Appetizers and sides

    These are the dishes that sit on the table quietly doing their job while the mains finish cooking:

    My Go-To 4th of July Backyard BBQ Menu - photo 3

    Classic potato salad. Every cookout needs one, and I make mine with a balance of mayonnaise and mustard so it coats the potatoes evenly without turning watery or mushy. It actually improves overnight if you have the chance to chill it before serving.

    My Go-To 4th of July Backyard BBQ Menu - photo 4

    Buffalo chicken dip. I use shredded rotisserie chicken to save time, and a cream cheese base keeps it thick enough that it scoops up well with celery sticks or tortilla chips. Biscuit has learned to sit very politely when this comes out — mostly because the bowl is too high for him to reach.

    My Go-To 4th of July Backyard BBQ Menu - photo 5

    Air fryer mozzarella sticks. Making these in the air fryer means you skip the mess and lingering smell of deep frying. The breading gets a proper crunch in just a few minutes, and they’re always gone fast.

    My Go-To 4th of July Backyard BBQ Menu - photo 6

    Loaded baked potatoes. Set up a toppings bar and let your guests build their own — sour cream, chives, cheese, bacon bits. Baking them with an oil-and-salt rub gives the skins a nice texture that holds everything together.

    The wings

    Wings always disappear first at my house. Having different versions on the table keeps things interesting:

    My Go-To 4th of July Backyard BBQ Menu - photo 7

    Classic buffalo wings. I bake these on a wire rack, which lets oven heat circulate underneath so the skin gets real crunch without needing a deep fryer. They’re straightforward and reliable — exactly what you want when there are twenty other things happening at once.

    Garlic parmesan wings. Tossed in melted butter, garlic, and cheese right out of the oven. The residual heat melts the cheese instantly so it clings to every piece.

    Lemon pepper wings. A dry rub that sticks well as they bake. The citrus cuts through the richness of the chicken in a way that feels lighter than any buffalo sauce — and on a hot day, that matters more than you’d expect.

    Mains

    A 4th of July table does not feel right without something substantial at its center:

    Chili dogs. You cannot have an Independence Day party without hot dogs. I top mine with a thick homemade chili that stays put on the bun instead of sliding off into your lap before you take the first bite.

    Pan-seared garlic butter steak with mushroom cream sauce. If you’re hosting a smaller group and want to skip the outdoor grill entirely, searing this steak in a hot skillet builds a dark crust and the pan juices go straight into the mushroom sauce. It feels dressed-up enough for the occasion without requiring extra effort.

    Crispy garlic herb roast chicken. Basting with garlic butter keeps the breast meat from drying out in the oven. A whole bird makes a great centerpiece when you’re dining indoors or under cover.

    Baked pork chops. Pork chops can dry out fast if you’re not careful. I sear them in a hot skillet first to lock in juices, then finish in the oven with a thick layer of barbecue sauce. They come out incredibly tender.

    Chili mac and cheese. Rich, loaded with flavor, and ideal for feeding a hungry crowd. Something this good means your guests will eat it straight from the serving dish — plates become entirely optional.

    Tomato soup mac and cheese. A nice variation if you want more brightness to balance all those heavy grilled meats. The acidity cuts through in a way that keeps things interesting.

    Classic mac and cheese. I make the sauce entirely on the stove, using freshly grated parmesan instead of pre-shredded. It keeps the cheese smooth and stops it from splitting — small difference, huge result.

    Summer salads

    Fresh salads are what keep a barbecue menu from feeling like one heavy note played all afternoon:

    Macaroni salad. Cook the pasta just to al dente so it holds its shape when tossed. The dressing — mayonnaise, vinegar, and a touch of mustard — gives it a clean tangy finish that cuts through grilled meats perfectly.

    Lemon herb Mediterranean pasta salad. If you want a mayo-free option, this is the one to make. Crisp cucumbers, tomatoes, and salty feta in a bright lemon-herb vinaigrette. It travels well and stays fresh on the table for hours.

    Avocado tomato corn salad. This tastes like peak summer. Sweet tender corn kernels balanced with creamy diced avocado — zero actual cooking required. It adds real color to the spread, too.

    Black-eyed pea and black bean salad. Mixing both beans keeps the texture interesting instead of mushy. Fresh lime juice and red wine vinegar in the dressing means the flavor stays sharp even after sitting out at the party for a while.

    Desserts

    It is not a 4th of July gathering without something sweet on the table:

    Red velvet brownies. The deep red color fits right into the holiday theme, and they’re dense and fudgy in the center rather than cakey. I usually bake these the night before so the flavors have time to settle.

    New York cheesecake. A classic with a creamy filling and an easy crust — probably the most straightforward cheesecake you can bring to any table. It holds up beautifully in the heat for at least an hour or two after coming out of the fridge.

    A note from Nora

    Last July, I spent the first three hours moving between the grill and the kitchen like a person running on pure anxiety. Then around four o’clock, our daughter sat down beside me with a glass of iced tea and said, "You look like you’re trying to run this party instead of being in it." She was right.

    This year I’m going to let the potato salad sit on ice, trust the wings to bake without babysitting them, and actually watch the fireworks from my own patio. Maybe that is the real gift of a good menu — not that it feeds everyone, but that it gives you back your afternoon.

    Keep Reading

  • Chicken Shawarma Bowls for Meal Prep (Ready in 35 Minutes)

    Chicken Shawarma Bowls for Meal Prep (Ready in 35 Minutes)

    The truth about meal prep is that it only works if you actually eat it. I used to spend part of Sunday cooking in batches, then by Wednesday I was reaching for the same three containers while the rest of the week’s food quietly went sad in the back of the fridge. This chicken shawarma bowl is the first one that fixed that. It tastes good enough on day one, and honestly, it’s better on day two.

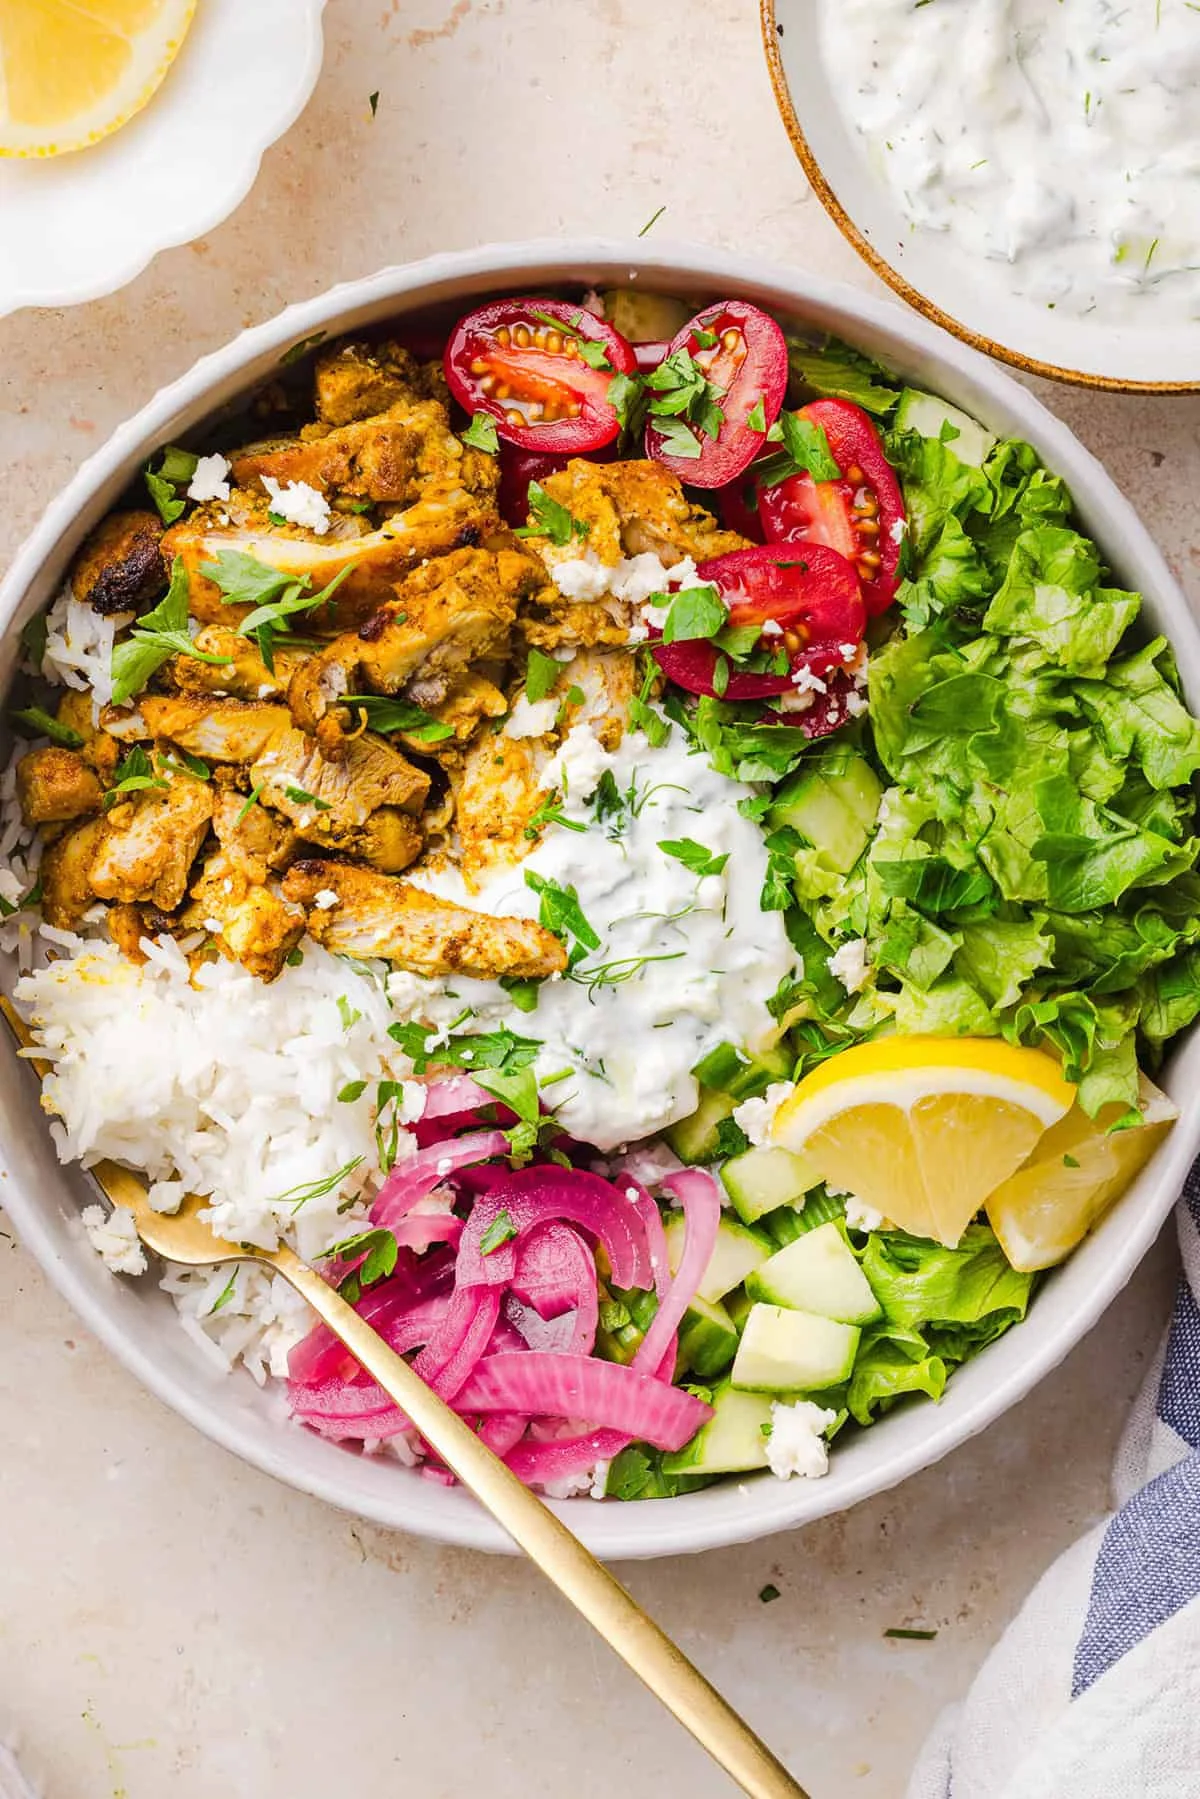
    Chicken Shawarma Bowls for Meal Prep (Ready in 35 Minutes) - photo 1

    It’s 35 minutes door to door, it makes four real bowls, and every part of it can be prepped ahead and stored separately. It passed the Tuesday test, so it’s staying.

    Prep time: 20 minutes · Cook time: 15 minutes · Total: 35 minutes · Servings: 4

    Why this bowl stays in rotation

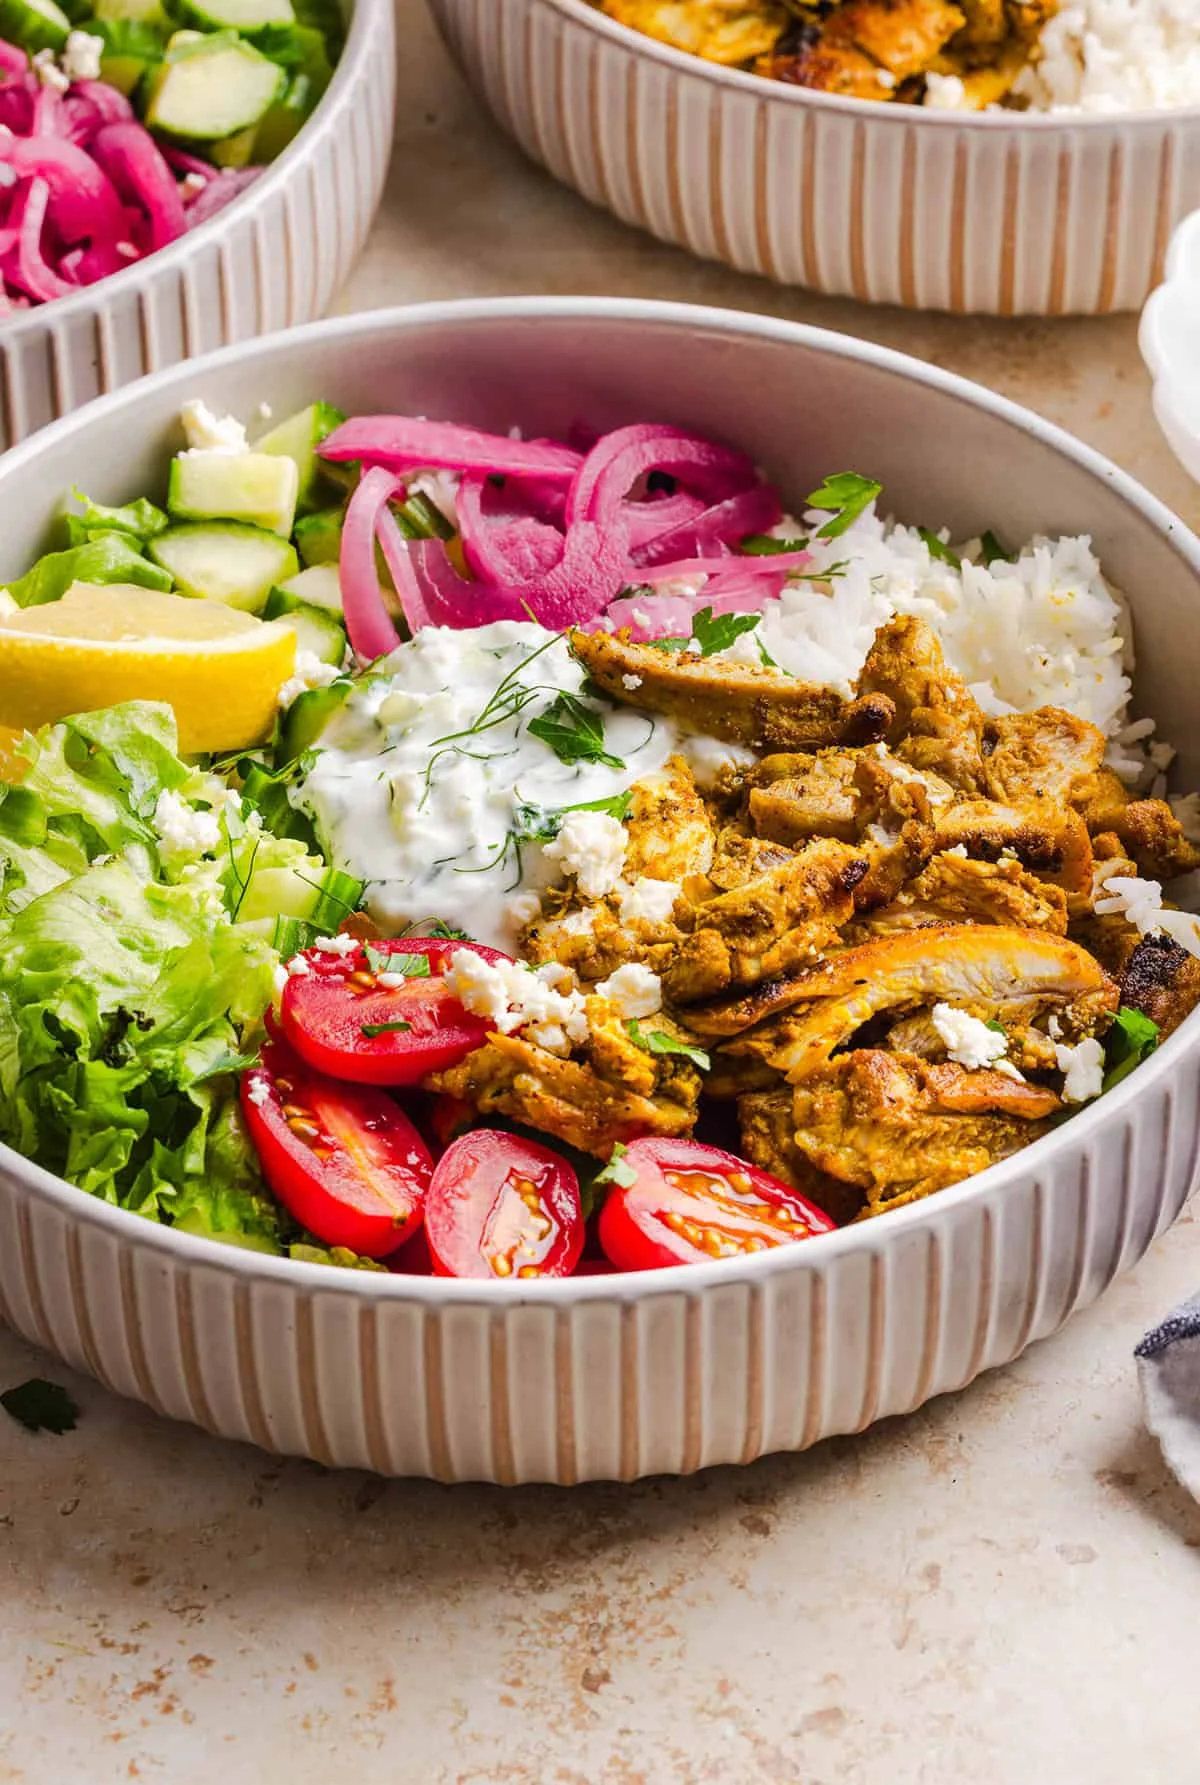
    The chicken goes into a marinade of lemon, garlic, olive oil and a warm blend of shawarma spices — smoked paprika, cumin, coriander, turmeric, and just a hint of cinnamon. It comes out of the skillet deeply browned and still juicy. Then you pile it over rice with crisp vegetables, pickled red onion, crumbled feta, and a spoonful of cool, creamy tzatziki. Every bite has a different texture, and that’s what keeps it from getting boring by lunch on Wednesday.

    A few things I keep coming back to:

    • It’s genuinely filling — the chicken thighs and Greek yogurt bring the protein, and the rice plus vegetables make it a complete meal, not a snack with extra steps.
    • It’s flexible. Swap the rice, change the vegetables, add hummus. Nobody’s watching.
    • It preps beautifully. Cook the chicken, make the tzatziki, chop the vegetables, store everything separately, and you’re assembling warm bowls all week.
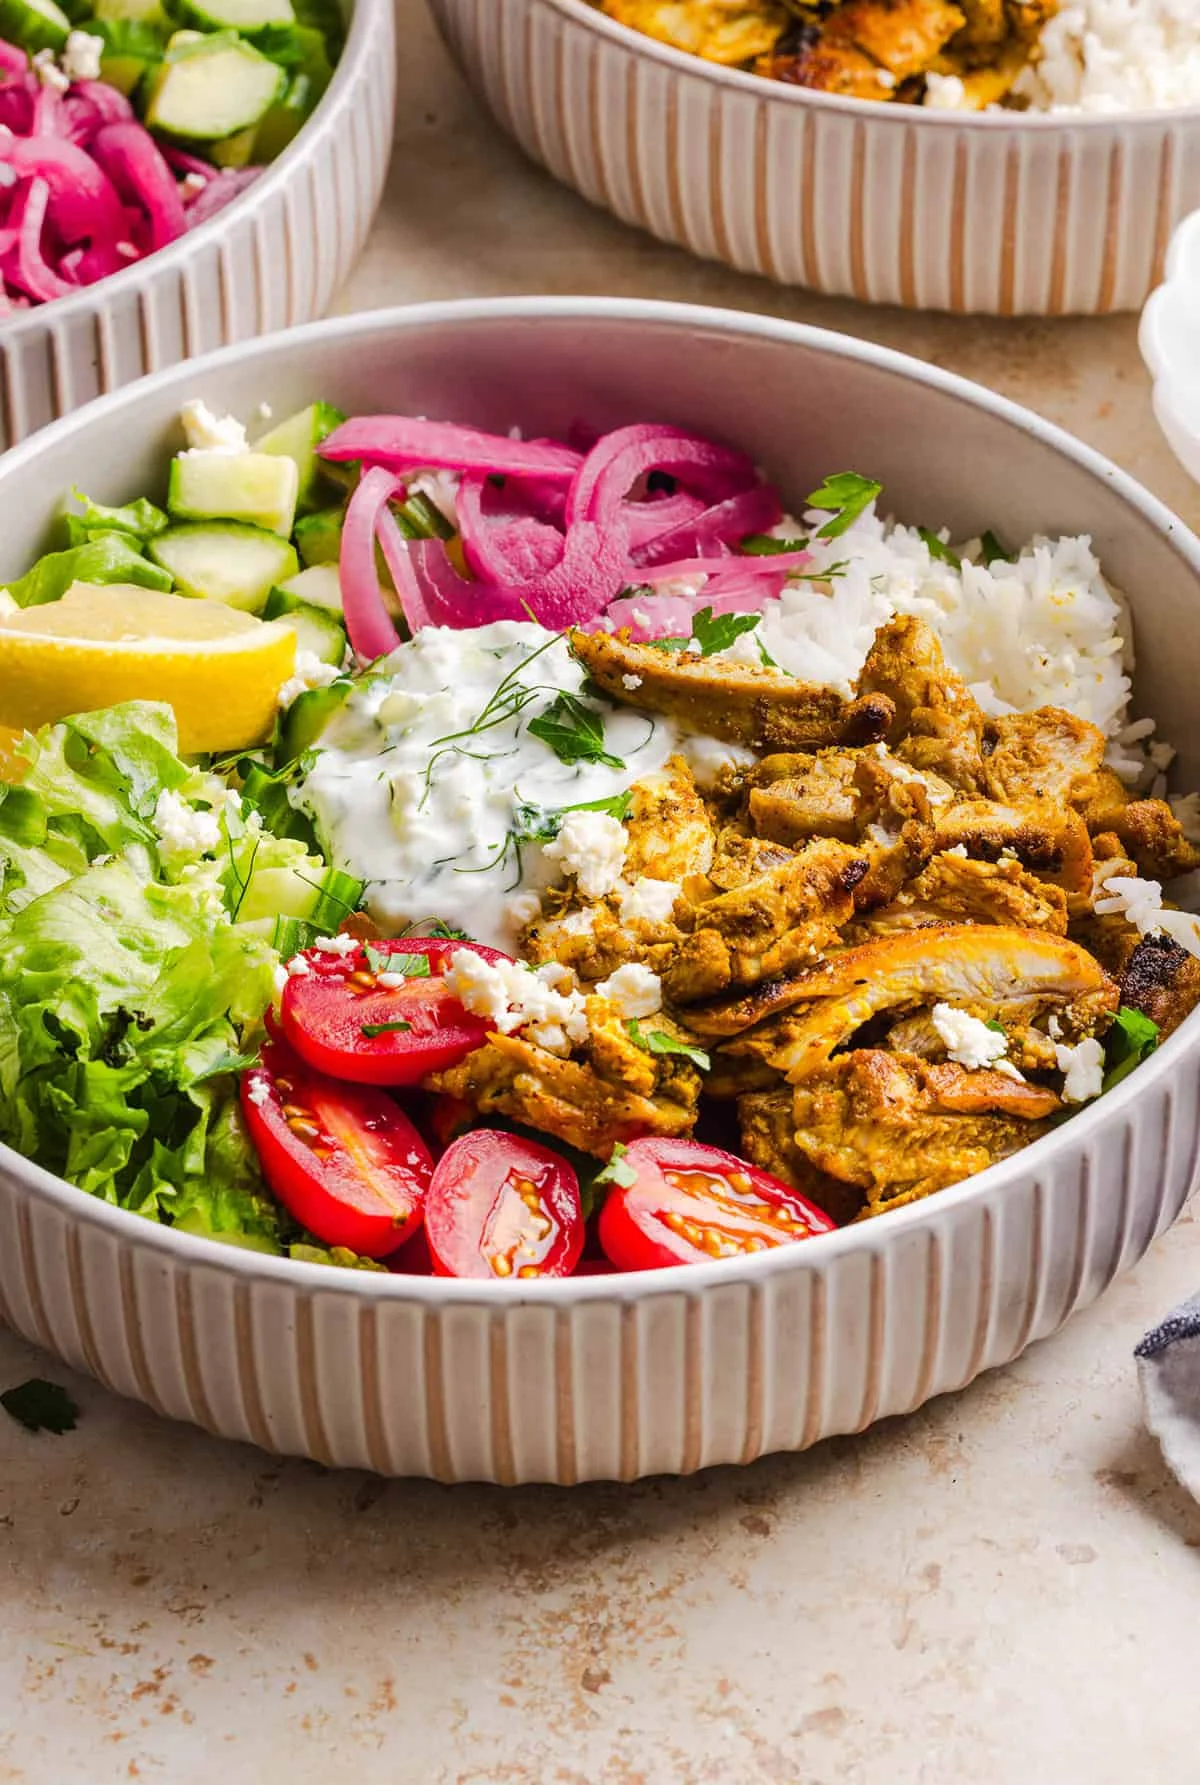
    Chicken Shawarma Bowls for Meal Prep (Ready in 35 Minutes) - photo 2

    What you’ll need

    For the chicken

    • 1 1/2 lbs boneless, skinless chicken thighs (breasts work too, but thighs stay juicier)
    • 2 Tbsp olive oil
    • Juice of 1 lemon (about 2 Tbsp)
    • 4 cloves garlic, minced (it sounds like a lot — trust me, it works)
    • Shawarma seasoning: 2 tsp smoked paprika, 2 tsp cumin, 2 tsp ground coriander, 1 tsp turmeric, 1 tsp garlic powder, 1 tsp onion powder, 1 tsp salt, 1/2 tsp black pepper, 1/2 tsp ground cinnamon, 1/4 tsp cayenne pepper

    For the bowls

    • 2 cups cooked jasmine or basmati rice (that’s about 2 cups cooked rice for the four bowls)
    • 1 cup cherry tomatoes, halved
    • 1 English cucumber, diced
    • 1 cup shredded lettuce
    • 1/2 cup thinly sliced pickled red onion
    • 1/2 cup crumbled feta cheese
    • Homemade tzatziki (Greek yogurt, grated and well-squeezed cucumber, lemon juice, a little olive oil, minced garlic, fresh dill, salt and pepper, mixed until creamy)
    • Fresh parsley, finely chopped, plus fresh dill for finishing
    • Lemon slices and warm pita bread to serve, if you have them

    The olive oil helps the spices coat the chicken and keeps it moist, and the lemon in the marinade cuts through all those warm, savory notes. I like to squeeze a little extra lemon over the finished bowl too.

    How to make chicken shawarma bowls

    1. Marinate the chicken. In a large bowl, whisk together the olive oil, lemon juice, minced garlic and the shawarma spice blend. Add the chicken thighs and toss until every piece is fully coated. Cover and refrigerate for at least 30 minutes, or up to 8 hours. The longer it sits, the deeper the flavor.
    2. Make the tzatziki. While the chicken marinates, combine the Greek yogurt, grated and well-squeezed cucumber, lemon juice, olive oil, minced garlic, fresh dill, salt and pepper in a small bowl. Mix until creamy, cover, and refrigerate until you’re ready to serve. It actually tastes better after it’s sat for a while.
    3. Cook the chicken. Heat a large cast-iron skillet over medium-high heat. When it’s hot, add the thighs in a single layer, making sure not to overcrowd the pan. Cook for about 5 to 7 minutes per side, depending on thickness, until deeply browned and cooked through — 165°F when you check the thickest part.
    4. Let it rest. Transfer the chicken to a cutting board and let it rest for about 5 minutes before slicing it into strips. This keeps the juices in the meat instead of on your board.
    5. Build the bowls. Divide the cooked rice among four bowls. Top each with sliced shawarma chicken, cherry tomatoes, cucumber, shredded lettuce, pickled red onion and crumbled feta.
    6. Finish and serve. Spoon a generous amount of tzatziki over each bowl, finish with fresh chopped parsley and dill, and serve with lemon wedges and warm pita if you’re feeling complete.

    Tips that make it better

    • Thirty minutes of marinating is the minimum, not the target. A few hours in the fridge takes it further. Eight hours is the ceiling — the lemon can get assertive past that.
    • Keep the skillet hot. Those browned, slightly charred edges are what make it taste like shawarma chicken and not just… chicken.
    • Don’t crowd the pan. Too much chicken at once traps steam and you end up with pale, steamed thighs. Batch it if you have to.
    • Squeeze the cucumber really well before it goes into the tzatziki. That’s the difference between a thick, creamy sauce and a watery one.
    • Prep the vegetables before you start the chicken. By the time it comes out of the skillet, everything is chopped and you can assemble and serve while it’s still warm.
    • Don’t skip the acidic toppings. The pickled red onion and a squeeze of lemon are what balance all the richness of the chicken, feta and tzatziki.

    Swaps and variations

    • Chicken breasts: they work, especially if you pound them to an even thickness first so they cook evenly and don’t dry out.
    • Swap the rice: brown rice, quinoa, couscous or farro all fit right in. For a low-carb version, use cauliflower rice or go heavier on the lettuce and call it a shawarma salad bowl.
    • Add hummus: a spoonful makes it creamier and rounds out the Mediterranean flavor.
    • Change the vegetables: thin bell pepper slices, shredded carrots, radishes, olives, chopped cabbage or roasted sweet potatoes all work well.
    • Add chickpeas for extra fiber and plant-based protein.
    • Make it spicy: bump up the cayenne in the marinade or drizzle hot sauce over the finished bowls.
    • No pickled onions? Thinly slice raw red onion and soak it in cold water for about 10 minutes to mellow the bite.
    • Dairy-free: skip the feta and use a dairy-free yogurt in the tzatziki.
    • Make it a wrap: stuff the chicken, vegetables and feta into warm pita or flatbread with a big spoon of tzatziki.

    Meal prep, the way that actually works

    The reason this bowl holds up all week is that every component can be prepped ahead and stored separately. Warm things go in one container, cold things in another.

    • Chicken: marinate and cook as above, let it cool completely, slice it, and store it in an airtight container in the refrigerator for up to 4 days.
    • Rice: cook it ahead and divide it among your meal prep containers alongside the chicken.
    • Vegetables: chop the tomatoes, cucumber and lettuce and keep them in a separate container from the warm stuff so they stay crisp.
    • Tzatziki: make it up to 3 to 4 days in advance and keep it refrigerated in its own container. Small individual containers are perfect for grabbing on the way out the door.
    • Toppings: store the feta, pickled red onions and fresh herbs separately, and add them right before you eat, when the texture is at its best.
    Chicken Shawarma Bowls for Meal Prep (Ready in 35 Minutes) - photo 3

    To serve a prepped bowl: reheat just the chicken and rice until warmed through, then add the cold vegetables, feta and pickled onions, a generous spoonful of tzatziki, fresh herbs and a squeeze of lemon.

    Storing and reheating

    • Refrigerator: leftovers keep in an airtight container for up to 3 to 4 days. Keep the rice, vegetables and tzatziki in separate containers whenever you can. The next-day version is arguably better.
    • Reheating: microwave the chicken and rice until warmed through — add a splash of water to the rice first so it doesn’t turn to cardboard. Or gently warm the chicken in a skillet over medium-low heat.
    • Freezer: cooked shawarma chicken freezes well for up to about 3 months. Cool it completely, then move it to a freezer-safe container. I wouldn’t freeze the fresh vegetables or the tzatziki — their texture doesn’t survive the trip.

    Frequently asked questions

    What is chicken shawarma? Traditionally it’s heavily seasoned chicken cooked on a vertical rotating spit, where the outer layers brown deeply and get shaved off to serve. This version uses the same warm spice blend but cooks the chicken in a skillet, which is a lot more practical for a weeknight.

    Can I use chicken breasts instead of thighs? Yes. Boneless, skinless breasts work fine — pound them to an even thickness first and don’t overcook them, since they’re leaner and dry out faster than thighs.

    How long should I marinate the chicken? At least 30 minutes, with a few hours giving more flavor. You can go up to about 8 hours in the refrigerator, but because the marinade has lemon juice, I wouldn’t push it much past that.

    Can I grill the chicken instead? Definitely. Preheat the grill to medium-high and cook the thighs for roughly 5 to 7 minutes per side, until they hit 165°F.

    Can I bake it? Yes. Put the marinated thighs on a baking sheet and bake at 425°F for about 20 to 25 minutes, until the internal temperature is 165°F. Broil the last couple of minutes if you want extra browning on the edges.

    Are these bowls healthy? They make a genuinely balanced meal — protein from the chicken and Greek yogurt, carbohydrates from the rice, and a lot of fresh vegetables. Portion and toppings are up to you.

    Is chicken shawarma spicy? Not necessarily. This recipe has just 1/4 teaspoon of cayenne, which adds a little warmth without making the chicken overwhelmingly spicy. Leave it out for a completely mild version.

    Nutrition (per bowl)

    Calories: 550 · Carbohydrates: 34g · Protein: 44g · Fat: 26g · Saturated fat: 7g · Cholesterol: 175mg · Sodium: 850mg · Fiber: 3g · Sugar: 6g

    Nutrition information is automatically calculated, so use it as an approximation, not a promise.

    A note from Nora

    The first time I made this, I marinated the chicken overnight on a whim. It was still delicious — just a little more tangy than I expected, which is what 8 hours of lemon does. The second batch I stuck to a few hours, and that’s where I like it. Sam ate two bowls that night and asked for the recipe, which from him is basically a standing ovation, and our daughter managed to eat the tomatoes despite being two and, on that particular evening, not a fan of tomatoes. Biscuit did not touch the dropped lemon wedge, which I’m choosing to read as a sign of respect.

    Maybe that’s the point of a good prep recipe: it doesn’t have to be impressive. It just has to be there on the nights when everything else isn’t. If I can make it on a Tuesday, it’s a keeper — and I think you’ll find the same is true in your kitchen.

    Keep Reading