博客

  • Disney Wilderness Lodge Molasses Cookies (The Actual Disney Recipe)

    Disney Wilderness Lodge Molasses Cookies (The Actual Disney Recipe)

    Sunday, three in the afternoon, and my kitchen smells like December. Biscuit is sitting two feet from the door like he’s paying for the privilege, and Sam keeps sniffing the air in the hallway like a man trying to solve a mystery.

    I baked a pan of molasses cookies in August. I don’t apologize.

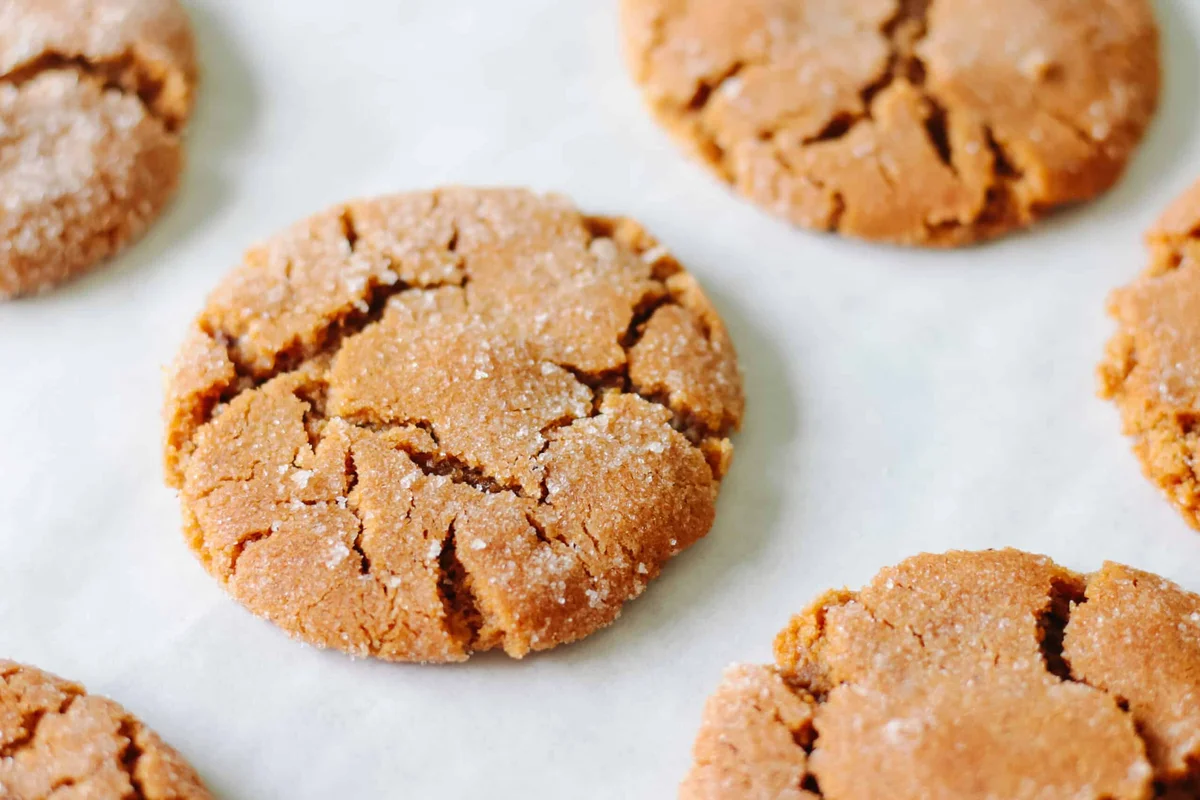
    These are the Disney Wilderness Lodge Molasses Cookies — the actual Molasses Crackle Cookies recipe Disney has shared, not a guess at one. Soft, deeply chewy centers, warm ginger up front, and that crackled sugar crust that looks like it took a lot more effort than it did.

    Molasses crackle cookies with cracked sugar tops on a tray

    Is this really the Disney recipe?

    Yes, and I know how that sounds, because most “famous restaurant” cookie recipes out there are someone’s very good impression. I’ve spent years baking my way through them — the Grand Floridian chocolate chip cookies, the Riviera resort cookies, all of it — so I have a healthy suspicion of the phrase “official.”

    This one earned it. Disney released a home version of the Molasses Crackle Cookie recipe from Disney’s Wilderness Lodge at Walt Disney World, and they’ve actually shared more than one over the years. I made the version with 3 cups of all-purpose flour, the one that skips chilling entirely.

    Disney does note that home versions can be adapted from their restaurant kitchen quantities, so your cookies may not be identical to what comes out of the lodge. That’s fine. It’s their recipe — the closest thing to ordering a plate without booking a table.

    What you’re actually eating

    Molasses crackle cookies are soft spice cookies — molasses, ginger, cinnamon, cloves — rolled in sugar before baking. In the oven they spread, the sugar crust fractures into those signature cracks, and that’s the whole name of the cookie. They sit somewhere near gingerbread and gingersnaps, but much softer and chewier than a rolled-out cut-out cookie.

    Ginger is the loudest flavor in the batch. The cinnamon and cloves do the cozy holiday-spice work, and the sugar coating adds a little sweetness on top of the soft middle. And like most molasses cookies, the flavor keeps developing as they sit. I genuinely think day 2 is better — softer, and the spice comes out even more.
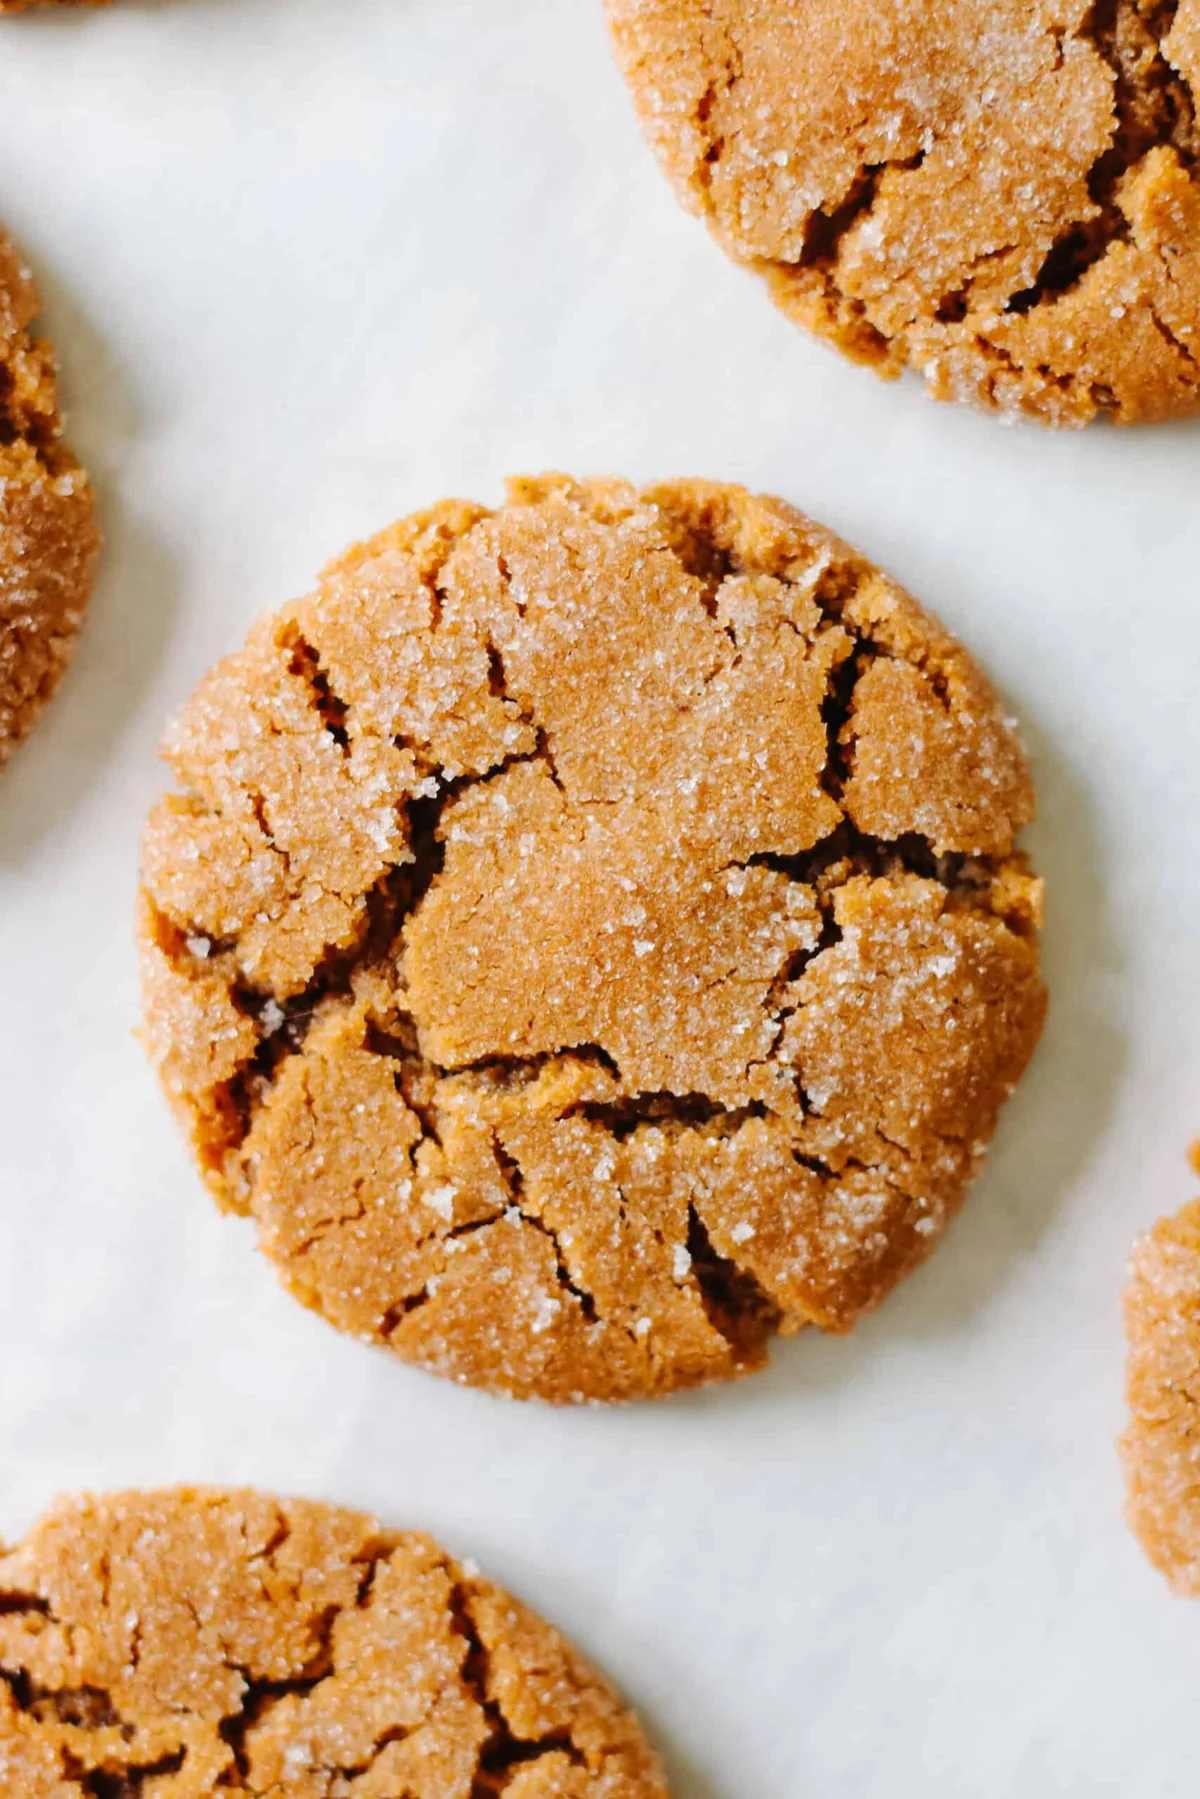
    Soft molasses cookies with crackled sugar-coated surfaces

    What you’ll need

    Everything is regular grocery store stuff, no special trips. One honest warning: there is no salt in this recipe, and that is not a typo.

    • 1 cup canola oil — Disney uses oil, not butter, and it’s what gives the center that soft, chewy texture. I wouldn’t swap it.
    • 2¼ cups granulated sugar, divided — 1¾ cups goes into the dough, ½ cup is for coating the outside
    • ⅓ cup molasses — regular unsulphured, not blackstrap (that one is much stronger and bitter)
    • 1 large egg
    • 3 cups all-purpose flour — this is the no-chill version of Disney’s recipe
    • 1 tablespoon baking soda
    • 1 tablespoon ground ginger
    • 2 teaspoons ground cinnamon
    • ½ teaspoon ground cloves

    Prep time: 15 minutes · Bake time: 10–12 minutes · Total: 25 minutes · Yield: 30 cookies · Per cookie: 177 kcal, 26g carbs, 1g protein, 8g fat

    How to make them

    Preheat the oven to 350°F and line a couple of baking sheets with parchment paper. This whole thing goes from mixing bowl to oven with no chilling in between.

    1. Mix the oil and sugar. In a large bowl, combine the canola oil and 1¾ cups of the sugar until combined.
    2. Add the molasses and egg. Mix until smooth and well combined.
    3. Combine the dry ingredients. In a separate bowl, whisk together the flour, baking soda, ground ginger, cinnamon, and cloves.
    4. Make the dough. Gradually add the dry ingredients to the wet and mix until a soft cookie dough forms.
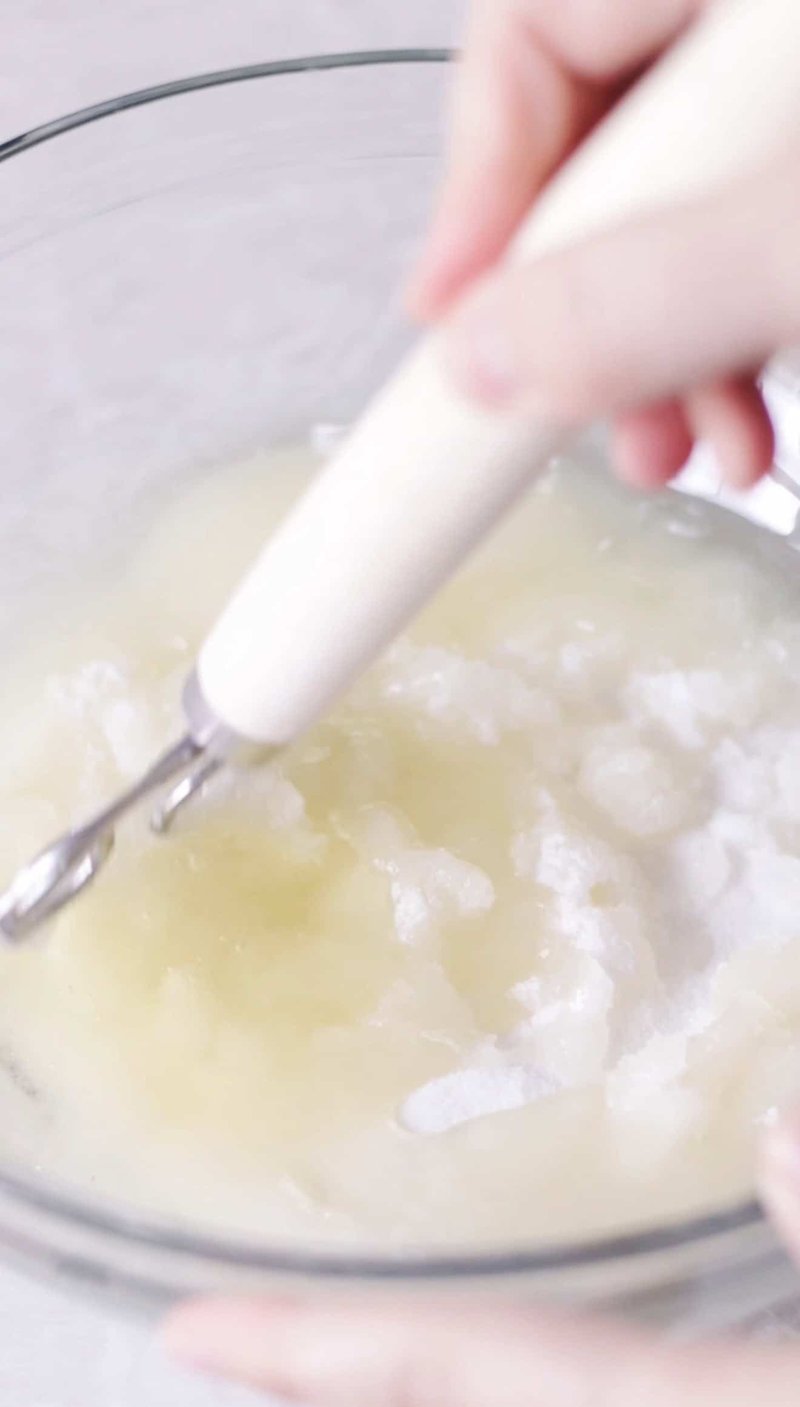
    Soft molasses cookie dough in a mixing bowl
    1. Shape the cookies. Scoop the dough with a 2 Tbsp. cookie scoop (or roll it into 2″ balls by hand) and form each portion into a ball.
    2. Roll in sugar. Put the remaining ½ cup of sugar in a small bowl and roll each ball until the outside is completely coated. This is the step that makes the cracks, so don’t skim it.
    3. Bake. Arrange the balls about 2 inches apart on the prepared sheets — they spread. Bake for 10–12 minutes, until they’ve spread and the tops are crackled.
    4. Cool. Let the cookies sit on the baking sheet for a few minutes, then move them to a wire rack to cool completely. The crackling keeps going as they cool.

    Things that actually matter

    • No chilling, for real. This 3-cup-flour version goes straight from bowl to oven. Shape, coat, bake.
    • Less sugar if you want it. Disney’s recipe calls for ½ cup of sugar for rolling, and ¼ cup was plenty for me. You can also drop the total recipe sugar from 2¼ cups to 2 cups.
    • Don’t overbake. Pull them when the tops are crackled and the edges are set — not when they look firm. They finish cooking on the sheet.
    • Use regular unsulphured molasses. Blackstrap is a much stronger, more bitter molasses and it changes the whole flavor.

    The questions I actually get

    Can I freeze them? Yes. Cool completely, then keep them in an airtight freezer-safe container.

    How should I store them? Airtight at room temperature is where they keep that soft, chewy texture. And as noted, they’re honestly better on day 2.

    Why didn’t mine crack? Make sure the balls are completely coated in sugar before baking, and leave them room to spread. If the cracks are shy when they come out of the oven, they usually keep developing while they cool.

    Are these the same as gingerbread? Same warm spice family, different body. Gingerbread dough is rolled and cut because it has to hold its shape; these are meant to spread into soft, crackled rounds.

    A note from Nora

    My first batch, I baked them until they looked “done” the way my grandmother would’ve called done — firm, a little pale, a little sad. The second batch I trusted the cracks instead. That’s the entire skill in this recipe.

    Sam took a stack to his school “for the staff room” and came home with an empty plate and a reputation to maintain. Twenty-five minutes, no chilling, nothing you can’t grab on a Tuesday — so if I can make it on a Tuesday, it’s a keeper.


    Keep Reading

  • Dad’s Vanilla Ice Cream

    Dad’s Vanilla Ice Cream

    Every family has one dessert that lives or dies in the freezer. Ours is vanilla ice cream — the kind Sam has been making since before I could reach the counter. For as long as I can remember, there’s been a tub of it waiting in our freezer, and I’m pretty sure almost everyone who’s ever sat at our table has ended up with a scoop of it, even the ones who swore they were just trying a little.

    Thick creamy scoop of homemade vanilla ice cream in a glass bowl

    It’s unapologetically old-school: whole milk, eggs, plenty of sugar, and an entire pint of heavy cream. No shortcuts, no cottage cheese sneaking in. It churns up exactly like the hand-crank version we used to make in the garage as kids — rich, smooth, and full of that classic vanilla flavor. It’s still one of my favorite things to make, and every bite tastes like nostalgia. So dust off the ice cream maker and let’s make a batch.

    How to Make Dad’s Vanilla Ice Cream

    Ingredients

    • 1 cup granulated sugar
    • 2 large eggs
    • ½ teaspoon fine sea salt
    • 2 cups whole milk
    • 1 pint heavy whipping cream
    • 2 teaspoons pure vanilla extract

    Equipment: an ice cream maker (no-maker options in the FAQ below).

    Instructions

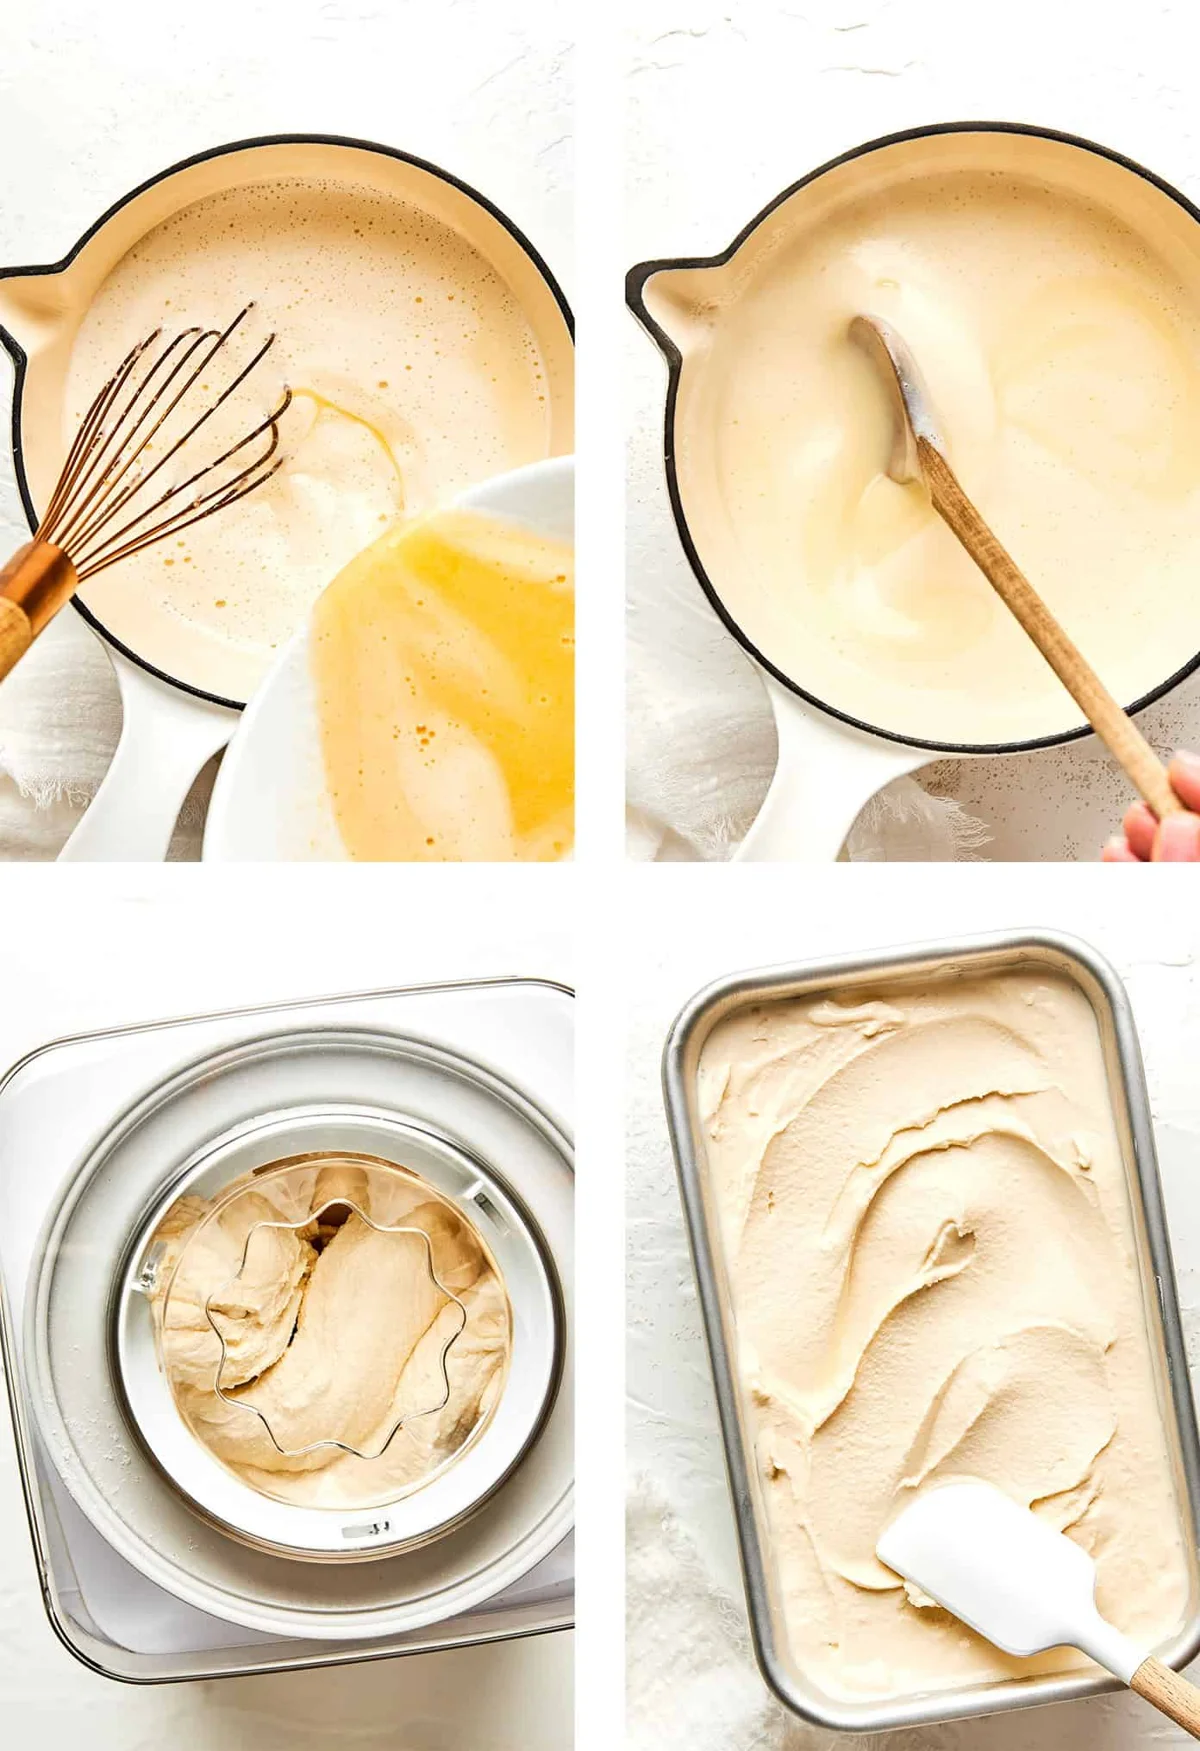
    1. Whisk the base. In a medium bowl, whisk the sugar, eggs, and fine sea salt together until smooth and slightly pale.
    2. Warm the milk. In a medium saucepan, heat the whole milk over medium heat until steaming but not boiling.
    3. Temper the eggs. While whisking constantly, slowly drizzle about 1 cup of the hot milk into the egg mixture. Then pour the tempered eggs back into the saucepan with the remaining milk, whisking constantly.
    4. Cook the custard. Keep cooking over medium-low heat, stirring often, until it thickens slightly and coats the back of a spoon, about 5 to 8 minutes. Do not let it boil.
    5. Add the cream and vanilla. Remove from the heat and stir in the heavy whipping cream and vanilla extract.
    6. Chill. Strain the mixture through a fine-mesh strainer into a clean bowl or container. Cover and refrigerate until completely cold — at least 4 hours, or overnight.
    7. Churn. Churn in your ice cream maker until thick and creamy, following the manufacturer’s instructions.
    8. Freeze. Transfer to a freezer-safe container, cover, and freeze for at least 2 to 4 hours, or until firm enough to scoop. Serve and enjoy.
    Vanilla custard simmering in a saucepan on the stovetop

    The Details That Make or Break It

    Homemade ice cream is pretty forgiving, but a few little habits keep this custard especially smooth. These are the ones I learned the slow way.

    • Don’t rush the tempering. Drizzling the hot milk into the eggs slowly, while whisking, is what keeps you from ending up with sweet scrambled eggs. Go slower than you think you need to.
    • Keep the heat gentle. Never let the custard boil — medium-low is your friend. If it boils, the eggs curdle and there’s no coming back from that.
    • Use the spoon test. The custard is done when it coats the back of a spoon and you can drag a clean line through it with your finger. It will still look fairly thin, and that’s okay.
    • Always strain. Even if you did everything right, straining through a fine mesh strainer catches any little cooked egg bits and guarantees a silky base.
    • Chill the base completely before churning. Overnight is ideal. A lukewarm base churns up icy and takes forever — patience pays.
    • Freeze the maker bowl ahead of time. If your machine uses a freezer bowl, it needs to be in the freezer at least 24 hours. A half-frozen bowl is the number one reason homemade ice cream turns out soupy.
    • Use good vanilla. With so few ingredients, the vanilla really shines — use pure vanilla extract, not the imitation stuff.
    Finished tub of homemade vanilla ice cream with a scoop

    Ways to Make It Your Own

    This custard base is a blank canvas, so have some fun with it:

    • Vanilla bean: scrape the seeds of one vanilla bean into the milk as it warms, for flecked, extra-fragrant ice cream.
    • Chocolate: add chopped chocolate or mini chocolate chips during the last few minutes of churning.
    • Caramel or fudge swirl: layer ribbons of salted caramel or hot fudge into the container as you transfer the churned ice cream to the freezer.
    • Boozy: stir 1 to 2 tablespoons of bourbon or rum into the chilled base before churning. Bonus — the alcohol keeps the ice cream softer and more scoopable.
    • Crunch: fold in crushed cookies, toasted pecans, or waffle cone pieces at the end of churning.
    • Brown sugar: swap in half brown sugar for a subtle caramel-y depth.
    • Berries: toss chopped fresh strawberries or raspberries with a spoonful of sugar, let them sit for 15 minutes, then fold them in at the very end of churning.

    FAQ

    Can I make this without an ice cream maker? An ice cream maker gives you the creamiest results, but you can pour the chilled base into a shallow pan, freeze it, and stir vigorously with a fork every 30 minutes for about 3 hours. The texture will be a little icier, but still delicious.

    Can I make the base ahead of time? Absolutely — in fact, I think it works best that way. Prepare the custard, cover it, and refrigerate it overnight. Churn it the next day once it’s completely cold.

    Why is my ice cream so hard after freezing? Homemade ice cream doesn’t contain the stabilizers that store-bought varieties do, so it freezes more firmly. Just let the container sit on the counter for 5 to 10 minutes before scooping.

    Can I double the recipe? Yes, as long as your ice cream maker is large enough. Otherwise, churn in two batches and keep the second half of the base chilled in the fridge while the first one churns.

    A Note From Nora

    My first batch of this came out more like vanilla slush than ice cream, and I blamed the vanilla. It was the bowl — I’d only given it 12 hours in the freezer instead of 24, and it never stood a chance. Sam didn’t even comment. He just finished the slush and refilled his bowl. This one passes the Tuesday test with room to spare, if you plan ahead the day before: the base chills overnight, and the churning takes less time than the pasta does on an actual Tuesday. If I can make it on a Tuesday, it’s a keeper.
    Keep Reading

  • A Peach Crisp Yogurt Bowl That Tastes Like Summer Breakfast

    A Peach Crisp Yogurt Bowl That Tastes Like Summer Breakfast

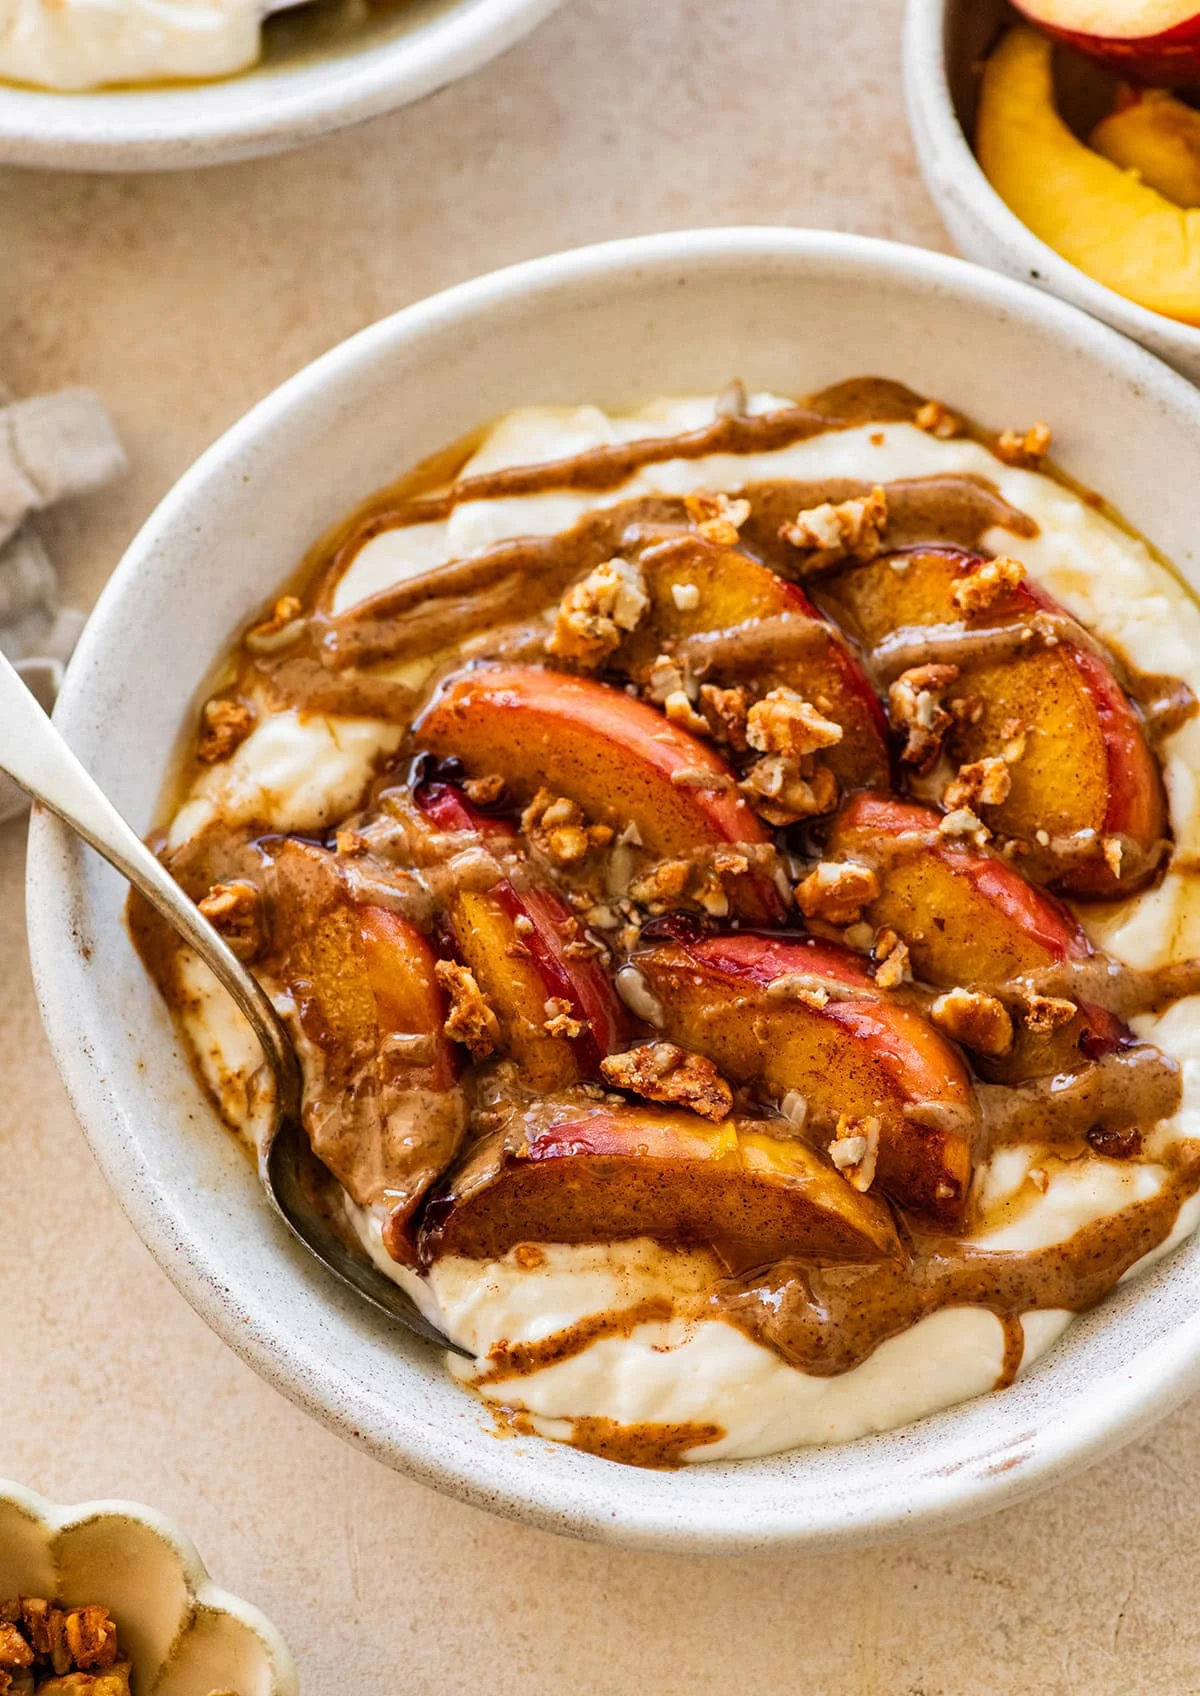
    The first time I had the idea to turn peach crisp into breakfast, Sam walked past the kitchen just as the butter was bubbling in the skillet. He paused in the doorway and said, “Is that what I think it smells like?” It was peaches and cinnamon — the kind of smell that makes you feel like something is about to be lovely.

    A Peach Crisp Yogurt Bowl That Tastes Like Summer Breakfast - photo 4

    Here in Portland, peach season arrives with the same quiet certainty as rain in November. The farmers market stalls fill up, and I find myself buying a bag every week, looking for the ones that give just slightly when you squeeze them. This high-protein peach crisp yogurt bowl was born from that kind of obsession — all the cozy flavors of a warm cobbler, rearranged into something I could eat on a morning when I needed protein as much as I needed comfort.

    The base is a creamy blend of Greek yogurt, cottage cheese, and vanilla protein powder. Topped with peaches that have caramelized in butter and maple syrup, plus a handful of crunchy granola, it tastes like dessert but delivers over 35 grams of protein. This one passed the Tuesday test — and honestly, I made it four mornings in a row before Sam noticed I was eating the same thing.

    Why this bowl works

    It really does taste like peach crisp. Warm caramelized peaches and crunchy granola make every bite feel indulgent. No one guesses that the creamy yogurt base underneath carries more than 35 grams of protein.

    Ten minutes from skillet to bowl. Cook the peaches, stir together the yogurt mixture, assemble, and you are done. This is a breakfast that does not require planning.

    You can make it whatever you need it to be. Swap coconut oil for butter if you prefer. Use any vanilla protein powder you trust. The granola on top can be store-bought or homemade — just pick something crunchy and let it sit until the last second so it stays crisp.

    What you need

    A Peach Crisp Yogurt Bowl That Tastes Like Summer Breakfast - photo 2

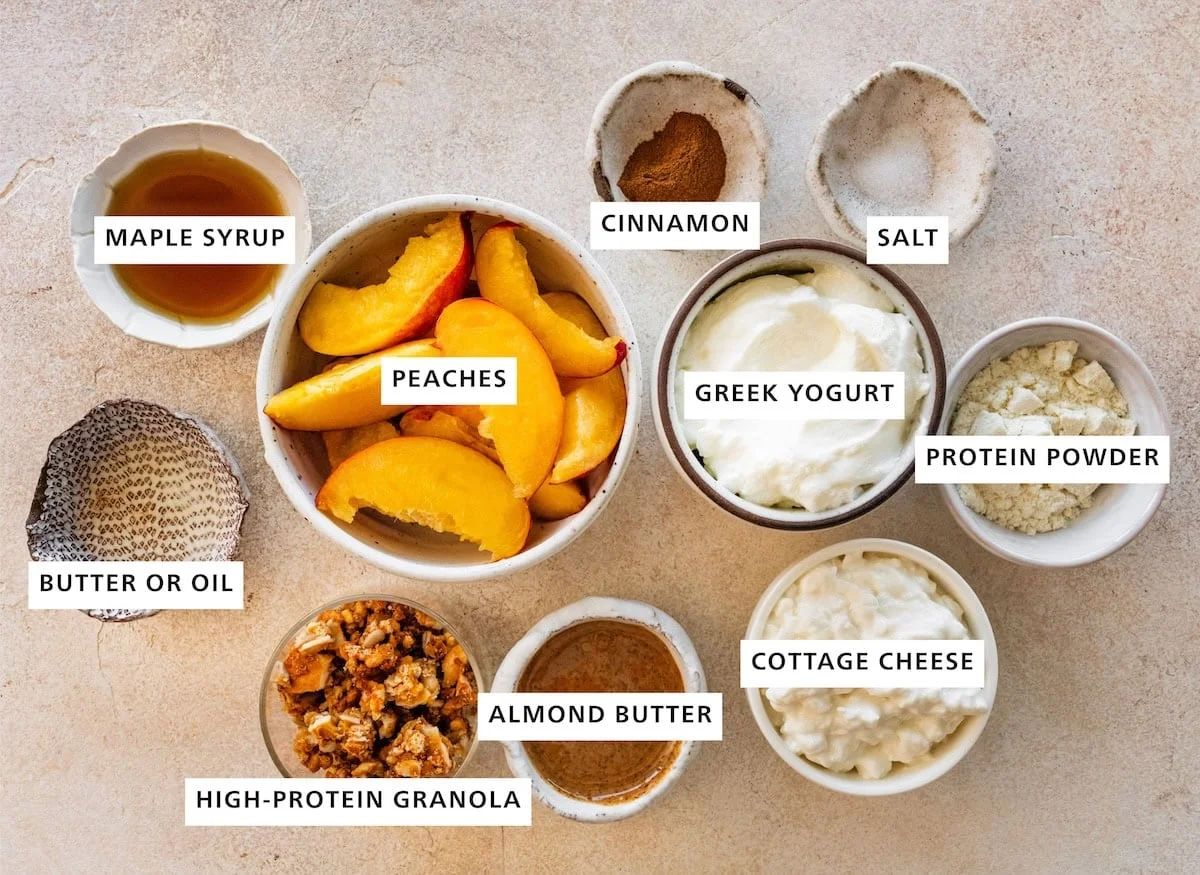
    Peaches. One ripe peach, sliced. The softer the better — a peach that yields gently to pressure will caramelise beautifully in the pan and taste sweeter without extra sugar.

    Butter or coconut oil (1/2 teaspoon / 2.5 ml). Butter gives richer flavour and helps the peaches develop that golden caramelised finish. Coconut oil works fine if you prefer, though it stays more neutral in taste.

    Maple syrup (2 teaspoons / 10 ml). This naturally sweetens the peaches during cooking. Honey is a fine swap if that is what you have.

    Cinnamon and salt (1/4 teaspoon cinnamon / 1.25 ml, plus a pinch of sea salt). The salt is not optional — it pulls the sweetness forward in a way that feels almost unfair.

    Greek yogurt (3/4 cup / 180 ml). I use plain non-fat Greek yogurt, but any fat percentage works. This is where most of the protein comes from.

    Vanilla whey protein powder (half a scoop / about 15 g). Use whatever brand you already keep on hand — vanilla flavour complements peaches without fighting them.

    Cottage cheese (1/4 cup / 60 ml, 2% fat). This might sound odd in breakfast yogurt, but it blends right in and adds extra creaminess and protein with almost no noticeable flavour. If cottage cheese is not your thing, just add a little more Greek yogurt instead.

    Granola or cereal (1/4 to 1/3 cup / 60-80 ml). Any high-protein granola works here — I like something honey-flavoured and crunchy. Keep it separate until you are ready to eat so it does not soften.

    Optional finishing touches: a drizzle of almond butter, extra cinnamon, or another spoonful of maple syrup on top.

    How to make it

    A Peach Crisp Yogurt Bowl That Tastes Like Summer Breakfast - photo 3

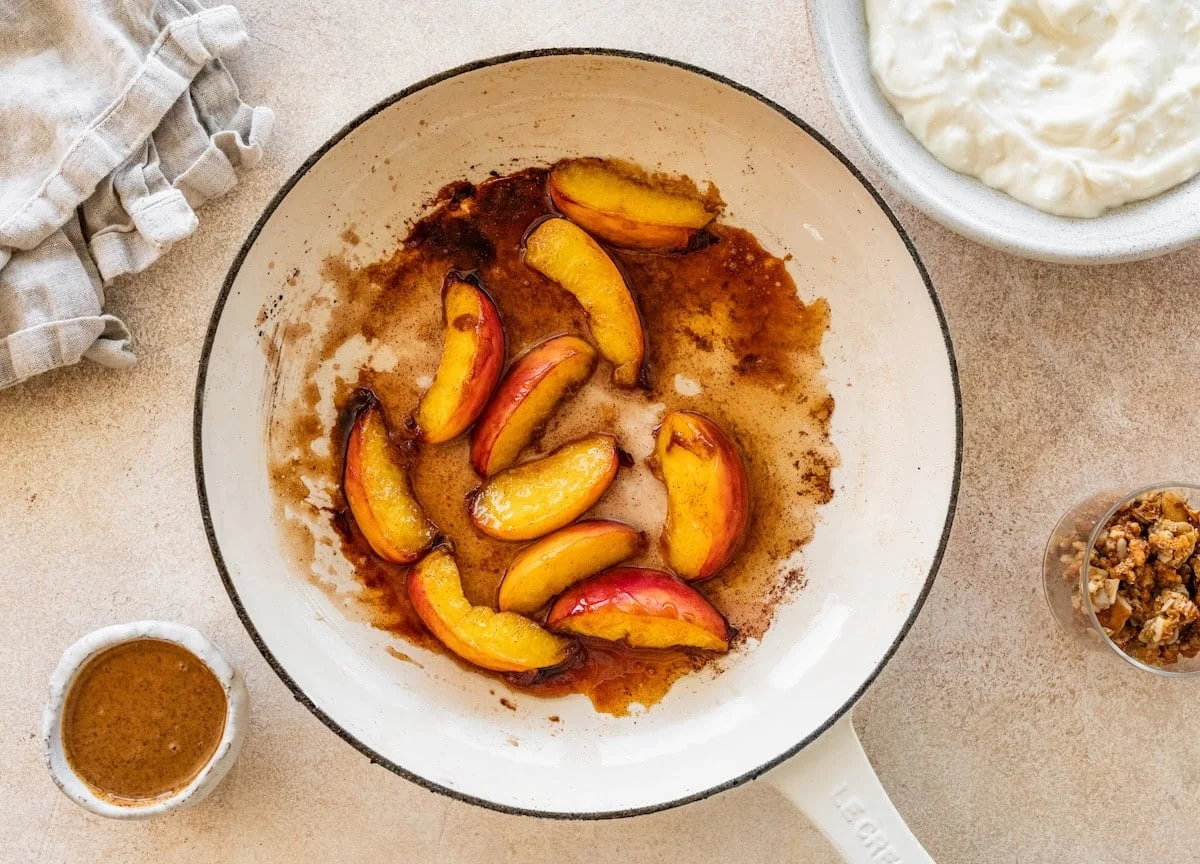
    1. Caramelize the peaches. Heat a small skillet over medium heat and melt the butter (or coconut oil). Stir in the maple syrup, cinnamon, and pinch of salt. Add the sliced peach and cook for 4 to 5 minutes, stirring occasionally, until the fruit is soft and lightly caramelised. Set aside.
    2. Blend the yogurt base. In a small bowl, stir together the Greek yogurt and vanilla protein powder until smooth — no lumps. Then fold in the cottage cheese.
    3. Assemble. Spoon the yogurt mixture into your favourite breakfast bowl.
    4. Top it off. Ladle the warm peaches over the cold yogurt, scatter granola on top, and finish with whatever you are craving — a drizzle of almond butter, extra cinnamon, or just a quiet moment before the day starts.

    A Peach Crisp Yogurt Bowl That Tastes Like Summer Breakfast - photo 1

    Notes from my kitchen

    • Ripe peaches are your friend. Soft, sweet peaches caramelise best and taste the most forgiving. If you can only find firm ones, add a little extra maple syrup while they cook.
    • Frozen peaches work fine. Just thaw them first and pat them thoroughly dry with paper towels before adding to the skillet. If they are wet, they steam instead of caramelise — and that is not what we want here.
    • Add granola right before eating. I know this goes without saying, but it bears repeating: crunchy toppings lose their crunch fast in a yogurt bowl.
    • You can prep ahead. Mix the yogurt, cottage cheese, and protein powder together and store it in an airtight container in the fridge for up to three days. Cook the peaches fresh each morning — that contrast of warm fruit over cold yogurt is what makes this bowl special.

    A few things I get asked about

    What kind of protein powder works best? Vanilla whey is my go-to, but most vanilla protein powders will work. If you use a plant-based version, the texture might be slightly thicker — just add a splash of milk to loosen it.

    Can I skip the cottage cheese? Yes. Add an extra two tablespoons of Greek yogurt instead. You lose some protein, but honestly, the bowl still tastes great either way.

    What if I want to make this for more than one person? The recipe scales easily — just multiply the ingredients. I have made a big batch on Sunday mornings and packed individual yogurt bases into jars for the week ahead.


    Nutrition per serving (one bowl): 475 calories | 59g carbohydrates | 36g protein | 14g fat | 8g fibre | 45g sugar

    A note from Nora

    I made this on a morning when the rain had finally stopped and Biscuit was sitting by the back door in that hopeful way he has. I brought him outside, came back in with wet grass on my jeans, and ate this bowl at the counter while watching the kitchen window turn gold. The peaches were warm, the yogurt was cold, and for a few minutes before we had to go anywhere, everything felt like exactly what it was supposed to feel like.

    Maybe that is the real gift of small rituals — they do not fix everything, but they remind us that even an ordinary Tuesday morning can hold something lovely.

    Keep Reading

  • 15 Dessert Recipes That Make a 9×13 Pan Worth Its Keep

    15 Dessert Recipes That Make a 9×13 Pan Worth Its Keep

    I keep a 9×13 pan (that’s 23×33 cm, for my British and European bakers) on the bottom shelf of my cabinet, and it gets pulled out more than I’d like to admit. It’s the one pan that solves almost every dessert problem I have: birthdays, potlucks, the Tuesday I need something sweet at 5 p.m., the dinner party where the oven is already busy with something savory.

    Lidded 9x13 baking pan on a white background

    I’m not a trained baker. I’m the person who bakes at 9 p.m. with a toddler asleep upstairs and a dog watching from under the table. So the recipes I come back to share are the ones that work on an ordinary weeknight. Every one of these fits in a 9×13 pan, and every one of them has survived the Tuesday test in my kitchen.

    Why one pan? Because I only have one oven

    When I can bake for a crowd in a single pan, I bake. The 9×13 shape makes portions easy, serving easy, and cleanup easy. You can line it with parchment if you want zero sticking, and a lid makes it perfect for bringing dessert to someone’s house. I keep a lidded pan specifically for this, because nothing kills a dessert like a cracked top from a bumpy drive.

    Cakes for the days that need them

    Cake is the first thing most people reach for with this pan, and honestly, I get it. A plain vanilla sheet cake with fluffy whipped buttercream is the move for any occasion that needs frosting but not a tiered centerpiece. I make it for birthdays and for no reason at all. If you love warm spice, a zucchini cake or spice cake with brown butter cream cheese frosting is the upgrade, and in the fall, an apple cake keeps the kitchen smelling like October all season. And yes, an apple crumb cake works beautifully as breakfast. It has, on more than one occasion, been our Saturday morning instead of toast.

    Bars that disappear before they’re plated

    Handheld bars are the other half of this pan’s superpower. Rice Krispie treats and M&M cookie bars are my go-to party bakes. No mixer, no chilling, no rolling individual dough. I put the tray on the table and it’s gone in a matter of minutes. They’re the desserts I make when I know people will be standing around instead of sitting down, and they pass the Tuesday test because they take less effort than assembling a salad.

    The 15 recipes I actually make

    Easy & Flavorful Zucchini Cake

    Cinnamon-kissed, plush cake under a thick layer of brown butter cream cheese frosting. The kind of thing you make when the garden or the farmers market hands you more zucchini than you can eat raw.

    Family-Favorite Rice Krispie Treats

    Extra butter, extra marshmallow, a splash of vanilla, a pinch of salt. That’s what takes this from good to the one my family asks for by name. It’s the recipe I make when I want dessert to feel like a treat and not a project.

    Soft-Baked M&M Cookie Bars

    Soft, chewy, studded with candy. No mixer, no chilling, no rolling. This is the bar I make before a dinner party so I’m not standing at the stove at 6 p.m.

    Vanilla Sheet Cake with Whipped Buttercream Frosting

    Soft, springy crumb and pillowy whipped vanilla buttercream. The reverse creaming method sounds fancy, but it’s really just a small change in mixing that gives you a cake that holds frosting without getting dense.

    Tiramisu

    No-bake Italian classic: espresso-dipped ladyfingers and a lightly sweetened mascarpone cream, layered in a sheet pan. This is the one I make when I want something that tastes like a restaurant dessert but doesn’t require a torch or a stand mixer.

    Lemon Bars with Shortbread Crust

    Buttery shortbread, thick creamy lemon curd. The best part is that the filling goes straight from mixing bowl to oven. No stovetop, no tempering, no fuss. A glass pan works well here if you have one.

    9×13 Pan Brownies

    A large batch of rich, dense, intensely chocolatey brownies with crackly tops and soft centers. I make these in the big pan when I know they’ll be shared, and I cut them smaller when it’s just Sam, our daughter, and me, which is most weeks.

    Chocolate Peanut Butter Cheesecake Bars

    Like a peanut butter cup in cheesecake form, without the effort of a full cheesecake. These are the bars I make when I want indulgent but don’t want to babysit a water bath.

    Classic Apple Crisp

    Warm gooey cinnamon apples and a brown sugar oat topping. Pure and simple, and the pan goes almost straight to the table. In the fall, this is the dessert that makes the whole house smell like a bakery.

    Easy Berry Cobbler

    Syrupy mixed berries under a golden biscuit crust. Serve it with vanilla ice cream if you have it, which I usually do. It’s the kind of dessert that forgives you for not washing the berries as much as you should.

    Brown Butter Pecan Pie Bars

    Brown butter, pure maple syrup, toasty pecans. Sweet and salty in every bite, without the fuss of a full pie. I make these around the holidays and they’re gone by the second helping.

    Super Moist Spice Cake

    Warm spiced flavor in every bite, topped with a generous layer of silkiest brown butter cream cheese frosting. The cake I reach for when I want something cozy without it being a dessert you have to plan for.

    The Best Banana Cake I’ve Ever Had

    Soft, buttery, ultra-moist, with tangy cream cheese frosting. This is the one that uses up the bananas in the bowl before they turn. I make it when the brown ones are multiplying faster than I can eat them, which is most of the time.

    Scotcheroos (Without Corn Syrup)

    Eight ingredients, no baking, a bar that combines chocolate, butterscotch, and peanut butter. It’s the one I make when I want something that tastes like it took all day but really took an afternoon.

    Peach Cobbler

    Juicy sweet peaches and a buttermilk biscuit-like topping. The ultimate comforting homestyle dessert, and the one I make in the summer when peaches are cheap and abundant. Serve it warm if you can. I always do.

    And if you’re new to bread pudding: think of it as the coziest cross between French toast, custard, and a dessert casserole. The butter rum version is our favorite. I make it in the 9×13 pan and it’s the first thing Sam asks for when he smells it.

    A note on pans

    A metal pan is my first choice for most of these. A glass pan is great for sheet cakes and casseroles, and it’s what I use for lemon bars. I also have a ceramic baking dish I love for hosting, especially when I’m serving something like a baked cream cheese French toast casserole. And a lidded pan is worth its weight in travel, because you can bring dessert to a dinner party without wrapping it in three layers of foil.

    Lidded 9x13 baking pan on a white background

    It’s not just for desserts

    One more thing, because I promise I’ll stop talking about this pan: it’s also handy for breakfast and dinner. I use it for blueberry French toast casserole, overnight cinnamon rolls, oatmeal molasses rolls, and stuffed shells. If you only own one baking pan, make it this one. It’s the workhorse that makes the rest of my kitchen feel less crowded.

    Maybe that’s the real gift of a good pan: it doesn’t fix everything, but it reminds you that even an ordinary Tuesday can hold something sweet.

    A note from Nora: I made the vanilla sheet cake last Tuesday with our daughter helping me spread the frosting. She did a better job than I did. If I can make it on a Tuesday, it’s a keeper.

    Keep Reading

  • Grilled Salmon with Avocado Sweet Corn Salsa (Ready in 25 Minutes)

    Grilled Salmon with Avocado Sweet Corn Salsa (Ready in 25 Minutes)

    It’s that time of year when the air gets thick and the idea of a heavy stew starts to feel like a personal attack. I was out on the grill the other evening, salmon on the grate, and I realized this is the meal I reach for when it’s genuinely too hot to cook anything complicated.

    Grilled salmon with avocado sweet corn salsa is one of my most-mad dishes of the summer. It’s light and refreshing when you want something, but very satisfying. Bright, fresh, and super filling. A quick weeknight meal the whole table actually asks for.

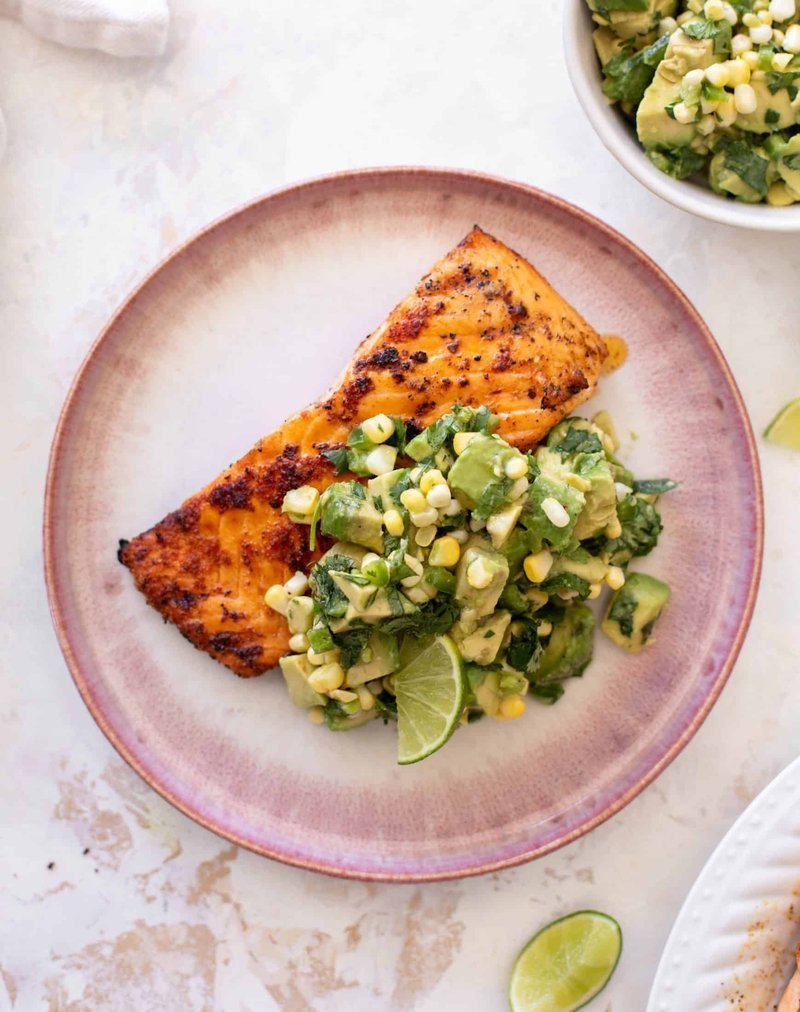
    Grilled salmon topped with fresh avocado corn salsa

    Why this one

    We have a few meals we make over and over in each season, and this is a version of one of them. Sam and I grill salmon at least once or twice a week, and there’s always a little something on the plate for everyone, so when it’s grilling season, you can find me out there.

    Grilling gets a lot easier once you’ve done it over and over again. Nothing beats the smoky, charred flavor, and the cleanup is almost fully eliminated. The next time you need an easy but show-stopping meal, grab a couple of fillets and throw together a quick, bright salsa.

    Bowl of fresh corn avocado salsa with lime juice

    The salsa

    This salsa is packed with wonderful ingredients, but my favorite is the sweet corn. I don’t cook it. I cut the kernels straight off the cob, and the crunch is unreal. It tastes so fresh and so sweet that we eat it this way all the time.

    There are so many ways to serve it. I love it exactly like this, because it’s so summery and light, especially when it’s ridiculously steamy outside and almost too hot to eat anything other than watermelon. Our daughter loves it over rice, and it’s excellent with a bowl of parmesan herb orzo or some garlic butter zucchini noodles.

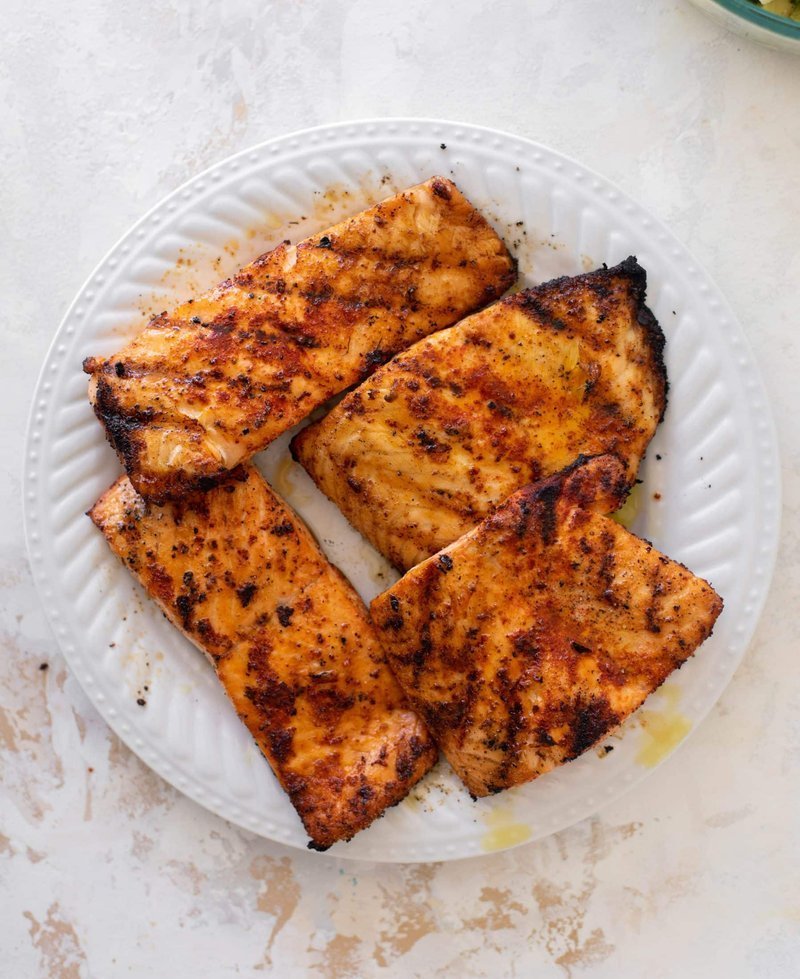
    Seasoned salmon fillets on a white plate

    And it comes together so quickly. Slice the corn right off the cob, toss it in a bowl with avocado, diced jalapeño, cilantro, and a boatload of fresh lime juice, and you’re golden. I could eat this straight out of the bowl, or with a bag of chips (obviously).

    The recipe

    Grilled Salmon with Avocado Sweet Corn Salsa

    Serves 4 · Prep 15 minutes · Cook 10 minutes · Total 25 minutes

    Grilled salmon fillet with fresh corn salsa on side

    Ingredients

    • 4 skinless salmon filets
    • Kosher salt and pepper, to taste
    • 1 teaspoon smoked paprika
    • 1 teaspoon garlic powder
    • 3 ears corn, kernels cut off the cob
    • 2 jalapeño peppers, seeded and diced
    • ⅓ cup chopped fresh cilantro
    • ¼ cup freshly squeezed lime juice
    • 2 avocados, chopped

    Instructions

    1. Preheat your grill to the highest setting. Pat the salmon completely dry with a paper towel.
    2. In a small bowl, stir together a big pinch of salt and pepper with the smoked paprika and garlic powder.
    3. In a large bowl, combine the corn, peppers, cilantro, and lime juice with a big pinch of salt and pepper. Set aside.
    4. Sprinkle the salmon on both sides with the paprika spice mix. Place it on the grill and grill for 4 minutes, then flip and grill for 3 to 4 minutes more. Transfer the salmon to a plate.
    5. Add the avocado to the corn salsa and toss well. Taste and season more if needed.
    6. Serve the salmon with the corn salsa on top. Enjoy!

    The salmon is on the grill in 10ish minutes total. Like, super fast. Throw it on a platter, top it with the salsa, and it’s ready. Buttery, flaky, fresh, and citrusy. Talk about a good Tuesday.

    Grilled salmon fillet with fresh corn salsa on side

    Swaps & notes

    Frozen corn in a pinch? Thaw it well and pat it dry. You lose the crunch, but the flavor is still there. If jalapeño is too hot for the kids, seed them carefully and start with just one. And the lime juice is not optional. That’s what makes the whole thing sing.

    A note from Nora

    My first attempt at this, I cut the corn wrong. Too much avocado, not enough lime, and it tasted more like a salad mistake than a meal. I fixed the ratios, and now it’s the dish the whole family asks for on warm evenings. If I can make it on a Tuesday, it’s a keeper.

    Maybe that’s the real gift of a good weeknight recipe. It doesn’t fix anything, but it reminds you that even an ordinary evening can hold something lovely.

    Keep Reading

  • Moist Chocolate Chip Bundt Cake Recipe with Chocolate Frosting

    Moist Chocolate Chip Bundt Cake Recipe with Chocolate Frosting

    I’ve been thinking lately about how little effort a dessert actually takes to look like a lot of effort. A Bundt cake does that on its own: fluted sides, a proper shape, the whole thing. You set it on the table and people assume you were at the oven for hours. Usually you weren’t.

    Chocolate chip bundt cake baked and cooled, golden with melted chocolate chips visible

    This one starts with a box of cake mix and a box of instant vanilla pudding, and that’s our little secret. It’s genuinely moist, genuinely chocolate, and the homemade frosting on top takes under 5 minutes to whip up. If I can make it on a Tuesday, it’s a keeper.
    Why this cake

    Bundt cakes get a reputation for being fussy — special pans, temperamental batters, frosting that won’t cooperate. This one skips all of it. The pudding mix does quiet work in the batter: it adds flavor, moisture, and a softer crumb than a plain boxed mix can manage. And the frosting? If you’ve only ever used the canned kind, you’ve been missing out. Five minutes, a few ingredients, and it’s the kind of frosting you want to spoon straight from the bowl.

    Serve it plain, with ice cream, or with whipped cream. It works for birthdays, potlucks, holidays, or a Tuesday with no occasion at all.

    Ingredients

    For the cake:

    • 15.25 oz yellow cake mix (white cake mix works too)
    • 3.4 oz box instant vanilla pudding mix
    • 4 large eggs
    • 1 cup sour cream
    • ½ cup vegetable oil
    • ½ cup water
    • 1 cup mini semi-sweet chocolate chips

    For the frosting:

    • ¼ cup salted butter, very soft
    • ¼ cup unsweetened cocoa powder
    • 1 dash salt
    • 2 cups powdered sugar
    • 1 tsp vanilla extract
    • 3 Tbsp milk (more if needed)

    A note for UK and EU bakers: “yellow cake mix” and “instant vanilla pudding mix” are the American standard supermarket versions. If you’re in the US or Canada, you’ll find both in the baking aisle. If you’re not, a plain white cake mix or a homemade vanilla batter works as the base, and the pudding mix is what makes this version extra moist.

    How to make it

    Prep time is about 20 minutes, the bake is 45–50 minutes, and it needs a couple of hours to cool. Total time: about 3 hours. The cooling is the only unglamorous part, and even that happens while you’re doing other things.

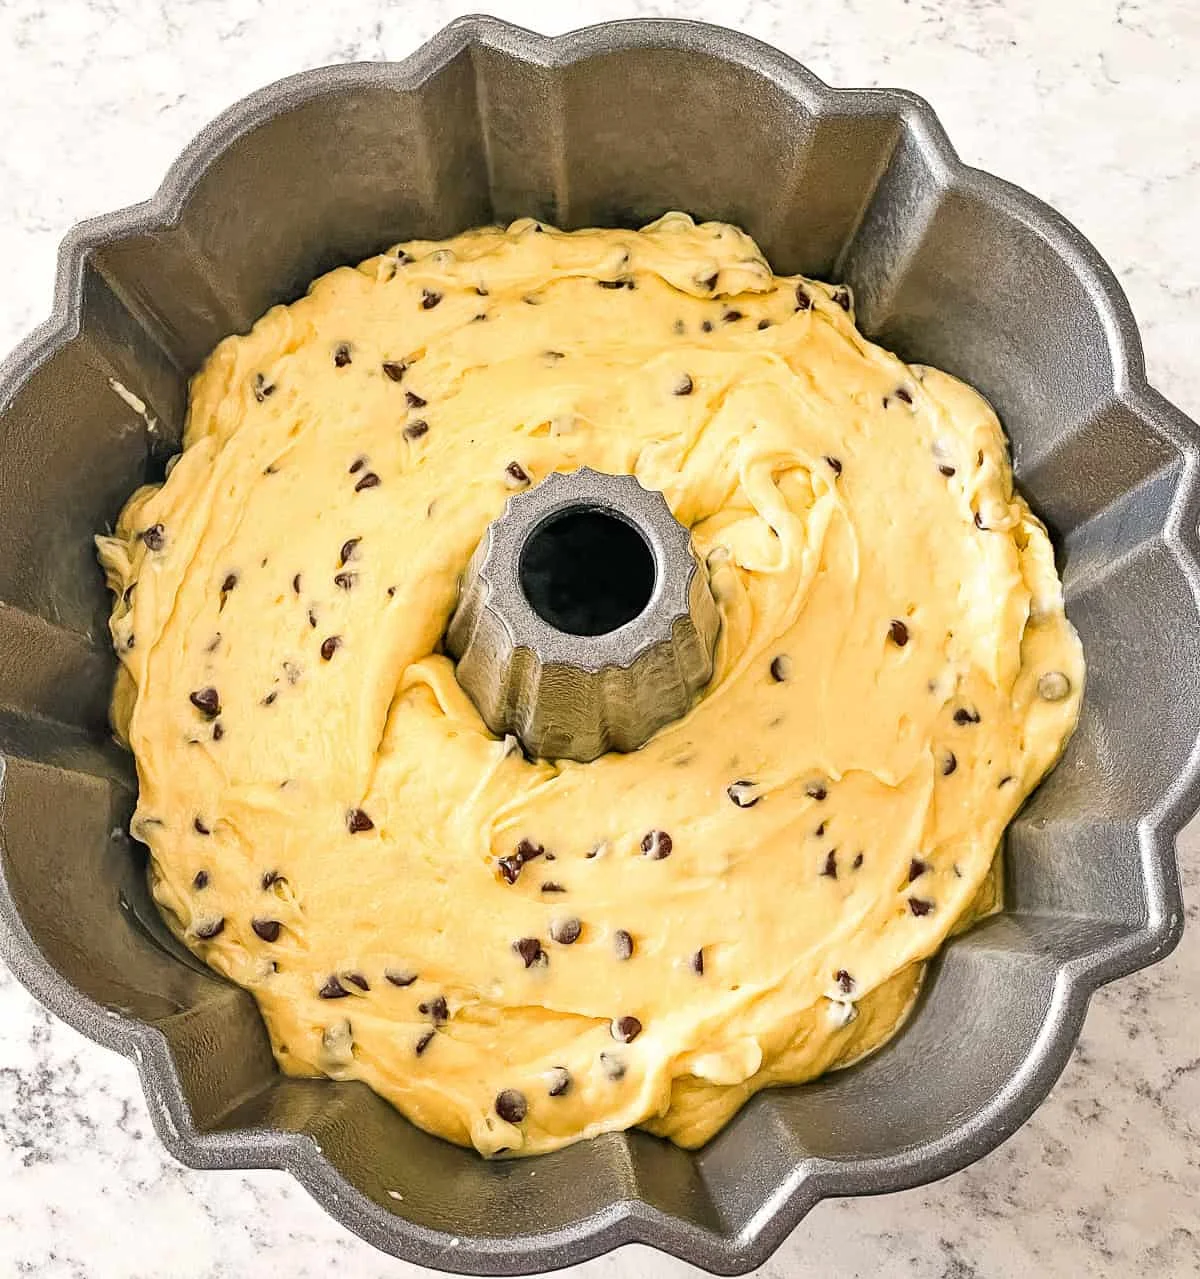
    Step by step photos of mixing chocolate chip cake batter in a bowl

    1. Prep. Grease a 12-inch (30 cm) Bundt pan with shortening and dust with flour, or use a no-stick baking spray with flour. Preheat the oven to 350°F (180°C).
    2. Batter. In a large bowl, combine the cake mix, pudding mix, eggs, sour cream, oil, and water. Beat at medium speed for 2–3 minutes, scraping down the sides of the bowl with a spatula now and then. Fold in the chocolate chips.
    3. Bake. Pour the batter into the prepared pan and bake at 350°F (180°C) for 45–50 minutes, until a toothpick inserted in the middle comes out clean or with a few moist crumbs.
    4. Baked chocolate chip bundt cake cooling upside down on a wire rack
    5. Cool. Let the cake cool in the pan for about 10 minutes, then turn it out onto a wire rack. Let it cool completely, a couple of hours.
    6. Frost. In a medium bowl, beat together the soft butter, cocoa, salt, powdered sugar, vanilla, and just 3 tablespoons of the milk until smooth, adding more milk a little at a time until it’s spreadable but still thin enough to run slightly down the sides. Spread it over the cooled cake and let it fall where it may.
    7. Chocolate frosting being spread over the top of a bundt cake

    Slice and serve on its own, with ice cream, or with whipped cream.

    Good to know

    Why the pudding mix? It’s the difference between a good cake and a cake that stays soft for days. The dry mix dissolves into the batter and adds both flavor and moisture without changing what you already have to do.

    Can I make it ahead? Yes, and it actually tastes better the next day, when the flavors have had time to settle. To bake it days or even weeks ahead, wrap the unfrosted cake in several layers of plastic wrap and freeze it. Thaw at room temperature, unwrap, frost, and serve. Freezer-friendly cakes are the ones that actually get baked.

    Storage. Kept in an airtight container or wrapped in plastic, the cake lasts 4–5 days at room temperature. The fridge adds a few more days, but it’s best at room temperature before serving.

    Swaps and variations

    • Want more chocolate? Swap the frosting for a chocolate ganache glaze.
    • Other frostings work fine too: buttercream, a vanilla glaze, cream cheese frosting, or just a dust of powdered sugar.
    • Any cake mix is fair game for different flavor variations.
    • For crunch, fold in ½ cup of chopped pecans or walnuts.
    • Prefer milk chocolate chips? Use them, but either chop them smaller or toss them with a teaspoon of flour first so they don’t sink to the bottom of the pan.

    One thing I’d do again next time without hesitation: mini chocolate chips. The regular size tends to sink, and the mini version keeps every slice even.

    A note from Nora

    The first time I made this, I rushed the cooling and inverted the pan while the cake was still warm. It held. It actually held, which surprised me more than the frosting did. Sam took three slices, the dog got a suspiciously interested sniff from across the kitchen, and we finished the cake over two days, which I take as a good sign. If I can make it on a Tuesday, it’s a keeper.
    Keep Reading

  • Make-Ahead Salted Caramel Toffee Brownie Ice Cream Cake

    Make-Ahead Salted Caramel Toffee Brownie Ice Cream Cake

    Summer birthday parties are the problem point of every summer, right? There’s the list everywhere, the short time, the one make-ahead dessert standing at the end of the list like it should be easy.

    So here’s what I keep making: a salted caramel toffee brownie ice cream cake. It starts with the kind of brownie I want at 10pm — rich, fudgy, with pockets of melted chocolate — and from there it becomes a day-ahead cake you can pull from the freezer whenever you’re ready to serve it.

    Flat-lay of brownie baking ingredients with ice cream and chocolate

    Why this recipe wins

    This is a cake that combines brownies, ice cream, caramel, and toffee into one actually irresistible dessert. Each slice is sweet, salty, creamy, and crunchy at the same time — and it holds up in the freezer, so the whole thing can happen the day before.

    I make it for summer birthdays, backyard BBQs, potlucks, and any family get-together where I need to feed a crowd. And here’s the part I love most: making it ahead means one less thing to juggle on a day that already counts every minute.

    One honest warning from my own kitchen: on my first attempt, the brownies went in warm and the ice cream turned to a sad milk puddle. Fix? Let them cool completely. Everything else after that is forgiving.

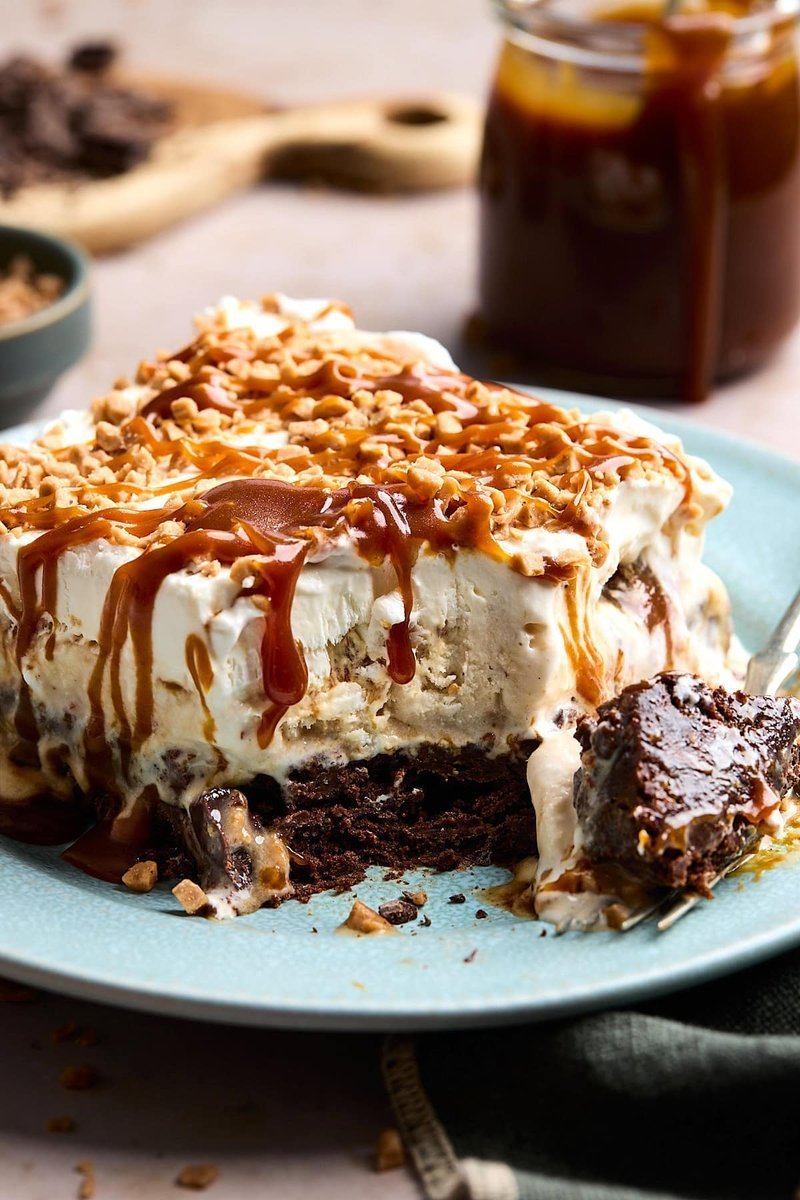
    Brownie ice cream cake slice with whipped cream and caramel drizzle

    Ingredients worth knowing

    A few quick notes before you dig in — all of them earn their spot in the bowl.

    Brownies: Melted butter keeps them rich and fudgy. I use both granulated and brown sugar — the brown sugar adds moisture and a faint caramel edge. Add the flour last and stir only until combined; overmixing is how brownies turn cakey. Dutch-process cocoa gives them that deep, dark color, and a little espresso powder deepens the chocolate without making them taste like the kitchen at 5am.

    I chop a cup of semisweet chocolate and fold most of it into the batter, so every bite lands on a small pocket of melted chocolate. The rest goes over the top before baking.

    Ice cream layer: Use the vanilla you already like. Soften it just enough to be spreadable — not soupy — then fold in the crunchy toffee straight into the ice cream, so the crunch shows up in every slice.

    Salted caramel: Any salted caramel you love works, store-bought or homemade. If yours is too thick to drizzle, warm it in short bursts, then let it cool before it touches the ice cream. You don’t want warm caramel doing slow demolition.

    Whipped cream: Heavy cream, a little confectioner’s sugar, a squeeze of vanilla. Beat to medium-stiff peaks — fluffy, but sturdy enough to sit on top of all that caramel without slumping.

    Finished layered cake in the pan, piece being lifted out

    How I put it together

    1. Bake the brownies. Butter, both sugars, eggs, vanilla in a bowl until smooth. Add the flour, cocoa, salt (and a 3/4 tsp of espresso if you’re in for it) and stir just until combined. Fold in 3/4 cup of the chopped chocolate, spread it into the 9×13 pan, and scatter the remaining 1/4 cup over the top. Bake for 24 to 28 minutes, until a toothpick comes back with just a few moist crumbs. This is the step that decides everything — pull them a touch early, they’ll keep setting as they cool.
    2. Cool completely. Yes, completely. Even slightly warm brownies and the ice cream starts to negotiate with them.
    3. Build the ice cream layer. Fold the Heath toffee bits into softened vanilla ice cream and spread it evenly over the chilled brownies.
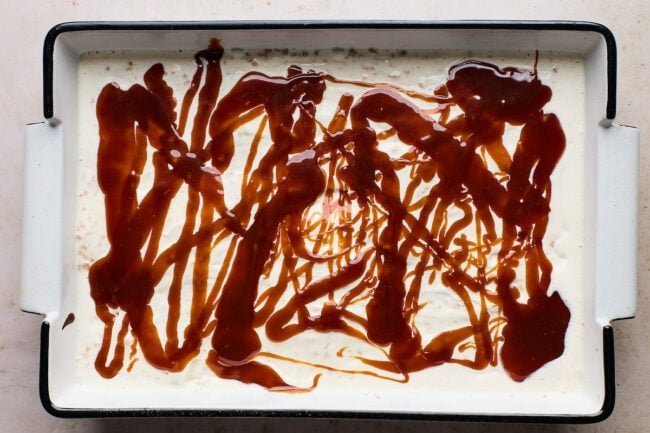
    4. Drizzle the caramel. Go in a slow, even zigzag. Freeze for about 30 minutes, until that layer sets up a little.
    5. Add the whipped cream. Beat it to medium-stiff peaks, spread it over the caramel, and shower the whole top with more toffee.
    6. Freeze it. Four hours is the minimum, but I do it the day before if I can, because overnight gives me the cleanest slices and one fewer thing to think about on party day.

    To serve: let the cake sit out for five to ten minutes, then dip a sharp knife in hot water and wipe it dry between cuts. An extra drizzle of salted caramel over each slice is an optional step I have never once skipped.

    Sliced brownie cake with caramel drizzle and crushed toffee

    The tips that actually matter

    So far I’ve walked through the whole thing, but here’s the short version of everything I’ve learned:

    • Pull the brownies when the toothpick has a few moist crumbs on it. Fudgy, not cakey. They firm up more in the freezer.
    • Cool the brownies fully before anything with ice cream touches them. That one saved my recipe.
    • Soften the ice cream on purpose, then stop. It needs to spread, not melt.
    • Give the caramel layer 30 to 60 minutes in the freezer before the whipped cream goes on — your slice lines will thank you.
    • Keep the caramel cool. A few seconds in the microwave is enough; a whole minute of it is a meltdown.
    • Make it a day ahead if you can. Four hours minimum, overnight ideal.
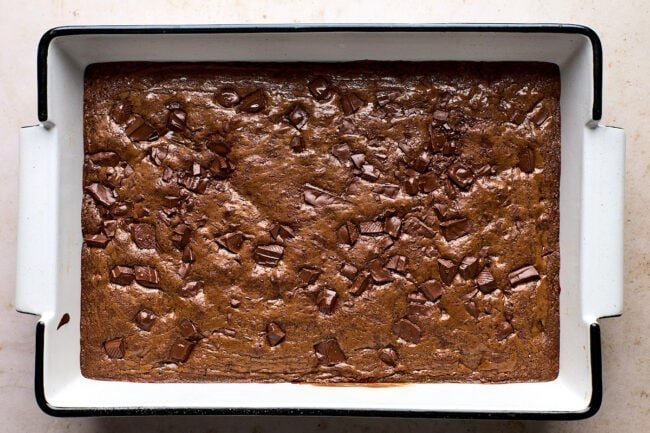
    Fudgy brownie batter with chocolate chunks in a 9x13 pan

    Storage: this one is the good part

    Wrap the whole cake tightly in plastic wrap or foil — or use your pan’s lid if it has one — and keep it in the freezer. The first seven or ten days are when it’s at its best, but it’ll hang on longer if it’s well wrapped.

    Have leftovers after the party? Press the wrap right up against the cut edges so air doesn’t sneak in. Before serving, that same five-to-ten-minute sit out brings it back to life.

    One serving runs about 570 calories, and honestly, this is the kind of thing I don’t do the math on with a slice in front of me.

    Tofee-laced vanilla ice cream spread over cooled brownies

    Make it your own

    The part I love about this cake? It’s easy to steer. A few ways I swap:

    • Extra chocolate: chocolate ice cream instead of vanilla, plus more chopped chocolate on top.
    • Coffee lover: swap in coffee or espresso ice cream — it plays well with both the toffee and the chocolate.
    • Peanut butter twist: drizzle peanut butter over the ice cream alongside the caramel, or use peanut butter ice cream.
    • Swap the candy: chopped Butterfinger or Snickers work in place of Heath toffee bits.
    • Double caramel: add a drizzle of hot fudge with the salted caramel.
    • Extra salty: a light sprinkle of flaky sea salt right before serving. Salted caramel people are out here for this one.
    Salted caramel drizzled in a zigzag across the ice cream layer

    A note from Nora

    The first time I served this, Sam did the thing where he gets very quiet while eating — quiet is high praise in our house. Our two-year-old managed a fair amount of whipped cream on her face and I believe that counts as a review. Biscuit sat under the table like he hadn’t seen a single toffee fall, but we both know he took the whole cache.

    If you’re making a crowd dessert this summer, start with the brownies the day before. It passed the Tuesday test for me, and if I can make it on a Tuesday and still have time to breathe, it’s a keeper.

    Keep Reading

  • Tapas Until You Can’t: Inside Peps, Amsterdam’s Cozy Spanish Wine Bar

    Tapas Until You Can’t: Inside Peps, Amsterdam’s Cozy Spanish Wine Bar

    I almost skipped this place. It’s on Bilderdijkstraat in Oud-West — a quiet side street behind the fancy shopping, with red awnings and a sign that promises tapas, cava, and pinchos at the bar. We were in Amsterdam for a long weekend a few months ago, and by dinner we were slightly hungry and very done with heavy meals.

    We weren’t. And neither was the rest of the room.

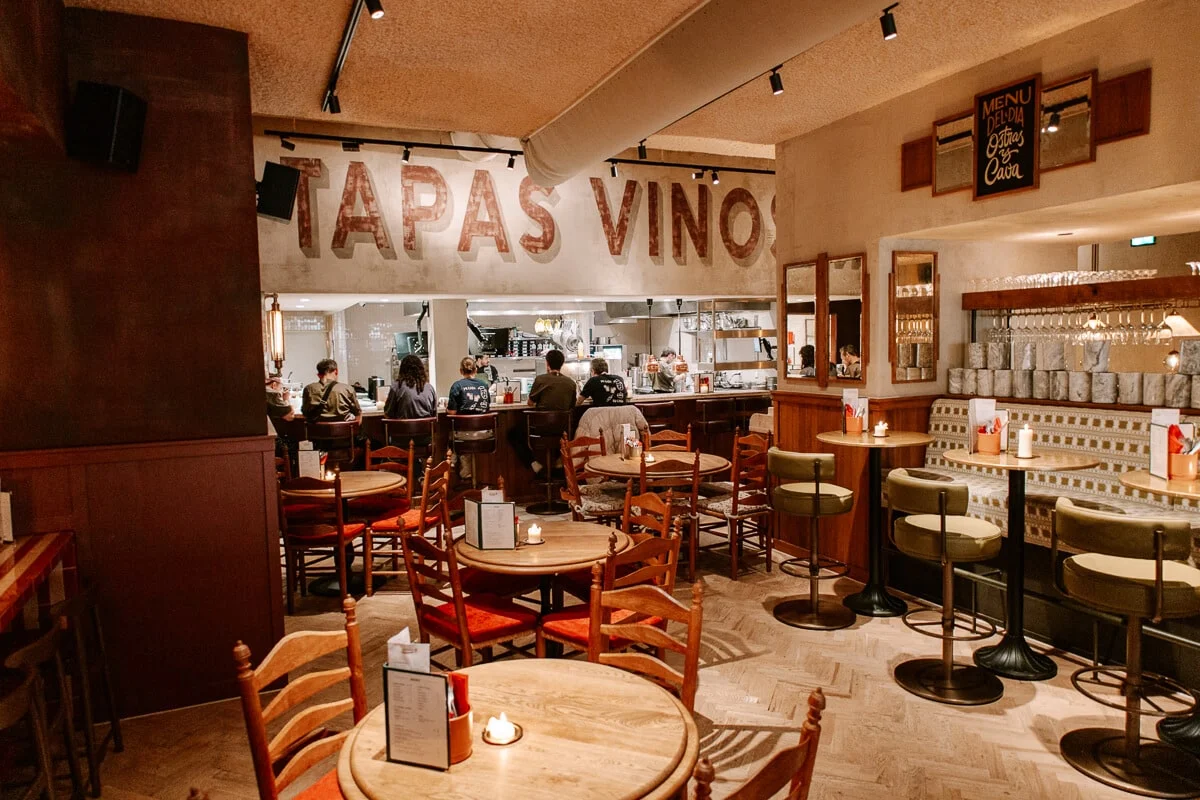
    Warmly lit interior of Peps tapas and wine bar in Amsterdam

    Inside it’s warm and loud in the best way — wooden tables, candlelight, wine bottles stacked to the ceiling, a long bar where you can watch the pinchos come together. There’s a dark, living-room corner at the back where, honestly, we forgot to look at the time. The service is relaxed, in the sense that nobody is hovering; the evening is allowed to be yours.

    No menu order, just a table that keeps growing

    There’s no real seating order here. You order a few small things, they come, you order a few more, they come again. The card has more than sixty small dishes — oysters, charcuterie, tapas, cold and hot pinchos, Spanish snacks that keep sneaking past your dinner plans.

    Board of Spanish tapas and cured ham at Peps Amsterdam

    There’s one detail I’ll remember the whole year: Uurtje Frituurtje — literally, the hour of fried snacks. Between 16:00 and 18:00, 10 euros buys you a bottomless snack board of Spanish fried snacks. Don’t overthink it; it’s exactly the kind of thing you want at happy hour.

    Plated Spanish dishes from Peps on dark wooden table

    What we actually ordered

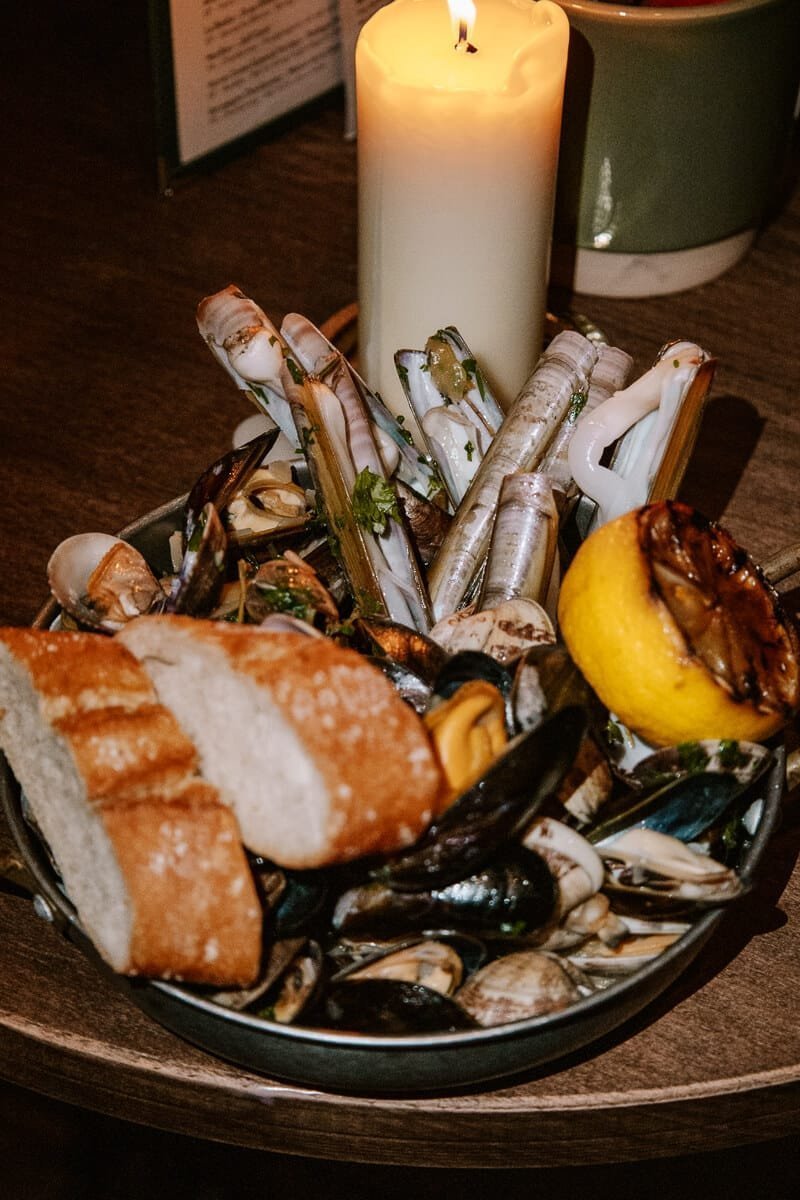
    Something for everyone: pimientos de padrón, pata negra (the cured Spanish ham that I’m not exaggerating when I call the best thing on the board), crispy fried chicken with chipotle mayo, and shellfish from the sea — mussels, vongole, razor clams, sautéed in white wine with gremolata.

    Shellfish and mussels sautéed in white wine at Peps

    The last one is chef Ramon van Welzenis’s own favorite — and he’s ex-BAUT, one of the highest-end restaurants in Amsterdam (if that name hasn’t reached you yet, take it from me: he’s cooked at the top of the Dutch game, and it shows). You can taste the care in a small plate like that without it ever feeling showy.

    Sangria’s friendlier next door

    The wine card changes with the seasons, from dry Verdejo to deep Rioja, and it’s cheap enough to feel casual. There’s cava, homemade sangria, and cocktails like the Readpertineje and the Aqualychee — the lychee and lime one, from what I can tell, grew on me one sip at a time.

    Go here if you want an early, easy snack during the afternoon, or a Spanish evening in Oud-West that will totally drift into a later hour without you noticing.

    Homework: check the Peps site for hours and what’s on right now.

    A note from Nora

    Sam’s take: “We ordered four things. I can’t remember when the fourth thing arrived.” Same story every night — and we came home talking about going back, which in our household is the highest score I have in a restaurant.

    Maybe that’s the real gift of small plates: they don’t fix anything, but they remind you that even an ordinary Tuesday dinner can hold something lovely.

    Keep Reading

  • The Screwdriver: My Foolproof Two-Ingredient Cocktail

    The Screwdriver: My Foolproof Two-Ingredient Cocktail

    It’s been one of those long, gray weeks here in Portland — the kind where the sun shows up, sneaks off, and shows up again just enough to make you wonder if you imagined it. By Wednesday night I was done with cooking. I wanted something cold, something orange, something that took exactly as long as it took to wash the glass.

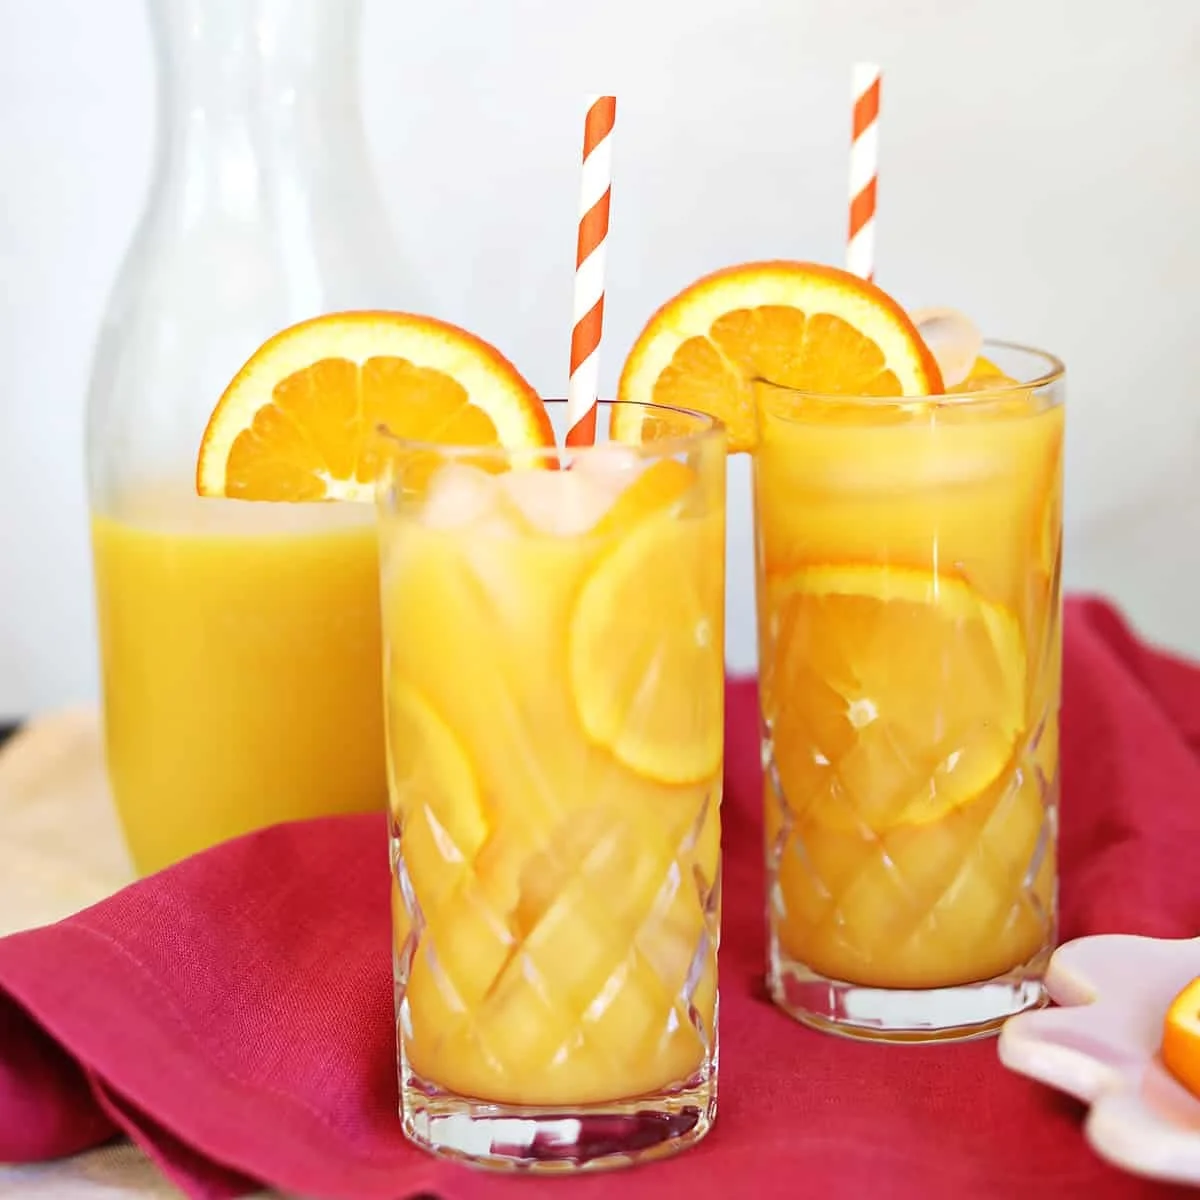
    Two tall glasses of screwdriver cocktails with ice and orange slices

    So I made a screwdriver. And I keep coming back to it, which is weird for a drink with two ingredients. But here’s the thing I learned: the proportions matter a lot. Get them wrong and you’re either pouring vodka over flat orange juice, or serving something that tastes like breakfast. Get them right and it’s cold, bright, and gone before it melts.

    What you’ll need

    That’s it. Three things, and only one of them is a spirit.

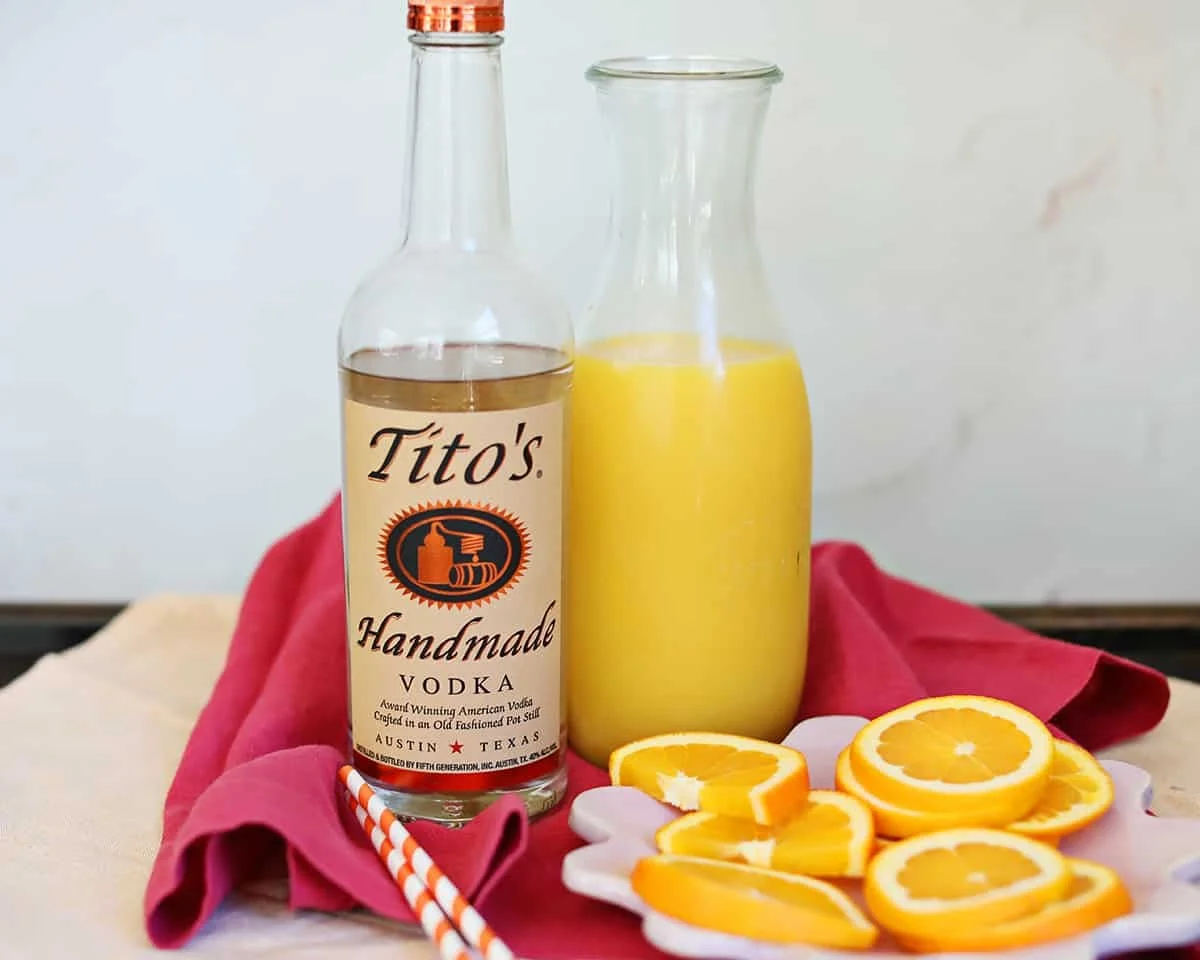
    • Orange juice — freshly squeezed, or your favorite store-bought bottle. I like mine with pulp, but honestly this is one of those opinions that doesn’t survive contact with the glass. Use whatever you like.
    • Vodka — a good, unflavored one. My mother-in-law is a devoted screwdriver drinker and she swears by Tito’s, and I’ve had enough of them to trust her on this. (She’s been a drinker of the classic since long before I was born, so her opinion carries weight in our family.)
    • Orange slices — for garnish, if you feel like it. A slice or a wedge, your call.
    Vodka bottle, carafe of orange juice, and orange slices on a red napkin

    The recipe below uses 2 ounces (about 60 ml) of vodka and 5 ounces (about 150 ml) of orange juice. That ratio is the whole point — the juice should taste like a drink, not a smoothie.

    How to make it

    Fill a tall glass with ice. Pour in the vodka — 2 ounces (60 ml). Top with orange juice, about 5 ounces (150 ml). Give it a good stir, add a thin orange slice if you’re feeling decorative, and serve it right away. The ice holds the slice in place better than I expected it to.

    That’s the whole method. Two minutes, start to finish.

    Ways I’ve made it my own

    Once the ratio clicks, it’s easy to bend the drink a little:

    • Flavored vodka. Citrus or cherry is a good place to start. Vanilla leans into something sweeter — if you grew up on creamsicles, you’ll know what I mean.
    • A little sweetness. A splash of grenadine or simple syrup. Start small — half an ounce (15 ml) — and taste before you add more.
    • Lighter version. Half orange juice, half club soda or ginger ale. Same flavor, less of it, and it lasts longer on a hot day.
    • Not into orange? Swap in cranberry, mango, or pineapple juice. All three work. I’ve tried them; I’m not a scientist, just a person with a glass.
    Finished screwdriver drinks garnished with orange slices and striped straws

    Where the name comes from (probably)

    The honest answer is nobody knows. One story has it going back to the World War II era, when soldiers who couldn’t get their hands on whiskey mixed whatever spirit they could find with orange juice to make it drinkable. Another says American auto workers were adding vodka to their OJ on the job and stirring it with a screwdriver, because of course they were.

    What’s less debatable is that by the 1950s and ’60s vodka was catching on in the U.S., and brands like Smirnoff started putting the screwdriver in their ads to push it along. Fifty years later, the trick still works — it’s one of the most recognized cocktails there is.

    Questions I actually get asked

    Is a screwdriver just vodka and orange juice? Yes. A shot of vodka into a glass of orange juice with ice. It’s the easiest cocktail there is to learn, which is exactly why the ratio matters.

    What’s the difference between this and a Fuzzy Navel? The juice swap. A Fuzzy Navel uses peach schnapps instead of vodka. Same shape, different drink.

    Do I need expensive vodka? No — and this is the one place I’d actually save money. The orange juice swallows most of what makes a premium vodka special. A quality mid-priced bottle, like Grey Goose, Tito’s, or Smirnoff, is more than enough. Spend up on the juice instead.

    A note from Nora

    The first time I made one of these, I poured from the vodka bottle by eye, the way I pour everything, and ended up with something that needed a second glass of juice to survive it. Sam, being the supportive husband, drank it anyway. That was my Tuesday test failure — and it taught me the only lesson this drink has to teach: measure, then pour.

    It’s not a fancy cocktail. But on an ordinary night, when the kitchen is still warm and the week is finally done, it’s exactly the right amount of something. If I can make it on a Tuesday, it’s a keeper.
    Keep Reading

  • Labor Day Recipes: A Full Menu For Your Backyard BBQ

    Labor Day Recipes: A Full Menu For Your Backyard BBQ

    It’s the last warm weekend of the year, and you’re already wondering what on earth you’re going to feed everyone.

    That’s the real problem with Labor Day. You want a full menu — something for the grill, something cold, something sweet — but you don’t want to plan six different recipes from scratch while Sam is trying to get our daughter to eat a vegetable. So this year I pulled the dishes together in one place, organized by course, so you can just pick and go. No hunting through ten different tabs.

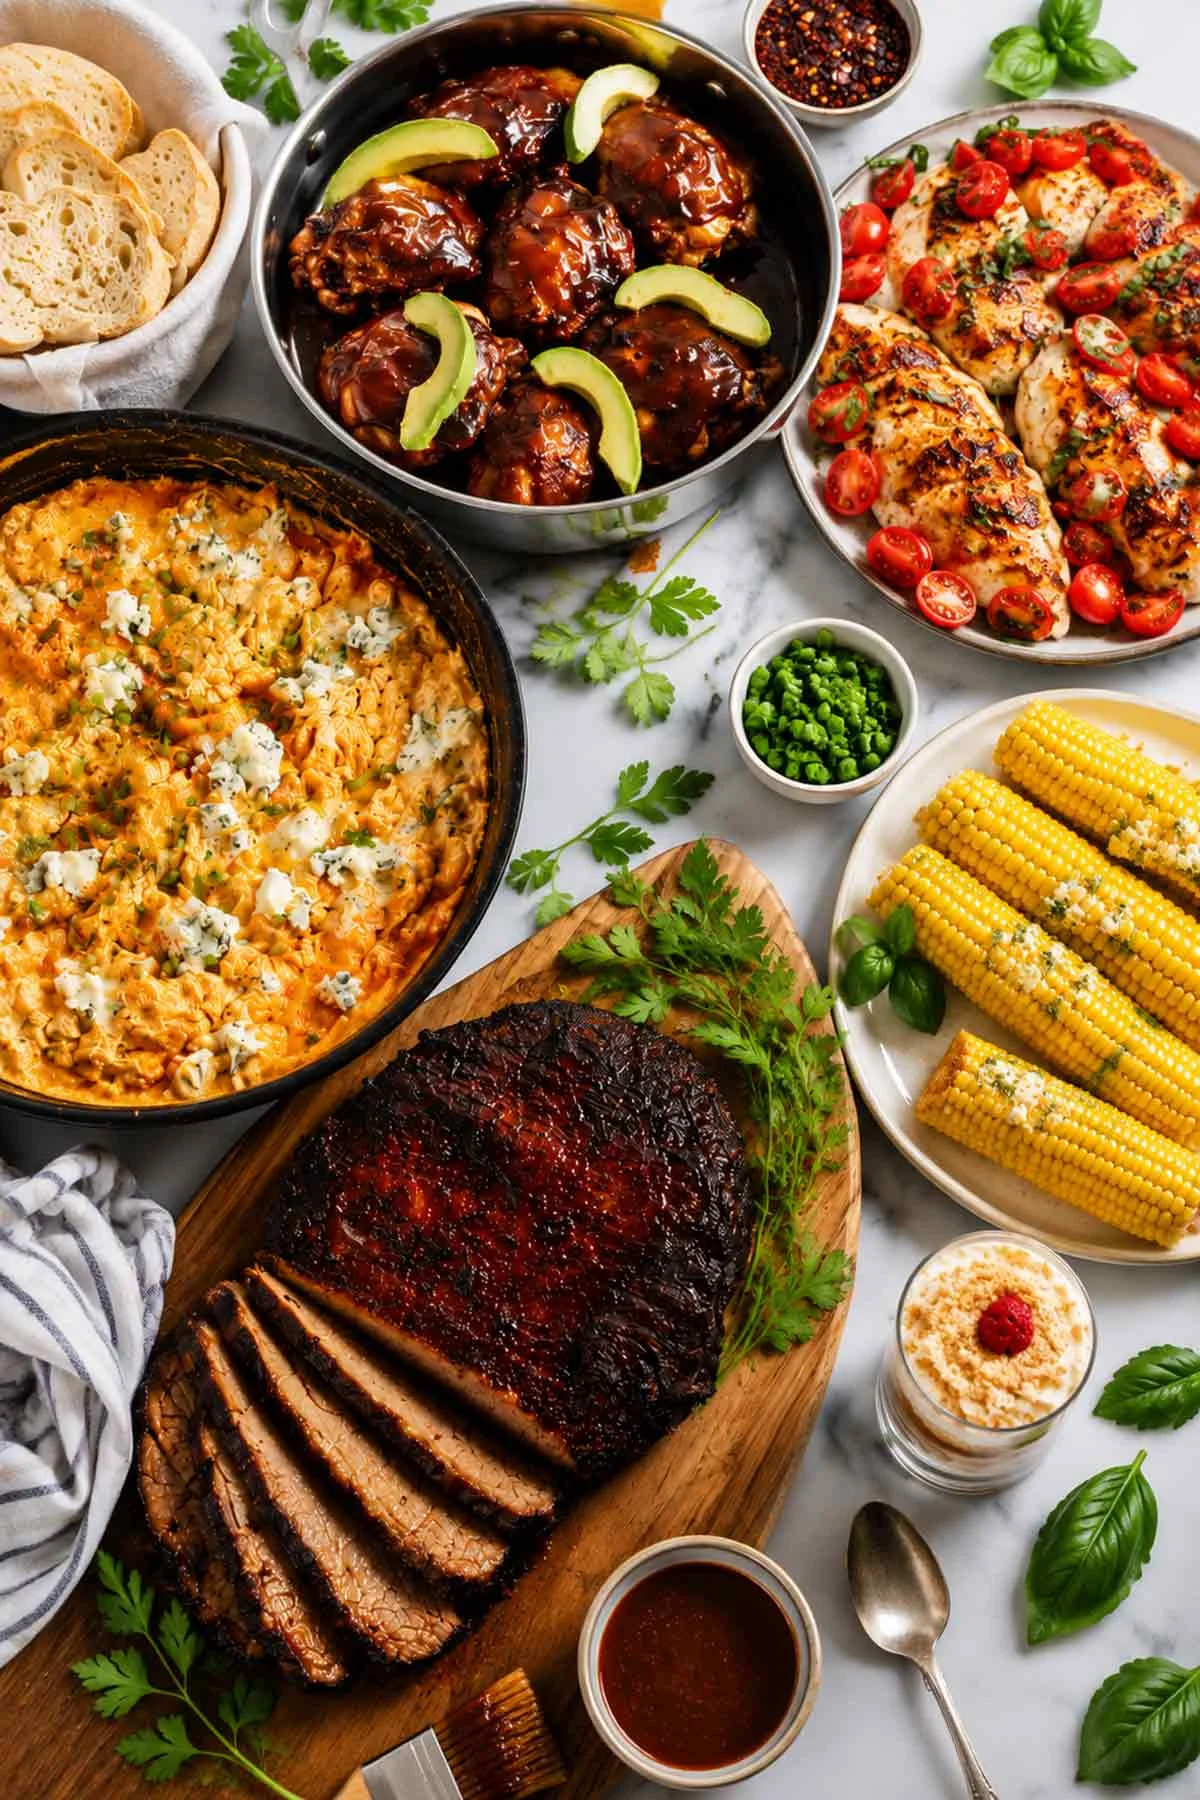
    Full Labor Day backyard BBQ meal spread on a table

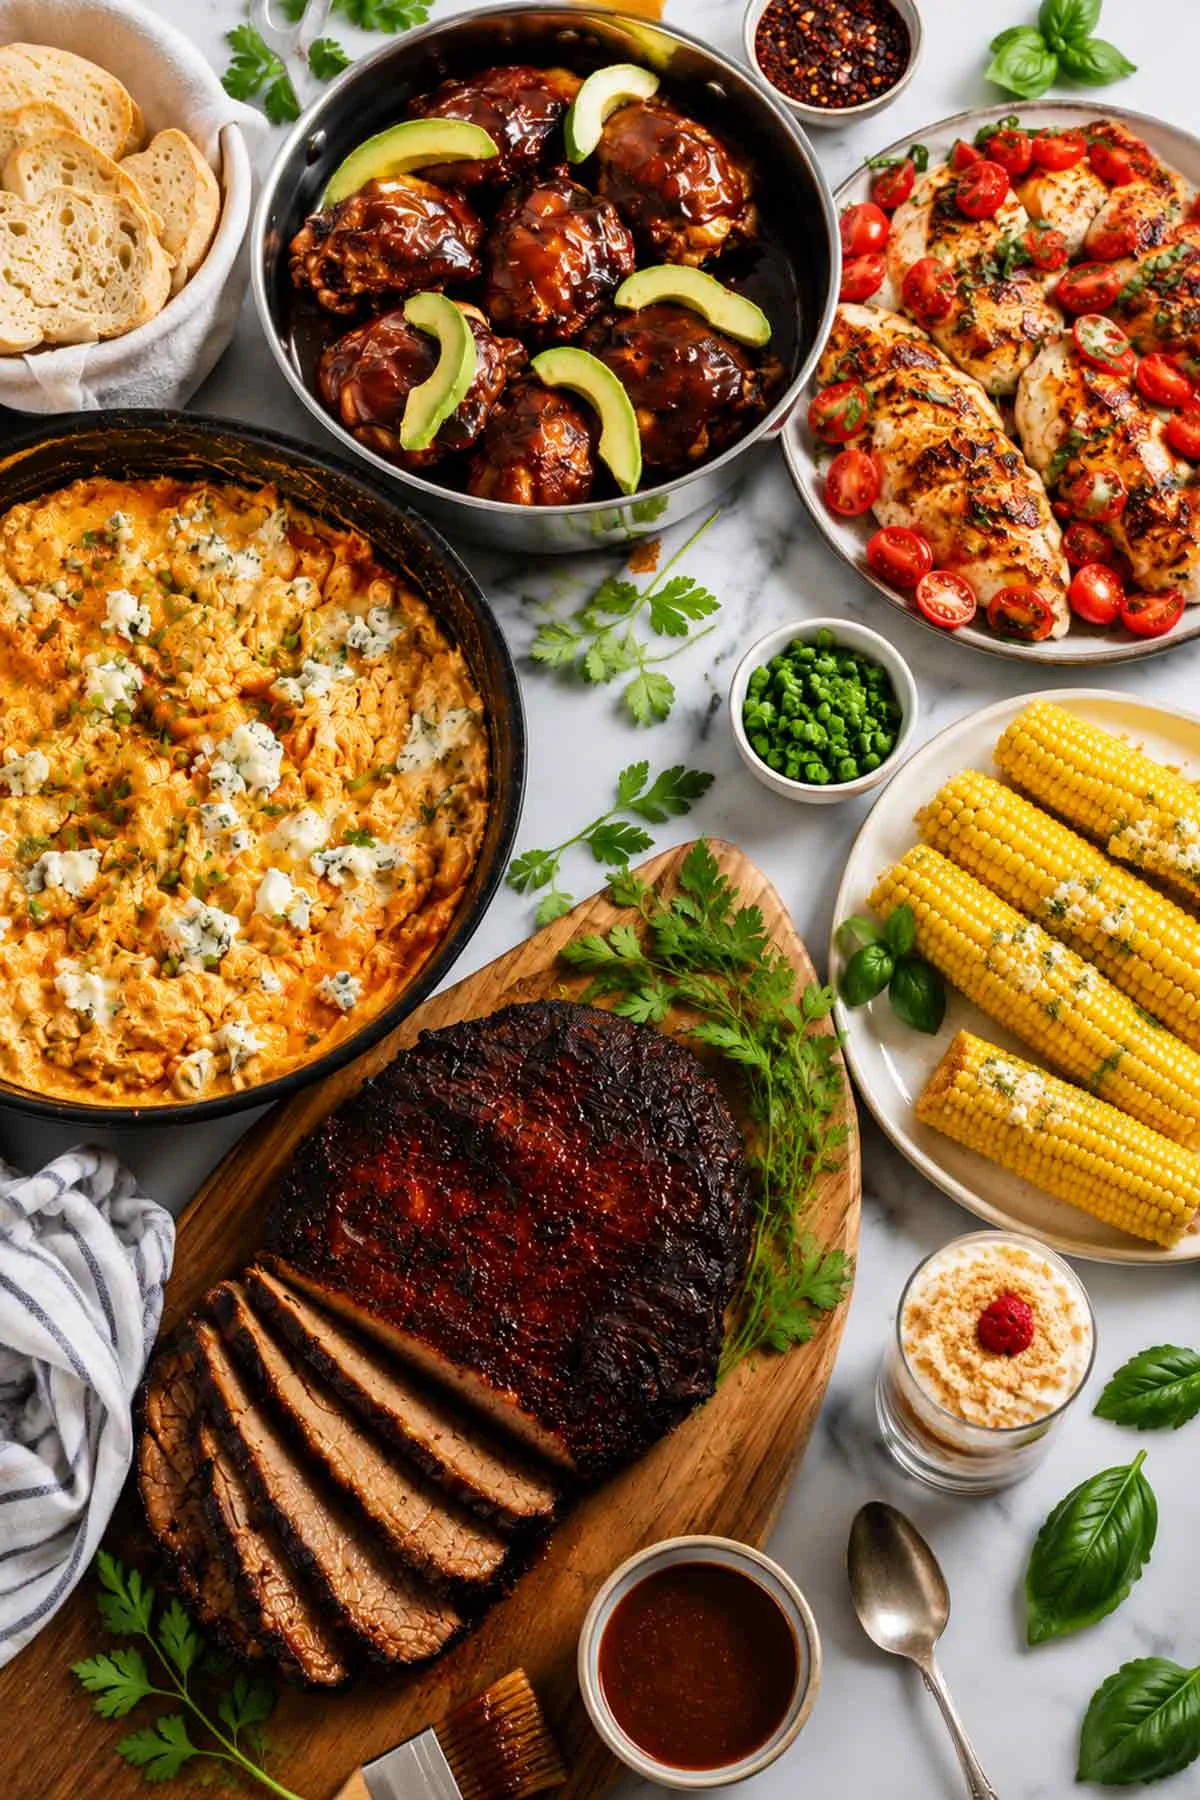
    The menu below is a mix of the heavy barbecue staples people come for and the fresh, light bites that balance them out. Everything here is the kind of thing I’d actually host with — nothing that requires me to be in the kitchen for six straight hours, which is exactly what I don’t have on a long weekend.

    A few things I’ve learned about hosting

    A summer cookout means you’re managing a hot grill, a pile of plates, and a group of people who have all decided to arrive at once. After a few of these in my own backyard, I’ve got a handful of rules that actually keep the day calm enough that I can sit down and eat like the rest of you.

    Let the meat come up to room temperature first. Cold protein straight from the fridge onto a hot grill seizes up and cooks unevenly. I take mine out about twenty minutes before it goes on, and that’s the difference between a proper sear and a tough, gray piece of meat.

    Save the barbecue sauce for the last few minutes. Most of it — store-bought or homemade — is loaded with sugar, and sugar burns fast over open flame. I brush mine on during the last five minutes of cooking, just long enough for it to caramelize and stick without going dark and bitter.
    Keep the cold sides actually cold. Creamy things like potato salad turn on you in late-summer heat. I fill a wide, shallow pan with ice and set the serving bowls right on top of it. The salads stay fresh all afternoon instead of getting warm and a little sad by dinnertime.

    Make the desserts the night before. No-bake treats need time to chill and set anyway, so doing them a day early means one less thing on your plate the morning of. Trust me on this one.

    What is Labor Day, anyway?

    It’s more than just an excuse to light the grill, though we certainly use it that way. The holiday started as a tribute to the American worker, born out of the labor movement’s push for fair wages and better conditions. It was first celebrated as a big street parade in New York City, and President Grover Cleveland signed it into law in June of 1894. It’s now always the first Monday in September — and for most of us, the unofficial end of summer. The last long, warm weekend before the kids are back at school, which is exactly why the backyard grill gets such heavy use.

    Appetizers while the grill heats up

    You need something on the table early, before the meat is ready and people are getting antsy. These are the ones I reach for first.

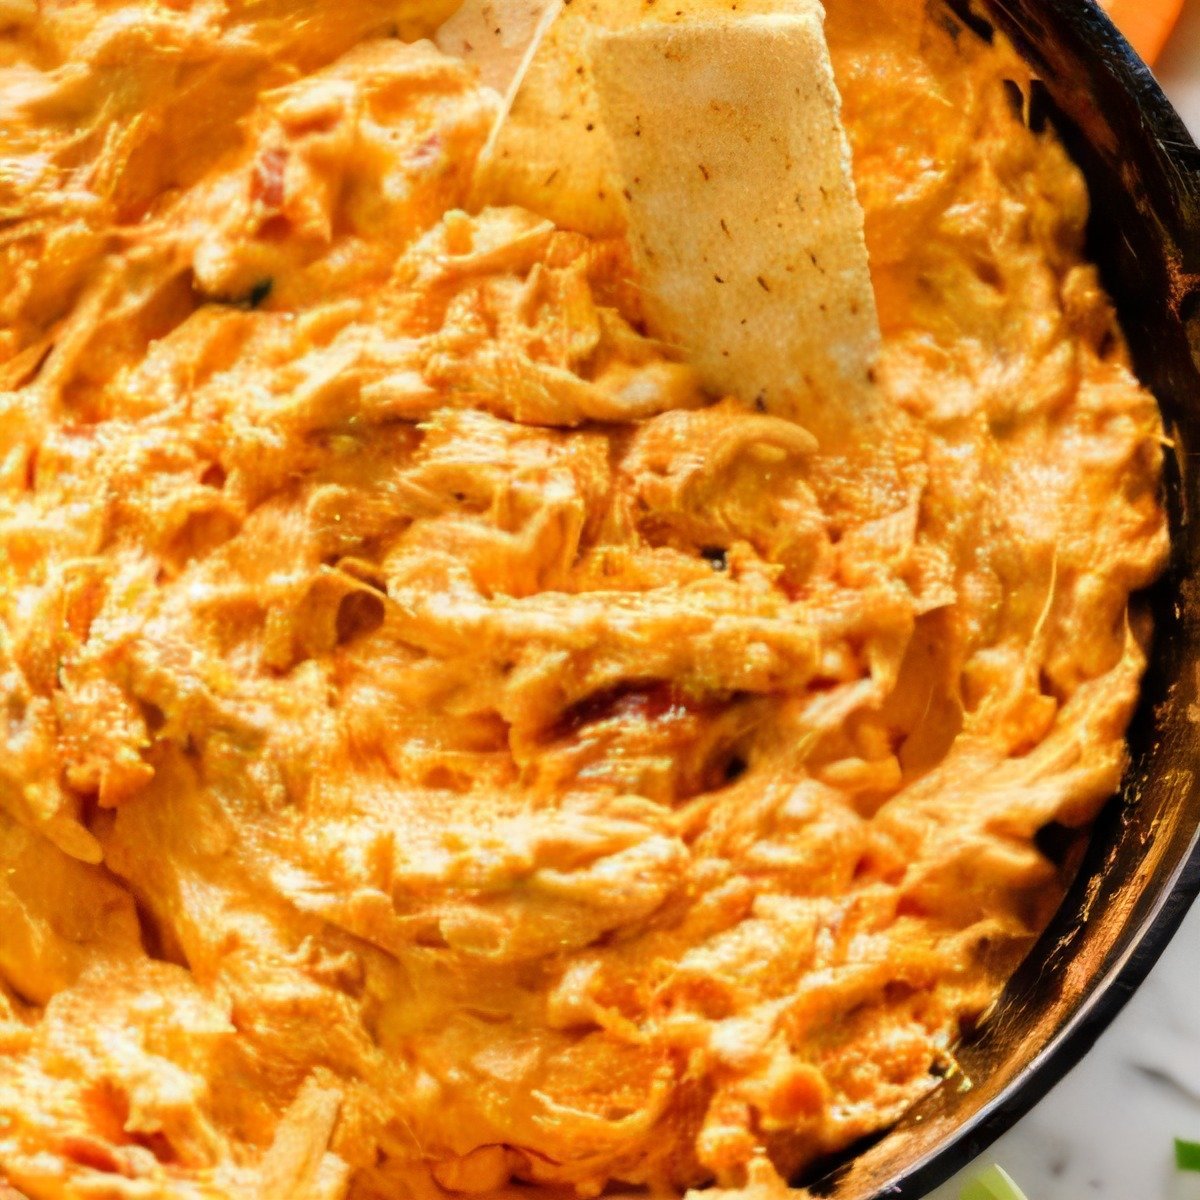
    Buffalo chicken dip is always the first thing to disappear at my house. I use shredded rotisserie chicken to skip a whole step, and the cream cheese base keeps it thick enough that it actually scoops up with celery and tortilla chips instead of falling apart in your hand. If you want the full method, here’s the recipe I’m working from.

    Air fryer mozzarella sticks are the party trick for anyone who wants fried cheese without the mess or the smell. The breading gets a real crunch in just a few minutes, and the cheese melts all the way through inside. It’s the same idea as the deep-fried version, minus the oil everywhere.

    Lemon pepper wings are another first-to-disappear classic. The citrus cuts right through the richness of the chicken, and I use a dry rub that holds to the skin as they bake. They come out crispy and tangy, and you don’t need to stand over a fryer the whole time. This one passed the Tuesday test, which is high praise from me.

    Buffalo chicken dip with celery and chips ready to serve

    The main event

    The secret to a stress-free cookout is picking your hero protein first, then building the rest of the menu around it. Here’s what I’d actually put on the grill.

    Beef brisket is the crowd-pleaser. I rub it with garlic powder, paprika, cumin, and a little chili, then finish it with a barbecue sauce mixed with brown sugar and Worcestershire. It comes out tender with a proper bark on the outside, and it feeds a lot of people from one piece of meat.

    Sticky buffalo chicken thighs are my answer when the usual barbecue sauce is getting old. The chicken gets a real sear in the pan, and the glaze is just honey, butter, and hot sauce — the butter thickens it so it actually clings to the meat instead of sliding off into the pan.

    Garlic tomato basil chicken is the lighter option, and I love having it on the table. Pan-seared breasts cooked with blistered grape tomatoes, fresh basil, and garlic. It’s fast, it’s fresh, and it gives people a real break from the heavier meats.

    And yes, chili dogs belong on the list. You can’t really host a summer cookout without them. I top mine with a thick homemade chili that stays put on the bun instead of sliding off onto your plate, and I set up a toppings bar so everyone can build their own. Biscuit thinks it’s the highlight of the day, and I’m not sure she’s wrong.

    Chili dogs topped with thick homemade chili in buns

    Sides that disappear fast

    You want a balance of hearty and fresh here, and these are the ones that never make it to the second helping.

    Garlic butter corn on the cob — I boil it in a milk and butter base so it picks up flavor from the start, then brush it with a homemade garlic and parsley butter once it’s out. It’s a big step up from plain boiling water, and it’s the first thing people grab off the grill.

    Creamy potato salad is non-negotiable at a barbecue. The dressing coats the potatoes well without turning them mushy, and it gives you a cool contrast against all that hot grilled meat. Make it a day ahead so the flavors settle — it’s actually better that way.

    Twice-baked loaded potatoes are the side that stands out on the table. The skins are stuffed with a chicken, bacon, and mushroom filling in a white wine sauce, topped with Camembert, and finished with a quick drizzle of honey to balance the saltiness of the bacon.

    Macaroni salad — the trick is cooking the pasta just to al dente so it holds its shape when you toss it. I make the dressing with mayonnaise, vinegar, and a touch of mustard, for a clean, tangy finish that cuts right through the richness of the grill.

    And for something with zero cooking: avocado tomato corn salad. The sweetness of tender corn against the creamy avocado — it feels like peak summer, it adds color to the spread, and it holds up fine in the heat.

    Desserts you can make ahead

    I try to avoid firing up the oven in summer if I can help it. These all come together in advance and get served cold, which is exactly what you want after a day of heavy barbecue.

    No-bake pineapple cheesecakes are a great lighter alternative to a dense slice of cake. A graham cracker base with a cream cheese and Greek yogurt filling, and the crushed pineapple adds an acidic bite that keeps it from getting too sweet.

    Strawberries and cream tiramisu parfaits layer strawberries with mascarpone cream in individual glasses. They look nice on the table, they taste light, and they take very little effort to assemble right before guests arrive.

    And if you want a real statement dessert: a New York-style cheesecake made the night before, so it sets up properly in the fridge. It’s the ultimate stress-free option — you do the work early, and it arrives looking like you spent all morning on it.

    A pitcher drink, so you’re not the bartender

    No cookout is complete without something cold to wash down all that barbecue, and the trick is making it in a batch so you’re not playing bartender all afternoon.

    Berry sangria is the one I reach for first. It’s loaded with fresh summer berries and a splash of citrus, and it’s the kind of drink that looks as good as it tastes on the table. The best part: you can mix it up in a big pitcher the night before, and the flavors actually get better as it sits in the fridge.

    If your crowd prefers something stronger, frozen strawberry and mango margaritas are the other reliable option. Just keep a bucket of ice and some salt-rimmed glasses within arm’s reach, and you’ve got a whole station that requires almost nothing from you.

    FAQs

    What’s traditional to serve on Labor Day? Burgers, hot dogs, and barbecue ribs usually take center stage, with potato salad, macaroni salad, and corn on the cob as the go-to sides. The goal is a menu that balances the heavy grilled meats with something fresh and a little acidic.

    Do people actually grill on Labor Day? All the time. Because it’s considered the unofficial end of summer, most of us want to spend the day outside around the grill before the weather turns. It’s the perfect reason to cook heavily outdoors one more time.

    What should a guest bring to a cookout? A cold side or a make-ahead dessert is your best bet — pasta salad, a fresh corn salad, or no-bake treats all travel well. The host will be grateful, because none of it takes up their oven or grill space.

    What’s a good Labor Day dessert? Stick with something you don’t have to bake. Fruit parfaits, no-bake cheesecakes, or a big fruit salad all work. After a full day of barbecue, people usually want something cold and refreshing to finish on.

    A note from Nora

    The first time I tried to host a full-menu cookout like this, I underestimated how much “making it all from scratch” would actually cost me in standing around the kitchen. Now I plan the menu the same way I plan anything else in my life: pick the few things that matter, make the rest ahead, and leave room to actually be a host instead of just a very tired cook. If I can pull this off in my own backyard on a Tuesday, you can pull it off on the last long weekend of summer. Tell me which recipe you’re making first — I’m curious which one wins.

    Keep Reading