Category: Recipes

  • Pineapple Chicken Fried Rice, Ready in Under 30 Minutes

    Pineapple Chicken Fried Rice, Ready in Under 30 Minutes

    I’ve been thinking lately about the takeout question. You know the one — it’s 6:15, nobody has agreed on a restaurant, and the Thai place is exactly one phone call away. I love that phone call. I also love not making it. That’s where this pineapple chicken fried rice earns its place on the rotation.

    Pineapple chicken fried rice being made in one skillet, three stages

    It’s a tropical twist on the fried rice we all know: tender chicken, sweet pineapple, crisp vegetables, and cold rice, all tossed in one big skillet with soy sauce and a little sriracha. Ready in under 30 minutes, and honestly, it costs a fraction of what the takeout would.

    I got this version a couple of years ago from my son and daughter-in-law. The first time I had it at their house, there was no chicken in it, and it was still great. But the chicken breast makes it a complete meal, and the meat-eaters in this house are grateful. This one passed the Tuesday test.

    Why this fried rice works

    • Sweet, savory, with a touch of heat — that balance is what makes it feel like the restaurant version.
    • Under 30 minutes door to table, which is the whole point of a weeknight recipe.
    • Endlessly customizable — swap in whatever vegetables are in your fridge.
    • A cheap, fast answer to the Thai takeout temptation.

    Ingredients

    Makes 6 servings, about a cup each. Prep 10 minutes, cook 18 minutes.

    • 1 pound (about 450 g) boneless, skinless chicken breasts
    • 1 Tbsp (15 ml) olive or vegetable oil
    • 1 medium onion, diced
    • 1/2 cup (about 60 g) diced carrots
    • 1 red bell pepper, diced
    • 3 cloves fresh garlic, minced
    • 3 1/2 cups (about 700 g) cold cooked white rice, long grain
    • 1/2 cup (about 90 g) corn
    • 1/2 cup (about 85 g) peas
    • 1/4 cup (60 ml) soy sauce (or coconut aminos for gluten-free)
    • 1 Tbsp (15 ml) sriracha
    • 1/2 tsp black pepper
    • 1 1/2 cups (about 200 g) chopped fresh pineapple
    • Green onions and salted roasted peanuts, to finish (optional)
    Diced chicken pieces browning in a nonstick skillet

    How to make it

    1. Prep everything first. Cut the chicken into bite-sized pieces. Dice the onion, carrot, and red pepper. Chop the pineapple. Fried rice moves fast, so you want the bowls ready.
    2. Cook the chicken. Heat the oil in a large nonstick skillet or wok over medium-high heat. Add the chicken and cook for 3-5 minutes, until golden brown and cooked through. Set it aside on a plate.
    3. Soften the vegetables. In the same skillet, cook the onion for 3 minutes. Add the carrots and cook 5 more minutes. Stir in the red pepper and garlic and saute another 2 minutes.
    4. Onions and carrots sauteing in the skillet before rice goes in
    5. Combine everything. Add the chicken back along with the rice, corn, peas, soy sauce, sriracha, and black pepper. Stir until everything is well mixed and hot.
    6. Finish with the pineapple. Stir in the pineapple and heat through — just long enough that it warms up but still has some bite. Toss with green onions and a handful of roasted peanuts if you’re using them.

    Tips for the best pineapple fried rice

    • Use cold, day-old rice. Chilled rice is less sticky and fries up separate and a little crisp at the edges. Hot fresh rice steams instead of fries, and that’s where soggy fried rice comes from.
    • Use a big pan. You want room for the rice to brown properly, not steam. A large skillet or wok is the move.
    • Use fresh pineapple if you can. It’s brighter and sweeter. If you only have canned pineapple tidbits, that works too — just drain them well.
    • Scrambled eggs, if you like. Scoot the rice mixture to one side, crack in 2 or 3 eggs, scramble until cooked, then fold into the rice before the pineapple goes in. More protein, very worth it.

    Ways to make it your own

    • Switch the rice — brown rice, short grain, or Thai jasmine all work.
    • Shift the flavor with a little curry powder, sesame oil, fish sauce, or oyster sauce.
    • Swap the protein — shrimp, pork, or skinless chicken thighs all fit right in.
    • Add different vegetables: broccoli, celery, snow peas, and edamame all do great here.

    FAQ

    Can I make this in advance? Yes — it’s a great make-ahead meal. Cook it 2 or 3 days ahead and store it in the fridge. Reheat it in a skillet or the microwave.

    What if I don’t have leftover rice? Cook some and let it cool and dry out first. Spread it on a baking sheet, break up the clumps, and put it in the fridge or freezer for a few minutes. If you dump hot rice straight into the pan, the extra moisture turns the whole thing clumpy and soggy.

    How long does it keep? Leftovers are fine in an airtight container in the refrigerator for 4 to 5 days. I freeze individual portions for busy-day lunches — thaw in the fridge overnight or microwave straight from frozen.

    One note from Nora: the first time I made this, I ran out of fresh pineapple and used canned. It turned out fine, but the second time I went back to fresh and you can taste the difference — it’s brighter, and the sweetness is more delicate. The dish is forgiving, and it’s the kind of thing the whole table eats in one sitting. If I can make it on a Tuesday, it’s a keeper.
    Keep Reading

  • Macerated Strawberries (10 Minutes of Actual Work)

    Macerated Strawberries (10 Minutes of Actual Work)

    There’s a moment in every July when the farmers market starts selling the kind of strawberries you can tell were grown to be eaten, not displayed. That’s my signal. I go home, I wash them, and before long there are berries in the bread box, berries in the salad bowl, and a slow build-up of whatever else they end up in.

    Glossy macerated strawberries in a white ceramic bowl with a wooden spoon

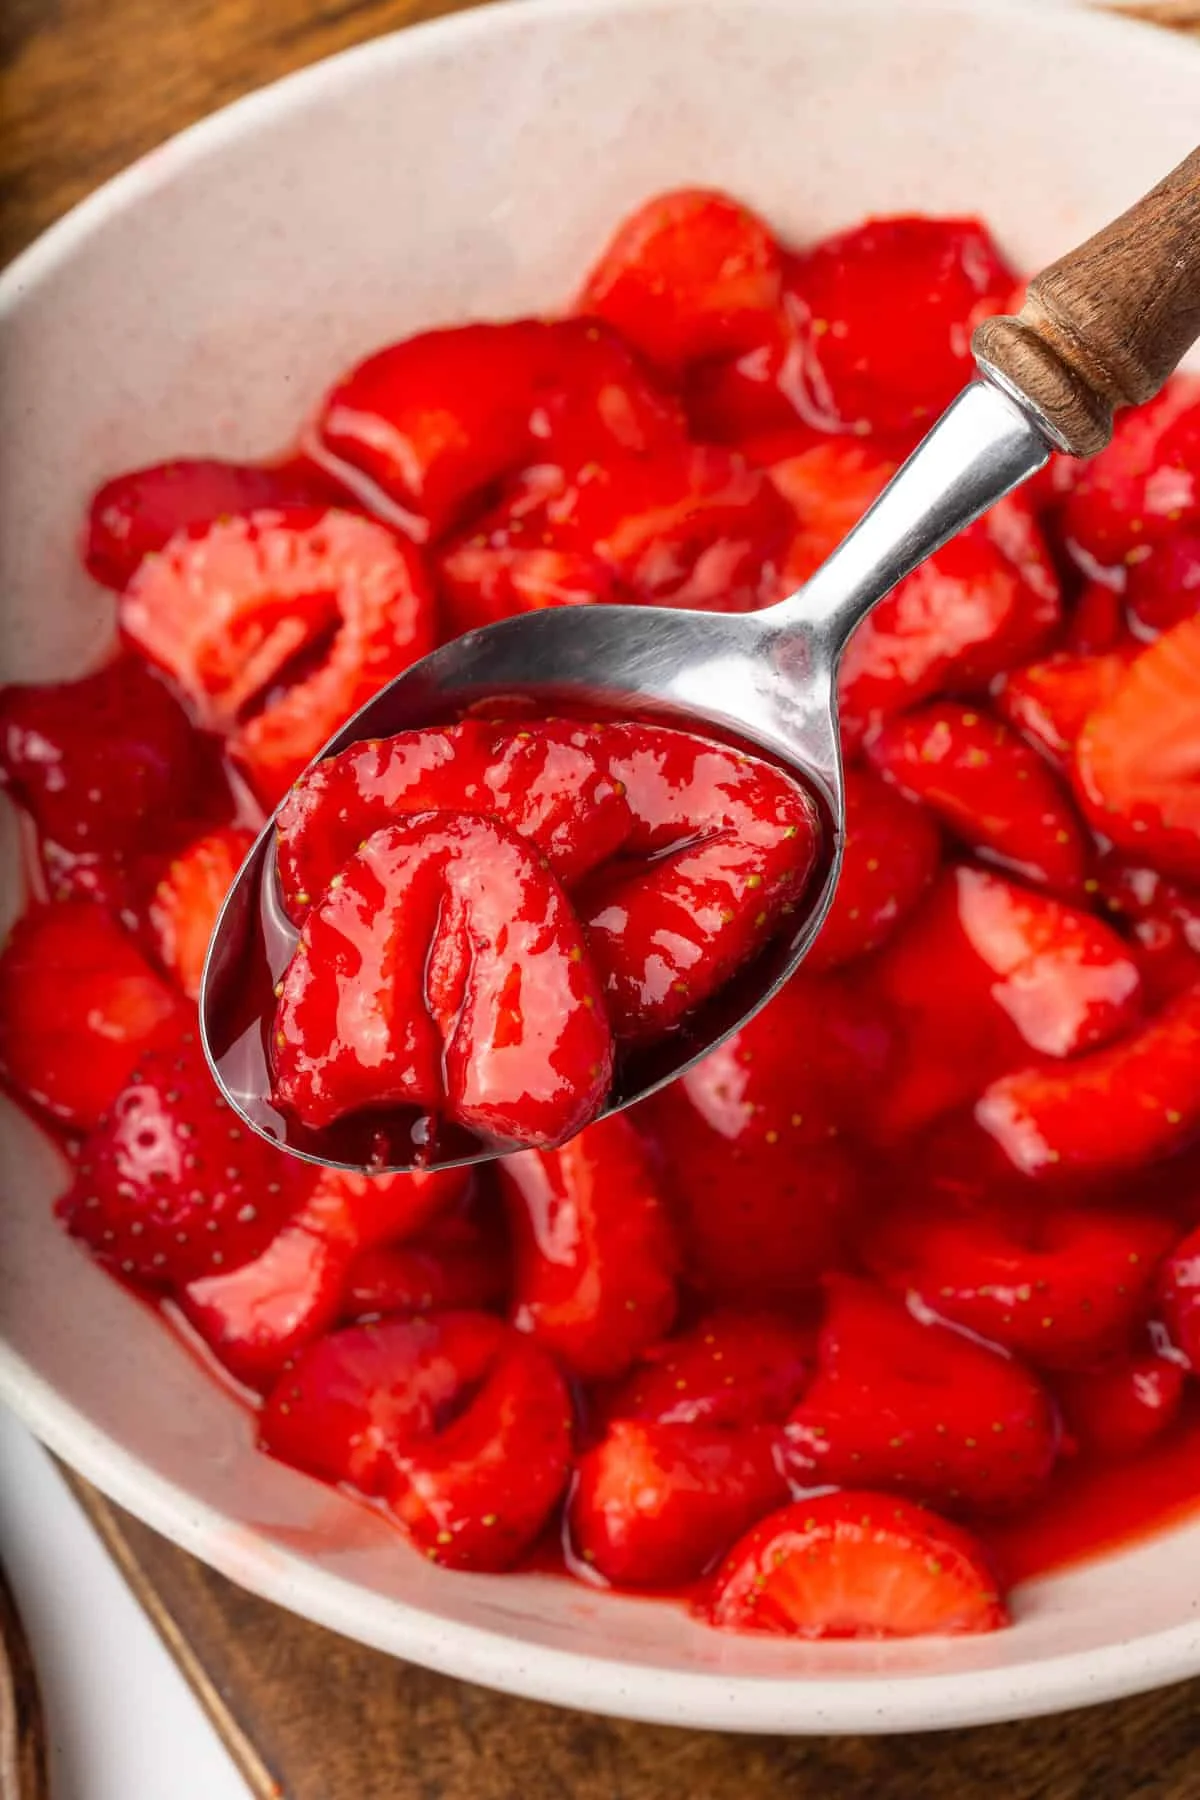
    Macerated strawberries are my favorite of the season. You toss the berries with sugar, lemon juice, vanilla, and a tiny pinch of salt, and you basically do nothing for the next half hour. When you come back, they’ve softened and released their juices, and the sugar has turned into the most unbelievable glossy syrup.

    The whole thing takes 30 to 70 minutes start to finish, depending on how soft you want the berries. Almost all of that is just… sitting in another room while the fruit does its thing.

    Why This Is a Summer Staple

    Five ingredients, no cooking, and you could be out of the kitchen in 10 minutes if you’re in a hurry. The berries come out incredibly juicy and syrupy without needing boatloads of sugar — the fruit’s own juices do most of the sweetening.

    They’re the kind of thing that looks fancy on a plate but costs you nothing in effort. And they keep well, so if you’re making a double batch, you’ve got dessert covered for several days.

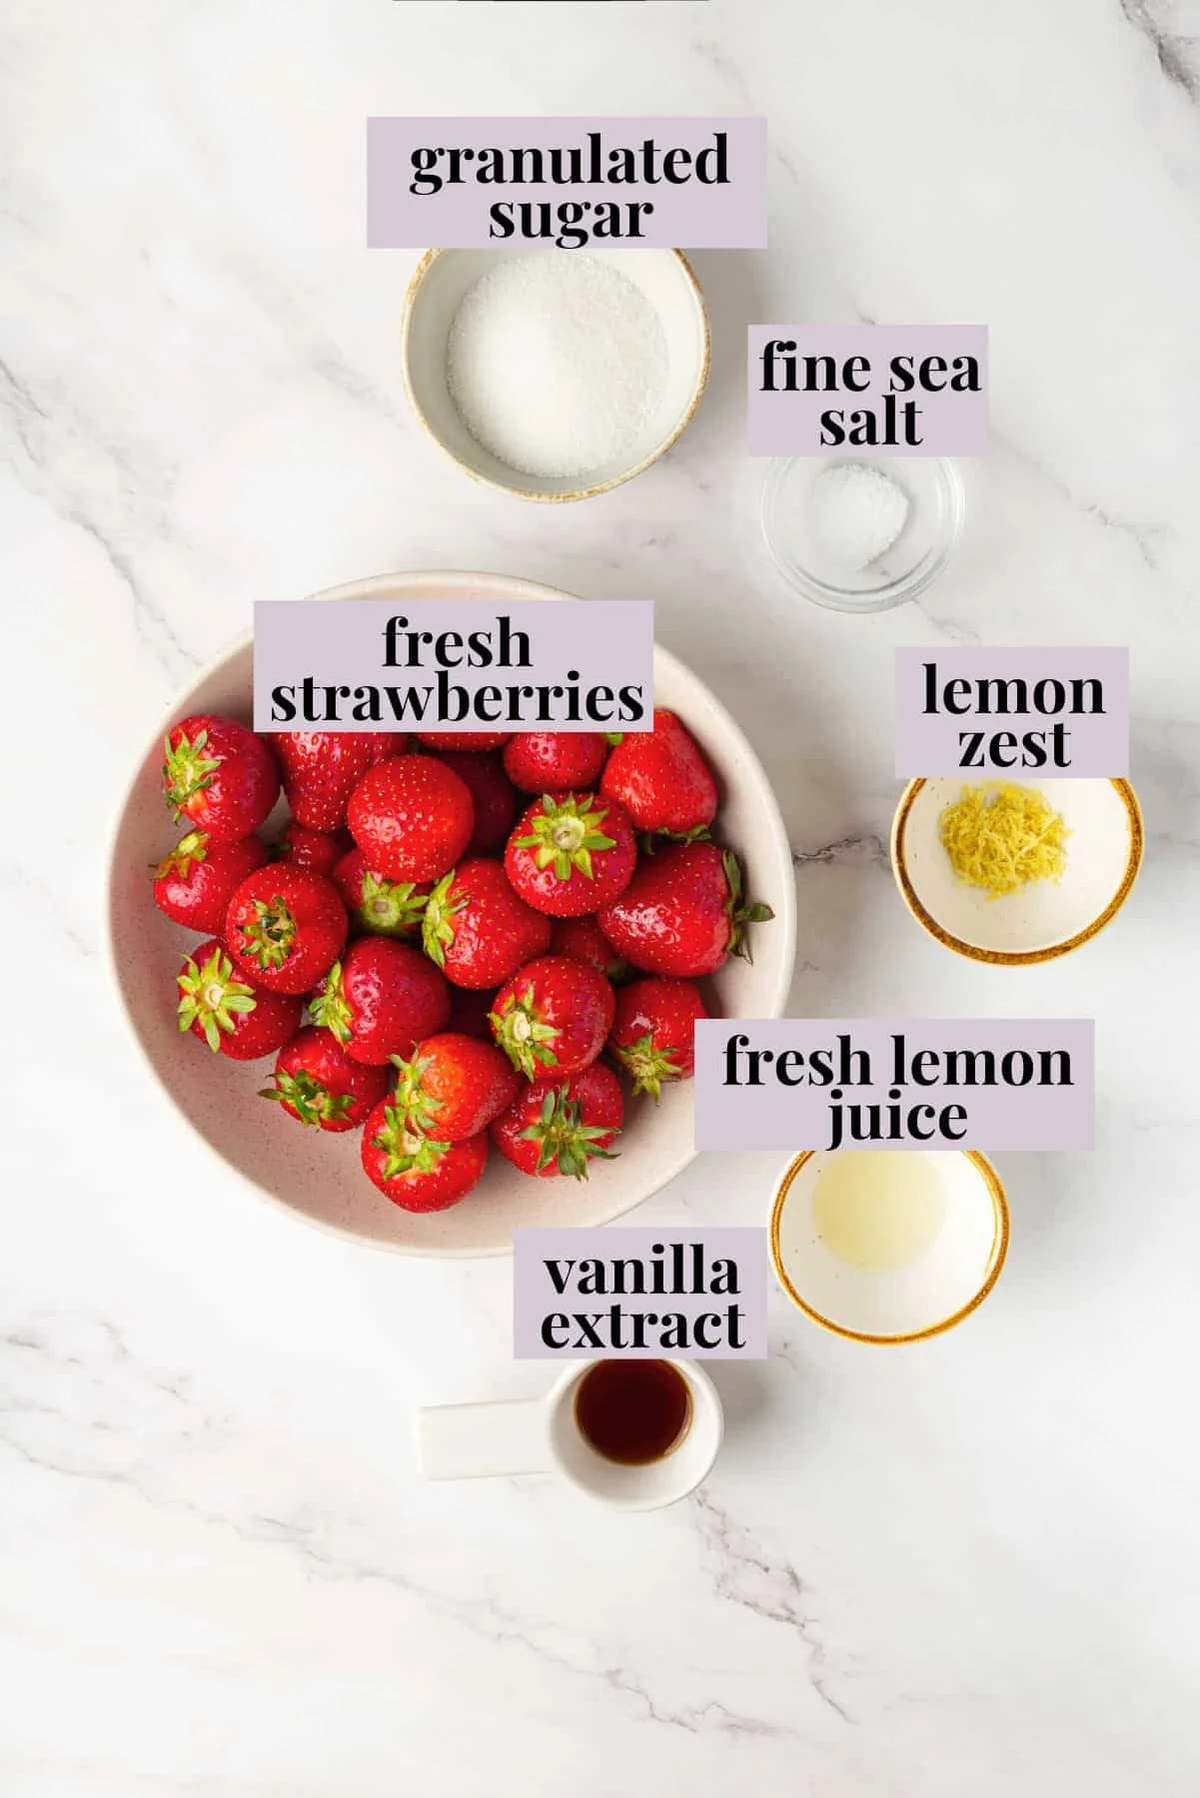
    Five macerated strawberry ingredients arranged on white marble

    What You’ll Need

    Just five things (the recipe card below has the full measurements):

    • Fresh strawberries — Farmers’ market if you can. Look for deep red berries. I prefer the smaller ones; they tend to be sweeter.
    • Granulated sugar — You could use brown sugar, but it adds a molasses note that takes away from that fresh, summery feel, in my opinion.
    • Vanilla extract or vanilla bean paste — deepens the flavor a little.
    • Fresh lemon juice — balances the sweetness. You won’t really taste it unless you add zest.
    • A tiny pinch of fine sea salt — brings out the berries and keeps the whole thing from tipping too sweet.

    Lemon zest is optional. I like the bright citrus lift it gives, but skip it if you want a cleaner strawberry-vanilla flavor.

    What “Macerating” Actually Means

    It’s a fancy word for a simple thing: the strawberries sit in the sugar, lemon, and vanilla, gradually soften, and release their juices. The juices mix with the sugar and turn into a smooth, glossy strawberry syrup. That’s all there is to it.

    How to Macerate Strawberries

    1. Rinse and pat dry. Rinse the strawberries under cold water, then pat them completely dry with a clean towel. This matters — dry berries mean less watery syrup later.
    2. Hull and slice. Remove the green tops and slice the berries into even pieces. Cut very large ones into quarters; halve or thickly slice the smaller ones.
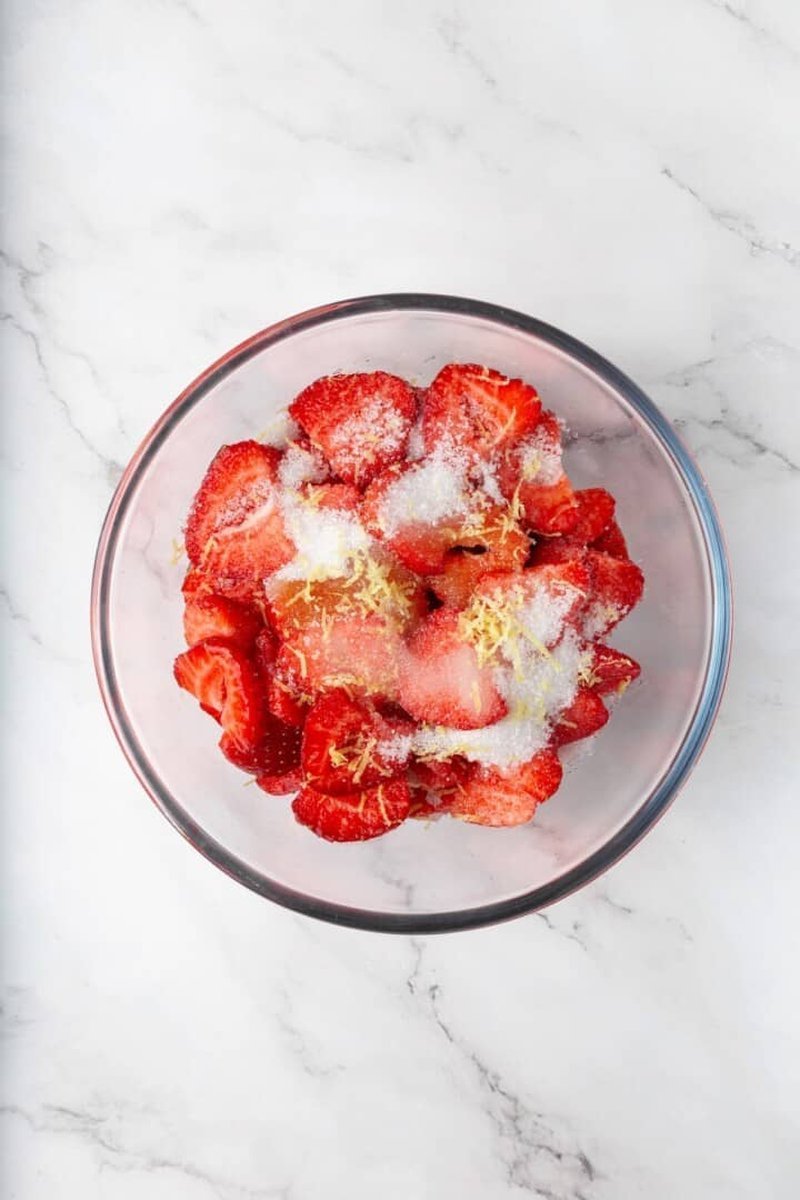
    3. Sliced strawberries being tossed with sugar and lemon zest
    4. Combine. In a medium bowl, add the sugar, vanilla, lemon juice, lemon zest (if using), and a small pinch of salt. Gently toss until the berries are evenly coated.
    5. Let them sit. Set the bowl at room temperature for 20 to 60 minutes, stirring once or twice. Twenty minutes gives you firmer berries; an hour gets you soft, juicy, syrupy.
    6. Serve. Eat them straight out of the bowl, or spoon them over whatever you’re having. Don’t skip the syrup in the bottom of the bowl — drizzle it over the top.
    Macerated strawberries in a speckled ceramic bowl with a wooden spoon

    Ways to Use Them

    Straight out of the bowl, they’re that good. But they’re even better as a topping:

    • Spoon them over yogurt and granola
    • Lay them on waffles or pancakes with a little whipped cream
    • Cut biscuits in half and sandwich strawberries and cream between them for a quick strawberry shortcake
    • Dump a scoop over vanilla ice cream or a warm mug cake
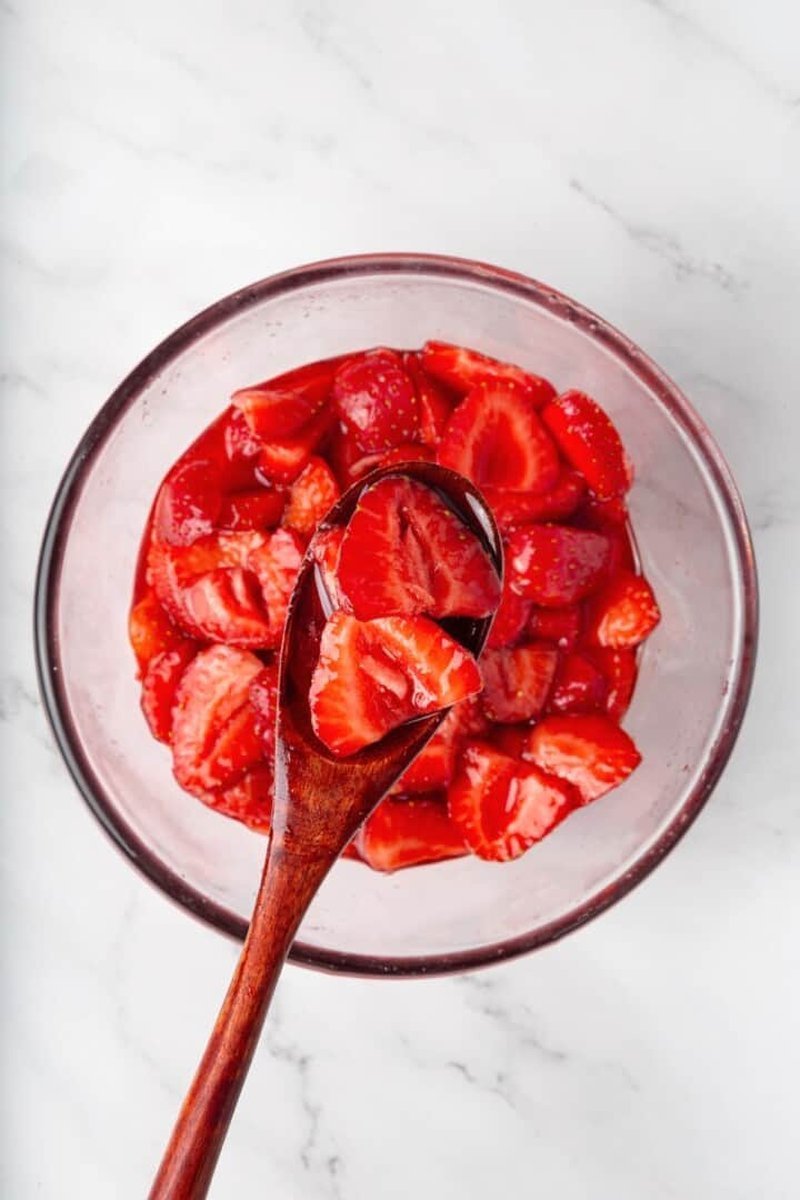
    Spoonful of syrupy macerated strawberries being lifted from a glass bowl

    Storage

    In an airtight container, macerated strawberries keep in the fridge for up to 5 days. You can also freeze them in a freezer-safe container for up to 3 months — just thaw them in the fridge before serving. Frozen-and-thawed berries will be a bit mushier and more watery, but they still taste amazing.

    A Note From Nora

    Here’s the first version of this I made last summer: I rushed the sit time because I was hungry, and I ended up with sugar-coated berries and a dry bowl. That was the lesson. The 20-minute minimum isn’t a suggestion — it’s the whole point. After that, this is the easiest “treat” I make all summer, and it passed the Tuesday test on the very first try.

    If I can make it on a Tuesday, it’s a keeper.
    Keep Reading

  • Healthy Salad Dressings I Actually Make: 14 Bottles That Retired the Store-Bought Shelf

    Healthy Salad Dressings I Actually Make: 14 Bottles That Retired the Store-Bought Shelf

    I eat a lot of salads. I’ll be honest about that without the photo of the week at the farmers market to prove it. The trick is not the greens — it’s the dressing. No amount of crisp lettuce tempts me to eat a sad, dry bowl, but a perfectly matched drizzle changes the whole meal. I use a creamy Caesar to add heft to sturdy lettuces and roasted vegetables, my balsamic vinaigrette for steak salads when I want something naturally sweet, and I always, always default to lemon vinaigrette to add life to the simplest side salad of the week.

    Three fresh plated salads with strawberries, feta, and vinaigrette drizzled on top

    So think of this as a mix-and-match system. Need something creamy for a dinner that’s already happening? Tangy to cut through a rich plate? A little sweet for a spinach salad? There’s a bottle for it. I even toss these with roasted vegetables or use them as a marinade, which is the best time-saver I know.

    How to pick: the 3 questions I ask first

    Before you reach for anything, ask yourself these three:

    • Is this a side salad for a dinner that’s already heavy? If yes, grab a bright vinaigrette. Something with acidity does the work of cutting the richness.
    • Is this a heartier bowl — grains, roasted veg, protein? Then go creamy. A light vinaigrette gets lost in those; a creamy dressing makes it feel complete.
    • Is there something sweet or salty on the plate? A slightly sweet dressing brings contrast and makes the savory parts pop.

    Here’s every bottle in my rotation, organized the same way.

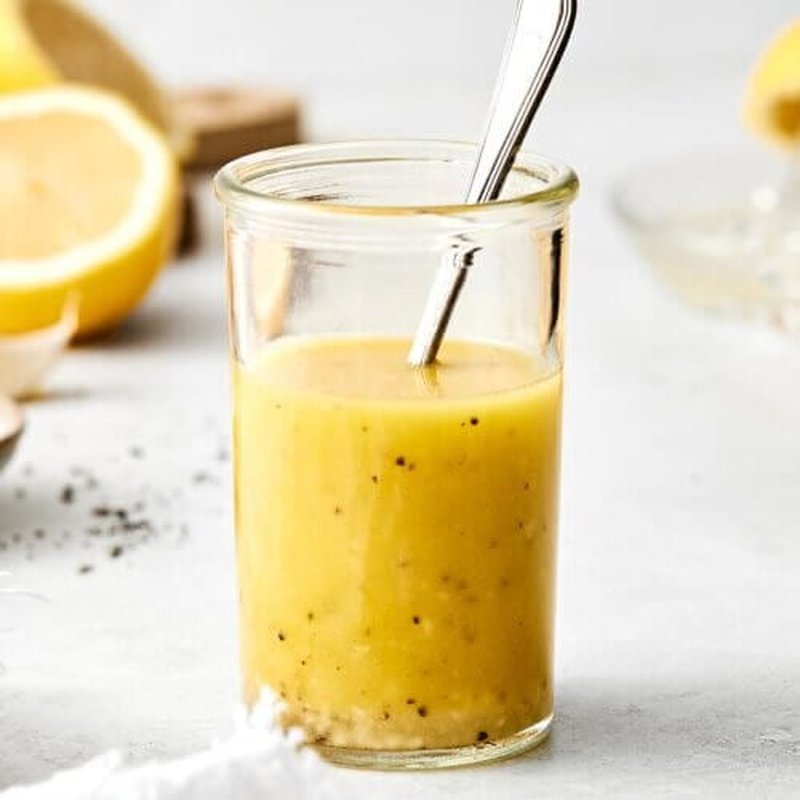
    Lemon vinaigrette in a small clear glass bottle with a lemon garnish

    Bright and Tangy Vinaigrettes

    These are the ones I make most often. They’re light, fresh, and the easiest way to brighten a simple bowl of greens without weighing it down. I reach for these:

    • I’m making a quick side salad to go with dinner.
    • The meal is rich and needs some acidity to balance it.
    • I want something that gently coats the greens without making them soggy.

    A note on nutrition: vinaigrettes are the lightest option on this list. They keep things bright without adding much at all, which is why they’re my first reach for most weeknight salads. Within a group, some use less sweetener; swap harder or more tart if you’re sensitive to sugar.

    1. Lemon Vinaigrette

    The one I make most often. Bright, fresh, and it pairs so well with just about any salad. I especially love it on a simple arugula salad, chickpea salad, or quinoa salad. It’s the default for the weeknight arugula side that goes with almost every meal I make.

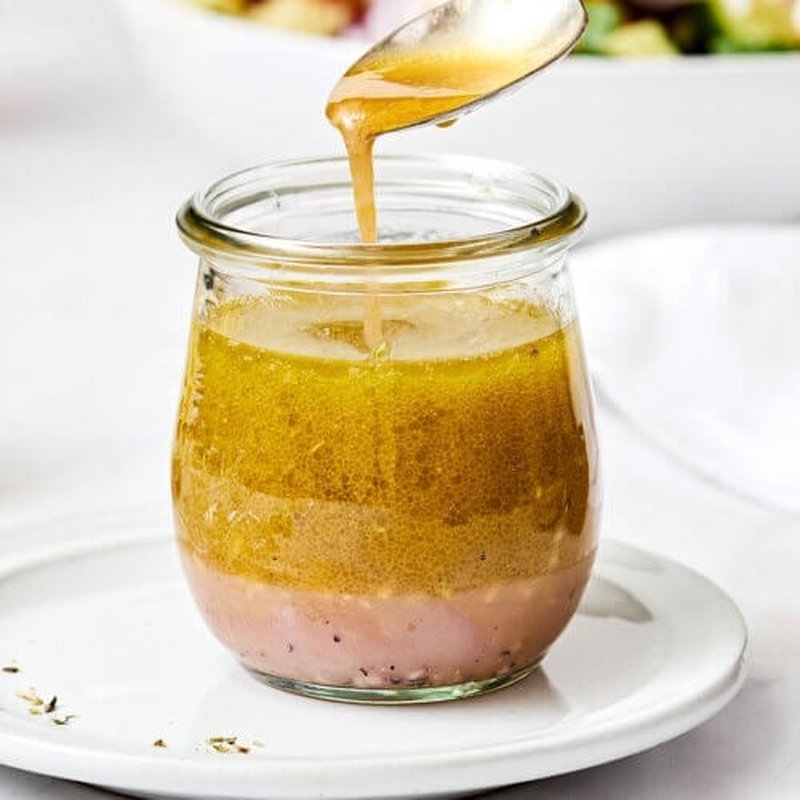
    2. Balsamic Vinaigrette

    The slightly sweet and tangy mix of flavors instantly elevates any salad. It adds a wonderful contrast to a strawberry salad and complements a summer steak salad so well. When the plate is rich or warm, this is the one that balances it.

    3. Easy Italian Dressing

    I love the bold, herby flavors in this one. It’s perfect for when I’ve got lots of veggies in the mix and want something that ties everyone together. I also like to drizzle it over antipasto skewers for a simple, fresh appetizer before dinner.

    4. Greek Salad Dressing

    A classic, made better at home. It’s briny, punchy, and perfect for Greek salad or any Mediterranean-style bowl with cucumber, tomato, and olives. If the salad already has a lot going for it, this keeps things fresh and simple.

    5. Apple Cider Vinaigrette

    Softer and less sharp than some of the others. That makes it great for fall-inspired salads or anything with apples or roasted vegetables — the kind with kale, apples, and chicken that shows up in my rotation every autumn.

    6. Citrus Lime Vinaigrette

    This gives any salad an extra punch of fresh, zesty flavor, and it tastes incredible on a pulled pork salad. When the protein is a little heavy or smoky, I want something like this to cut through.

    7. Dijon Vinaigrette

    Similar to my lemon vinaigrette, but goes a little heavier on the sharp Dijon mustard. If you like a brighter, spicier punch, this is the one to try. I keep it in rotation whenever the lemon one feels too safe.

    8. Champagne Vinaigrette

    A go-to when I don’t want the dressing to overpower the salad. It pairs just as beautifully with peppery arugula as it does with baby spinach. I love drizzling it on a smoked salmon, avocado, and arugula salad — quiet, clean, nothing screaming for attention.

    Close-up plated creamy salad dressing in a small glass bowl

    Creamy Salad Dressings

    These are my favorites for heartier ingredients — roasted vegetables, grains, or proteins. A vinaigrette can sometimes get lost in those, but a creamy dressing makes the bowl feel complete. While a few of these use homemade mayonnaise, you can swap in Greek yogurt for a creamier, protein-forward swap that still works on a packed night.

    A note on calories and creaminess: creamy dressings weigh more on your plate — and on your evening — than vinaigrettes do. I’m not counting calories, but I do feel the difference. I always start with less and add more as I go; that’s the difference between a perfectly coated salad and one that feels heavy.

    9. Most Delicious Caesar Dressing

    A must for Caesar salad, of course. But really, you can use it for any bowl of hearty greens, especially ones with grilled chicken. Its rich, garlicky flavor pairs so well. On weeknights I skip the croutons and use it as a topping for grilled chicken and sturdy lettuce.

    10. Ranch Dressing

    I love this ranch dressing paired with hefty chicken salads — the kind with chicken and bacon, or even a Cobb. It makes each plate so satisfying, and my version has a cleaner ingredient list than any store-bought option I’ve tried.

    11. Coleslaw Dressing (So Easy!)

    The dressing really does make or break coleslaw. I find that store-bought versions just don’t compare when it comes to fresh flavor and the perfect texture. I make this in a jar and keep it in the fridge for a week to go with any bowl.

    12. Maple Mustard Tahini Dressing

    The tastiest blend of slightly sweet and nutty flavors, which makes it perfect for heartier fall and winter salads — like sweet potato salad — grain bowls, or roasted vegetables. This is the one I reach for when the plate is already dark and earthy.

    13. Avocado Dressing

    I’ll drizzle this dressing on any salad where I’d typically go heavy on avocados. Think Tex-Mex flavors in a southwest chicken salad or even a taco salad. It’s creamy without being rich, and it tastes like it should be.

    14. Lemon Tahini Dressing

    A little brighter than the maple mustard tahini, and one I reach for when I still want creaminess but with a fresh, citrusy edge. I love this with Mediterranean or Middle Eastern roasted vegetables — things that have a bit of a burn to them.

    Raspberry vinaigrette with fresh raspberries garnish in a small glass bottle

    Sweet and Fruity Vinaigrettes

    These are the dressings I pull out when a salad needs a little contrast. A touch of sweetness really does make everything more interesting, especially when paired with salty cheese, nuts, or anything savory. The sugar here is mostly from the fruit itself, which keeps these closer to a vinaigrette than a dessert — a gentler, fruit-first sweetness.

    15. Raspberry Vinaigrette

    Bright, slightly sweet, and perfect with goat cheese, nuts, or a simple spinach salad with fruit — like a berry spinach salad. In summer this is the one I use on warm afternoons when a salad needs to feel like a treat.

    16. Cranberry Vinaigrette

    A little deeper and more tart than my raspberry. Seasonally appropriate in the fall or with heartier greens, especially when I have leftover cranberries from the holidays. I plan for the leftovers around Thanksgiving and keep a batch through the colder months.

    A note from Nora

    The first version of this system I tried was worse. I had too many creamy dressings and not enough bright ones, which meant the week ended with a fridge full of bottles and the same three salads in rotation. The fix was simple: two vinaigrettes, two creamy, one sweet. Now every week I’m making a new combination from a small set of things. If I can make it on a Tuesday, it’s a keeper — and a jar of dressing in the fridge keeps that promise.

    Do you have a dressing that works this hard in your kitchen? I’d love to hear what you make most often in the comments below. And if you want more healthy food inspiration without the diet-app aesthetic, my free newsletter“>join here — I send the recipes that actually made it to the table.

    Keep Reading

  • Why Watermelon Belongs in Everything This Summer

    Why Watermelon Belongs in Everything This Summer

    Every summer I buy a watermelon bigger than I have any business buying. It looks perfectly reasonable in the store, and then it sits on my counter for a week while the rest of us negotiate with it.

    Bright watermelon salad with feta and herbs in a glass bowl

    Here’s the thing: it never lasts. By the time that melon is gone, I’ve worked it into at least three different dishes, which is why I’ve quietly stopped calling it a fruit and started calling it a whole meal system.

    I’m not a professional cook. I’m the person who plans a nice dinner and then realizes in the late afternoon that I haven’t chopped anything. So if I can make watermelon work in my kitchen, it’ll work in yours.

    Why watermelon wins all summer

    It’s at its sweetest right now, which means you don’t have to do much to make it taste good. A whole melon stretches across breakfasts, snacks, salads, and drinks, which is a lot of eating for the price of one watermelon at the store.

    And it’s more than 90% water. On a hot Portland afternoon, that’s the difference between a snack and actually feeling cooled down.

    The other thing people miss: it goes sweet or savory. Feta, herbs, lime, chili powder, smoothies, cocktails — the mild sweetness plays nice with almost everything.

    How to pick a watermelon that’s actually ripe

    I’ve bought my share of disappointing ones, so I’ve learned to look for a few things in the store:

    Watermelon on a cutting board, ready to be cubed
    • Creamy yellow field spot. That’s where the melon rested on the ground. The deeper the yellow, the longer it had to ripen.
    • It should feel heavy. A ripe melon is dense with juice, so it should feel heavier than its size suggests.
    • Dull, not shiny. Glossy rinds tend to be less ripe than matte ones. Trust the flat finish.
    • Even shape. Round or oval are both fine. Skip the ones with big flat spots or odd bumps.

    Once it’s home, I cut it into cubes first, then let the week decide what it becomes.

    Three ways I’ve actually used it this week

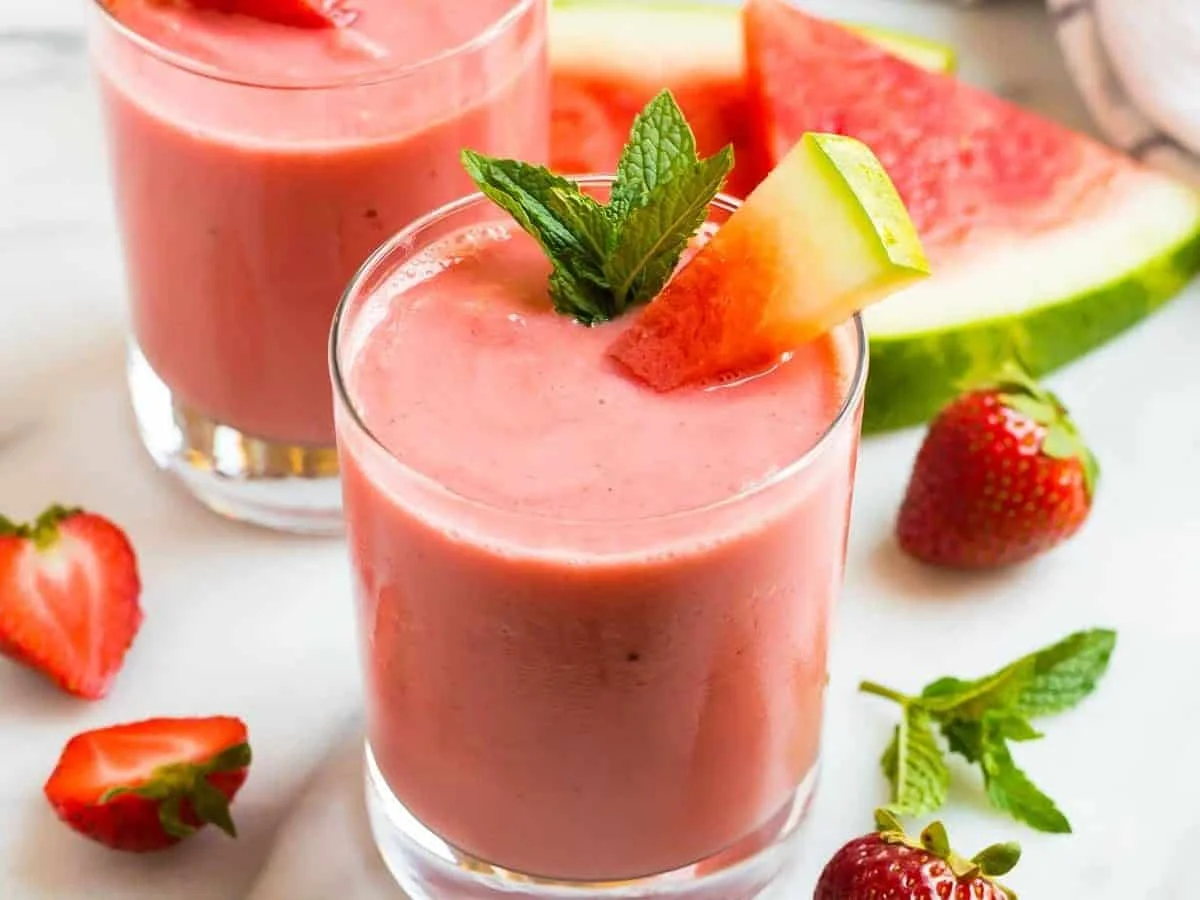
    Watermelon smoothie

    Two glasses of creamy pink watermelon smoothie

    Watermelon practically makes its own smoothie. Blend it with fruit and yogurt and you’ve got a cool, bright breakfast or an afternoon pick-me-up that doesn’t require any cooking. On hot mornings, it’s the whole meal.

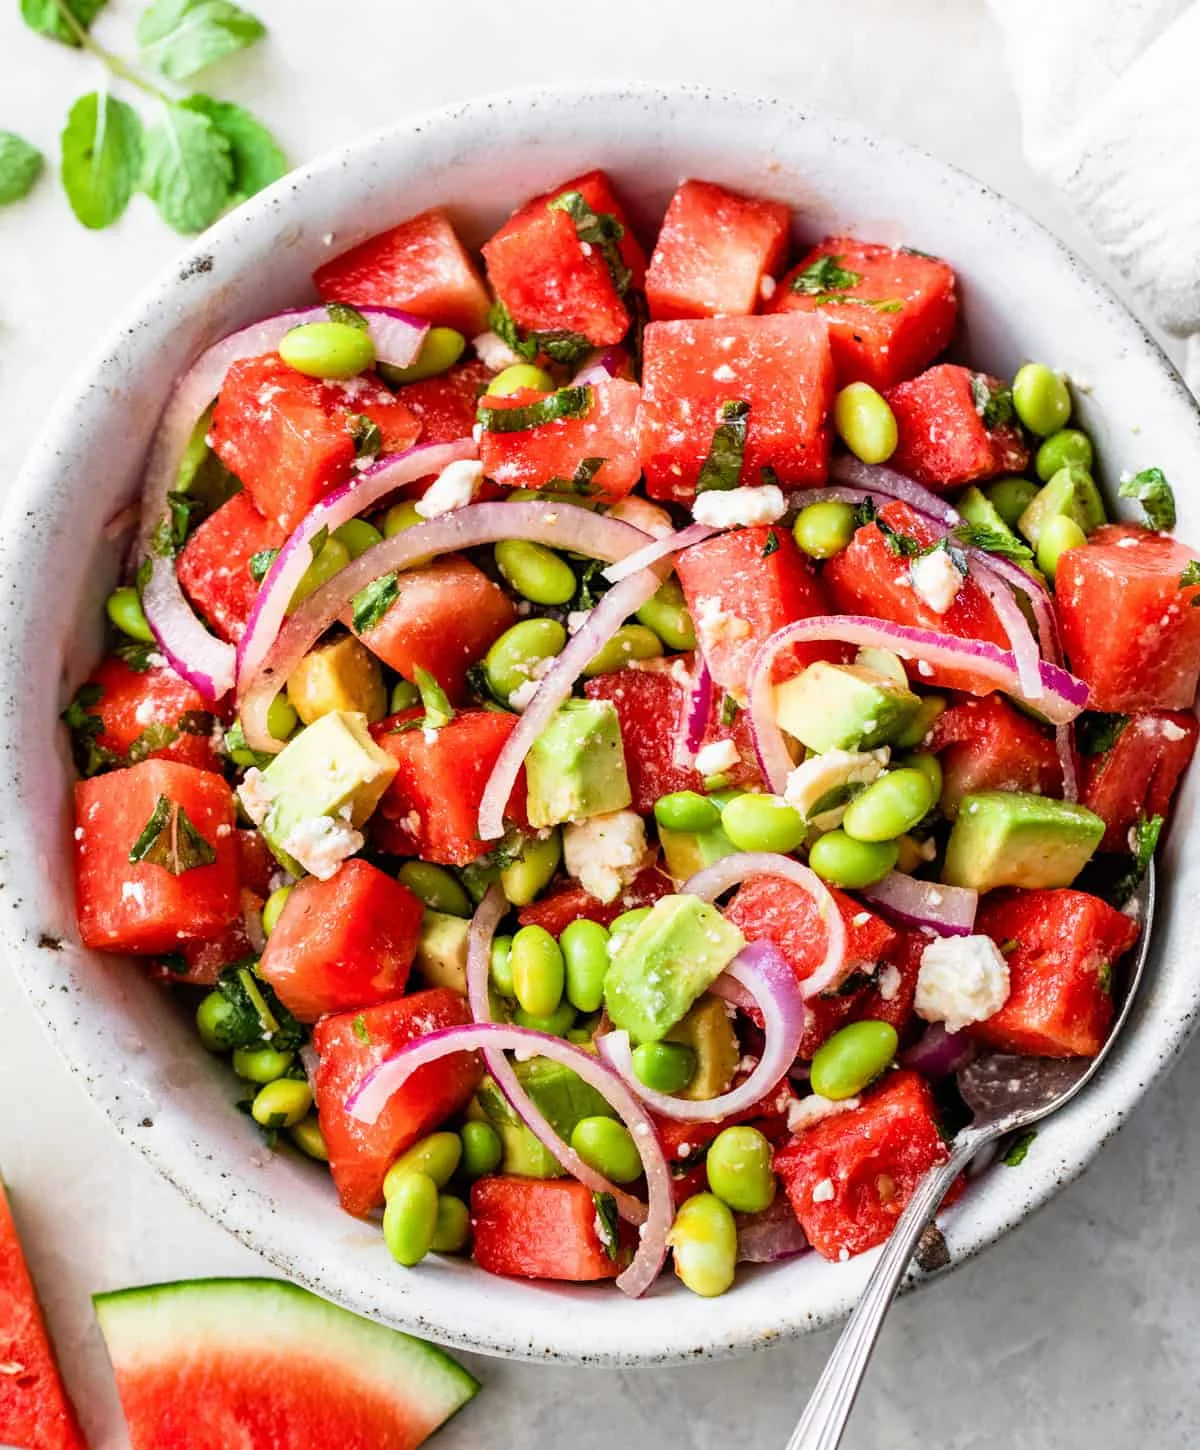
    Watermelon salad with feta and avocado

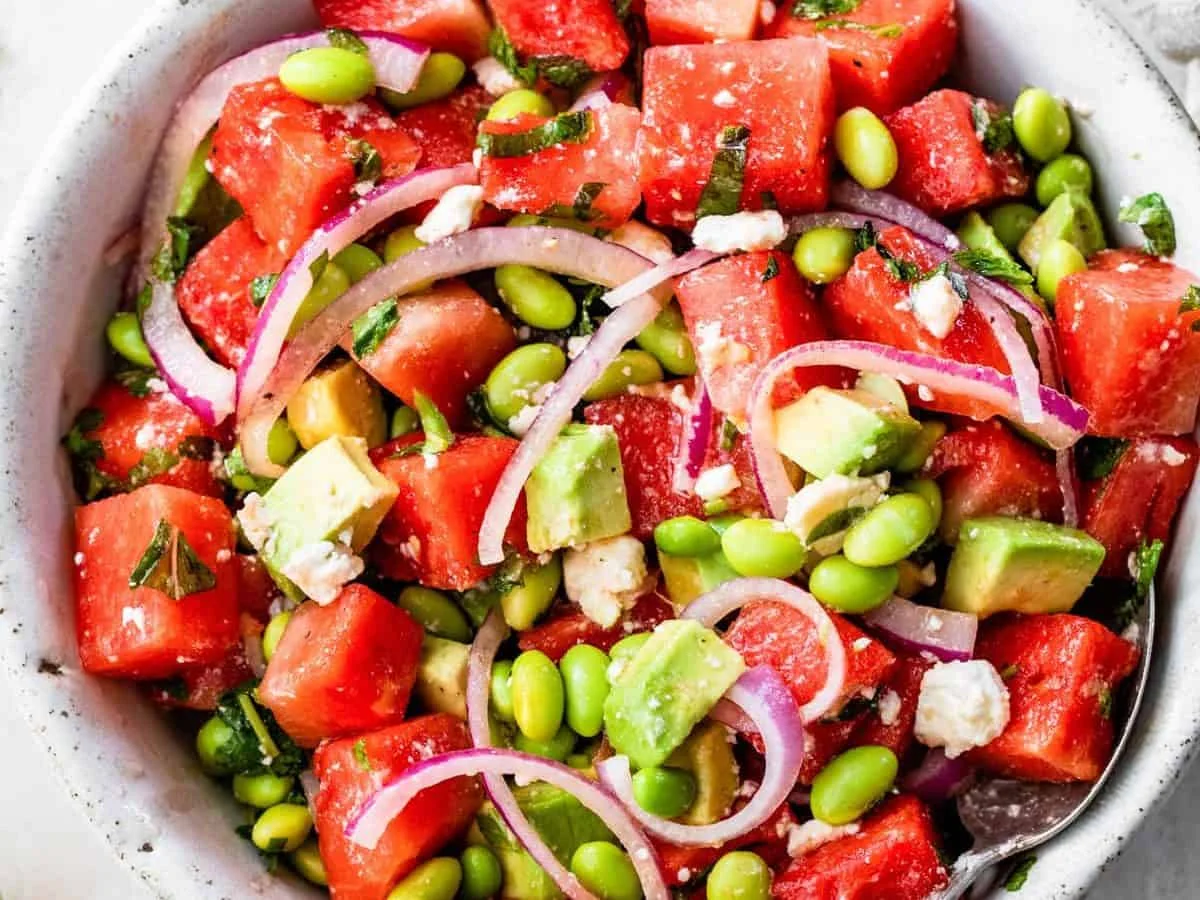
    Watermelon and feta salad with avocado in a bowl

    This is the one that convinces people watermelon belongs outside the fruit bowl. Sweet melon, salty feta, fresh herbs — it’s the kind of plate that sits happily next to anything coming off the grill on a weekend.

    Full recipe: watermelon salad with feta and avocado

    Watermelon margarita

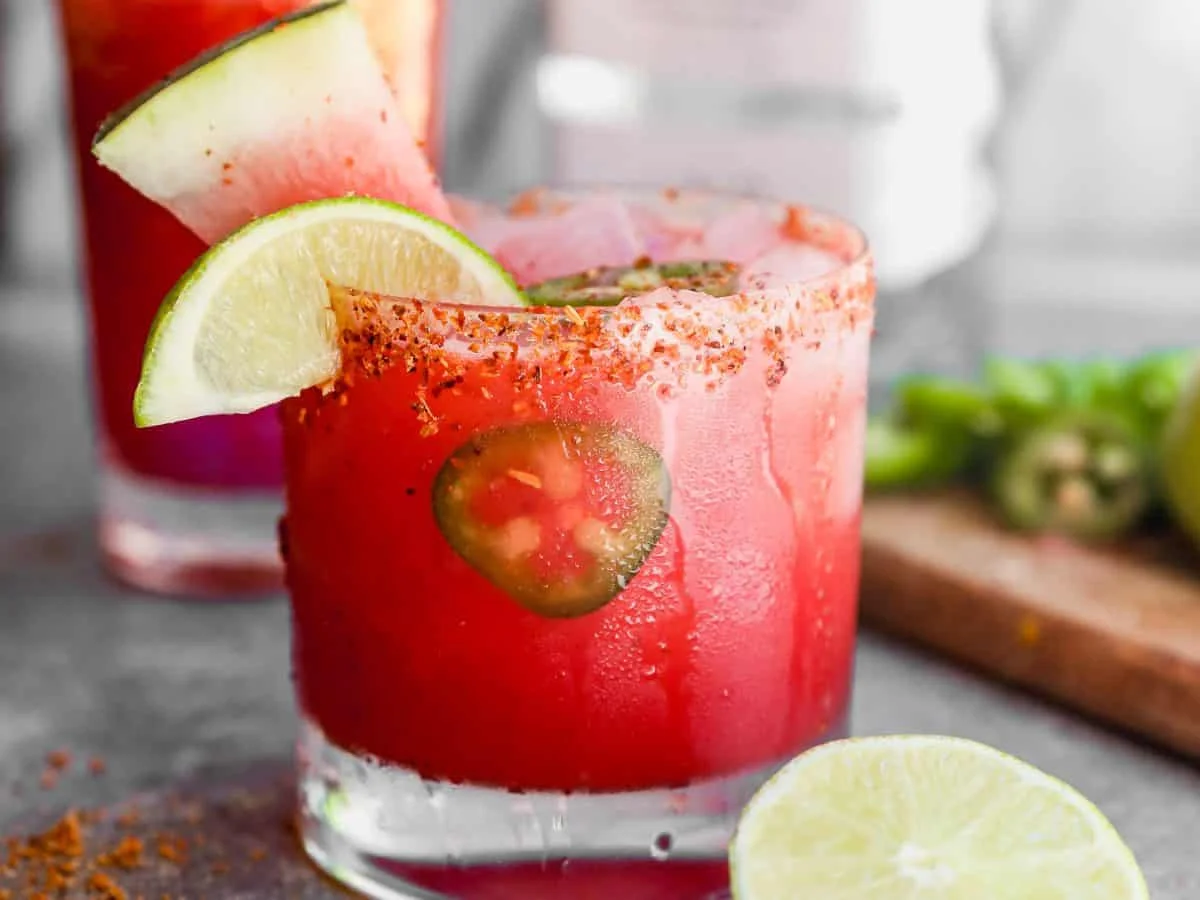
    Frozen watermelon margarita in a salt-rimmed glass

    Watermelon brings natural sweetness to a frozen margarita without making it taste cloyingly sugary. It’s the drink that disappears fast at a summer gathering — and it’s easy to scale up in a pitcher.

    Full recipe: watermelon margarita

    And if you’re feeling really wild, dice the melon really small and stir it into guacamole. A little Tajin — that chili-lime seasoning from the spice aisle — on top, and it’s a whole different snack.

    A note from Nora: The first time I tried watermelon in guacamole, I was skeptical in exactly the way I’m skeptical about most things that don’t fit in my head. Sam took one bite and didn’t say anything, which is his version of applause. We’ve done it twice since.

    Maybe that’s the real deal with summer food: it doesn’t need to be complicated, it just needs to be the thing that’s right there when the weather turns. One melon, a few hours of heat, and a kitchen that isn’t afraid to improvise. If I can make it on a Tuesday, it’s a keeper.
    Keep Reading

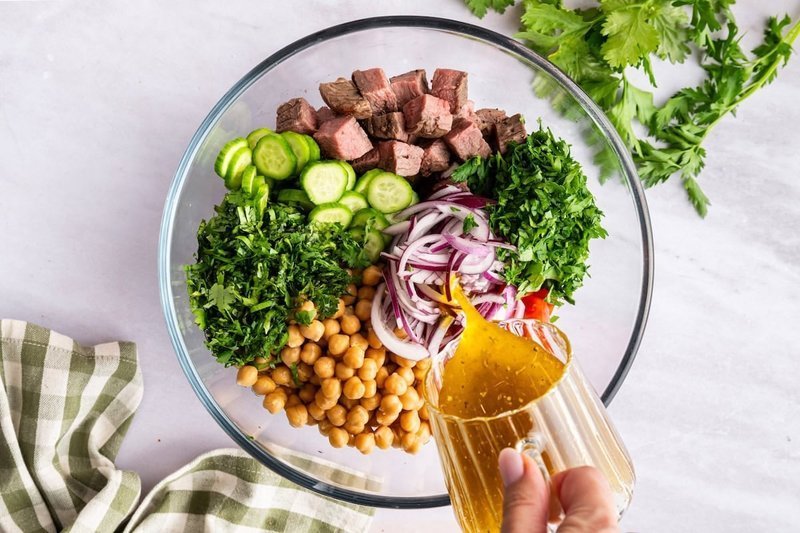
  • Chimichurri Steak Salad (The Viral Recipe Worth Trying)

    Chimichurri Steak Salad (The Viral Recipe Worth Trying)

    There was a recipe going around my inbox last week that I almost skipped. Another viral salad? Really? But then I read the title again — no lettuce, forty grams of protein, twenty-five minutes on the clock — and honestly, it sounded like exactly what our Tuesday nights needed.

    Chimichurri Steak Salad (The Viral Recipe Worth Trying) - photo 2

    I made it that evening, and Sam came in to find a bowl full of steak and herbs and asked if we had company. It turned out to be one of those recipes where the first bite answers every question. The chimichurri is bright and garlicky, the cucumbers stay crisp even after sitting with the dressing, and the chickpeas soak up flavor like little sponges.

    This one passed the Tuesday test without any trouble.

    Why this salad actually works

    I have been making healthy dinners for years now, and I know enough to be suspicious of salads that claim to fill you up. This one does. With forty-five grams of protein per serving (from the steak and chickpeas together), it is genuinely a meal, not a prelude to one.

    The flavors also deepen overnight. If you are packing lunches for the week, the second-day bowl always tastes better than the first. I should mention that Biscuit has learned to sit very patiently near my prep bowls — the steak trimmings do not go unnoticed in this house.

    What you need

    Chimichurri Steak Salad (The Viral Recipe Worth Trying) - photo 1

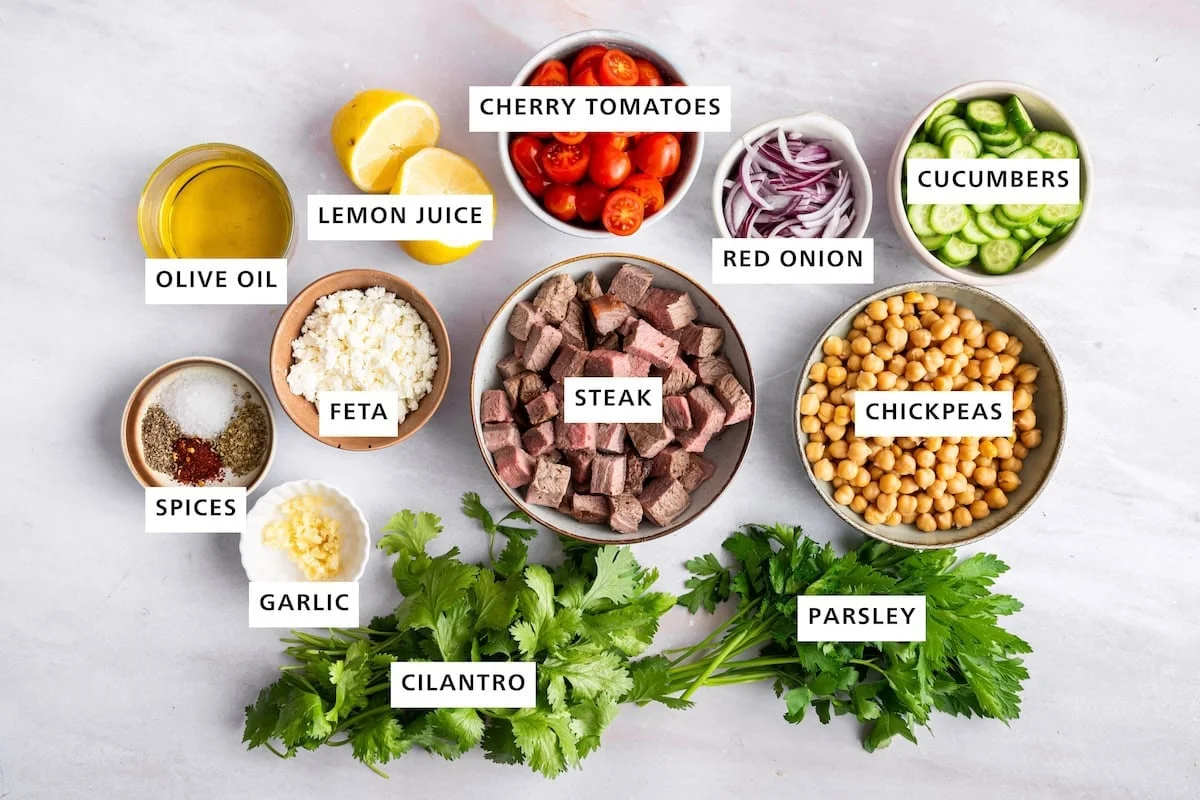
    Steak. I used a leftover filet mignon from the weekend, but any cut works. Ribeye adds richness, sirloin keeps things lean and budget-friendly, and flank steak is fine as long as you slice it against the grain.

    Fresh parsley. One full bunch, finely chopped. Do not substitute dried — that is where the bright color and fresh flavor come from.

    Fresh cilantro. This takes the chimichurri a step beyond traditional and adds another layer of herbal brightness. If you are not a fan, use all parsley instead.

    Cucumbers. I reach for mini seedless ones — also called Persian cucumbers — because there is no peeling or seeding. Regular cucumbers work fine too; just peel them if the skin feels thick.

    Cherry tomatoes, chickpeas, red onion, and crumbled feta. The cherry tomatoes add a little sweetness against the tangy dressing. The chickpeas bring fiber and plant protein that genuinely make this filling. And the feta — do not skip it. That salty creaminess ties everything together.

    Chimichurri Steak Salad (The Viral Recipe Worth Trying) - photo 3

    How to put it together

    1. In a small bowl, whisk the olive oil with minced garlic, lemon juice, dried oregano, salt, black pepper, and red pepper flakes (if you like a little heat). Stir in the chopped parsley and cilantro. The dressing takes about two minutes from start to finish.

    Chimichurri Steak Salad (The Viral Recipe Worth Trying) - photo 5

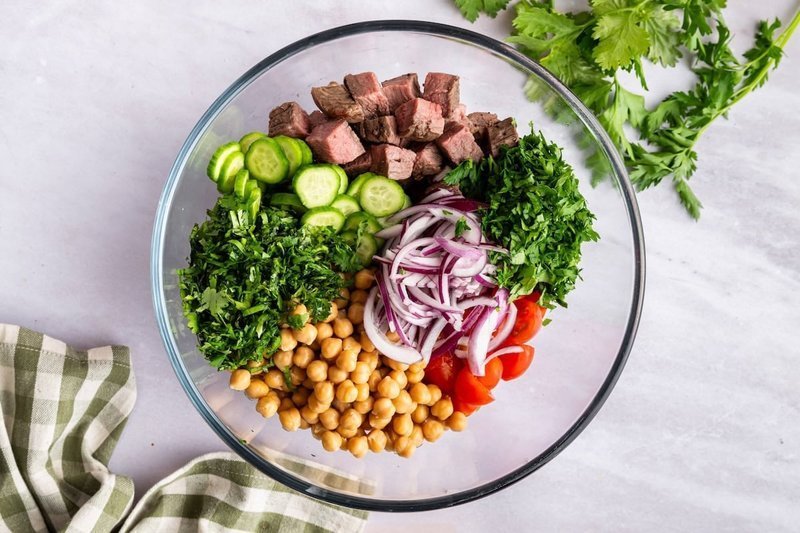
    2. In a large bowl, combine the cooked steak (cubed or sliced), cucumbers, cherry tomatoes, chickpeas, and thinly sliced red onion. Add the chopped herbs here too.

    Chimichurri Steak Salad (The Viral Recipe Worth Trying) - photo 4

    3. Pour the chimichurri dressing over everything and toss well until every piece is coated.

    4. Gently fold in the crumbled feta at the end so it does not break down too much. Taste, adjust salt or pepper if needed, and serve. If you have the time, let it sit for ten to fifteen minutes before eating — the steak and chickpeas will soak up more dressing and the whole bowl will taste more like itself.

    A few notes from my kitchen

    Chop the herbs finely. The finer the parsley and cilantro, the more evenly they spread through the dressing. Every bite gets that fresh flavor instead of just the occasional leaf.

    Make a double batch of chimichurri. It keeps in a sealed jar in the fridge for up to a week. I often use the extra on grilled chicken, roasted vegetables, or even plain yogurt as a dip throughout the week.

    Hold off on the feta if prepping ahead. If you are making this for lunches later in the week, add the feta right before eating so it stays crumbly and does not soften too much in the dressing.

    Storing leftovers

    This keeps well in an airtight container in the fridge for up to three days. Give it a good toss before serving since the dressing settles at the bottom. The flavors get better as they sit, which makes this one of my favorite recipes for Sunday meal prep.

    Frequently asked questions

    What cut of steak is best? Almost any cut works with chimichurri. I used filet mignon, but sirloin is a great budget-friendly choice and ribeye adds extra richness. Flank steak works well too — just slice it thinly against the grain.

    Can I use a different protein? Yes. Grilled chicken, shrimp, or salmon all pair nicely with this dressing. For a vegetarian version, skip the steak and add an extra can of chickpeas or some white beans.


    A note from Nora: The first time I made this, I used cilantro without checking with Sam. He is not what you would call a cilantro person. But he ate two bowls that night and then asked for the recipe. Sometimes the best dinners are the ones where nobody expected to love something quite this much.

    Maybe that is the real gift of recipes like this: they do not need special occasions or perfect ingredients. Just a quiet Tuesday, a bowl on the counter, and enough flavor to make an ordinary week feel a little brighter.

    Keep Reading

  • Loaded Taco Fries the Whole Family Will Fight Over

    Loaded Taco Fries the Whole Family Will Fight Over

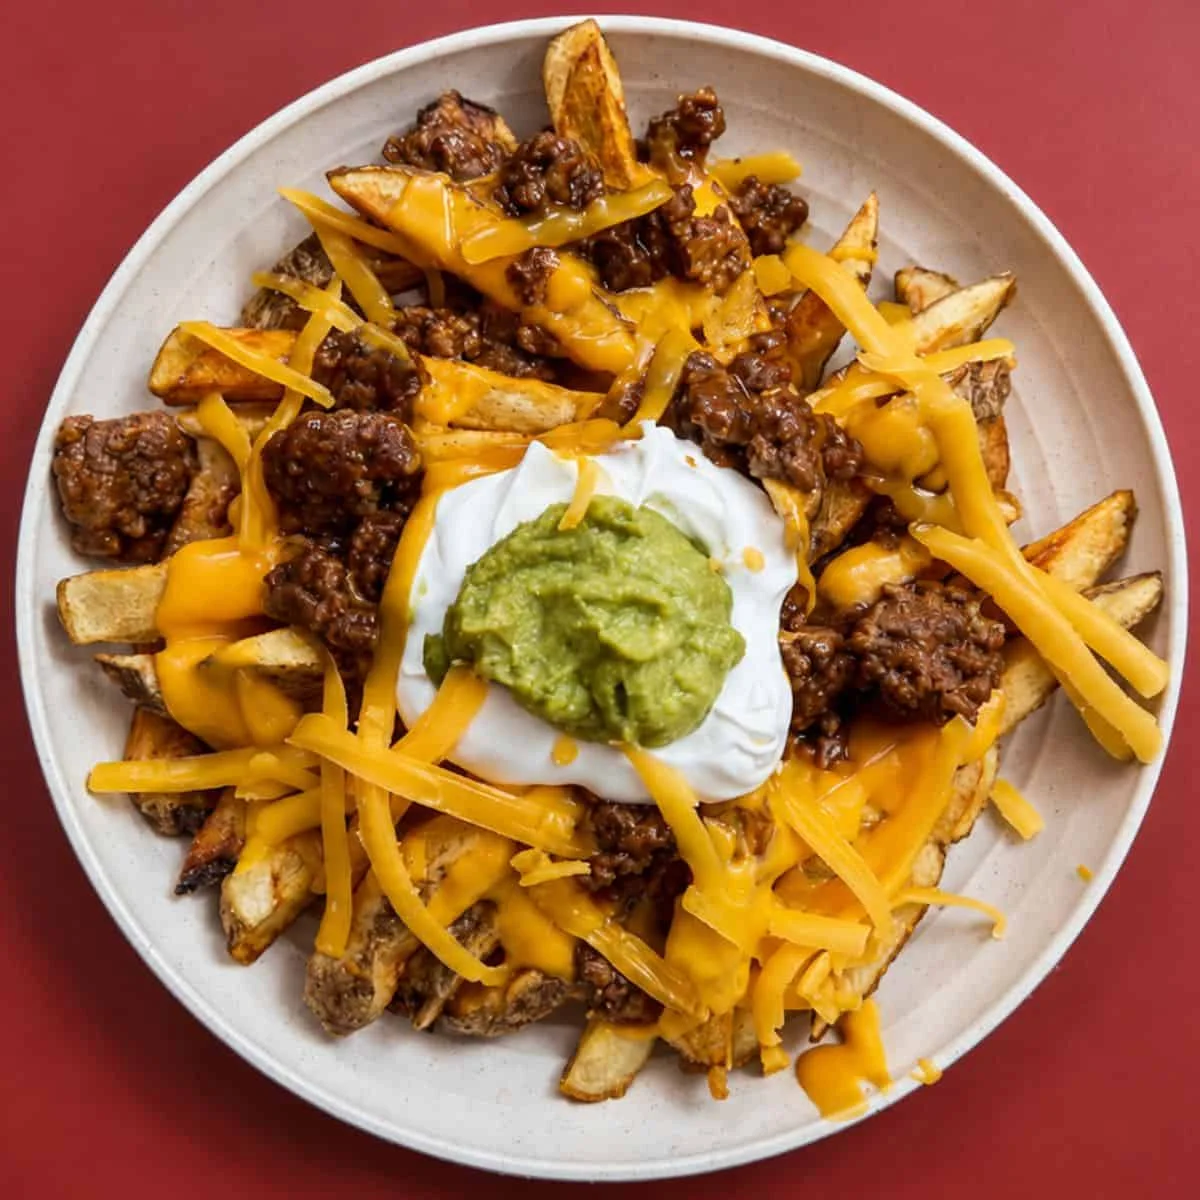
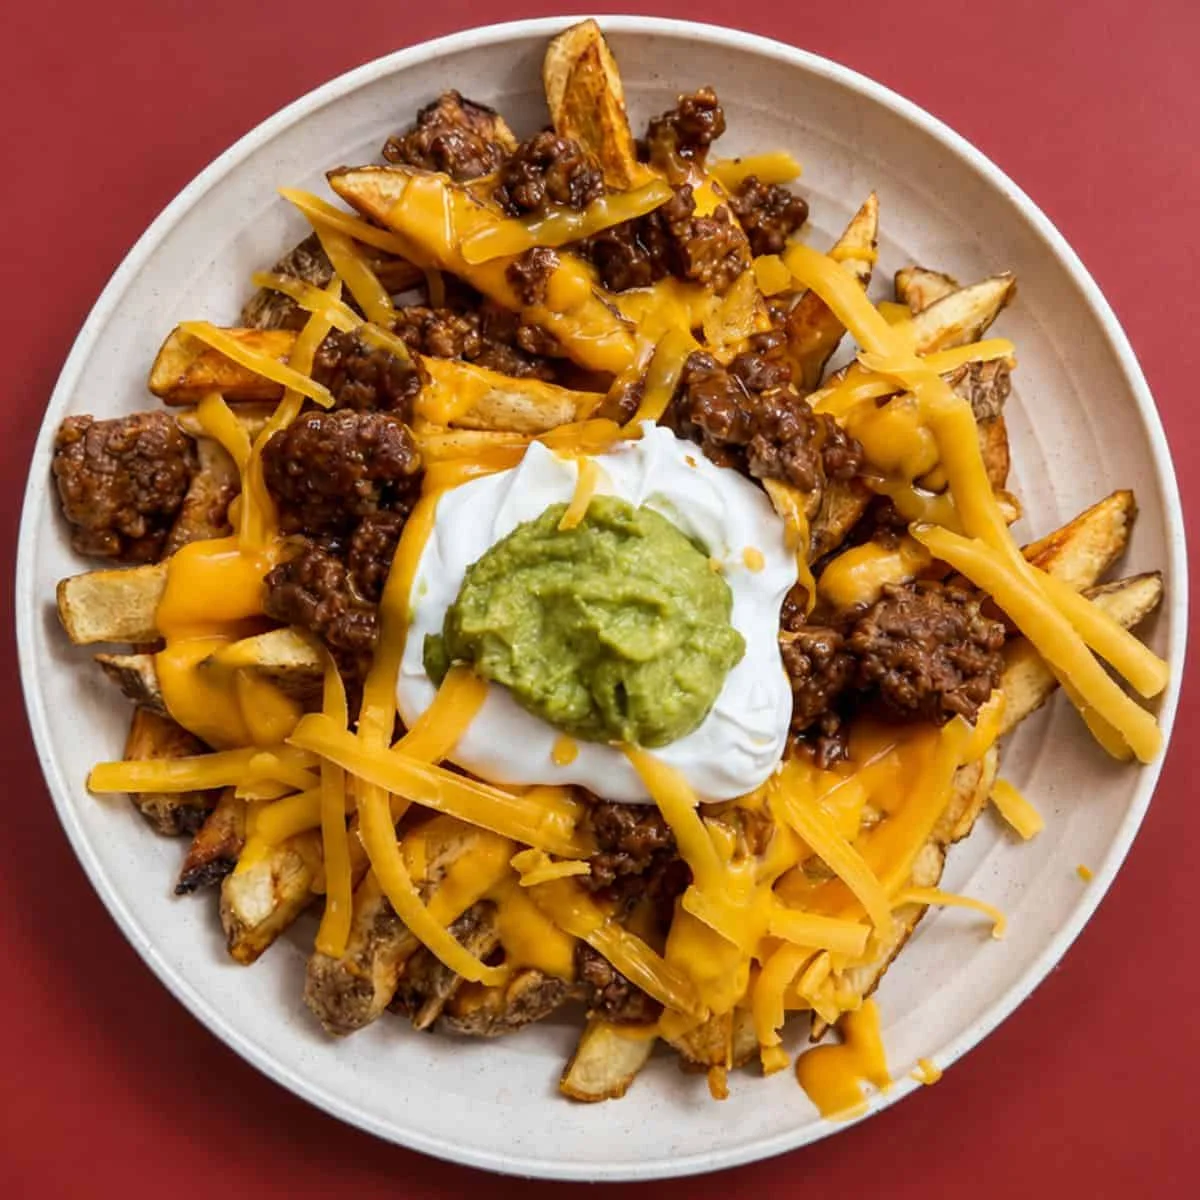
    One Tuesday night the kitchen was chaos and nobody was in a mood for real cooking. So I cut up potatoes, fried them, and built a platter the way you’d build a taco — beef, warm cheese, sour cream, guacamole, all of it piled on top of hot fries.

    My two-year-old was too small to care about the concept. Sam and my daughter’s dad’s colleagues were not around to judge. What mattered is that in under an hour we had a dinner that felt like a treat, and the platter was clean before the fries went cold.

    Loaded taco fries piled with beef, cheese sauce, sour cream and guacamole

    That was the night I realized loaded taco fries are not a side dish or a snack. They’re a complete meal in a format everyone already knows how to eat.

    Why this one works

    It’s the make-your-own part. Everyone gets their own pile of toppings and builds the plate to their own taste. The kid gets less cheese and more guacamole. The adult who wants spice adds jalapeños. Nobody argues about what’s on their plate because they chose it themselves.

    And it’s flexible. Crispy fries, seasoned taco beef, warm nacho cheese sauce — that’s the base. From there you can swap the protein, change the toppings, use whatever potatoes you have on hand. The recipe below uses homemade fries, but frozen fries work just as well when you’re short on time.

    What you’ll need

    • 4–6 large potatoes, cut into fry shapes
    • 4 cups vegetable oil, for frying
    • 1 lb ground beef
    • 1 packet taco seasoning
    • 1 can nacho cheese sauce
    • Sour cream, for serving
    • Guacamole, for serving
    • Shredded cheddar cheese
    • Salt

    You’ll also want a heavy-bottomed pot or Dutch oven, a slotted spoon or skimmer, and paper towels for the fries. If you have a mandoline or potato slicer it helps, but a sharp knife and steady hands work fine.

    How to make them

    1. Cut the fries. Wash and peel the potatoes if you like them peeled, then cut them into fry shapes. Uniform cuts help them fry evenly, so try to keep the width consistent.

    2. Heat the oil. Pour the vegetable oil into a large, heavy-bottomed pot or Dutch oven. Heat over medium-high until the oil reaches 350°F. You’ll know it’s ready when a small piece of potato sizzles as soon as it touches the surface.

    3. Fry in small batches. Carefully lower the potatoes in, a few at a time. Fry for 5 to 7 minutes, stirring occasionally, until golden brown and crispy. Working in batches keeps the temperature from dropping and keeps the fries from clumping.

    4. Drain and salt. Lift the fries out with a slotted spoon or skimmer and set them on a plate lined with paper towels. Season with salt right away — the salt sticks best while the fries are still hot. Repeat until all the potatoes are cooked.

    5. Cook the taco beef. While the fries are frying, brown the ground beef in a large skillet over medium heat until fully cooked. Drain any excess grease, then add the taco seasoning and the amount of water called for on the packet. Stir, bring to a simmer, and let the sauce thicken for a few minutes.

    6. Warm the cheese. Heat the nacho cheese sauce in a small saucepan over low heat until it’s pourable. Shred the cheddar if it isn’t already, and get the sour cream and guacamole ready.

    7. Build the platter. Arrange the hot fries on a serving platter. Drizzle the warm cheese sauce over them, then spoon the taco meat on top. Finish with dollops of sour cream and guacamole and a generous sprinkle of shredded cheddar. Serve right away, before the fries go limp.

    Tips and swaps

    Frozen fries are a perfectly fine shortcut here — regular, waffle, or seasoned, they all work. If you want something a little different, sweet potato fries make a nice variation.

    The ground beef is the classic choice, but ground turkey, shredded chicken, steak, or carne asada all work in place of it. For the toppings, set out whatever sounds good: diced tomatoes, red onions, green onions, sliced jalapeños, fresh cilantro, black olives, lettuce, salsa, or extra cheese. A drizzle of hot sauce is a natural addition too.

    For leftovers, store the taco meat and toppings separately in airtight containers in the fridge for up to 4 days. The fries are best made fresh, so for the crispiest result fry a fresh batch when you’re ready to serve.

    Questions I get asked

    Can I use frozen fries? Yes — frozen regular, waffle, or seasoned fries all work and make the whole thing quicker.

    Can I make it ahead? The taco meat can be made in advance and refrigerated until you’re ready to serve. The fries should be cooked just before assembling, for the crispest result.

    What else can go on top? Diced tomatoes, fresh cilantro, green onions, red onions, jalapeños, black beans, olives, salsa, or a sprinkle of paprika are all good options. The build-your-own format is the whole point, so add whatever your table wants.

    A note from Nora

    The first time I made these, I ran out of cheese sauce halfway through the platter and had to improvise with a little extra shredded cheese on top. Nobody noticed. Nobody cared. The platter was gone before the fries were even cool, and that’s the real test. This one passed it on a Tuesday, which means it’s a keeper.

    Keep Reading

  • Creamy Cacio e Pepe Style Pasta

    Creamy Cacio e Pepe Style Pasta

    There is a version of cacio e pepe that lives in my head. Three ingredients, one pan, that glossy, peppery, impossibly glossy sauce you get at an Italian restaurant, the kind that makes you close your eyes on the first bite. It is also the version that fails on me more often than I’d like to admit. The cheese clumps. The sauce turns grainy. I stand over the pan at 6:15 on a Wednesday, wondering what I did wrong.

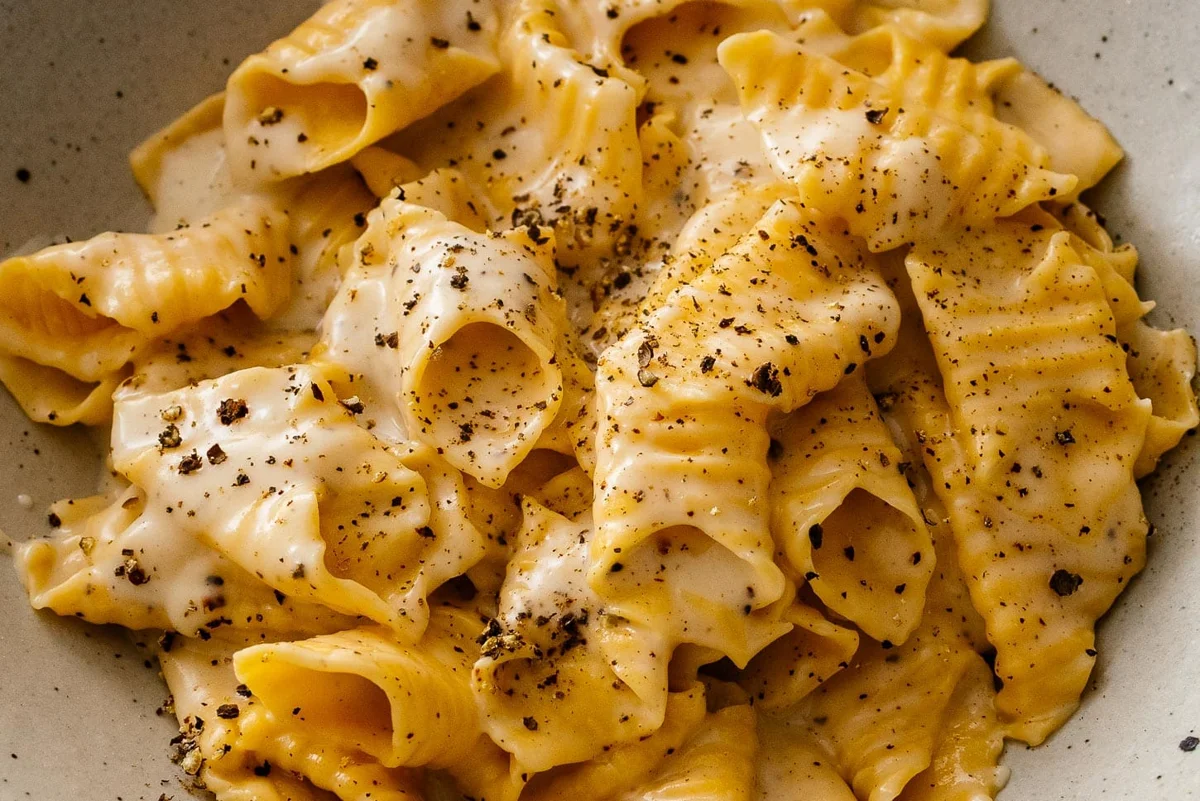
    Bowl of creamy cacio e pepe style pasta with cracked black pepper

    So I started making a different one. A cacio e pepe style pasta built on a mornay sauce: butter, pepper, flour, milk, and a mountain of pecorino. It is not the classic. But on the nights when the classic fights back, this one delivers every time, and it passed the Tuesday test without breaking a sweat.

    The version that doesn’t fight back

    Classic cacio e pepe relies on pasta water, cheese, and pepper emulsifying into a sauce. It is beautiful when it works. When it doesn’t, you get a cheese ball in a pool of starchy water, and no amount of whisking fixes it. This version thickens the sauce with flour first, then thins it back out with starchy pasta water. The result has more body and real clinging power, and the sauce stays smooth and glossy even when you do it a little wrong. (You will do it a little wrong. So will I.)

    Creamy pecorino pasta coated in glossy sauce with cracked black pepper

    The pepper first, always

    Start with butter in a skillet and a generous amount of freshly cracked black pepper. Black pepper is a key flavor in cacio e pepe, and toasting it in the hot butter coaxes out its spicy floralness. The heat draws the flavor out of the peppercorns and the butter carries it everywhere. Skip this step and the dish goes from complex to merely cheesy.

    What is mornay sauce, anyway?

    Mornay is a classic French sauce built off béchamel, a flour-thickened milk sauce. The traditional version uses gruyère, but this one uses pecorino, the cheese cacio e pepe is actually supposed to be made with. You can use parmesan if that is what is in your fridge. But if you see pecorino at the store, buy it. It is made from sheep’s milk instead of cow’s, so it is sharper, more intense, and less sweet than parmesan. If you have ever wondered why restaurant cacio e pepe tastes deeper than yours, the cheese is a big part of the answer.

    Build the sauce

    Once the pepper is fragrant in the butter, stir in the flour and cook it, stirring constantly, until every granule is coated in fat and the mixture is completely smooth. This is the part where you stay close to the pan: flour and fat is what gives the sauce its body later. Then pour in the milk in a thin stream, whisking the whole way. It may start out lumpy. That is fine. Keep whisking over low heat and it will turn into a thick, glossy paste. Take it off the heat and fold in the pecorino in batches. The residual heat melts the cheese, and the sauce will look a little lumpy at this stage. Do not panic. It is supposed to be very thick right now, and the pasta water is coming.

    Here is the hack that makes this recipe my fallback for every weeknight: the sauce keeps. Pop the extra in a container in the fridge, and any night this week you get almost instant pasta. Heat it, whisk in some hot pasta water, toss it with whatever pasta you have. I have done this on more than one night where dinner needed to happen by seven and my energy said otherwise.

    The reassembly

    Cook your pasta in well salted water until just shy of al dente. Meanwhile, bring the sauce back over medium-low heat and whisk in hot starchy pasta water, a splash at a time, until it loosens up into something pourable. Toss in the drained pasta, adding more pasta water as needed until the sauce clings to every piece. Finish with extra cracked pepper, and a little crushed red pepper if you like the heat.

    The pasta in my photos is homemade fresh egg garganelli, which is a whole project of its own. Any sturdy shape works here, and honestly, the night this recipe earned its place in my rotation, I used the dry rigatoni that was already in the pantry. It is the sauce that is the point.

    Super Creamy Cacio e Pepe Style Pasta

    A silky, protein-packed cacio e pepe style sauce for nights when you want mac-and-cheese comfort but are trying to adult. Serves 2. Prep 5 minutes, cook 15, on the table in 20.

    Ingredients

    • 1 tbsp butter
    • 1 tsp freshly cracked black pepper
    • 1 tbsp flour
    • 1/2 cup whole milk
    • 3 oz finely grated pecorino (about 1.5 cups)
    • 1/4 cup pasta water, more as needed
    • 6 oz pasta (I used homemade garganelli; any sturdy shape works)

    Method

    1. Melt the butter in a skillet over medium heat, add the pepper, and let it toast in the butter as it melts, stirring until fragrant, about a minute.
    2. Stir in the flour and cook, stirring constantly, for about three minutes, until completely smooth and every granule is coated in fat.
    3. Pour in the milk in a thin stream, whisking constantly. It may start lumpy; keep whisking over low heat until it becomes a thick, smooth paste.
    4. Remove from the heat and stir in the pecorino in batches until melted. The sauce will be very thick and a little lumpy. That is normal.
    5. Meanwhile, bring a pot of salted water to a boil and cook the pasta until just shy of al dente.
    6. Reserve a cup of the pasta water, then drain. Bring the sauce back to medium-low heat and whisk in 1/4 cup of the hot starchy water until smooth and glossy.
    7. Add the pasta and toss, adding more pasta water a splash at a time until the sauce coats every piece. Finish with extra black pepper, and crushed red pepper if you like.

    Notes

    The sauce keeps well refrigerated in a sealed container for about a week; reheat gently with a splash of pasta water or milk. Swapping parmesan for the pecorino works in a pinch, but pecorino is where the depth comes from. Nutritional estimates per serving: 545 calories, 22.8g protein, 63g carbs, 19.6g fat.

    Loosely based on this recipe from iamafoodblog.

    A note from Nora

    The first time I made this, I got impatient at the milk stage, dumped it in all at once, and ended up with a lumpy white soup that Sam ate anyway and called “peppery.” He always eats whatever I make, so that is high praise and low praise simultaneously. The second time, I poured it in slowly like the recipe says, and the difference was the difference between soup and sauce. This one is in my rotation now: 20 minutes, five real ingredients, and it is the answer on the nights when classic cacio e pepe is having a moment. If I can make it on a Tuesday, it’s a keeper.

    Keep Reading

  • Country Pork Meatballs with Onion Gravy

    Country Pork Meatballs with Onion Gravy

    I’ve been thinking lately about the gap between what dinner sounds like out loud and what it actually is. Last week, my daughter asked for “the sausage-tasting meatballs,” and I realized I’d never bothered to give the dish a proper name. So here it is: Country Pork Meatballs with Onion Gravy. The name is a little grand. The recipe is not.

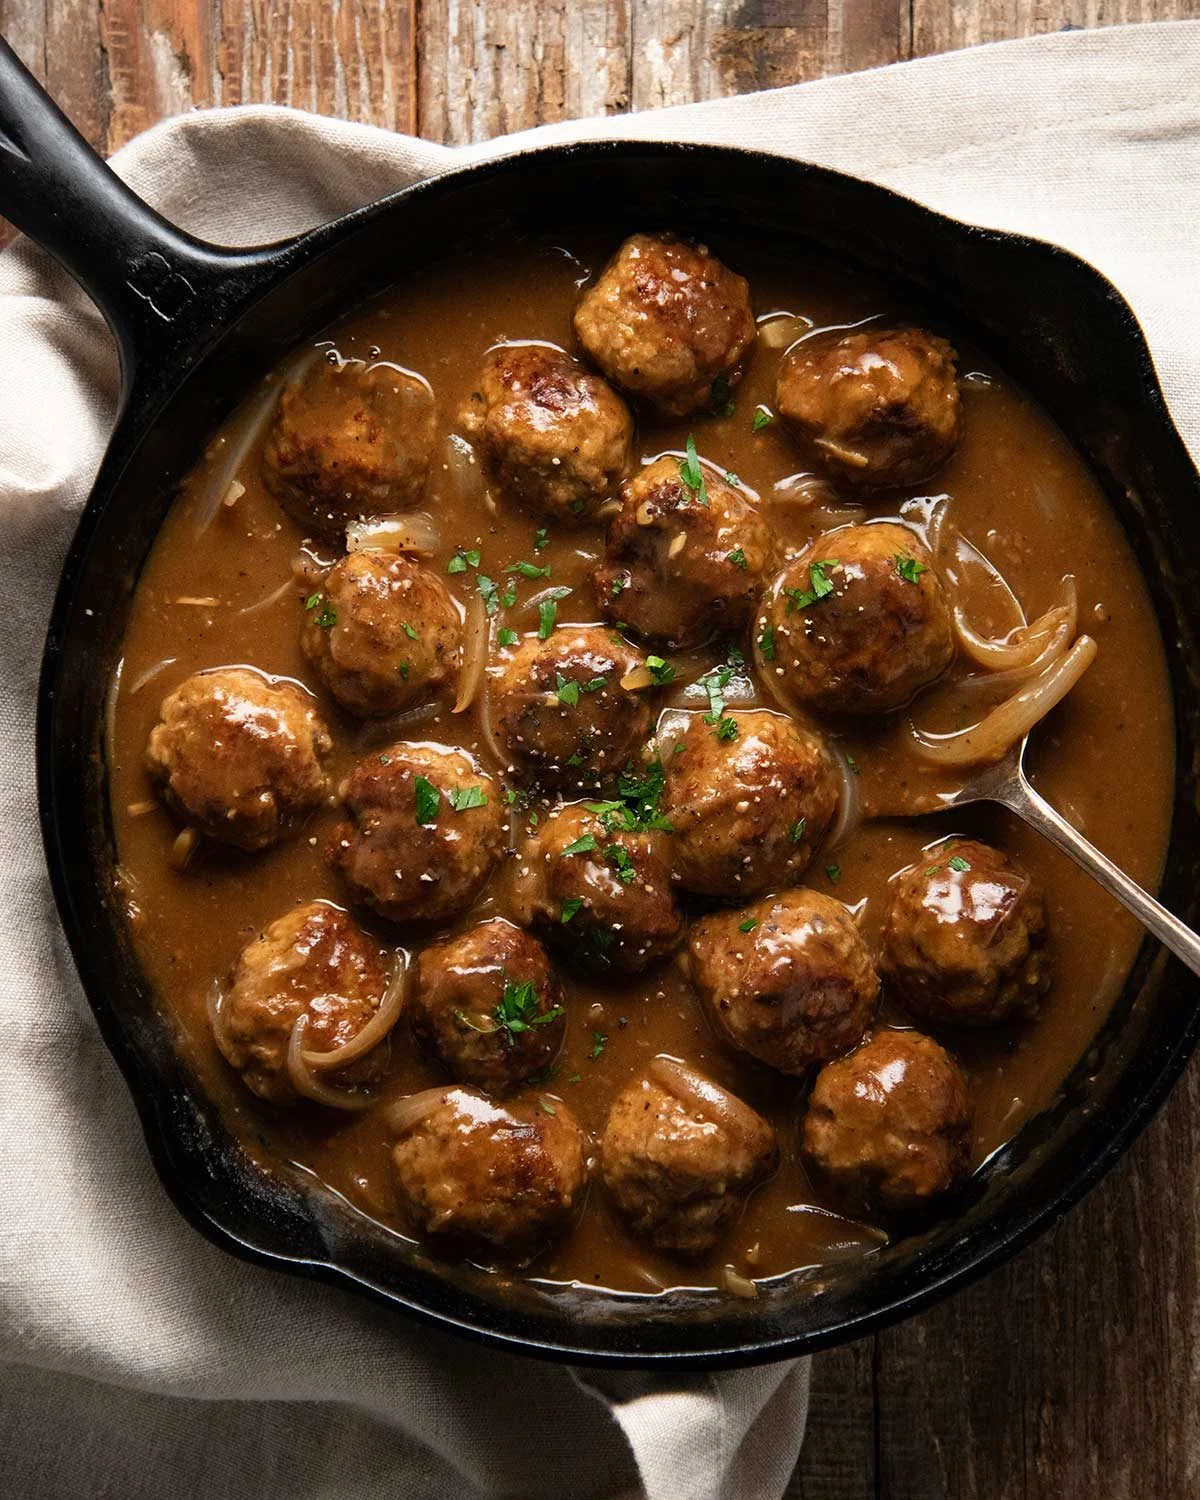
    Country pork meatballs smothered in rich onion gravy

    First, a full confession about the name

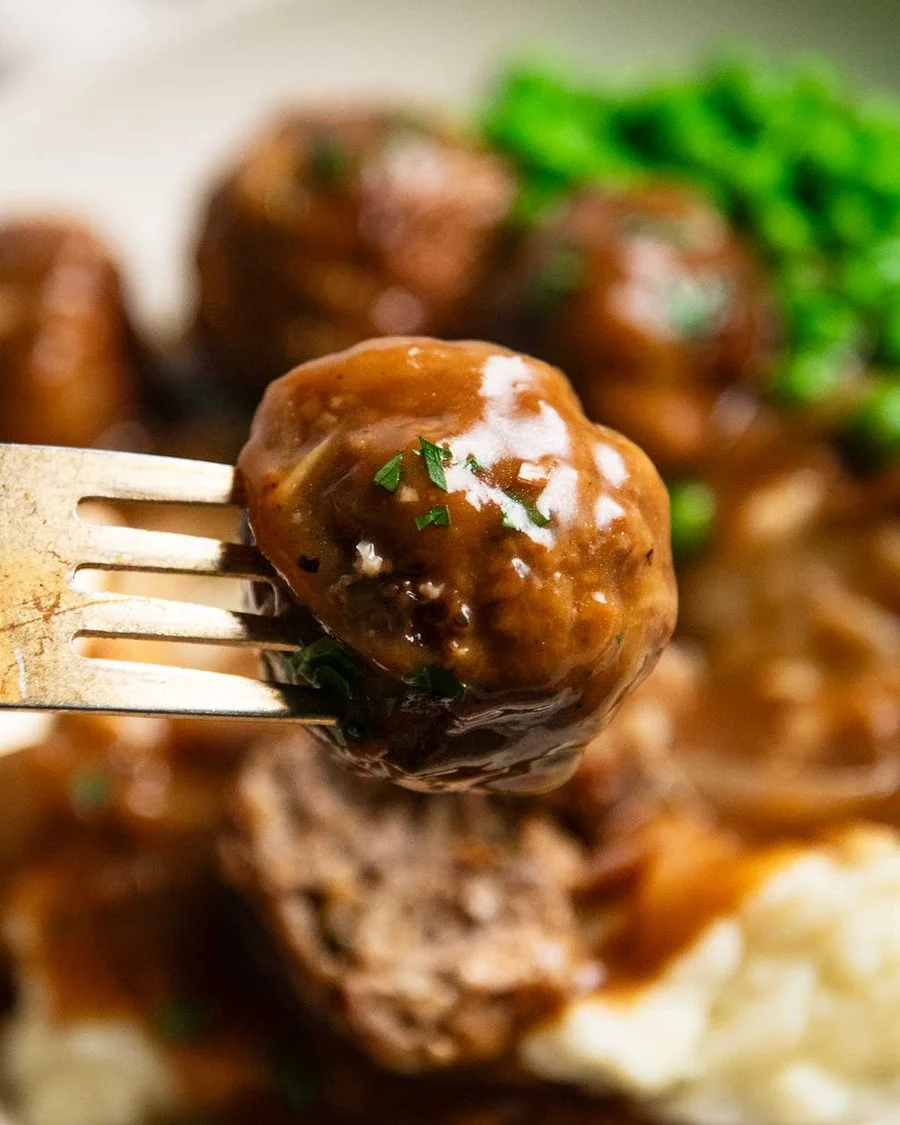
    Full disclosure: there is nothing officially “country” about these meatballs. I named them that because the combination of onion, sage, and thyme gives them the wholesome, country-pub comfort vibe I was going for — and honestly, the first time I bit into one, I thought of the country pork sausages at the butcher I used to frequent. So let me keep the name. Serve them over mash with a side of peas and call the whole thing “country pork meatballs, farmhouse mash, and garden peas.” Nobody’s checking.

    Pork meatballs nestled in onion gravy in a bowl

    The gravy is where the meal gets serious. It’s built from the drippings left behind after you brown the meatballs, with a hint of garlic, and it tastes like the kind of hearty, homestyle dinner you’d expect at a farmhouse table.

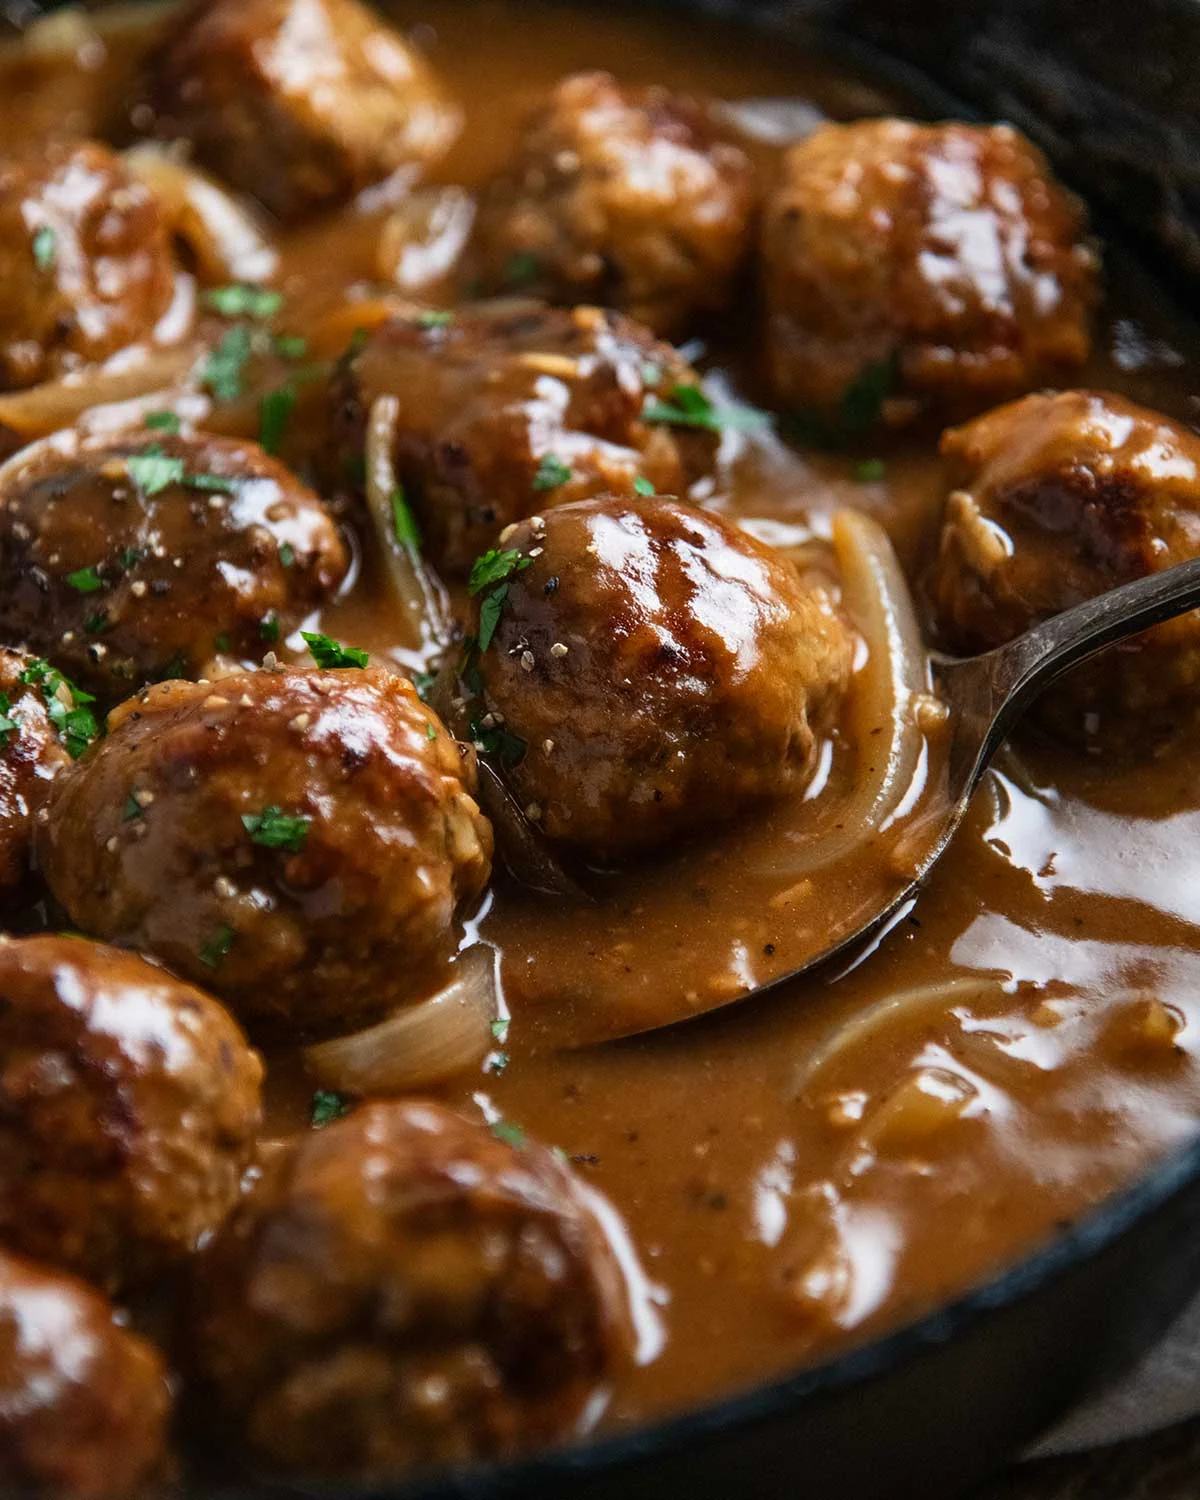
    Meatballs in glossy onion gravy, ready to serve

    Why pork, and why sage

    Pork makes the softest, juiciest meatballs I know — softer than beef, juicier than chicken. I use regular ground pork, not lean, not extra fatty. Beef works if that’s what’s in the freezer. Chicken and turkey will work too, but they’re much leaner, so the inside won’t be nearly as succulent.

    And please don’t skip the sage. You can skip the thyme, the onion powder, even the paprika — not the sage. It’s the one that gives these the unmistakable country-sausage flavor. Ground sage is in the spice aisle of a regular grocery store, no foraging required.

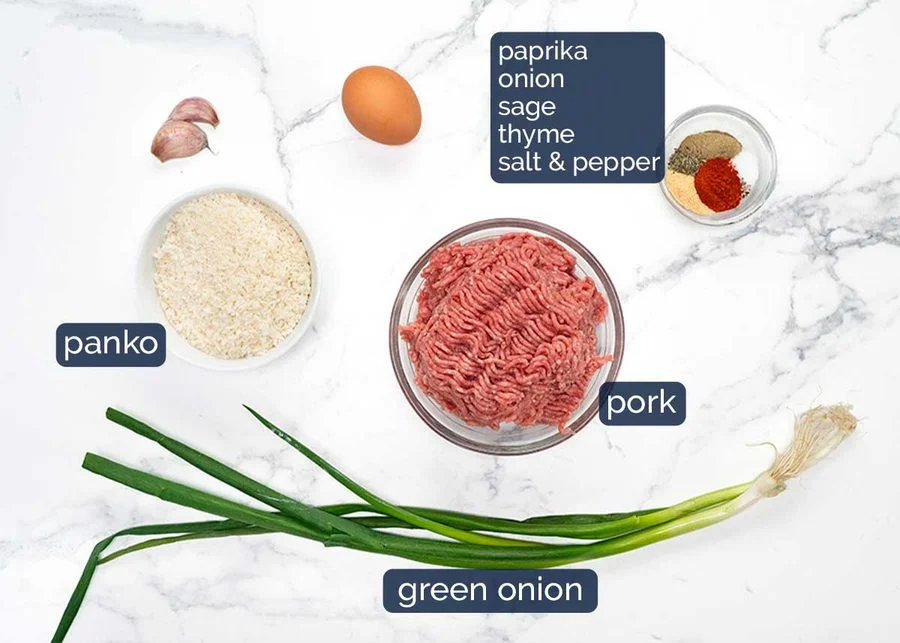
    What you need

    Here’s the whole list, meatballs first.

    For the meatballs

    • 1 1/2 tablespoons olive oil
    • 500 g / 1 lb ground pork (or another meat)
    • 1 cup panko breadcrumbs (regular breadcrumbs work fine)
    • 1 large egg
    • 2 green onion stems, finely sliced (or 1/2 onion, grated)
    • 1 garlic clove, grated or pressed
    • 1 teaspoon ground sage — don’t skip this
    • 1 teaspoon onion powder
    • 1/2 teaspoon paprika (sweet or smoked, not spicy)
    • 1/4 teaspoon dried thyme
    • 3/4 teaspoon salt
    • 1/2 teaspoon black pepper

    For the onion gravy

    • 30 g / 2 tablespoons unsalted butter (or olive oil)
    • 2 small onions, cut into wedges (or 1 1/2 large onions)
    • 2 garlic cloves, minced
    • 3 tablespoons all-purpose flour
    • 2 cups low-sodium beef stock
    • 1 teaspoon Worcestershire sauce
    • 1/4 teaspoon salt
    • 1/4 teaspoon black pepper
    • 1/4 to 1/2 teaspoon dark soy sauce or gravy browning — optional, just for color (see the note below)

    And to serve: mash, pasta, rice, or cauliflower rice, plus a little chopped parsley if you have it.

    Ingredients for country pork meatballs laid out

    A few words on the ingredients I keep coming back to. Panko makes the meatballs softer and lighter than regular breadcrumbs — the larger flakes create a more tender texture inside. If you only have regular breadcrumbs, use those; they work. For the gravy, butter does double duty: it cooks the onions and, combined with the flour, forms the thickening base that gives the gravy its silky texture. Use low-sodium stock so you can control the salt yourself. And the Worcestershire: a little slosh of it rounds out the whole thing. If you’re using homemade beef stock — well, I want to be you — you can skip it.

    Ingredients for onion gravy including butter and stock

    One more thing, and it’s genuinely useful. The dark soy sauce is a trick I’ve been using for years to deepen the color of gravies that come out a little paler than I’d like. In the UK you can buy gravy browning made specifically for this job, but it’s not nearly as common here. A quarter teaspoon of dark soy does the same thing, and you can’t taste it at all — it’s purely for that richer, deeper brown.

    How to make them

    Confession: I hate rolling meatballs. But I love eating them, so I roll them. The first batch I made of these fell apart in the pan — the spices hadn’t been mixed through, and you can always tell when you bite into an unseasoned patch. The fix is simple: really, genuinely mix the meatball mixture with your hands. The second batch was the one you’re about to make.

    1. Mix the meatball mixture. Put all the meatball ingredients in a bowl and mix thoroughly with your hands until everything is even. This is the step most people rush and then blame on the meat. Don’t.

    2. Roll the meatballs. Shape the mixture into 20 meatballs, about 2 tablespoons each. I portion them with a small ice cream scoop onto a tray, then roll them smooth by hand.

    3. Brown the meatballs. Heat the oil in a large non-stick pan over medium-high. Brown the meatballs on 3 or 4 sides, rolling them with two spoons, for about 6 to 7 minutes. The inside should still be raw — the gravy finishes them. Lift them out with a slotted spoon back onto the tray, leaving the fat in the pan.

    Mixed ground pork meatball mixture in a bowl

    4. Start the gravy. Add the butter to the same pan and let it melt. Turn the heat up and add the onions. Cook about 3 minutes until floppy, then add the garlic and cook another minute. It starts to smell amazing right about then.

    5. Build the gravy without lumps. Add the flour and stir for a minute. Then, keeping the pan moving, pour in half the stock. The flour mixture dissolves in and thickens into a paste that coats the onions. Pour in the remaining stock along with the Worcestershire, salt, pepper, and dark soy if you’re using it, and stir until it’s smooth and lump-free. This slow-pour method is the whole trick — no whisk needed, and whisks are awkward with that much onion in the pan.

    6. Simmer. Bring the gravy to a simmer, nestle the meatballs back in (with any juices from the tray), and let them cook about 4 to 5 minutes, until the gravy thickens to a thin gravy consistency and the meatballs are cooked through. Roll them once or twice while they simmer.

    7. Serve. Spoon them over mash — or rice or pasta — and give them a pinch of parsley if you want. Don’t let the gravy get too thick on the stove: it tightens up fast as it cools, in the pan, in the bowl, on the way to the table.

    Finished meatballs simmering in thick onion gravy

    Good to know

    • The meat. Pork is my favorite here — it makes the softest, most succulent meatballs of any protein. The recipe works with beef first, then lamb, chicken, or turkey.
    • Leftovers. They keep for 3 to 4 days in the fridge, or up to 3 months in the freezer.
    • Nutrition. Per serving, excluding the mash: about 548 calories, 28 g protein, 40 g fat.

    I also had a vivid dream of stuffing these into a warm crusty baguette, meatball-sub style but with gravy. I woke up before I could eat it, which was a loss, but I fully intend to make the dream a reality.

    A note from Nora

    The first time I made these, I called it “meatballs with gravy” and served it. The next time, I said the full name out loud over the table — country pork meatballs, farmhouse mash, garden peas — and my daughter pretended to be unimpressed and ate three helpings. The name costs you nothing. Spend it.

    If I can make it on a Tuesday, it’s a keeper.
    Keep Reading

  • Easy Panzanella (Italian Bread Salad)

    Easy Panzanella (Italian Bread Salad)

    The tomato bins at my Saturday farmers market have that certain glow lately — the kind that tells you the season has finally turned. That’s when I start dreaming about panzanella.

    Panzanella is the Italian bread salad that makes summer feel like it belongs to me: cubes of crusty bread, ripe cherry tomatoes, bell peppers, fresh basil, and a sharp vinaigrette. The bread drinks in all that tomato juice and dressing and turns chewy, savory, and honestly a little addictive. It comes together in 25 minutes, which means I can make it even on a packed evening. This one passed the Tuesday test.

    Finished panzanella bread salad plated with a full bowl beside it

    What is panzanella?

    Panzanella is a classic from Tuscany: crusty or day-old bread tossed with vegetables at their peak and a simple vinaigrette. It started as a way to use up old bread, and it may be the most delicious “leftovers” idea in Italian cooking. It’s vegetarian and vegan exactly as written.

    Ingredients you’ll need

    With a recipe this simple, the ingredients do all the work. A few notes before you start:

    • Bread: use a sturdy artisan loaf — sourdough, ciabatta, or a rustic country loaf. Skip the soft store-bought sandwich bread. Day-old is actually ideal, but fresh works if you toast it a little longer.
    • Cherry tomatoes: buy the ripest, highest quality you can find. In season, local is best; out of season, greenhouse tomatoes hold up well.
    • Bell peppers: one each yellow, red, and green. The color is half the fun, and I use multi-colored cherry tomatoes too for the same reason.
    • Basil: fresh is a must. It’s easy to grow on a sunny windowsill, if you’re into that.
    • Vinegar: I love sherry vinegar for its depth, but red wine vinegar is the classic Italian choice and works perfectly.
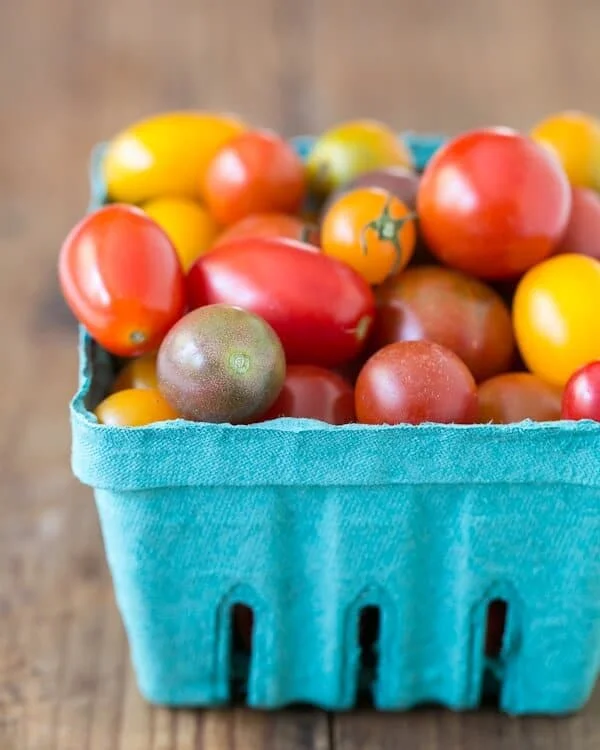
    Punnet of colorful cherry tomatoes in red, yellow, orange, and purple

    How to make it

    Prep time: 15 minutes. Cook time: 10 minutes. Total: 25 minutes. Makes 4 to 6 servings.

    1. Preheat the oven to 450°F. Cut the bread into cubes, toss them with 1 tablespoon olive oil, and season with kosher salt and fresh ground black pepper. Spread in a single layer on a rimmed baking sheet and bake until golden brown, about 7 minutes.
    2. Chop everything. Halve the cherry tomatoes, dice the bell peppers, thinly slice the red onion, mince the garlic, and thinly slice the basil (chiffonade).
    3. Make the dressing. In a medium bowl, combine the sherry vinegar and garlic. Gradually whisk in 3 tablespoons olive oil, 1 tablespoon at a time, until a creamy emulsion forms. Season with kosher salt and black pepper.
    4. Toss and rest. Combine the vegetables, dressing, basil, and toasted bread in a large bowl. If you’re making it in advance, add the bread last so it stays crisp. Let it stand about 15 minutes for the flavors to meld, then serve immediately.

    Ways to make it yours

    • Add cucumber — peeled, seeded, and diced. It’s a traditional addition.
    • Add cheese — torn mozzarella or burrata isn’t in the traditional version, but I’d take it.
    • Make it Greek — feta, olives, oregano, and a Greek-style dressing.

    I also have a spring version I make with peas and feta when the tomatoes go on vacation.

    What to serve it with

    This is a natural partner for anything off the grill — grilled chicken or salmon, veggie kabobs, or a spread of Italian sides for a summer dinner party. Or lean in: a dense bean salad, a Mediterranean chickpea salad, and a bowl of olives, and you’ve got an easy antipasto-style meal.

    Storage and make ahead

    Panzanella is best eaten within 1 to 2 hours of making it. The bread keeps drinking, and the next day it’s completely soggy, so it’s not really a leftovers situation. To get ahead, toast the bread cubes up to 2 days in advance and store them airtight at room temperature, then combine everything just before serving.

    Questions, answered

    What does panzanella mean in Italian?

    A mashup of “pane” (bread) and “zanella” (a deep bowl or basin). Functionally: bread salad.

    Where is it from?

    Tuscany, though similar bread salads appear across Italy. It’s traditionally a summer dish built around peak tomatoes.

    What bread is best for panzanella?

    Anything crusty with an open crumb — sourdough, ciabatta, or a rustic Italian loaf. Day-old is best.

    Should panzanella be soggy?

    No. The bread should be softened and full of flavor but still have a chew. If it’s mushy, it either sat too long or the bread wasn’t sturdy enough.

    Can I make it the day before?

    Not the whole salad — but you can prep the bread 1 to 2 days ahead and assemble it about 15 minutes before serving.

    A note from Nora

    The first time I made this, I grabbed a soft fresh loaf because it was what I had, and the salad came out closer to bread pudding than salad. Day-old sourdough, toasted a little longer, and it’s a whole different dish. We loved it so much I made it again the very next day — because panzanella doesn’t really do leftovers. If I can make it on a Tuesday, it’s a keeper.

    Keep Reading

  • Rice in Cream: Why Nasi Lemak Tanglin Is Kuala Lumpur’s Best-Kept Breakfast Secret

    Rice in Cream: Why Nasi Lemak Tanglin Is Kuala Lumpur’s Best-Kept Breakfast Secret

    Nasi Lemak is Malaysia’s national dish. Fair title, honestly — when you’re talking about a plate of food that serves tens of millions of breakfasts a day from southern Thailand through to Singapore, simplicity like this does not get much better than ‘Rice in Cream.’

    And one of the best versions I have ever had is at Nasi Lemak Tanglin, tucked into a food court in Kuala Lumpur. Let me tell you about it.

    Rice in Cream: Why Nasi Lemak Tanglin Is Kuala Lumpur's Best-Kept Breakfast Secret - photo 2

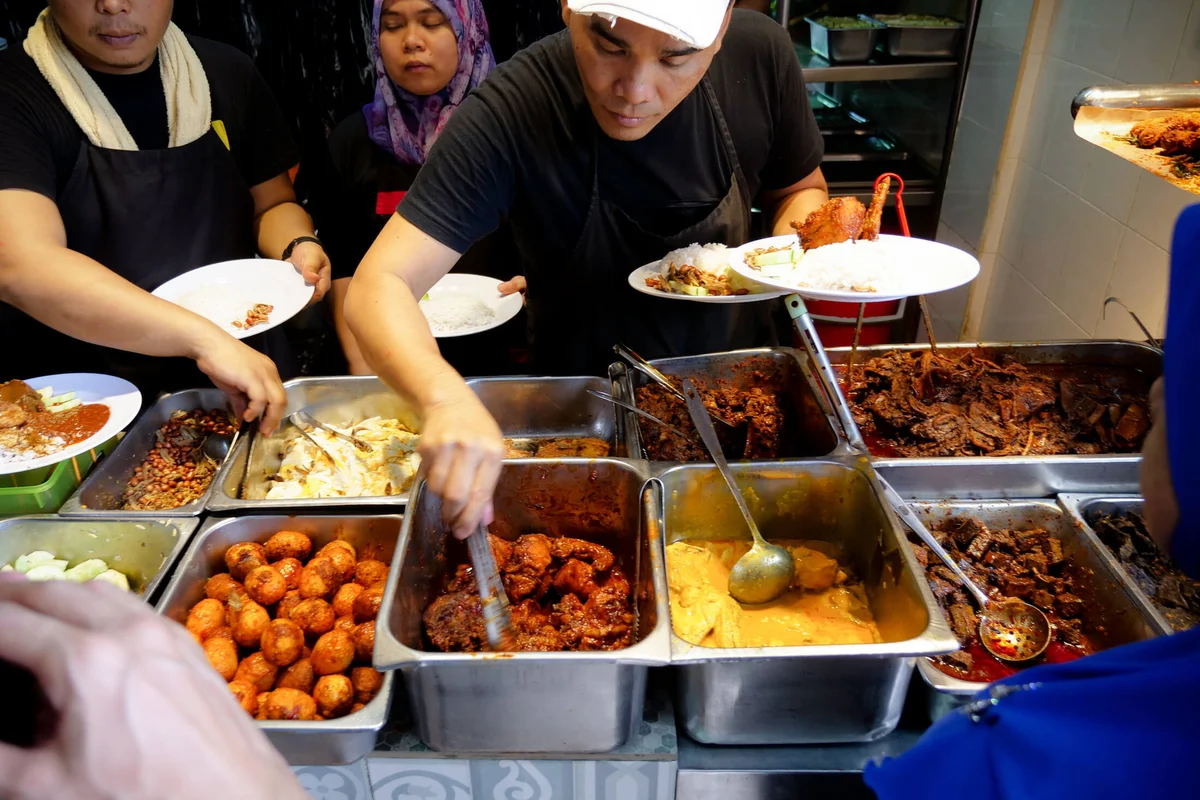
    Pick and choose your own combinations — every plate looks different because everyone orders differently.

    The Parking Lot Tells the Story

    Nasi Lemak Tanglin sits inside a cluster of stalls, all selling Malaysian-style breakfast and lunch. We went on a Friday and did four or five laps around the parking lot before finding a single open spot. You get the idea.

    Each stall has its own specialty — several looked genuinely tempting — but local friends had been very specific: Nasi Lemak Tanglin is the one you have to visit. They also came with a warning. Rain or shine, this place sells out every single day. Friends said the stalls finish their rice and ingredients without fail, so arrive early. It often closes out by 11:30 am.

    On the day we went, hundreds of people had already moved into the seating area under an awning that was being extended to keep them dry. And it was only 10 in the morning.

    Rice in Cream: Why Nasi Lemak Tanglin Is Kuala Lumpur's Best-Kept Breakfast Secret - photo 1

    Drinks, rice, and curry toppings — all ordered at one counter.

    A Few Ingredients, Done Right

    Nasi Lemak is comfort food for most Malaysians and the national dish to boot. The name literally means ‘fat rice,’ which feels almost too modest for something with this much variety across the country.

    The rice cooks in coconut milk with pandan leaf woven through it, giving that gentle fragrance you recognize from about three feet away. Then come the essentials: something salty (usually salted fish), something crunchy (fried peanuts and cucumber slices), and sambal — a chili paste that looks basic but takes real time to get right. It can be spicy, tangy, or sweet depending on what goes in it, and its job is to tie everything together.

    For budget-conscious travelers, Nasi Lemak is also one of the most affordable ways to eat local anywhere in Malaysia.
    Rice in Cream: Why Nasi Lemak Tanglin Is Kuala Lumpur's Best-Kept Breakfast Secret - photo 3

    Could not resist a taste before the photo. No shame here.

    How to Order

    You walk up to the counter in the food court, wait your turn, and get a plate of white rice. Then you choose from a lineup of curries and meats — do not be surprised if your plate starts looking too small for everything you want. A staff member ladles each choice onto your rice, and you pay right there while they still have it.

    Some travelers miss the traditional banana-leaf serving style. I get it. But a reusable plate cuts down on waste and is faster to handle — plus you are joining Malaysia’s push against single-use plastics and reducing the demand for banana leaves harvested from protected jungle areas. Small choice, nice impact.

    Always Ask for Extra Spleen

    One friend in our group swore by the cockles. Another said he could not visit without at least one spoonful of kolong — beef intestines and spleen. So I went with the spleen, which was rich and almost mushily creamy under a thick dark brown curry sauce. Great call. Ask for extra when you go.

    I also added Rendang (beef) and asked for that same Rendang curry as an extra ladle of broth to dump over any exposed rice. And of course, I threw on a fried egg — because Nasi Lemak with an egg is just better than Nasi Lemak without one.

    Eat Malay-style: use your fingers, mix the sambal and curry deep into the rice. The flavor gets warmer, fuller. Every grain ends up coated in ways a fork or spoon simply cannot achieve.

    The Vibe

    There is usually a live band playing Pop Yeh Yeh — a local Malaysian rock-and-roll style that has been around since the 1960s. Sitting outside under tents, surrounded by jungle views and the murmur of a proper lunchtime crowd, it felt equal parts lively and relaxed. A great weekday lunch spot.

    Live music at midday eateries seems common across Kuala Lumpur, and I do not mind one bit. It makes waiting for your table feel like part of the experience rather than an inconvenience.

    Do Not Miss It

    Nasi Lemak Tanglin stands out among all the gorgeous street food in KL. They serve the standard Nasi Lemak foundation, but what sets them apart is the sheer range of meats, curries, and fresh steamed vegetables waiting to pile onto your plate. That diversity alone is reason enough to make the trip.

    If you are traveling to Malaysia, do not skip at least one meal of Nasi Lemak. And if you find yourself in Kuala Lumpur, go to Kompleks Makan Tanglin early, grab a plate, and add more than you think you need.


    Nasi Lemak Tanglin

    Location: Kompleks Makan Tanglin (search Google Maps)
    Hours: 7 am – 1 pm, open daily
    Prices: A basic plate of Nasi Lemak starts at RM 2. Eggs and meat toppings add RM 1–5 each. Our full meal for four people came to RM 35 (about US $8.50).

    Keep Reading