Every year the same question lands in my inbox: “How do you pull off a party spread in one evening?” I’ve been thinking about it a lot lately, and the answer keeps coming back to jello shots. They’re one of those treats that look like you spent an afternoon on them, but the actual hands-on work is closer to a long coffee.
Halloween is when jello shots really earn their spot. You can lean into the theme — little cauldrons, googly eyes, “blood” syringes — and still finish before the guests show up. The base is the same four ingredients every time. What changes is the decoration on top.
A quick note: these are technically adult shots, but if you leave the vodka out, the same base works perfectly for a kids’ Halloween party. Pair them with something like candy apples and you’ve got a table that photographs well and feeds the whole neighborhood.
What You’ll Need
The base comes from one 3-ounce box of jello (that’s the standard small box, about 10 to 12 shots). Double the water and alcohol if you use a 6-ounce box.
1 3-ounce box of jello in the flavor you want
1 cup boiling water
1/2 cup vodka, or the spirit you prefer (white rum, gin, whiskey, tequila all work)
1/2 cup cold water
For the decorations: green boba pearls, swizzle sticks, candy eyeballs, gummy eyeballs, and jello shot syringes. Only what you need for the specific shots you’re making.
I usually grab a flavored vodka — vanilla or chocolate — because it adds a second layer without much effort. Plain vodka is fine too.
The Base
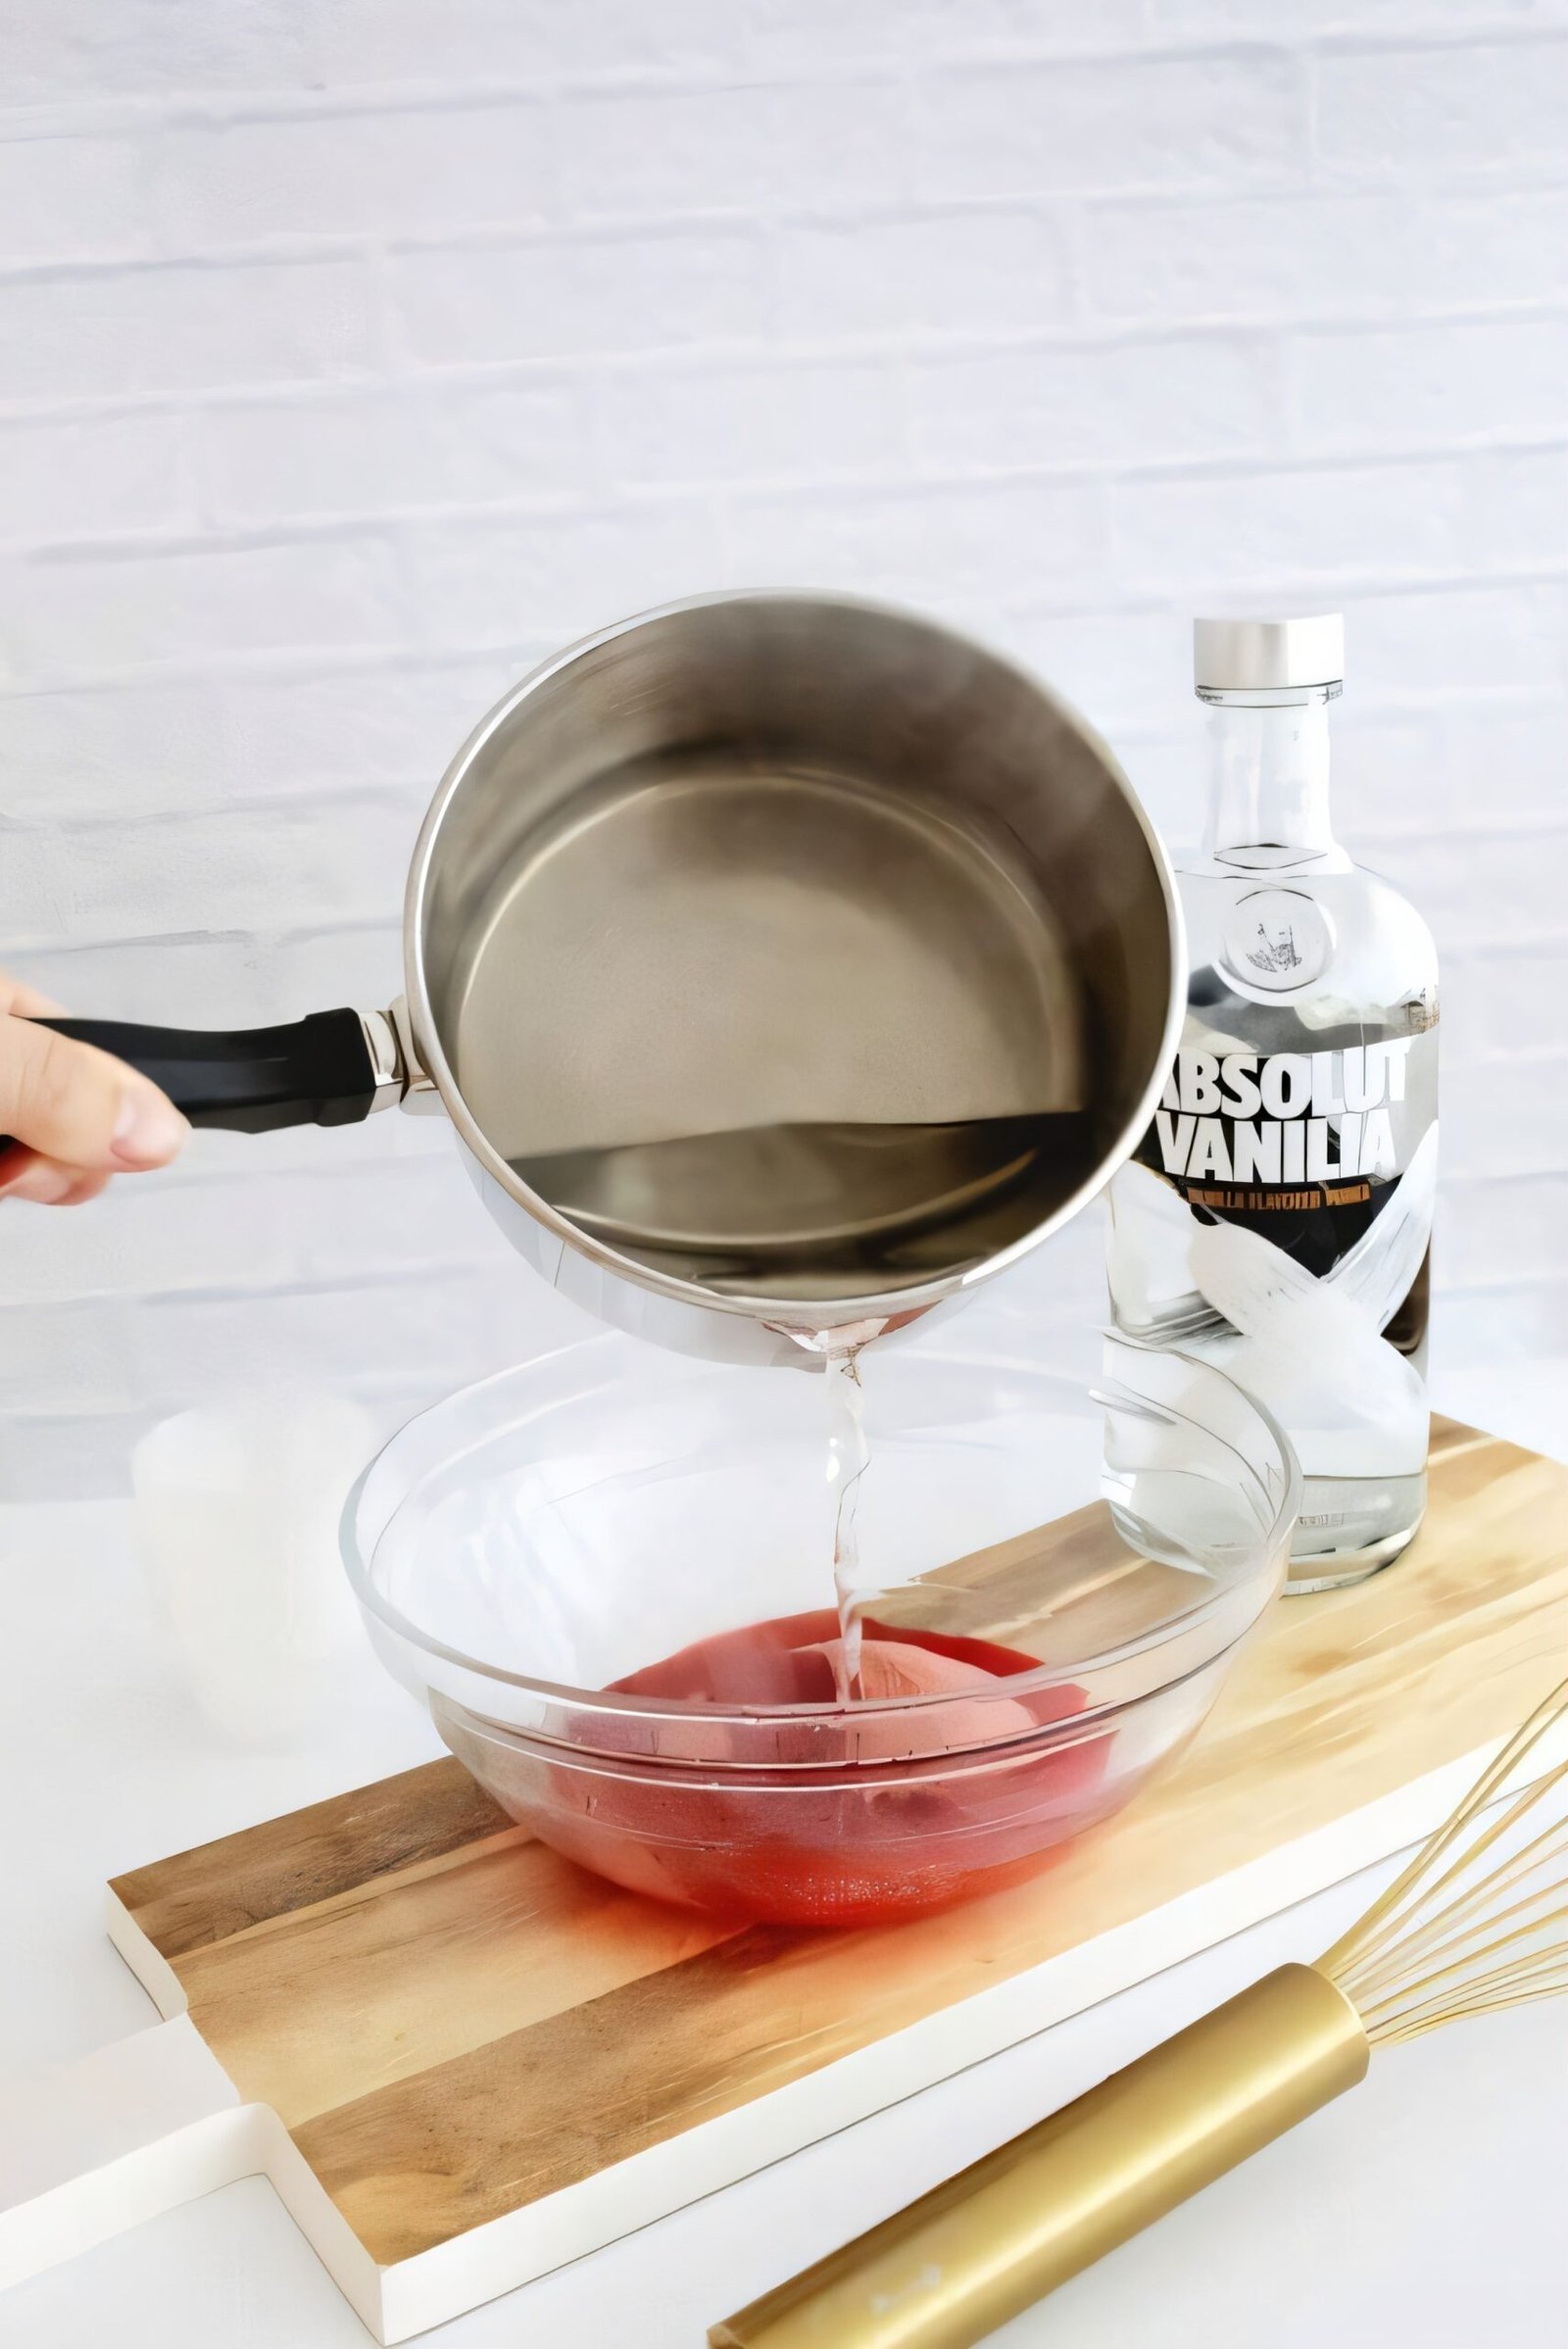
Boil the water and pour it over the jello powder in a mixing bowl. Whisk until the powder is fully dissolved. Then stir in the vodka and the cold water until combined.
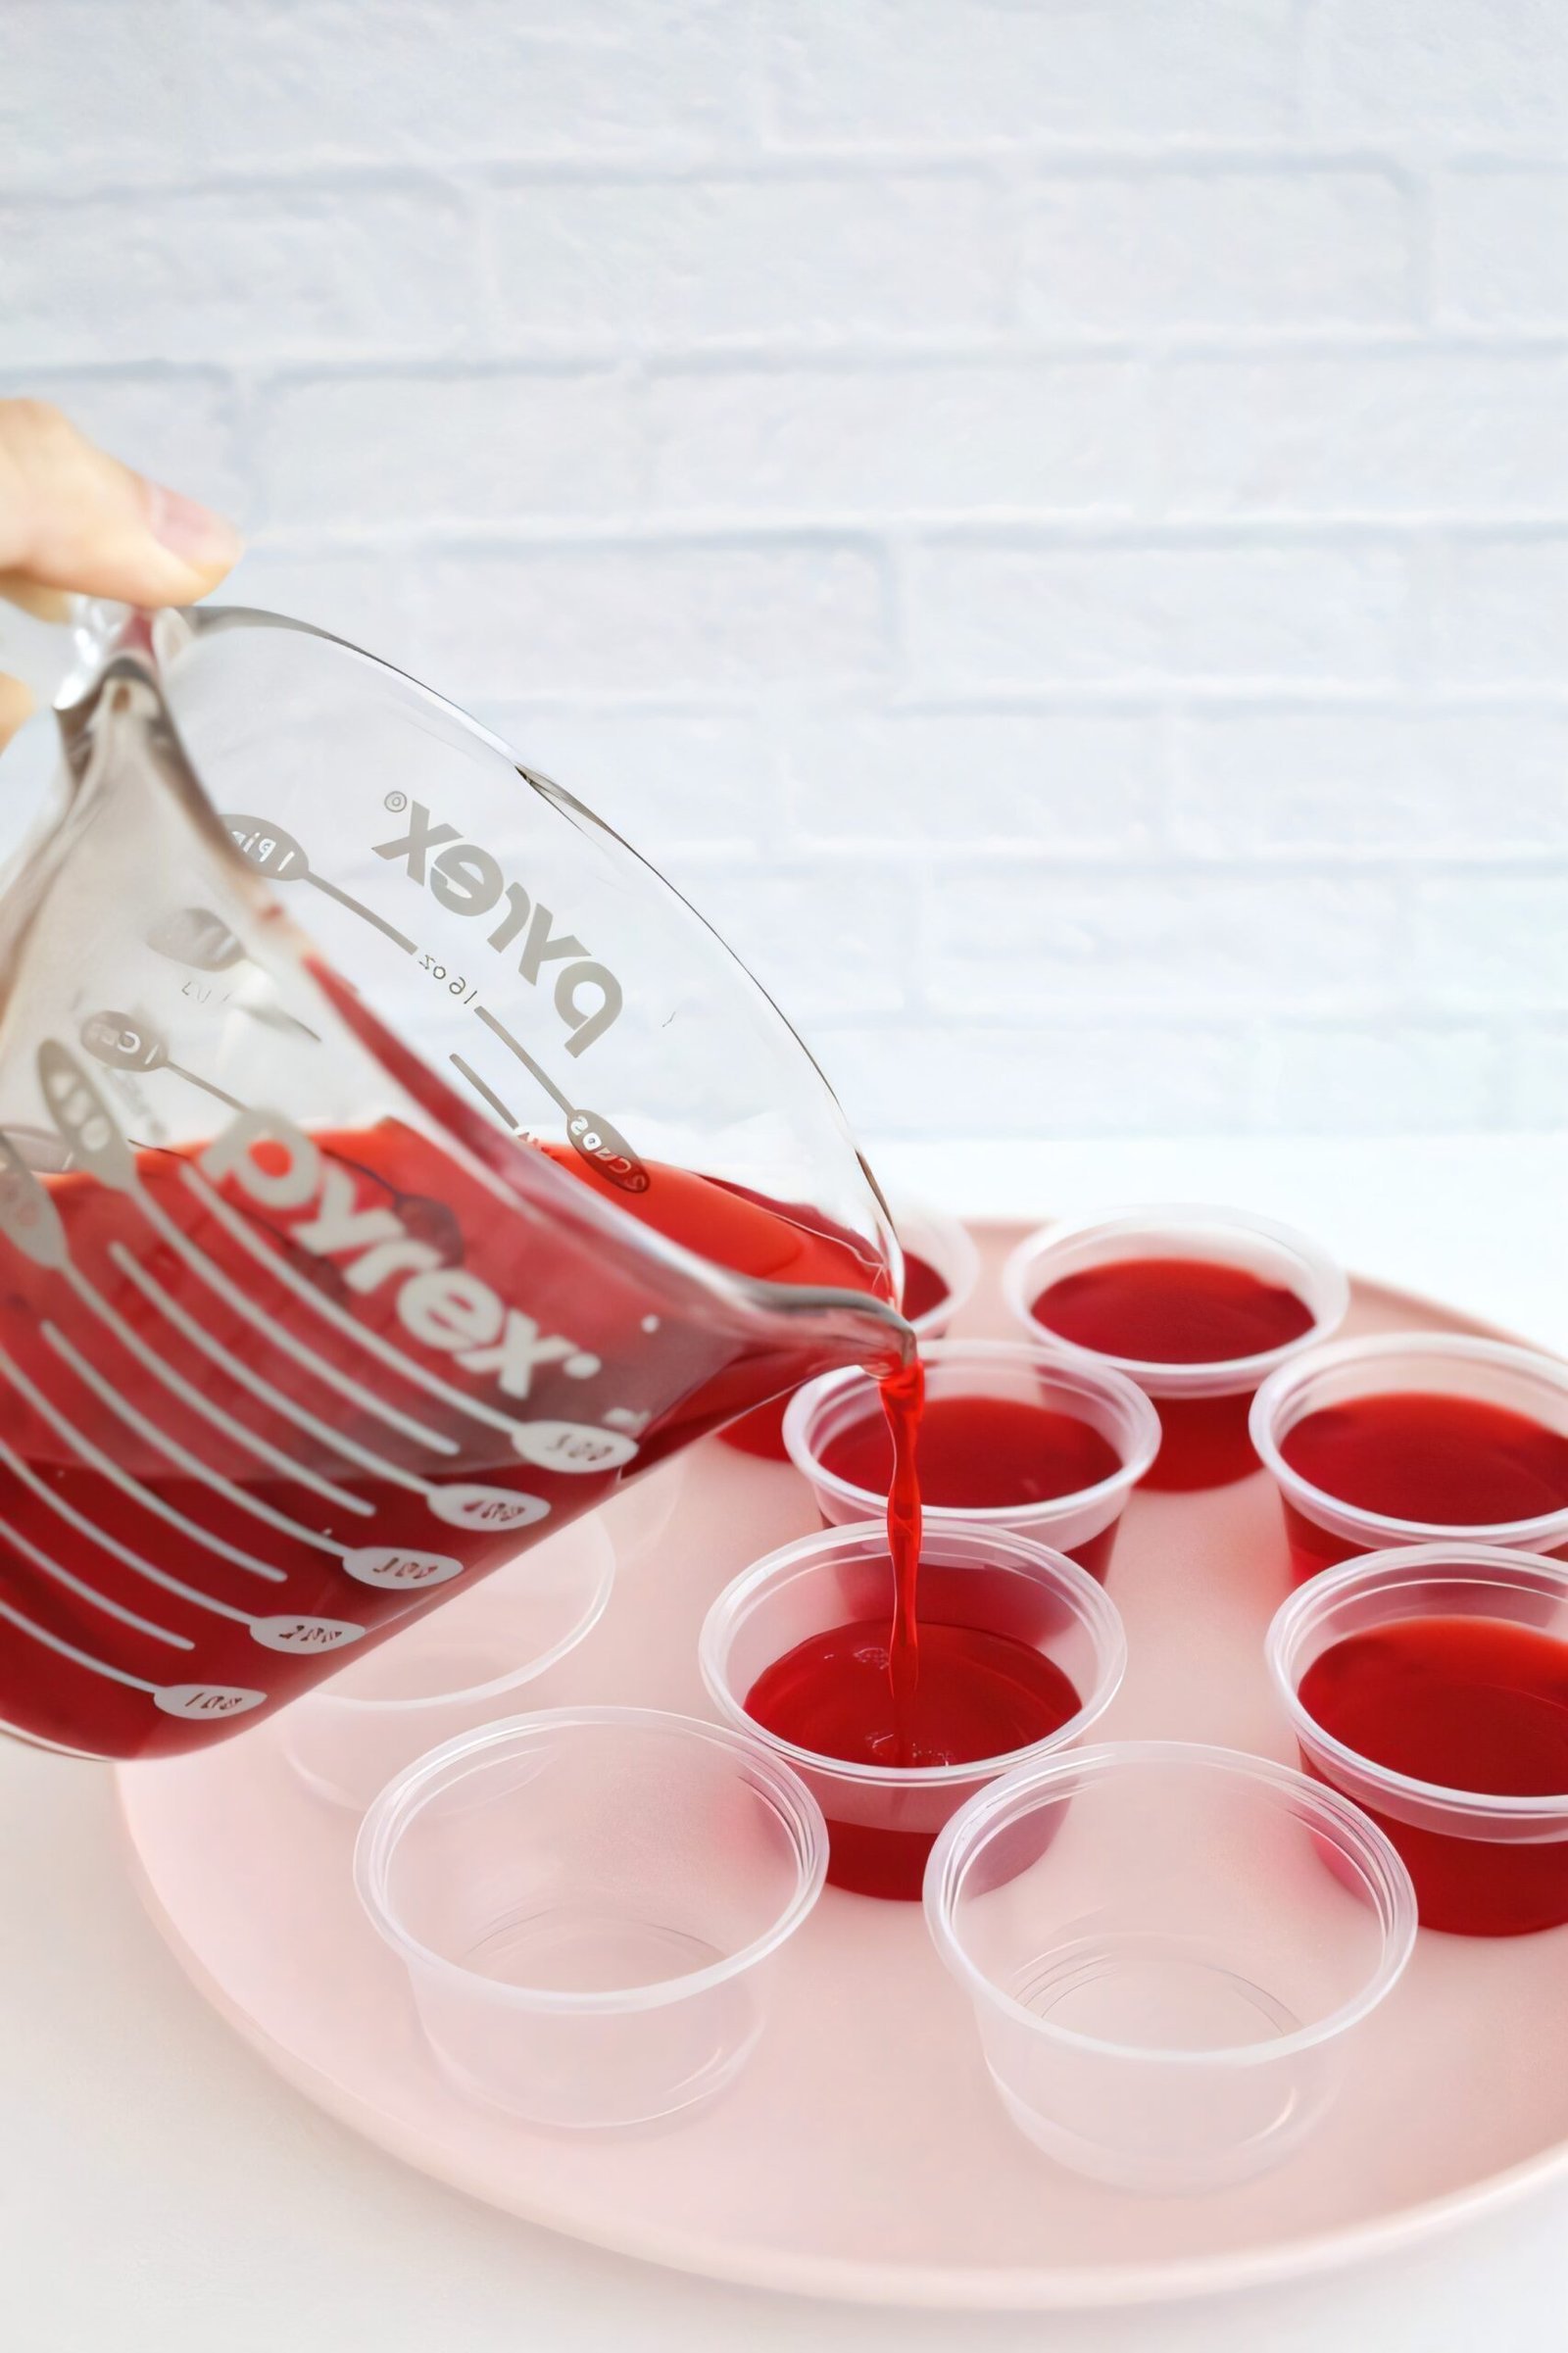
Pour the mixture into small cups, filling them about three-quarters full. A cup with a spout makes this a lot less messy. Let the liquid cool completely before putting lids on, or you’ll get condensation inside the lid.
Pop them in the fridge for 2 to 4 hours. That’s it for the base — the rest is decoration.
Four Ways to Dress It Up
Witch’s Cauldron
Use a black cup if you have one. Once the jello has set, scatter green boba pearls on top to make the “brew,” and break a swizzle stick to size so it looks like a stirring wand.
Eyeball Shots
The base works in any flavor. Once it’s set, drop a gummy eyeball on top and call it done. This one is the easiest of the four and the one my daughter keeps asking me to make.
Syringe Shots
Make the base in a red or green flavor. Instead of pouring it into cups, use the jello shot syringes to draw the liquid up directly. Let them set in the syringes in the fridge, then serve straight from them. No un-molding, no mess.
Monster Shots
Green base. Once it’s set, pile green boba pearls on top for the “body” and add candy eyeballs for a silly face. The kids eat the whole thing, eyes and all.
A Few Things I’ve Learned
Squeezable cups make getting the shot out a lot easier. Hard plastic cups can trap a stubborn corner of jello.
Wait to add the boba pearls, candy eyes, and gummy eyes until right before serving. They soften and slip around if you add them too early.
Layering is a real thing. Pour a small amount of one flavor into the cup, let it set, then pour a second flavor on top. You can do as many layers as you want — it just takes longer.
A Note From Nora
The first time I made the syringe shots, I overfilled one and it leaked all the way down the counter. The fix is simple: fill the syringe to just below the top, wipe the tip, and give it a minute before it goes in the fridge. Beyond that, this one passed the Tuesday test — and honestly, I’d do it on a Friday just to have an excuse to decorate the kitchen like a haunted house.
One summer night I pulled a platter of charred vegetables off the grill, set it on the table, and my whole family went quiet for a second. No one was talking about the chicken. Sam asked for seconds of zucchini before the plate was even cold, and I stood there in my kitchen doorway thinking: this is it. This is the thing.
The grill gets plenty of attention for burgers, steaks, and chicken — and it should. But grilling vegetables is where the magic hides: smoky, caramelized flavor and crispy, browned edges that no oven can quite copy. Here’s everything I’ve learned, so your first attempt doesn’t end in soggy disappointment.
Before the rules: I’m no chef. I test every dish in my own kitchen until it works on a weeknight, and this list of grilling rules is the one that made vegetables a regular on our grill instead of a once-a-year experiment.
Start with dry vegetables
Wash your vegetables, then dry them properly. I can’t stress this enough. Excess water turns to steam on the grill, and steam is how you get sad, mushy vegetables instead of char. Pat them dry, even if it takes an extra two minutes — that’s the difference between a nice char and a boiled vegetable situation.
Don’t go light on the oil
You don’t want a flood of oil — it drips onto the flame and causes flare-ups. But a thin, skimpy coat is the enemy too. Coat the pieces well enough that they won’t fuse to the grates. I toss the cut vegetables in a bowl with oil and salt until every side is glistening.
Cut everything into even pieces
Uniform pieces cook at the same rate, which means they all finish at the same time. Mix a few big chunks in with small ones and you’ll end up with half a plate of char and half a plate of raw. One size, whole tray. Life is simpler that way.
Use two heat zones
If you’re grilling a few different vegetables at once, set up a hot side and a cooler side on the grill. Start sturdier vegetables like potatoes over higher heat to build color, then move them to the cooler side if they need extra time to finish. Delicate vegetables, like asparagus, benefit from gentler heat from the start.
Season twice
I salt vegetables before grilling — it draws out moisture and improves texture. Then after grilling I add the rest: a squeeze of lemon or lime, fresh herbs, grated Parmesan. Dry spices like chili powder and cumin belong on before the grill, so they can toast with the vegetables instead of burning on top of them.
Know that vegetables don’t all grill the same
Different vegetables have different amounts of moisture, sugar, and density, and it changes how they cook:
Dense vegetables like potatoes need more cooking time.
Delicate vegetables like asparagus cook in just a few minutes.
Mushrooms shrink as they cook — start with more than you think you need.
Zucchini and other summer squash cook quickly and do best over high heat, so they brown instead of getting watery.
Grilled vegetable recipes worth your time
Once the rules click, these are the dishes I come back to all season.
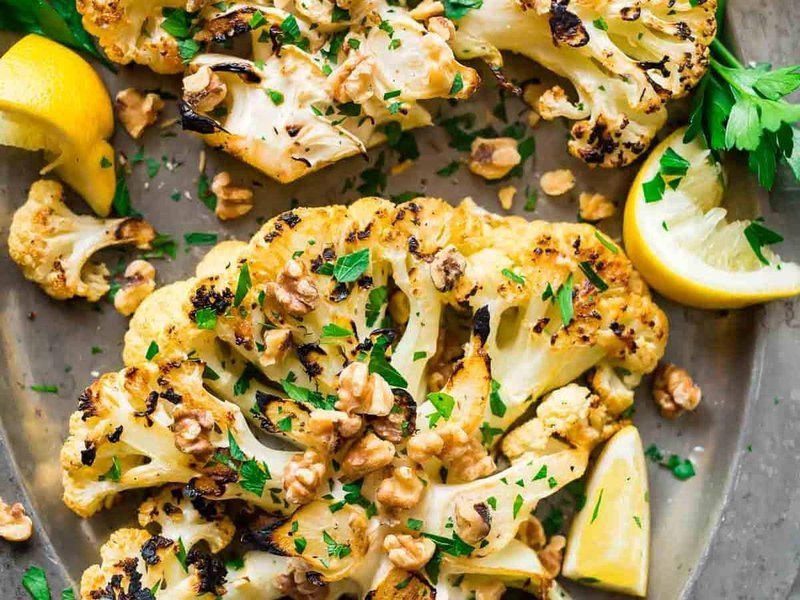
Grilled cauliflower steaks
Thick slices of cauliflower caramelize beautifully on the outside while staying tender inside. Hearty enough to serve as a vegetarian main or alongside grilled meat — this one always disappears fastest.
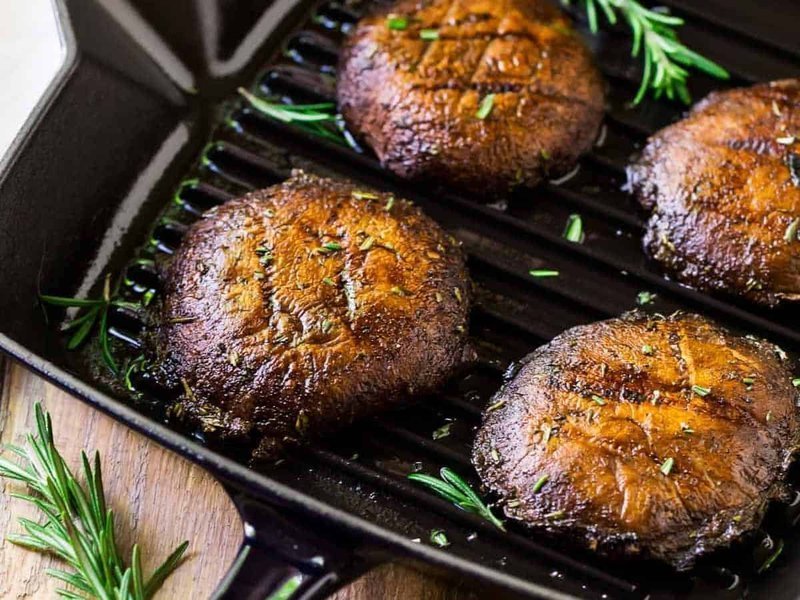
Grilled portobello mushrooms
Large portobellos soak up marinade and come off the grill rich, savory, and almost meaty. Great in sandwiches or on burgers, or served whole.
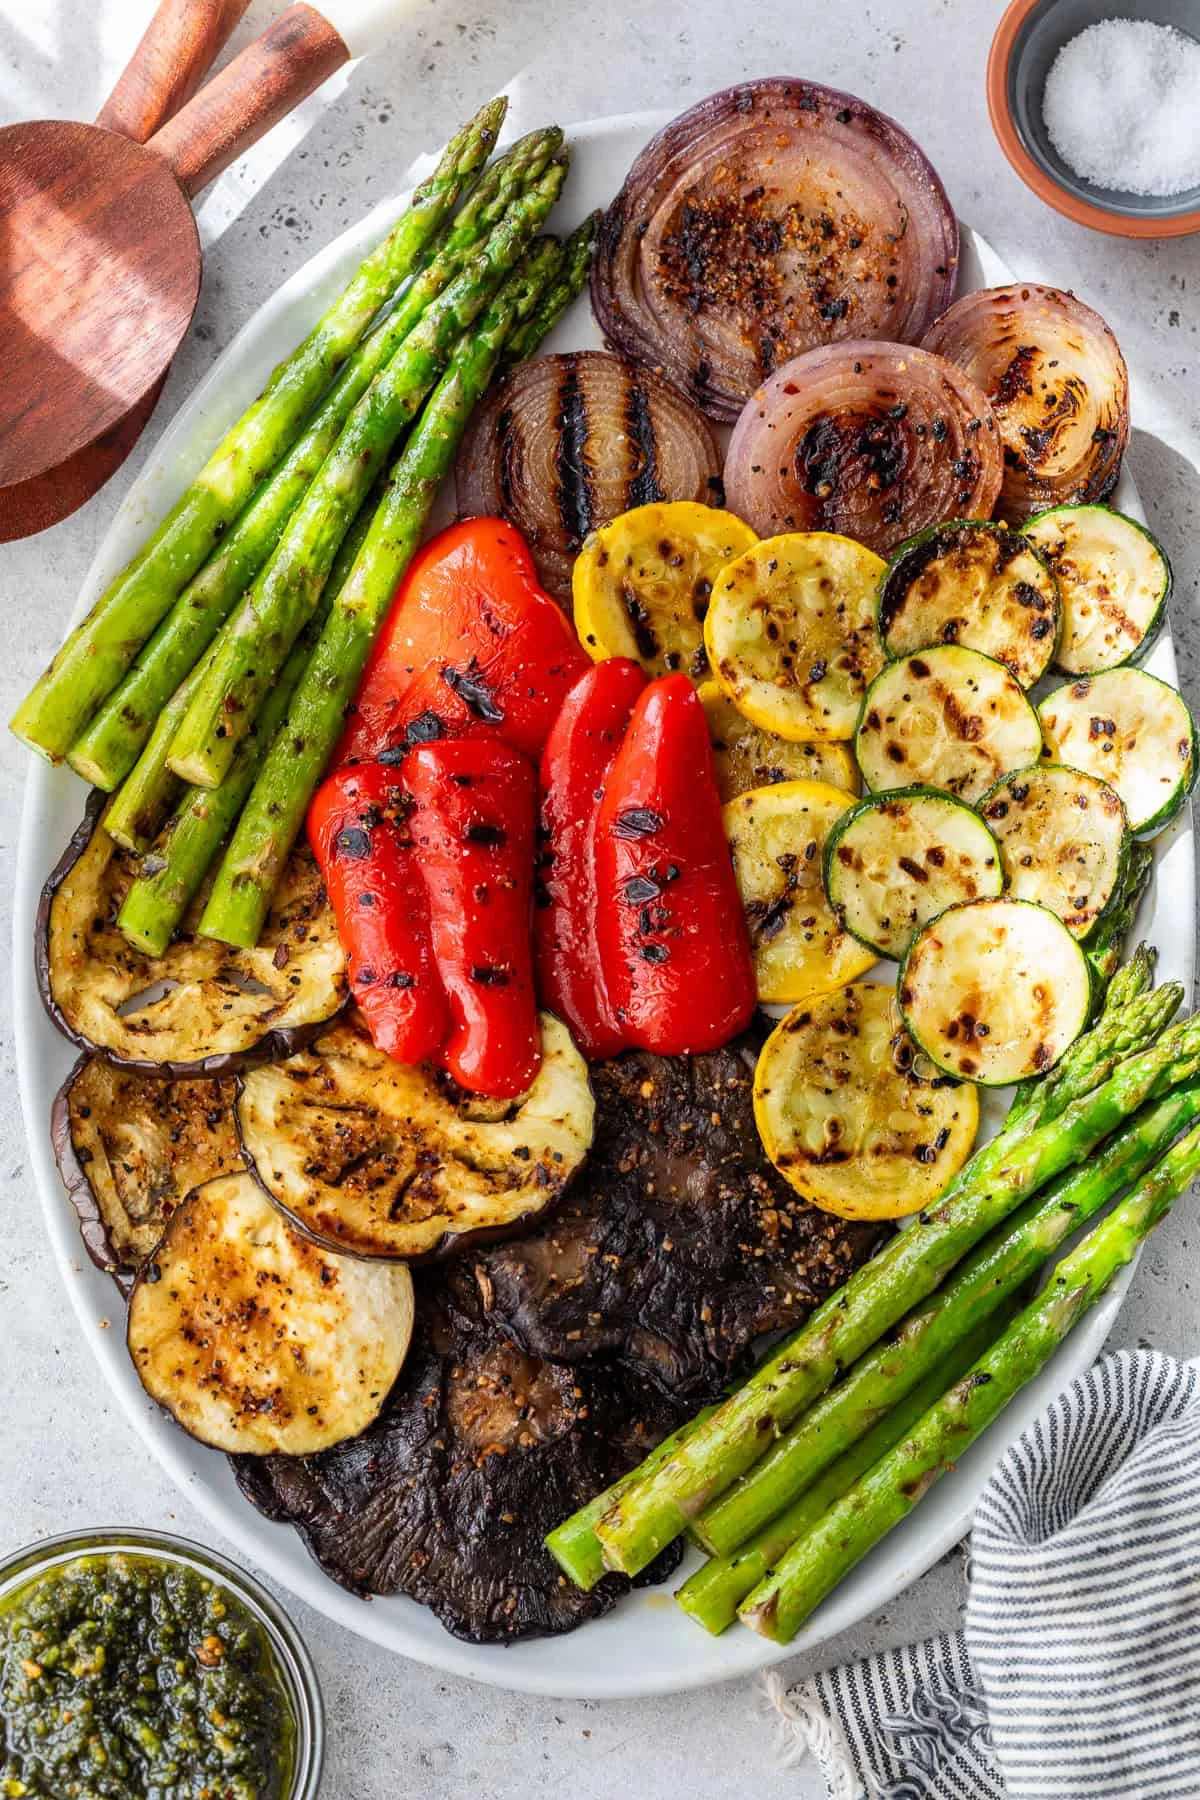
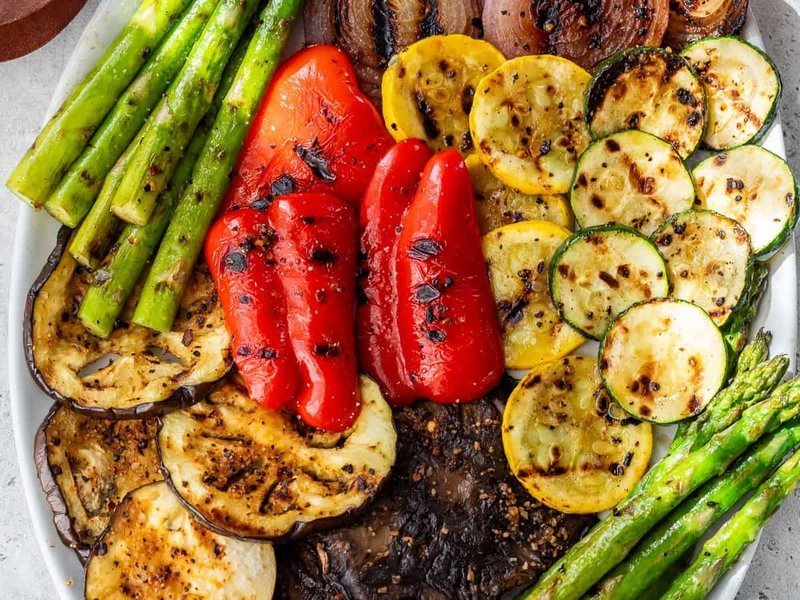
A platter of mixed grilled vegetables
Cooking for a crowd? A colorful platter of mixed grilled vegetables is hard to beat. Combining several vegetables gives everyone something they’ll love, and it makes a genuinely impressive centerpiece for any barbecue.
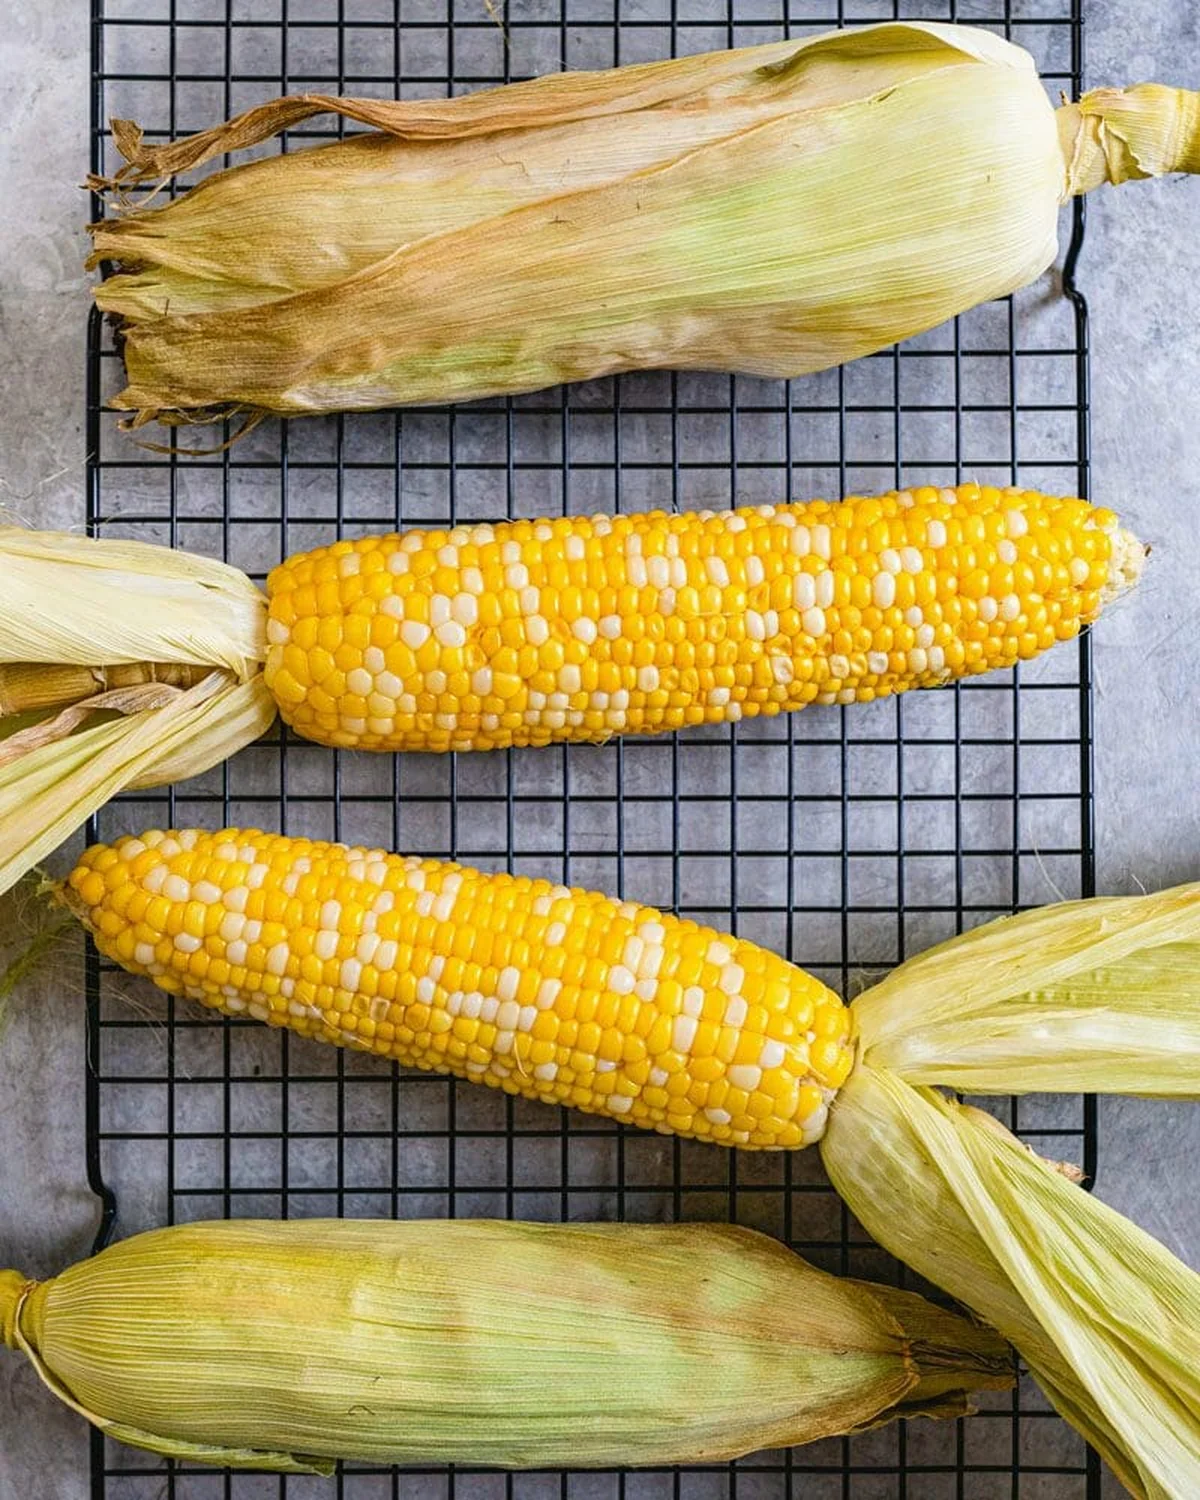
Grilled corn
Few summer foods are as satisfying as sweet corn fresh off the grill. The kernels get sweeter as they cook, and the smoke pairs beautifully with butter, herbs, or a sprinkle of cheese.
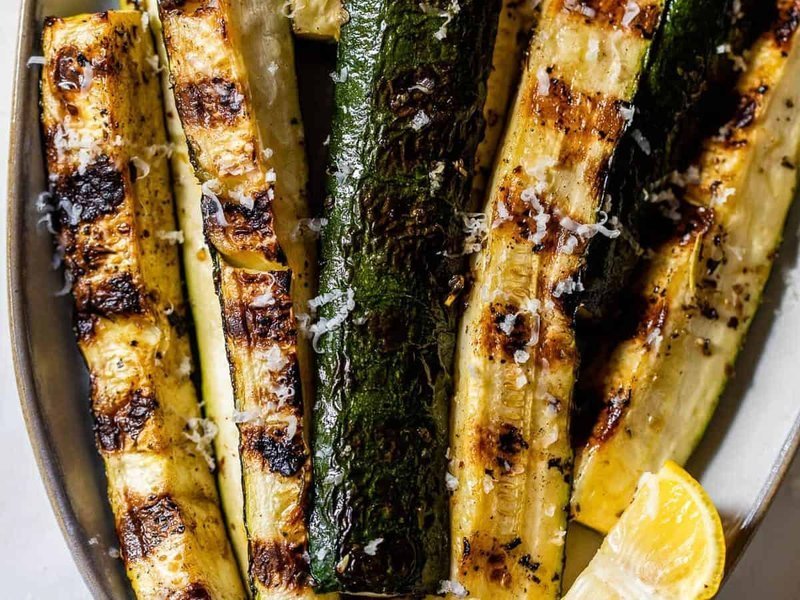
Grilled zucchini with Parmesan and herbs
Zucchini cooks fast and develops lightly charred edges while staying tender. The trick is giving each piece room on the grill so it browns instead of steaming — crowded zucchini is sad zucchini.
If zucchini gets you started, try the same approach on broccoli, sweet potato fries, or eggplant — the rules above don’t change, and none of them need more than a few minutes of attention.
A note from Nora
The first time I grilled a whole tray of vegetables, I over-estimated the zucchini and under-estimated the potatoes — half the tray was perfect, half was a lesson. This is the corrected version. Grilled vegetables pass the Tuesday test for our house: one bowl of oil and salt, one tray, and dinner is basically done while the grill does the work. If I can make it on a Tuesday, it’s a keeper.
Corn season in Portland is short, loud, and completely worth the fight for the last good ear at the farmers market. I’ve been cooking corn on the cob almost every week since it hit the stands, and I’ve cycled through every method I can find until I knew exactly which one I’d reach for on a given night.
This is the post I wish I’d had. Not a recipe, really, but a map of the five ways to cook corn on the cob, with the honest trade-offs, so you can pick the one that fits the night you actually have.
How long it takes, at a glance
Before the details, the short version, so you can decide fast:
Boil it: 5 minutes in rapidly boiling water.
Grill it, shucked: 12 to 15 minutes on the grates at medium-high, or 20 to 25 minutes wrapped in foil.
Roast it in the oven: 35 minutes on a baking sheet.
Microwave it: 5 to 6 minutes with a damp paper towel.
Pick the one that matches your evening. If the grill’s already on for dinner, corn goes on with it. If it’s a rainy Tuesday and the idea of lighting charcoal feels like a project, the oven does all the work for you.
How to boil corn on the cob
Boiling is the method everyone should know: simple, reliable, and genuinely hard to mess up. It’s my default on a weeknight when I want corn and don’t want to think about it.
Put 1 tablespoon of kosher salt in a large pot of water and bring it to a boil. It takes about 15 to 20 minutes to come up, so start it early and plan around it.
Shuck the corn and remove the silk.
When the water is boiling, lower the cobs in and boil covered for 5 minutes, until the kernels are bright yellow and cooked through.
Drain and season with butter, salt, and pepper.
The whole thing is done before your side dish is. If you have a little more time, the stovetop is also where I’d start if I’m making a bigger batch for a potluck.
How to grill corn on the cob
If you ask me for my favorite, this is it. Grilled corn is smoky, a little charred, and sweet all at once. It’s the reason I keep the grill going well past the last real meal of the season.
Preheat the grill to medium-high heat, around 375 to 450°F (190 to 230°C).
Shuck the corn by peeling the outer layers down one at a time, keeping them attached and hanging below the cob. Optional: tie the husks back with kitchen twine for a natural handle.
Rub oil on each cob evenly with your hands, then set it straight on the grates. Turn it as it begins to blacken.
Grill about 12 to 15 minutes total, until charred on all sides.
Serve right away with butter and sea salt, husks tied back as handles.
If you’d rather not deal with flare-ups, the foil method is the same idea, gentler. Wrap each shucked cob in foil with olive oil, a little salt and pepper, and a thin pat of butter, poke a few small holes in the top, and grill for 20 to 25 minutes, turning now and then, until the corn is bright yellow and tender.
How to cook corn in the microwave
Some nights you want corn and you want it now. The microwave is the fastest way to get there, and honestly, for a single cob, it’s good enough.
Wrap each cob in a damp paper towel, top and bottom.
On high, cook 4 minutes, then check whether the kernels are bright yellow and done all the way around.
Rotate and keep going in 2-minute bursts until it’s cooked through. A cob or two takes roughly 4 to 5 minutes; three or four cobs take closer to 8 to 10.
It won’t give you the char that the grill does, but for a weeknight when the pot’s already on for something else, it’s the move.
How to oven-roast corn on the cob
This is the one I reach for when it’s too wet to grill and too lazy to stand at the stove. Almost no prep, and you don’t even have to shuck it first.
Preheat the oven to 350°F (175°C).
With a knife or kitchen scissors, trim off the loose silk and any outer husk pieces that are flaking.
Set the cobs husks-on straight onto the oven racks, spaced out evenly, and roast for 35 minutes.
Let it cool a few minutes so the husks aren’t scalding, then peel them back. Season with butter or olive oil, kosher salt, and freshly ground pepper.
It’s a little slower than the other methods, but it’s completely hands-off, which is the whole point when the kitchen is already full of other things.
How to smoke corn on the cob
If you’ve got a smoker, you’ve absolutely got to try this one. The smoky-sweet, buttery, salty flavor is the reason I fire it up even on days that didn’t originally call for it.
Heat the smoker to 300°F (150°C) and prep your wood chips or chunks per the maker’s directions. Any smoking wood works; I like hickory.
Shuck the corn the same way as grilling, peeling the husks down and keeping them attached, then tie them back for a handle if you like.
Lay the cobs in a single layer on the grates and smoke until golden brown, 40 to 45 minutes. Turn once halfway through if your smoker lets you.
Serve with butter and salt.
This is the weekend version, not the Tuesday version. But on a slow Saturday with nothing else going, it’s the best way to eat corn.
Ways to season it
Once it’s cooked, the topping is where it gets fun. I keep most of it simple, but these are the ones that actually make it in our kitchen:
Butter and salt. The classic for a reason. Take it a step further with a sprinkle of smoked paprika and a little finely chopped parsley.
Mexican street corn. A creamy sauce of lime and chili powder with crumbled cheese over the top is my favorite way to serve it when I want something a little more.
Old Bay. This blend is perfect on corn and adds a lot of flavor for very little effort.
Feta, Parmesan, and chopped fresh basil. Butter plus two cheeses and a handful of basil makes fresh corn sing.
How to cut the corn off the cob
If you’re planning to use the kernels in a salad, you’ll need to chop the corn off the cob, which, as anyone who’s tried it bare-handed knows, is a mess. Here’s the trick that keeps it contained.
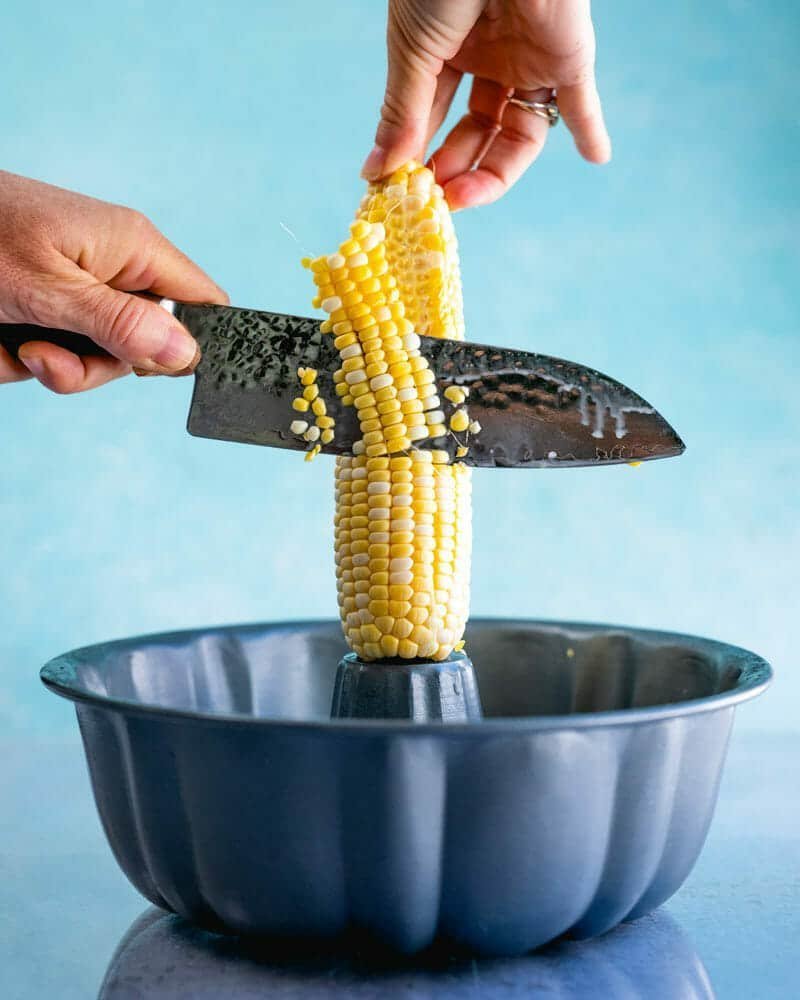
Grab a bundt pan and set the tip of the cob into the hole in the middle. Hold the bottom of the cob firmly with your non-cutting hand.
With a large chef’s knife, slice downward in a steady motion, letting the kernels fall neatly into the pan.
The bundt pan does the work of catching every kernel, so the counter stays clean and you don’t lose half your corn to the floor.
What I do with the leftovers
When there’s more corn than I can eat in one sitting, the off-cob kernels go into a salad, a soup, or a quick salsa. Corn is one of those ingredients where the scraps become their own thing. A few cut kernels stirred into a bowl with some black beans and lime is a whole snack on its own.
A note from Nora: the first time I tried the oven method, I pulled the husks off too soon and nearly burned my fingers. Lesson learned, and now I let it cool a few minutes and thank myself for the patience. If I can make it on a Tuesday, it’s a keeper. Which, as it turns out, all five of these are.
One evening this week, the grocery bag was heavier than usual — two pounds of tomatoes, the kind that smell like summer the moment you tear the bag open. I wanted something warm on the table but didn’t have energy for a full production, so I did what I do: I put them in the oven with olive oil, garlic, a little balsamic, and called it dinner’s side.
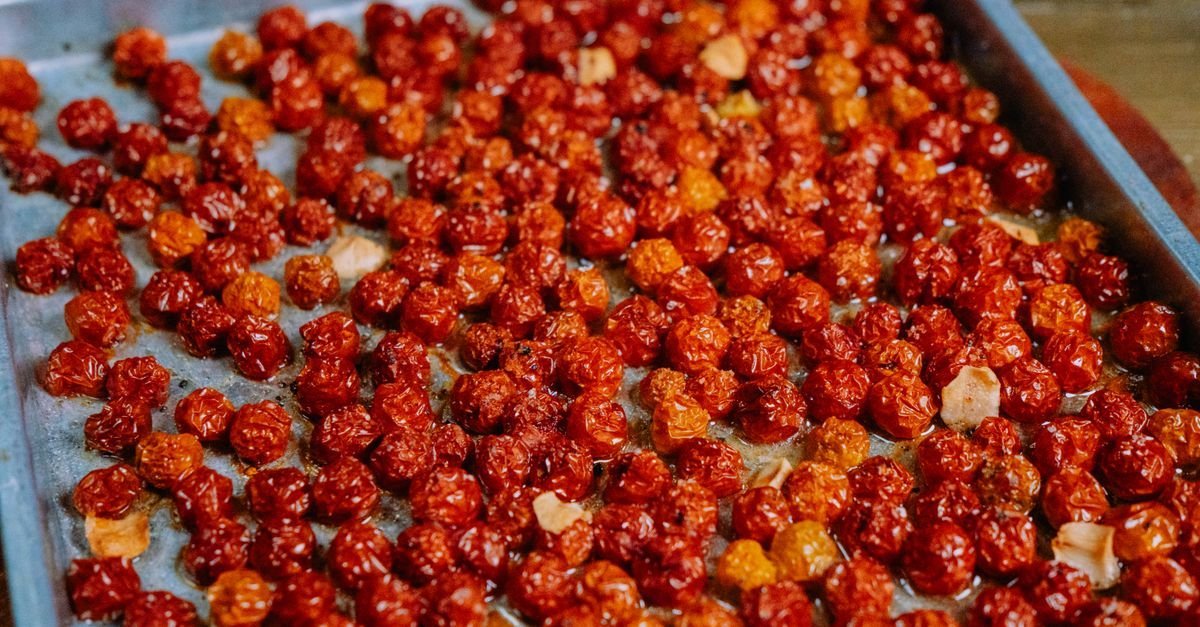
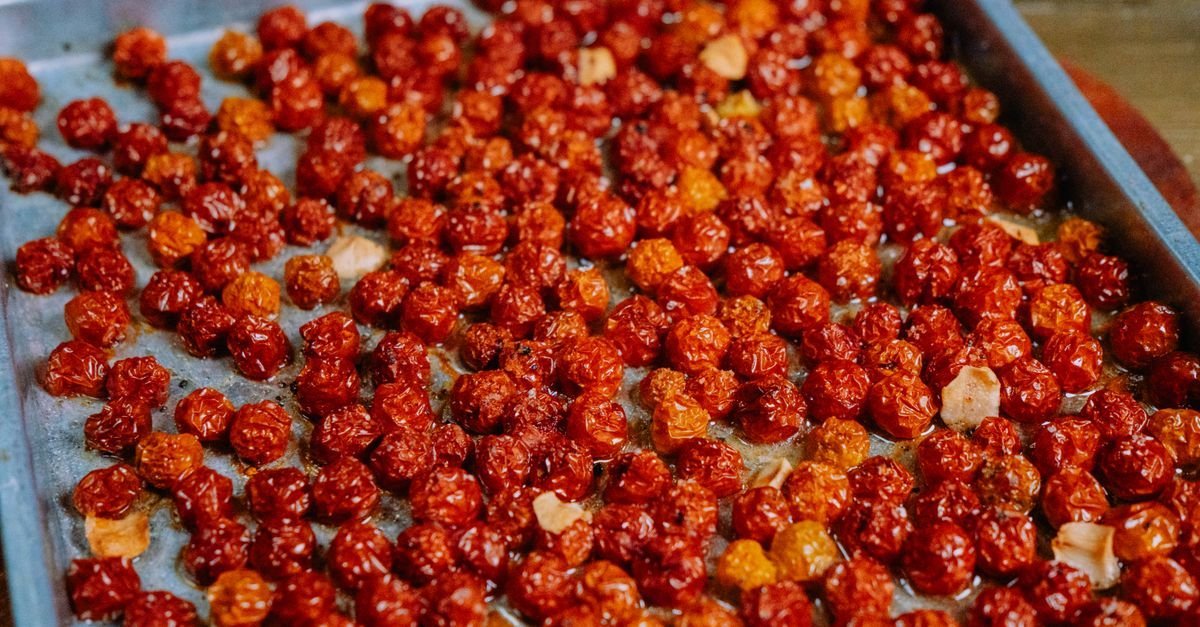
That’s the whole thing. Roasted tomatoes are an easy and delicious side dish, and this version takes about 15 minutes from start to finish. They come out sweet, juicy, and slightly caramelized, with savory garlic, fragrant basil, and a hint of tangy balsamic in every bite. Roasting concentrates the tomatoes’ natural sweetness, so you get a rich, savory side with almost no effort.
Why this recipe works
These tomatoes are the kind of dish that sounds like a side and behaves like a small feast. I’ve served them next to grilled chicken, tossed them with egg noodles, and spooned them over crusty no-knead bread. The 10-minute cook time for small tomatoes means the oven is barely warm before they’re done — that’s the Tuesday test, and this one passed.
Ingredients
2 to 3 pounds ripe tomatoes
1 tablespoon olive oil
½ tablespoon balsamic vinegar
1 clove garlic, minced
1 tablespoon chopped fresh basil (or ½ teaspoon dried basil)
2 tablespoons shredded Parmesan cheese, optional
Salt and pepper to taste
Serves 6. Total time: 15 minutes. Method: oven roasted. All you need is a rimmed baking sheet or dish.
A few notes on the ingredients
Tomatoes: Choose the ripest tomatoes you can find — ripe fruit makes the biggest difference in flavor. Roma tomatoes are meatier and may need a few extra minutes in the oven, while cherry, grape, and Campari tomatoes roast more quickly and become wonderfully juicy.
Balsamic vinegar: A splash of balsamic adds a subtle tang and enhances the tomatoes’ natural sweetness. For a sweeter, richer finish, drizzle with balsamic glaze after roasting so it doesn’t over-reduce in the oven.
Garlic: Minced garlic adds bold, savory flavor as the tomatoes roast. Want it milder? Substitute garlic powder, or roast a few whole smashed cloves alongside the tomatoes.
Basil: Fresh basil gives a bright, garden-fresh flavor, and dried basil is a perfectly good substitute when fresh isn’t available. Oregano, thyme, parsley, or Italian seasoning all work too — and a pinch of crushed red pepper flakes before roasting adds a little heat if you like it.
Parmesan (optional): A sprinkle adds a salty, nutty finish. Leave it out entirely if you prefer them plain.
How to make roasted tomatoes
Preheat the oven to 450°F. Wash the tomatoes and cut them in half — if they’re large, cut them into quarters so everything cooks at the same pace.
In a bowl, toss the tomatoes with the olive oil, balsamic vinegar, garlic, basil, Parmesan if you’re using it, and salt and pepper to taste.
Spread them in a single layer on a rimmed baking sheet or in a baking dish. A single layer matters: crowded tomatoes steam instead of roast. Roast for 10 to 20 minutes, or to your desired doneness. Smaller, riper tomatoes like Campari are done in about 10 minutes; larger or firmer ones like Romas run closer to 20. Once cooked, they can sit and be served hot or at room temperature.
Tomato roasting tips
Cut tomatoes evenly. Quarters for large tomatoes, halves for small ones — even pieces cook at the same pace.
Don’t toss after roasting. Tossing them around makes them too soft and too juicy. Use a spatula, or just serve straight from the pan.
Time the basil to your taste. Add fresh basil after roasting for a brighter flavor, or before roasting for a more mellow herb flavor.
Storing leftovers
Save every spoonful. Keep leftovers in an airtight container in the refrigerator for up to 4 days, or in the freezer for up to 3 months. Thaw in the refrigerator, then reheat in the microwave or in a skillet over low heat. They’re also perfectly good cold or at room temperature, spooned over toast with a little extra olive oil.
One serving comes in around 56 calories with 6g of carbohydrates, 1g of protein, and 3g of fat — the rest is mostly summer in tomato form.
If you want more to do with fresh tomatoes, my other favorites are a simple tomato salad, bruschetta, tomato mozzarella salad, and a tomato pie for when you’re ready to go all in.
A note from Nora
The first time I made these, I panicked halfway through and flipped the pan with a spatula, thinking they needed turning. They didn’t. They got a little soft, and Sam said they were “fine, honestly” — which from him is a standing ovation. Since then I’ve learned to leave them alone, and honestly, that’s a life lesson worth roasting a tomato to. If I can make it on a Tuesday, it’s a keeper.
There’s a version of me that survives on coffee and a granola bar eaten over the kitchen counter while chasing a two-year-old around. I’d make peace with it, honestly — until the day I grabbed one of those pre-made breakfast sandwiches from the freezer aisle and bit into something that tasted like yesterday’s leftovers wearing a costume.
So I made my own. And I’m never going back.
These freezer-friendly breakfast sandwiches come together in less than an hour, and one batch gives you six hearty breakfasts that keep for up to three months. Fluffy eggs, melted cheese, crispy bacon or savory sausage, toasted English muffins — everything the store-bought version promises, except the mystery aftertaste.
Why these live in my freezer
I keep a stack of these tucked in the back of the freezer, and it’s quietly changed how our mornings work. Instead of cooking breakfast before school or work, I grab one, wrap it in a paper towel, and microwave it for a couple of minutes. By the time Sam’s shoes are found and the backpack is on my daughter’s shoulders, breakfast is already in her hands.
They’re also forgiving in the way good meal prep should be. I make half with bacon and half with sausage, so everyone gets their version. Whole wheat English muffins and turkey sausage if you want them lighter; add spinach or peppers to the eggs if you want them louder. Same one-hour batch, different sandwiches.
If you’ve ever paid full price for a frozen breakfast sandwich, these taste like a much fresher version of it.
What you’ll need
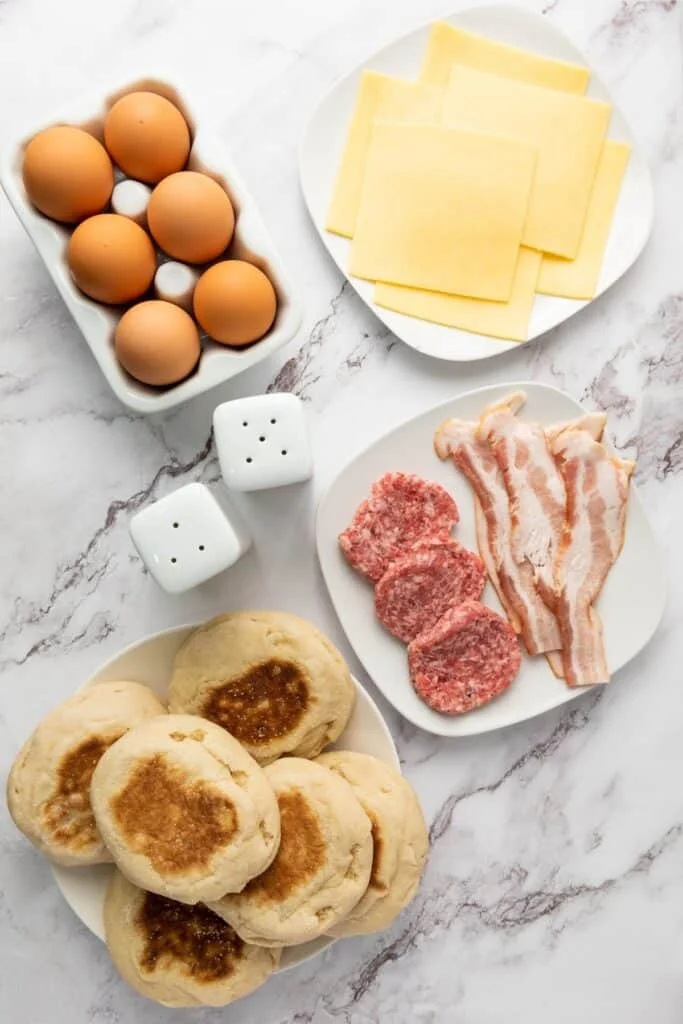
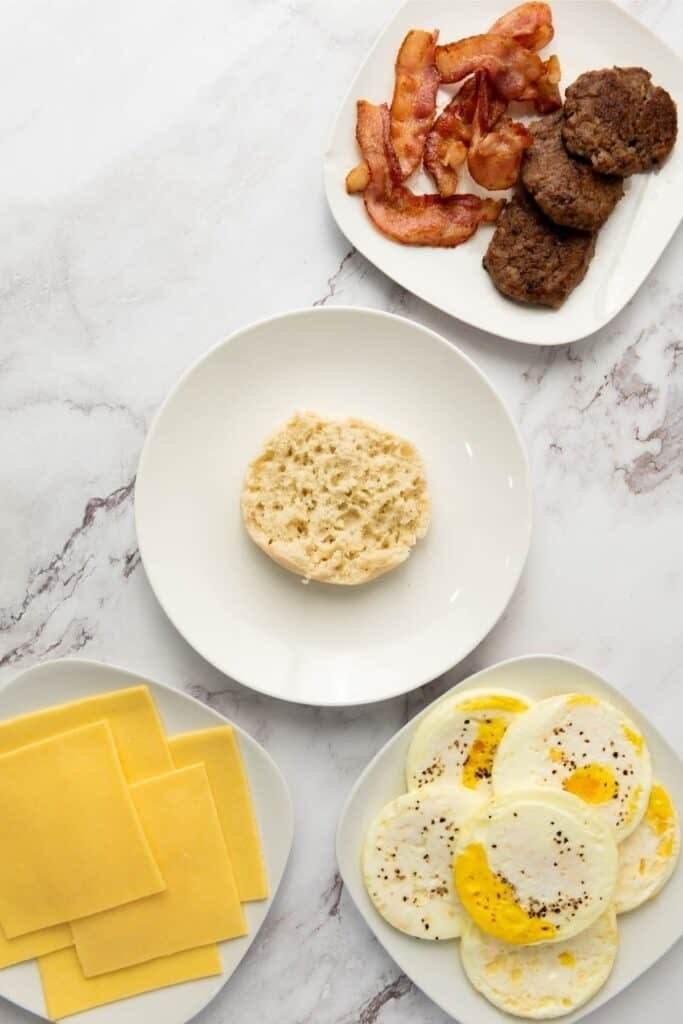
6 English muffins, split in half
6 large eggs
3 slices bacon, cut in half
3 sausage patties
6 slices cheese (Gouda, cheddar, American, Swiss — your favorite)
Salt and pepper
Butter or cooking spray
How to make them
The whole process takes less than an hour, and there’s nothing technical about it. Here’s exactly how I do it in my kitchen.
Step 1: Cook the bacon and sausage
Cook the bacon in a skillet over medium heat until it’s properly crispy. Pull it onto a paper towel-lined plate. Then cook the sausage patties in the same skillet until they’re cooked all the way through, drain them on paper towels, and set both aside.
Step 2: Cook the eggs
Lightly grease a nonstick skillet (or an egg-ring pan if you have one — these come out so much neater that way). Crack the eggs in, season with salt and pepper, and cook until the whites are set and the yolks are at your preferred doneness — about 3 to 4 minutes. For firmer yolks, carefully flip and cook another minute or two.
Let the eggs cool slightly before you start assembling. This is the part I always rush the first time, and the sandwiches end up a little more fragile than they need to be. Worth the two minutes of patience.
Step 3: Assemble
Lay the bottom halves of the English muffins out. One slice of cheese on each. One cooked egg on each. For three of the sandwiches, add the bacon halves. For the other three, add a sausage patty. Cap each one with the top half of the muffin.
Step 4: Wrap and freeze
Wrap each sandwich individually in parchment paper, then pack them into a large freezer bag or airtight container. They’ll keep for up to three months in the freezer — write the date on the bag so future-you doesn’t have to guess.
Step 5: Reheat
When the morning arrives: unwrap the parchment, wrap the sandwich loosely in a paper towel, and microwave for 1 to 2 minutes until heated through. If you have a few extra minutes and want the muffin properly crisp, bake it in a 350°F oven for about 20 minutes instead. Both work. The microwave is what I actually do, and I’m not sorry.
Tips that actually help
Let everything cool before wrapping. Warm ingredients mean steam, and steam means a soggy muffin a month from now.
Toast the English muffins first. Not required, but it gives the sandwich a little more structure after reheating.
Swap the cheese freely. Gouda, cheddar, pepper jack, Swiss, provolone, American — anything that melts well works here.
Veggies in the egg. Spinach, sautéed peppers, onions, or mushrooms fold right in.
Go lighter if you want. Turkey bacon, turkey sausage, whole wheat muffins, reduced-fat cheese. All of it works.
Scrambled eggs are a valid option. Honestly, they assemble even more easily and taste just as good frozen.
Storage, the short version
Freezer: wrapped in parchment, in a freezer bag or airtight container, good for up to 3 months. Fridge: if you’re eating them within a few days, an airtight container in the refrigerator keeps them for up to 3 days. Reheat in the microwave for 1 to 2 minutes, or in a 350°F oven for about 20 minutes if you want the crisp version.
Questions I keep getting
Do these actually freeze well? Yes — this recipe is built around freezing. Wrapped properly, they reheat like they were made that morning.
Should I toast the muffins first? You can. It’s a texture upgrade, not a requirement.
Can I use scrambled eggs instead of whole eggs? Absolutely, and some people prefer it — the assembly is easier and the texture is softer after reheating.
What’s the best cheese for this? Cheddar, Gouda, Swiss, American, pepper jack, colby jack — they all melt beautifully. I default to Gouda, but I’ve used cheddar a dozen times and it’s just as good.
A note from Nora
The first batch I made, I wrapped everything still warm because I was tired and the dog was watching me with his whole face. Lesson learned, muffins softened, but the sandwiches were still good — which tells you everything about how forgiving this recipe is. The second batch was properly cooled and properly wrapped, and that’s the version that’s been quietly saving our school mornings ever since.
One hour of my time, once a month, buys back a lot of small, tired, no-one-sees-me mornings. If I can make these on a Tuesday, they’re a keeper — and I think you’ll find they’re about as easy as breakfast gets.
Team bacon or team sausage? Tell me in the comments, and if you make these, I’d genuinely love to hear which version won in your house.
I’ve been thinking lately about how much I used to hate cottage cheese. Not the flavor — the texture. Those little curds, staring back at me from a plastic container, felt like they were judging my snacking choices. Then one night last week I threw a tub into the food processor with olive oil, lemon juice, garlic, and a pinch of salt. A few pulses later, the curds were gone. What was left was smooth, tangy, and honestly better than anything I’d buy in a jar.
It comes together in under 5 minutes, and one serving — about 1/2 cup — packs 13 grams of protein. I’ve been on repeat with it since: blended up on the weekend, eaten all week as a grab-and-go snack. When friends drop by, it’s the thing on the counter with the crudités. It passed the Tuesday test, which is the only test that really matters around here.
Why this one stuck
So long, lumpy texture. Whipped, cottage cheese goes light and silky — closer to sour cream or Greek yogurt than anything you’d expect from that plastic tub. And the protein: 13 grams in a half-cup serving, which makes it a legitimate snack instead of a guilty one.
It’s also the kind of recipe that can’t really go wrong. Five minutes, five simple ingredients, one appliance. If you’ve ever wanted a high-protein dip that doesn’t require a food processor course, this is it.
What you’ll need
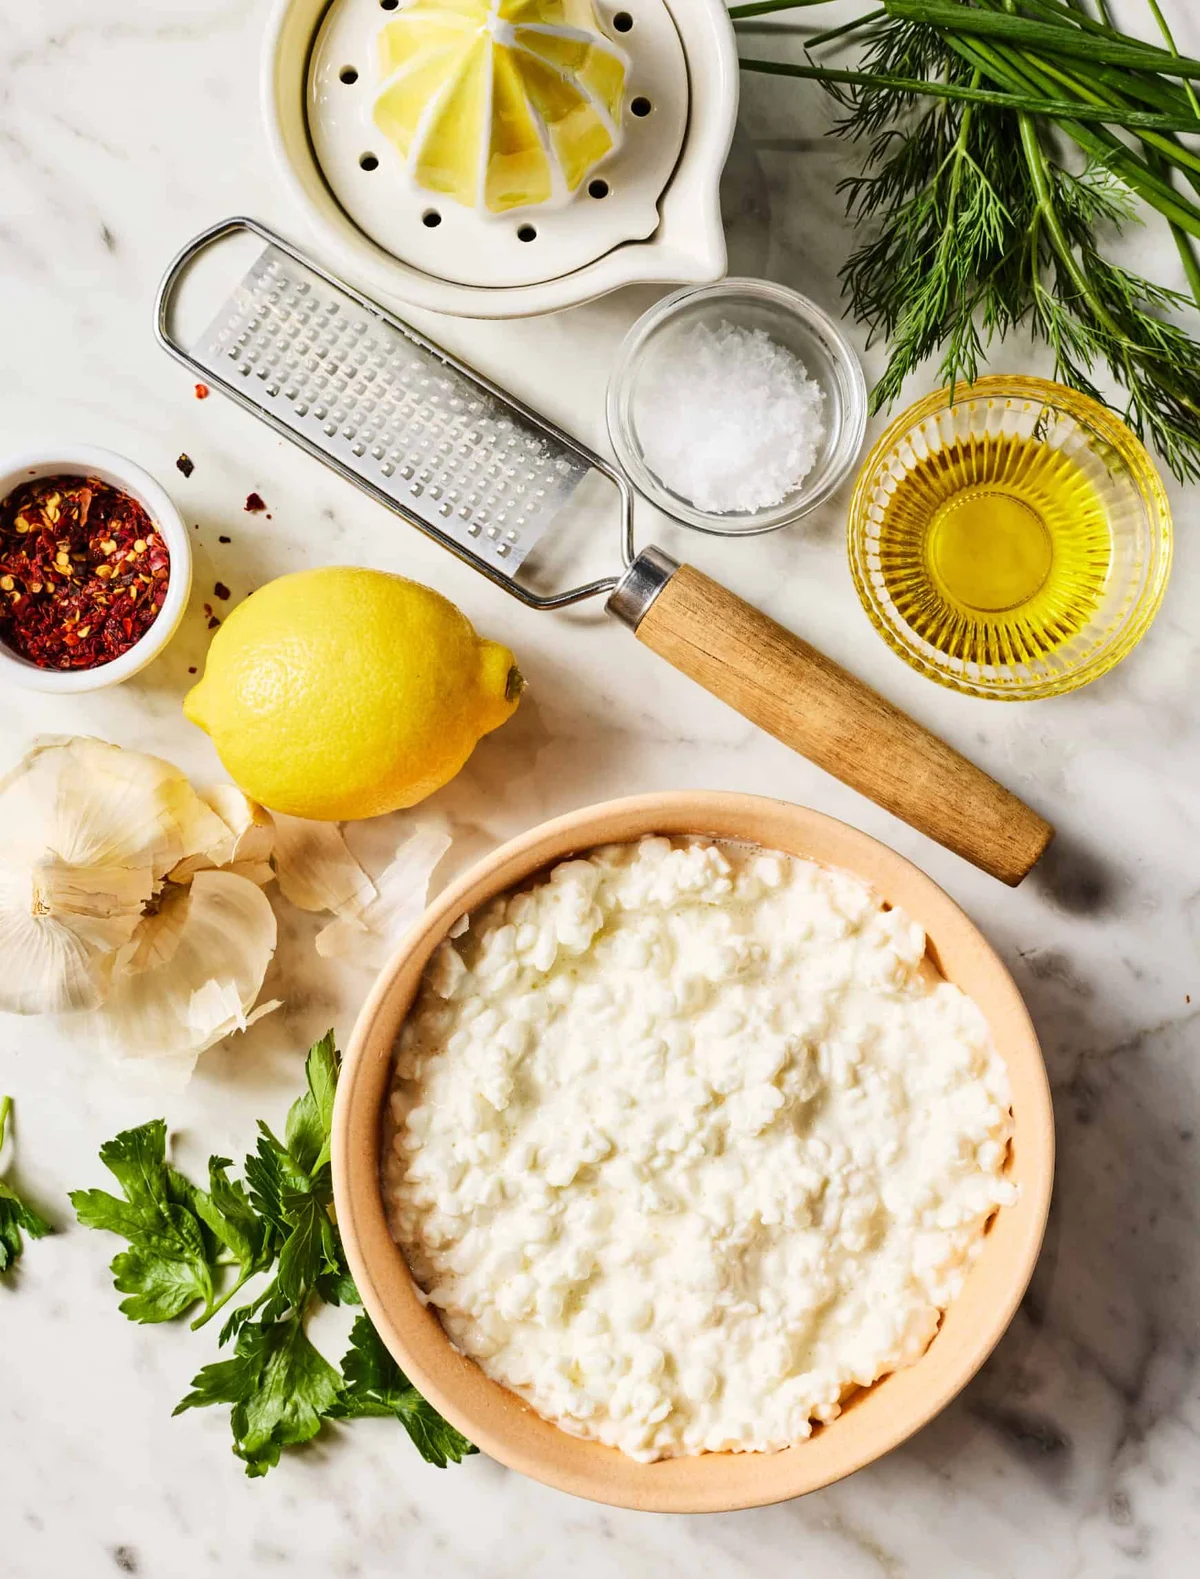
16 ounces whole milk cottage cheese
2 tablespoons extra-virgin olive oil, plus more for drizzling
1 tablespoon fresh lemon juice
1 small garlic clove
1/4 teaspoon sea salt
To finish: chopped fresh parsley, dill, and/or chives, lemon zest, red pepper flakes
Crackers and/or veggies for dipping
A note on the cheese: I like this best with full-fat (5% and up) — it has the richest flavor. 2% works fine too. I’d skip the fat-free, which gives you a flatter taste and a less creamy result.
How to make it
Put the cottage cheese, olive oil, lemon juice, garlic, and salt in a food processor.
Pulse until smooth and creamy. If it’s still lumpy, keep pulsing — don’t be shy, it may take a minute or more.
Taste and adjust: more garlic, salt, or lemon juice if you want it brighter.
No food processor? A blender works too. The mixture is thick, so stop and scrape down the sides as you go, and mince the garlic first so it blends in evenly.
How to serve it
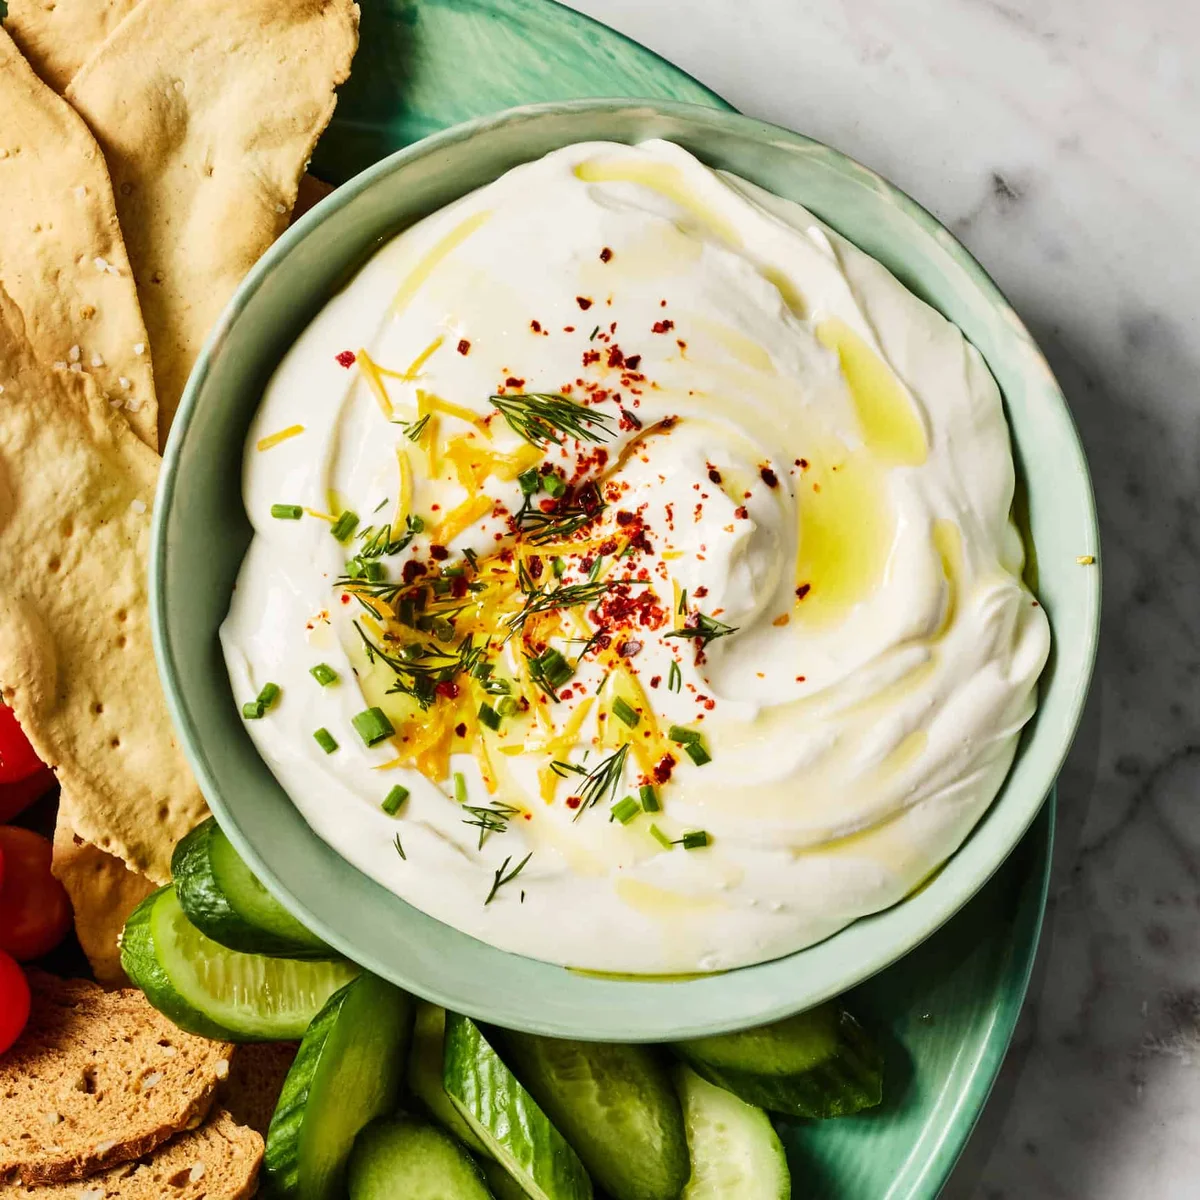
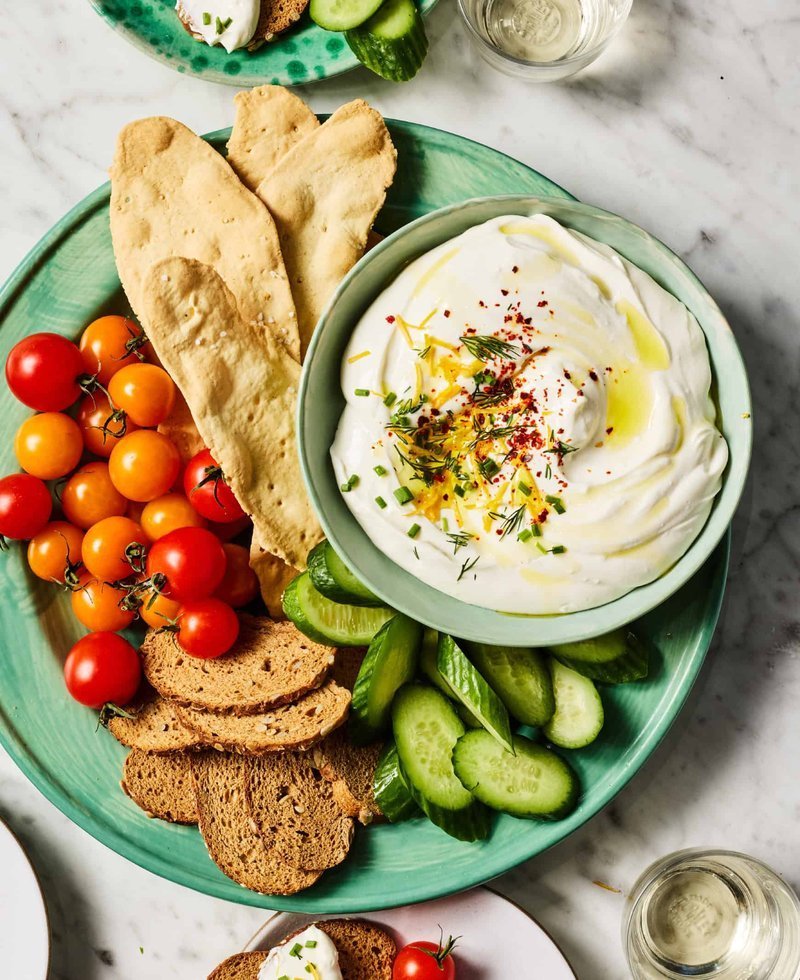
My favorite is a dip. Before serving I always dress it up: a drizzle of olive oil, fresh herbs, lemon zest, and red pepper flakes on top. Crackers, pita chips, crostini, and raw veggies all work for dipping — my default tray is cucumbers, cherry tomatoes, carrots, peppers, snap peas, celery, and radishes.
Beyond the dip: spread it on toast, dollop it on grain bowls, or serve it the way you’d serve sour cream — over zucchini fritters, corn fritters, baked potatoes, that kind of thing.
Make-ahead and storage
It keeps for up to 4 days in an airtight container in the fridge. It may separate a little — if liquid pools on top, just stir it back together before serving. Making it ahead for a gathering? Add the garnishes right before you eat, not when you prep.
More cheese recipes to try
Once you’re down the whipped-cheese road, the rest follows: whipped ricotta, a whipped feta dip, or baked brie. And if you love cottage cheese specifically, an avocado cottage cheese dip and these little egg bites are the natural next stops.
A note from Nora: the first time I made this, I under-whipped it — I stopped at the first ‘looks mostly smooth’ moment and served a dip that was more chunky than creamy. Nobody complained, but I wasn’t fooled. The fix is just patience: keep pulsing until it’s genuinely silk. If I can make it on a Tuesday, it’s a keeper.
I’ve been thinking lately about how summer always starts with a bowl of something green. One afternoon I threw together spinach, leftover quinoa, and a handful of strawberries from the farmers’ market — and this salad just happened.
It is simple enough for a weeknight but feels special enough to bring to a potluck. Sweet and tangy, protein-packed, clean-eating friendly, and naturally gluten-free. This one passed the Tuesday test.
Ingredients
For the salad:
½ cup uncooked quinoa, rinsed (or 1½ cups cooked)
1 cup water
6 cups baby spinach, coarsely chopped
2 cups strawberries, sliced or diced
½ cup crumbled feta cheese (or goat cheese)
1 large avocado, diced
¼ cup fresh basil, coarsely chopped
For the balsamic vinaigrette:
¼ cup olive oil
2 tablespoons balsamic vinegar
1 teaspoon honey (more to taste)
1 teaspoon Dijon mustard
1 clove garlic, minced (optional)
Salt and pepper, to taste
How to Make It
Cook the quinoa. Rinse it in a fine mesh colander for at least 30 seconds. Add the quinoa and water to a medium saucepan over medium-high heat until boiling, then reduce to a gentle simmer. Cook until the water is absorbed — about 10 minutes. Remove from heat, cover for 5 minutes while the quinoa blooms, and let it cool.
Whisk the dressing. While the quinoa cools, combine olive oil, balsamic vinegar, honey, Dijon mustard, garlic, salt, and pepper in a small bowl until smooth.
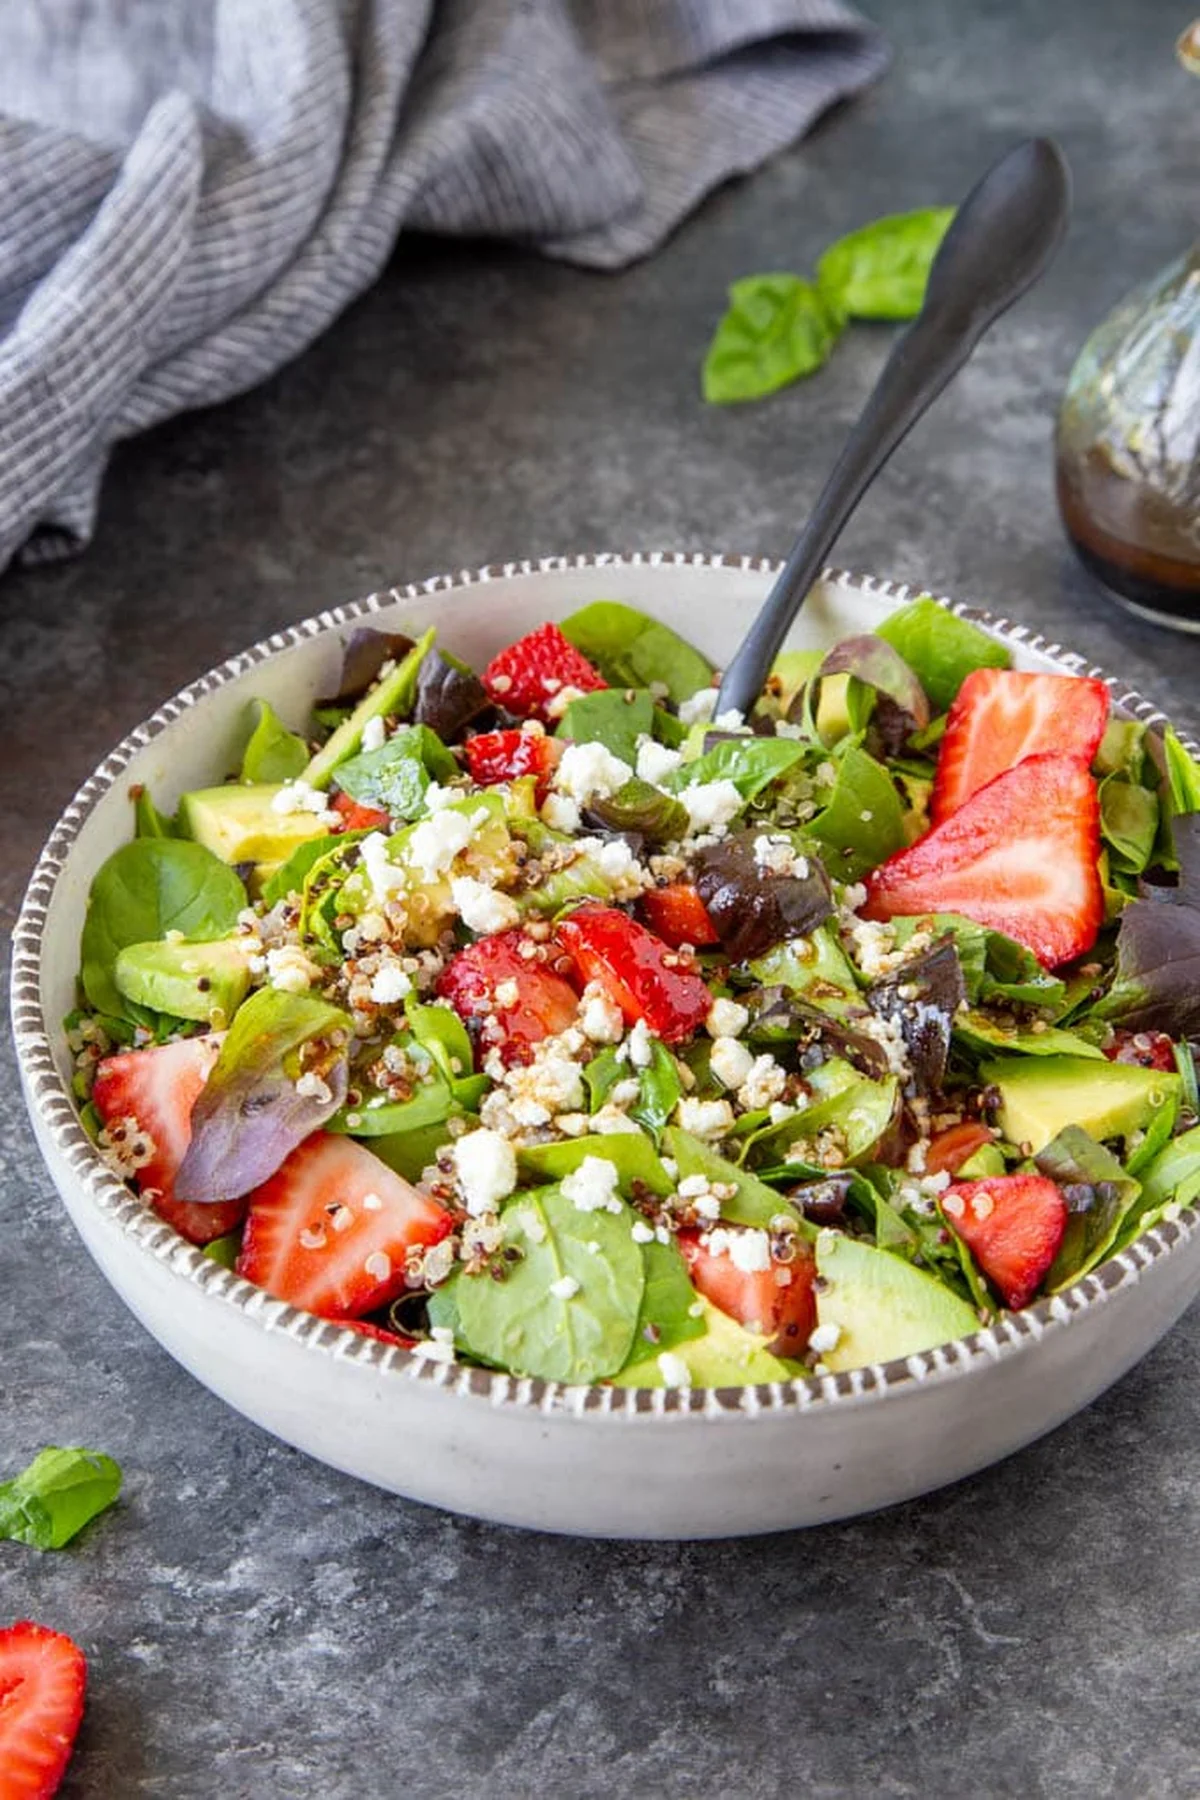
Toss everything together. Transfer cooled quinoa to a large bowl. Add spinach, strawberries, feta, avocado, and basil. Toss lightly, drizzle with the vinaigrette, and toss again. Serve right away.
Total prep is 10 minutes, cook time is 10 minutes. Makes 4 servings at about 232 calories each (salad only, without dressing).
Variations Worth Trying
Extra protein: Add grilled chicken, rotisserie chicken, or chickpeas if you want to keep it plant-based.
Different greens: A spinach and spring lettuce mix or a baby spinach and baby kale blend both work great here.
Swap the fruit: Blueberries, apples, or pears are all good alternatives — or add them alongside the strawberries for more sweetness.
A little zip: Thinly sliced red onion adds a nice bite.
Crunch: Toasted or candied pecans, walnuts, almonds, or cashews give it extra texture.
Make It Even Quicker
This salad is already fast, but here are a few shortcuts I reach for on the busiest nights:
Prewashed bagged spinach saves the washing step entirely.
Boil-in-the-bag or frozen quinoa. I keep boil-in-the-bag quinoa in my pantry for lazy evenings — drop the bag in water, boil for 10 minutes, snip the top, and you are done. Frozen quinoa from the veggie aisle works too; just microwave it.
Bottled dressing. Your favorite store-bought balsamic vinaigrette gets my full approval. I also like poppyseed dressing with this salad.
A Note from Nora
The first time I made this, Sam came into the kitchen just as I was tossing it all together and said, “Can we have this every summer?” The dog, Biscuit, tried to negotiate for a strawberry. We said no.
Maybe that is what makes a good salad: nothing complicated, everything in season, and a dressing that does most of the heavy lifting. If I can make it on a Tuesday, it is a keeper.
It was a Wednesday night, the woman of the house was running late, and I was standing at the stove trying to rescue a batch of hard-boiled eggs for Sam’s salad. Last time I’d boiled them, I’d walked away from the pot for too long. Out they came — rubbery, gray-ringed, the yolk with the texture of landscaping chalk. I’d been doing it wrong for years, and it rattled me how much I didn’t actually know about one of the oldest dishes in the kitchen.
So I sat down and tested this properly in my own kitchen: cold-water start versus boiling-water start, a dozen eggs, every minute of doneness from soft to fully hard. What I landed on has been my method ever since, and it makes peeling the shells genuinely easy. If I can boil a dependable egg while keeping an eye on the kids, you can too.
First, the quick answer
Lower cold large eggs gently into boiling water, and cook them uncovered:
6 minutes: liquid yolk, barely set whites
7 minutes: jammy yolk, fully set whites
8 minutes: medium-boiled, soft-set yolk
10 minutes: classic hard-boiled, still tender
12 minutes: firm, fully set hard-boiled
Then straight into an ice bath for 10 minutes. That’s it — the whole thing takes about 25 minutes start to finish, and the times are exact enough to plan a midnight snack around.
Which time is your time
This is where a timing chart stops being boring. The same method, different stop points, and each one has a job it’s actually good at:
6 minutes (runny yolk) — an egg cup and a slice of toasted bread for dipping. Under 6 minutes and the whites won’t be there for you.
7 minutes (jammy) — the one I reach for on ramen or grain bowls on a slow Saturday morning.
8 minutes (medium) — a high-protein snack between meals. The yolk has just enough body to eat with a spoon.
10 minutes (tender hard-boiled) — the number for egg salad. Mash it, season it, call it lunch.
12 minutes (firm hard-boiled) — Deviled Eggs, a sliced Cobb Salad, anything that needs the yolk to hold its shape in a slice. Go past 12 and you’ll start looking at that greenish ring around the yolk, which is just pretty once, honestly.
How I actually cook them
The method I landed on after testing: cold eggs straight into boiling water. Not the other way around. Here’s the whole thing.
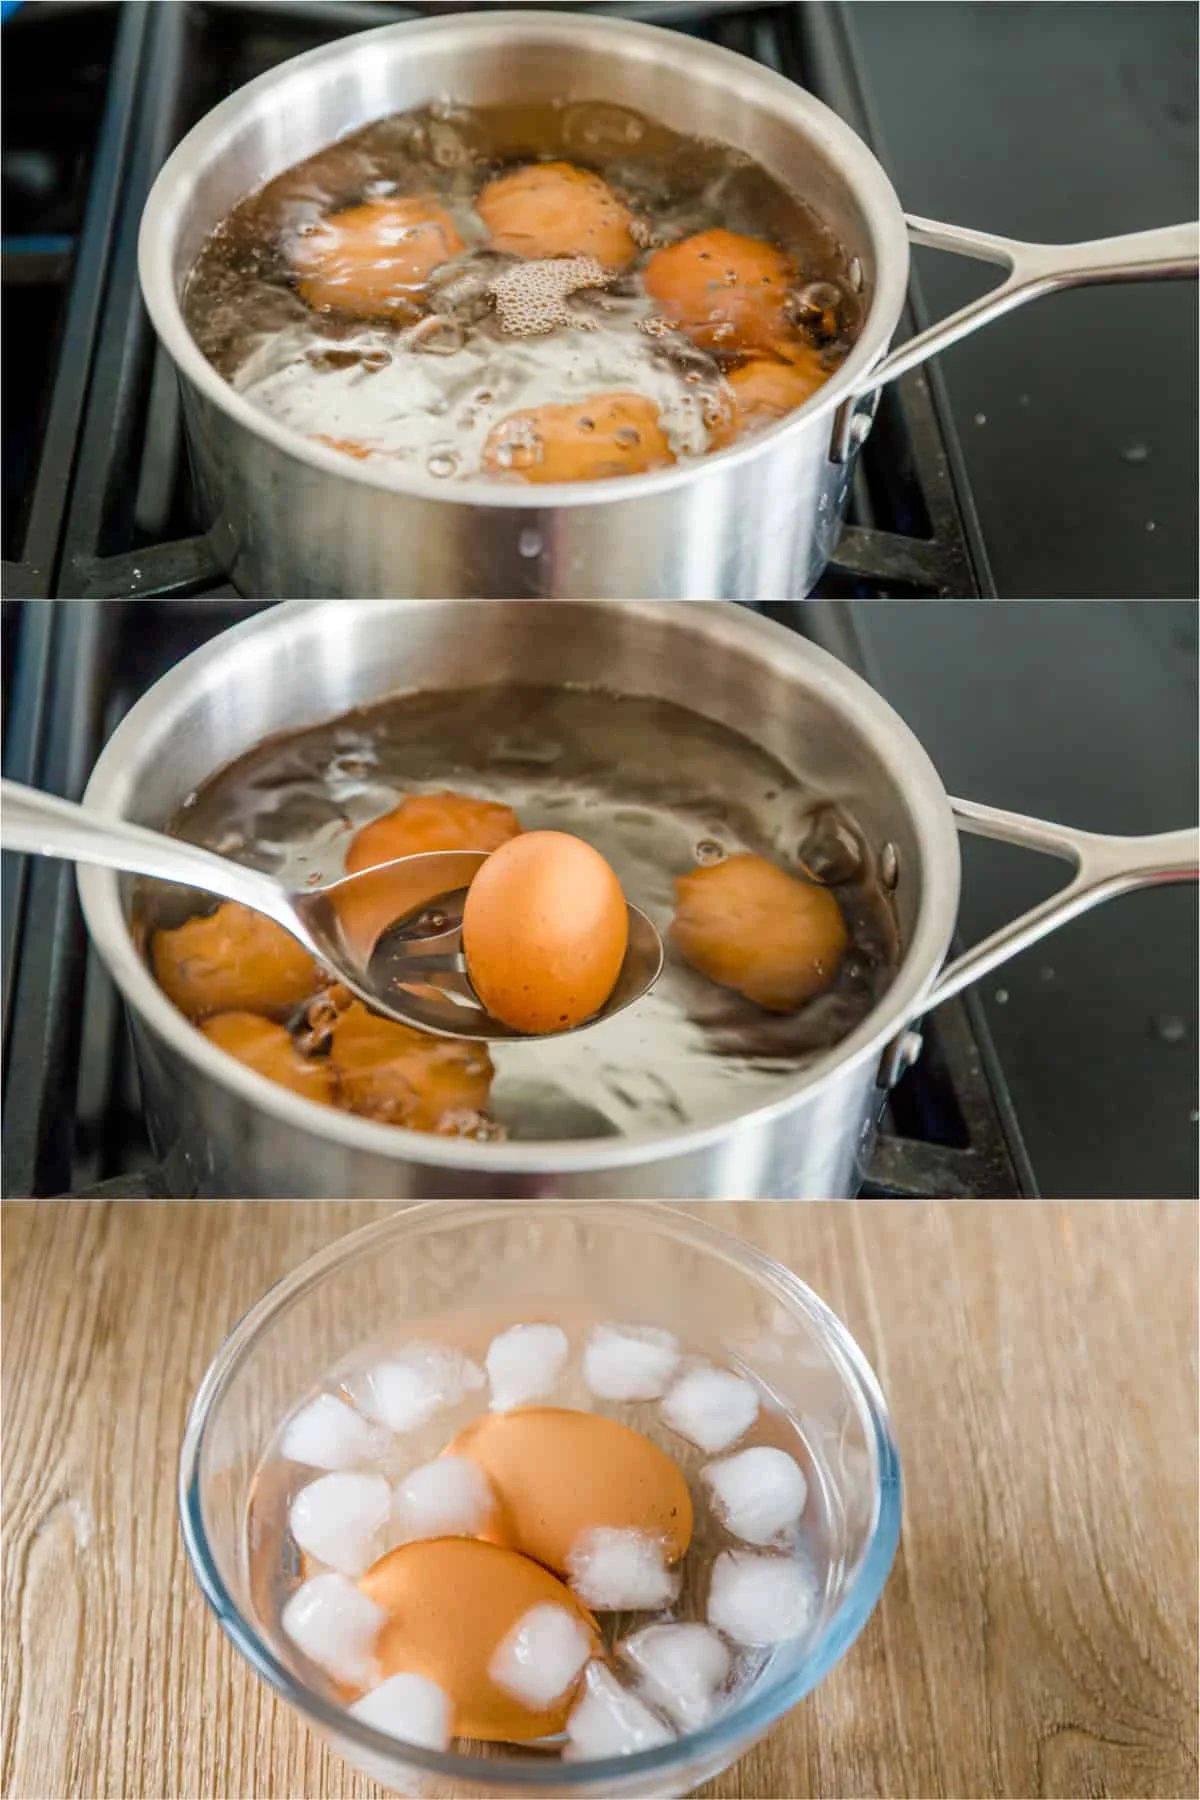
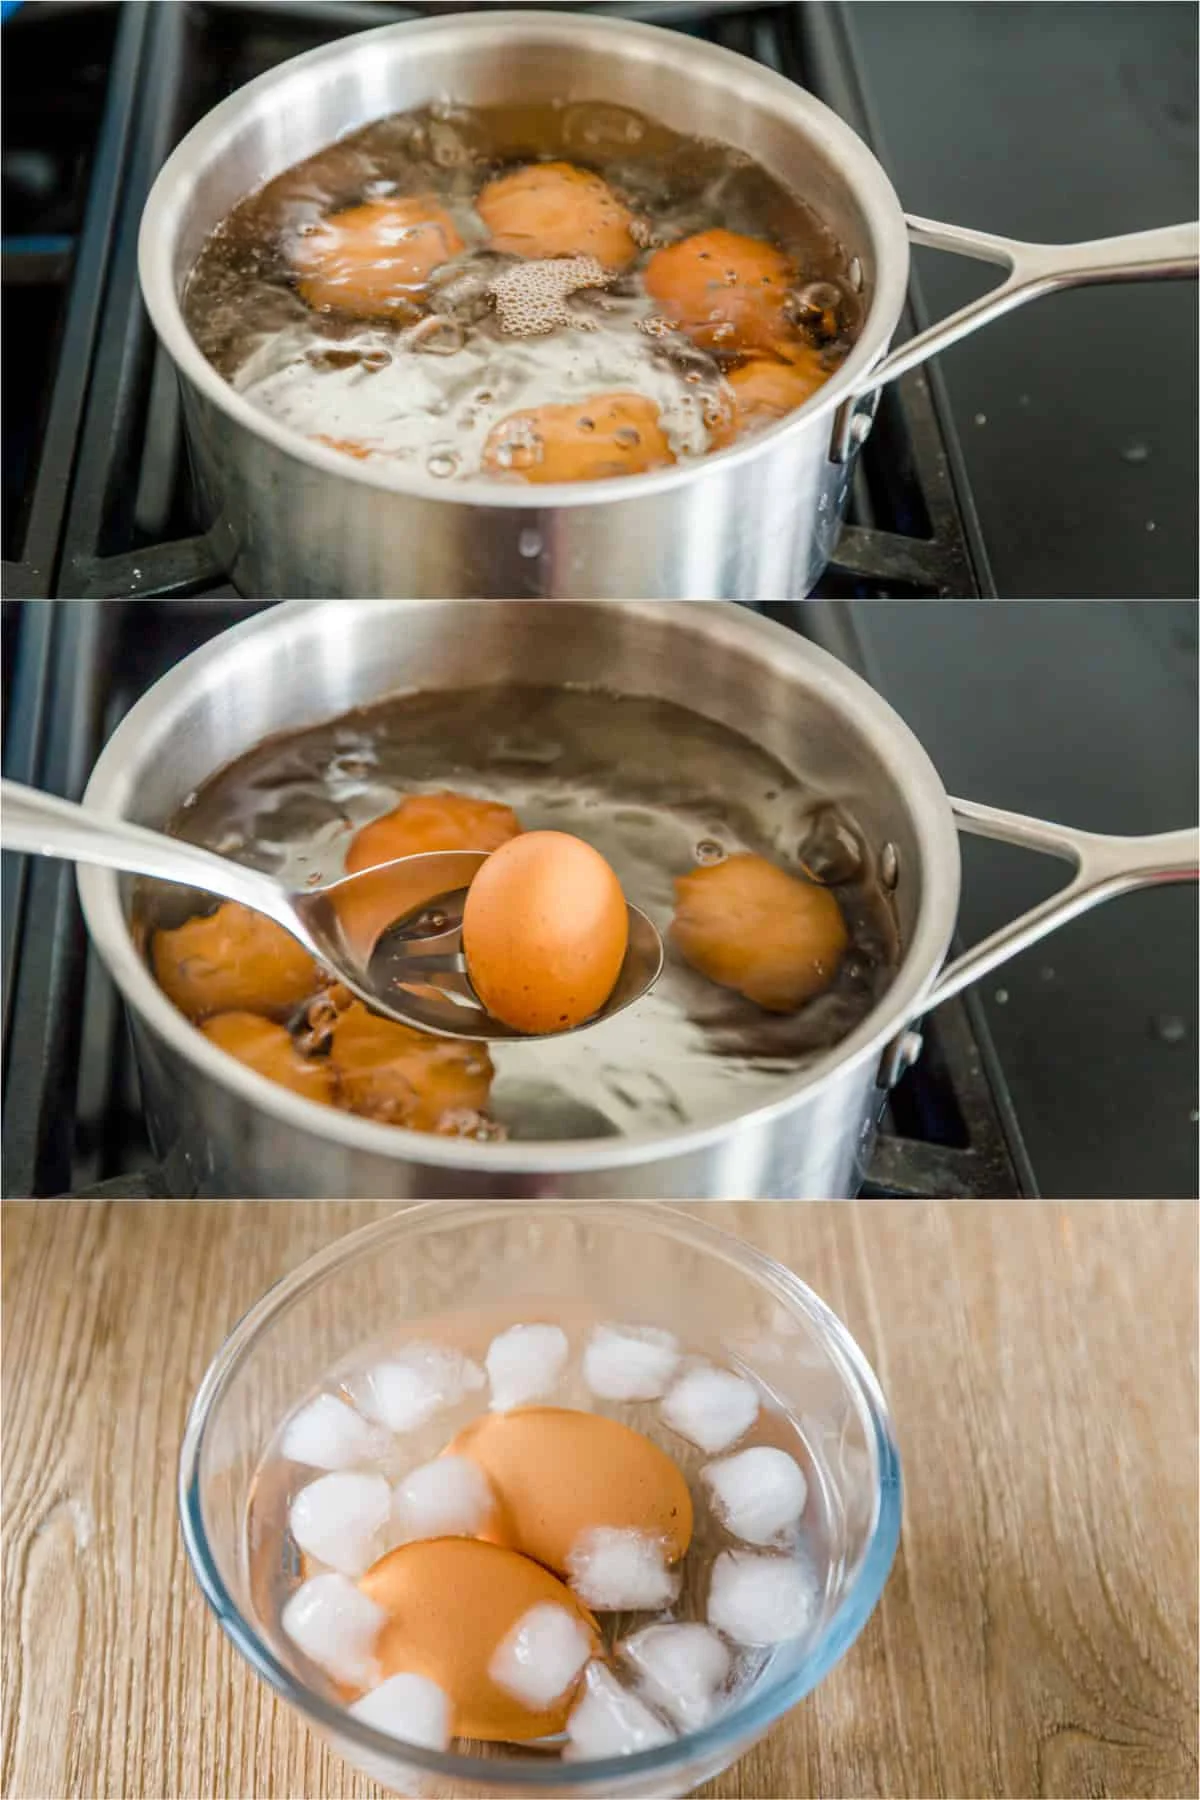
Boil the water. A 3-quart saucepan with 5 to 6 cups of water. Enough that the eggs sit covered by about an inch of water. High heat, lid off, until it’s a full boil.
Lower the eggs in gently. This is the part people crack. Use a slotted spoon or a skimmer, ease them in one at a time from the fridge, and resist the urge to splash and hurry. Right after they’re in, drop the heat so the water holds a steady, gentle boil instead of a rolling one — the eggs should simmer, not bounce around and crack.
Start the timer the second they’re in. This is the only rule I’m strict about. Cook uncovered for as long as the chart above says, no peeking, no shrinking the time because they look done. They never look done.
Mind the ice bath while they cook. A bowl of ice water, 10 minutes of chilling is non-negotiable. Transferring them out is easier with a basket or slotted spoon.
The part everyone gets wrong: peeling
Here’s what all the testing told me about why my batches used to come out bumpy and ragged. The water temperature matters more than any kitchen trick.
Start with boiling water, not cold. I tried the slow, cold-water start first — what most people grow up with. It gives the least consistent cook, and the shells don’t release as clean. The hot start did it better in every single batch I tested.
The ice bath does the real work. Ten minutes of cold water stops the cooking dead and shrinks the egg just enough that the membrane releases from the shell.
When you peel, go for the wide end. There’s an air pocket down there. Crack the shell firmly and start the peel from that end, working the shell under the membrane. Peeling under cool running water loosens it even more.
For a big batch — Deviled Eggs or a tray for a potluck — I boil several eggs at a time and peel while they’re still cold. Nobody notices the time.
What about vinegar and salt?
I still see the advice to add vinegar or salt to the water, and I’ve tried both. Salt helps if a shell cracks and the white starts weeping into the water. A little vinegar helps that same crack. But neither is what gets my shells off clean — the boiling-water start plus the ice bath do all the real work. I don’t add either to my pot anymore.
A few words on freshness
We cook with store-bought large eggs — the size the timing chart was built on. Eggs a couple of weeks from the fridge peel easier than eggs laid that morning. If you get truly fresh eggs from backyard chickens, the shells stick to the membrane in a way that’s almost a hobby, and a pressure cooker is the gentle answer for those. If you’re working outside large eggs, adjust the clock: smaller cook faster, bigger cook slower. The chart assumes large, which is what most recipes assume anyway.
Storage, the honest notes
Refrigerate within 2 hours of cooking. Not on the counter overnight.
Hard-boiled eggs keep up to a week in the fridge. Keep them in the shell as long as you can — the shell keeps them from drying out and from absorbing refrigerator smells.
Soft-boiled eggs don’t keep as long. At least 2 days in an airtight container, but honestly they’re an eat-them-now dish.
What to make with them
Once the technique is on auto-pilot, eggs start showing up all over the week: as a protein snack straight from the fridge, as the base for egg salad or deviled eggs on Saturday, as the quiet upgrade to a grain bowl, as the chopped addition to a potato salad or Cobb salad. In my house, they’re the thing the kids actually finish, and a batch of 8 in a 3-quart pan is my favorite way to feed a family on a night when everything else has to be simple.
A note from Nora
The first time I nail a perfect hard-boiled egg, I opened the door to show Sam and he said something I haven’t been able to recall since. We both knew the relief: a dish you used to dread barely gets the chance to frustrate you anymore. This one passed the Tuesday test. Put the eggs in, set the phone, come back with clean hands — that’s the whole method, and the whole point, as far as I’m concerned.
I was standing in my kitchen last week, staring at a half-empty fridge and wondering if we could survive another night of toast when Sam asked, almost casually, whether I had any chicken thighs left. That is how most good dinners start around here: not with inspiration, but with whatever happened to be in the drawer.
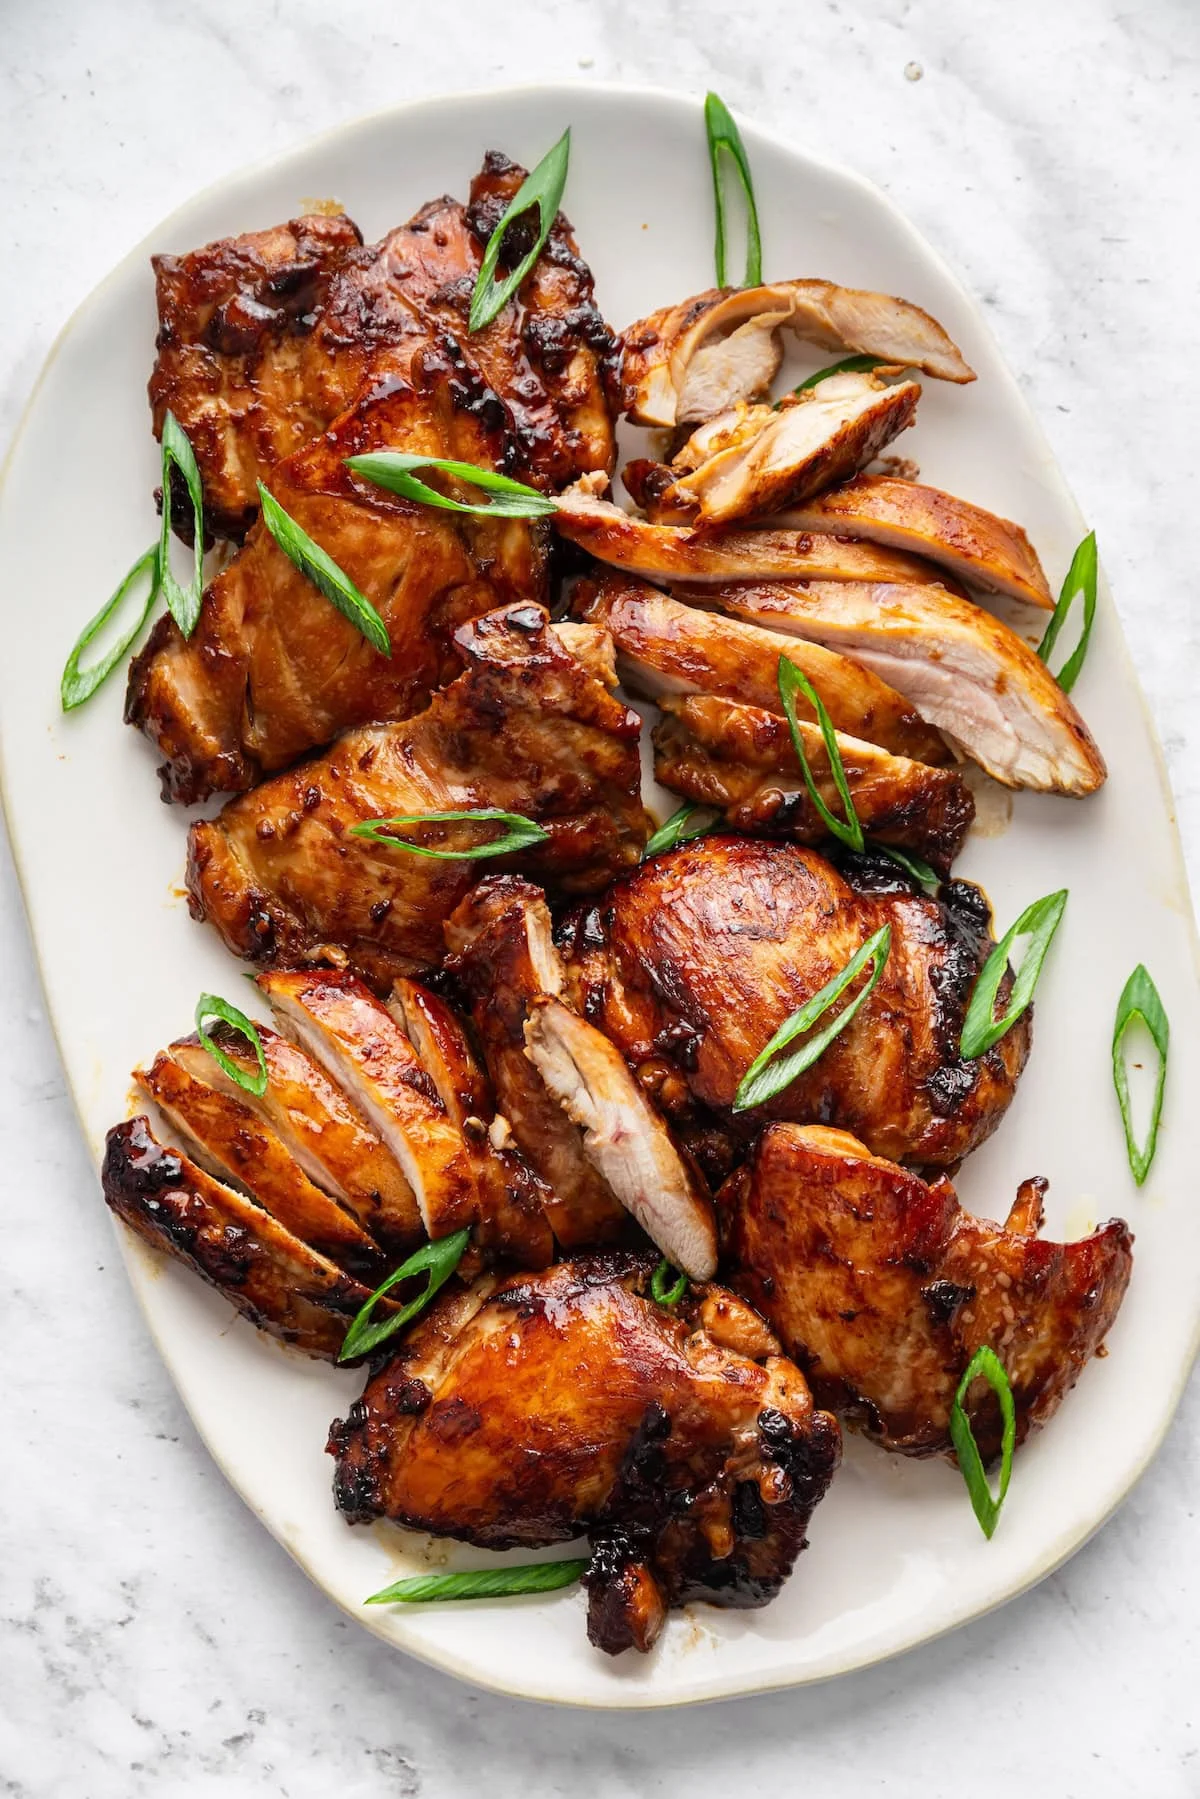
This teriyaki chicken is savory, slightly sweet, and packed with flavor from a homemade marinade that takes five minutes to throw together. You can cook it on the grill, in the oven, or in a skillet. It has been a regular at our table for years, and this one passed the Tuesday test without any trouble.
I already share a teriyaki salmon recipe and a slow cooker version on the site, but I realised I had never written down my everyday go-to. This is the one I make when I want juicy, flavorful chicken without much effort, and I love that the method bends to whatever season we are in.
Why I Love This Recipe
Homemade marinade, no bottle required. Skip the store-bought teriyaki sauce. This simple mix comes together in minutes and lets you control the sweetness, sodium, and quality of every ingredient.
Balanced flavor in every bite. Sweet, salty, and umami — the kind of combination that makes people ask if you ordered takeout.
Cook it your way. Grill it on a warm evening, bake it when the weather turns, or use a skillet when you are short on time. It turns out good every single time.
Meal prep friendly. Serve it with rice and veggies for dinner, then pack the leftovers for lunches through the week.
Ingredients You Need
Chicken thighs. The star of the show. Thighs stay juicy and tender no matter how you cook them, and they soak up marinade far better than breasts do. Breasts work in a pinch, but thighs are more forgiving and taste richer.
Tamari or soy sauce. The salty backbone of the whole marinade. I use tamari to keep this gluten-free, but regular soy sauce works perfectly if that is what you have.
Coconut sugar (about 60 ml / 1/4 cup). It gives the marinade that signature teriyaki sweetness with a slightly deeper note than white sugar. Brown sugar is the best one-to-one swap. Honey or maple syrup work too, though they thin the marinade a bit and burn more easily.
Rice vinegar (30 ml / 2 tablespoons). A gentle brightness that keeps everything from tasting flat. Do not skip it.
Sesame oil (30 ml / 2 tablespoons). This is where much of the flavor lives. Toasted sesame oil gives the whole thing that deep, nutty aroma you associate with a good restaurant dish. A little goes a long way.
Fresh garlic and fresh ginger. Garlic adds savory depth. Fresh ginger is strongly preferred — but if you are in a hurry, about 1/4 teaspoon of ground ginger replaces each teaspoon of fresh.
Red pepper flakes (optional). Just a quarter teaspoon for a touch of warmth.
How to Make It
Marinate the chicken. Whisk together 120 ml (1/2 cup) tamari or soy sauce, 60 ml (1/4 cup) coconut sugar, 30 ml (2 tablespoons) rice vinegar, 30 ml (2 tablespoons) sesame oil, 2 minced garlic cloves, 1 teaspoon grated fresh ginger, and a quarter teaspoon red pepper flakes. Pour it over about 900 g (2 lbs) boneless, skinless chicken thighs in a shallow dish or resealable bag. Turn to coat, then refrigerate for 30 minutes to an hour.
Cook and rest. Discard the used marinade and cook the chicken using your preferred method until it reaches an internal temperature of 165°F (74°C). Let it rest for five minutes before slicing. Serve over rice with steamed vegetables, garnished with sesame seeds and sliced green onions if you like.
Cooking Methods
Grilling: Lightly oil the grill grates and preheat to medium-high heat. Grill for 5–7 minutes per side, flipping once, until the internal temperature reaches 165°F (74°C). Transfer to a plate and rest.
Baking: Arrange the chicken in a single layer on a parchment-lined baking sheet. Bake at 400°F (200°C) for 20–25 minutes, flipping halfway through, until it reaches 165°F (74°C).
Skillet: Heat one tablespoon of avocado or olive oil in a large skillet over medium-high heat. Cook the chicken for 5–7 minutes per side until it reaches 165°F (74°C).
A Few Tips That Actually Help
Do not rush the marinade. Even thirty minutes makes a noticeable difference. If you have the time, go for the full hour. You can prep it in the morning and leave it in the fridge all day — I have done this more than once when the afternoon gets away from me.
Discard the used marinade. Once raw chicken has been sitting in it, that liquid should not be reused as a sauce. If you want extra glaze for serving, set aside some fresh marinade before adding the chicken, or make a quick new batch and simmer it on the stove.
Let the chicken rest. I say this for nearly every protein recipe because it genuinely works. Five minutes on the cutting board keeps all those juices inside where they belong.
Watch the heat. The sugar in the marinade helps the chicken caramelize beautifully, but it can also burn if the flame is too fierce. Cook over medium-high and keep an eye on things — especially when grilling or using a skillet.
Serving Ideas
Over rice and vegetables. The classic approach. Slice the chicken, pile it over steamed jasmine rice, and add broccoli or roasted carrots on the side.
With a crunchy Asian-style salad. A cold cabbage and carrot slaw with ginger dressing balances the sweet-savory chicken perfectly.
Over noodles. Thinly sliced chicken served over soba noodles makes a satisfying bowl that feels light and filling at the same time.
With edamame on the side. Sometimes the simplest additions are the best. A bowl of salted edamame takes five minutes and rounds out the plate without any fuss.
Storage and Reheating
Fridge: Store leftovers in an airtight container for up to four days. Let the chicken cool completely before sealing.
Freezer: It freezes well for up to three months. Place cooled chicken in a freezer-safe container or bag and thaw overnight in the fridge before reheating.
Reheating: Warm it in a skillet over medium heat with a small splash of water or broth — this keeps the chicken moist. You can also microwave in 30-second intervals until heated through.
Frequently Asked Questions
Can I use chicken breasts instead of thighs? Yes. Boneless, skinless breasts work well, but they cook faster and dry out more easily. Watch them closely — pull them from the heat as soon as they reach 165°F (74°C).
Can I make this ahead of time? You can marinate the chicken up to 24 hours in advance and cook it whenever you are ready. It also reheats beautifully, which makes it a solid option for weekly meal prep.
How long should I marinate the chicken? Thirty minutes to an hour gives the best balance of flavor. You can go up to 24 hours if you want to prep ahead. Beyond that, the chicken can start to taste too salty and the texture changes a bit.
Nutrition
Per serving (one quarter of the recipe): approximately 307 kcal, 5 g carbohydrates, 45 g protein, 11 g fat. Nutrition is automatically calculated and should be treated as an estimate rather than a precise measurement.
A Note from Nora
The first time I made this recipe with the kids home from school, Biscuit stood under the table for what felt like an entire dinner service. He did not bark or whine — just looked at me with those calm golden retriever eyes until Sam dropped a small piece of chicken near his bowl. I think that quiet faith is what cooking at home is really about: showing up, putting something good on the table, and trusting the people (and dogs) you love to take care of the rest.
Maybe that is the real gift of recipes like this one — they do not need much from you, but they give back a whole lot in return. Even on an ordinary Tuesday.
It’s 5:40 on a Tuesday. Sam is still grading papers at the kitchen table, our daughter is halfway through a second round of crayons, and the question that decides the next two hours is on everyone’s mind: what’s for dinner?
My answer has been the same for months now. Beef tacos. Not because they’re fancy — they’re the opposite of fancy — but because the meat comes together in one skillet in about 25 minutes, and the toppings turn the table into a little taco bar. My daughter helps build hers, no one complains, and the only cleanup is the pan.
I tested this recipe the way I test everything here: a few times, on real weeknights, with real interruptions. It passed the Tuesday test, which means I can make it without thinking.
Why this recipe earns a spot in rotation
The trick to taco meat that never goes dry is simple: brown the beef properly, leave a spoonful of the rendered fat in the pan, and let the meat simmer in a little liquid until it’s saucy but not soupy. The result is juicy, deeply seasoned, and better than the directions on the back of the packet — in about the same amount of time.
You can absolutely use a store-bought taco seasoning. But I hope you’ll try making your own — it’s the difference you can taste in every bite, and it takes one small bowl.
Ingredients
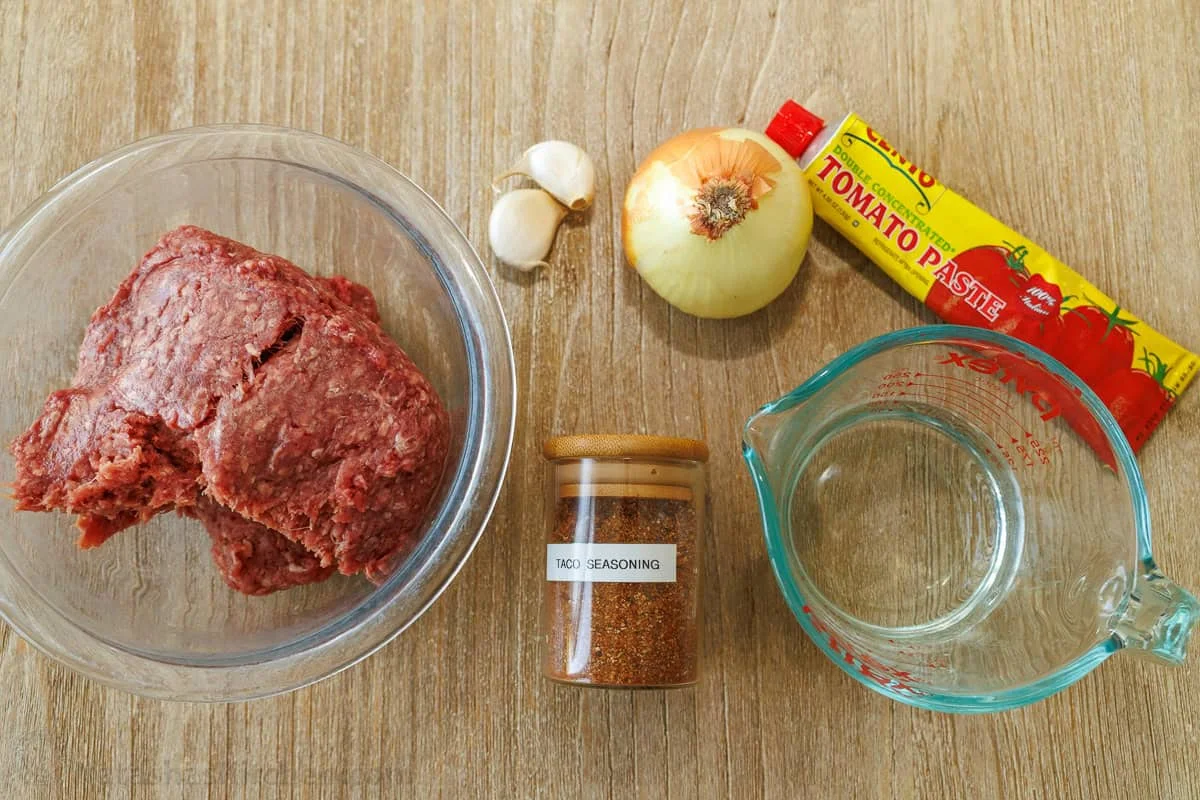
Six things for the meat, plus whatever’s in your fridge for topping. Check your pantry first — you may already have all of it.
1 lb (about 450g) ground beef — 85/15 is the most flavorful; if you use leaner meat, drain some of the grease after browning
1 small yellow or white onion, finely diced
2 garlic cloves, minced
1 Tbsp tomato paste — this is what gives the meat its depth
1/2 cup (about 120ml) water (or chicken or beef broth for more flavor)
3 Tbsp taco seasoning, homemade or store-bought
For serving: 8 taco shells or small tortillas, plus the toppings below.
How to make ground beef tacos
Prep takes about 10 minutes, cooking about 15. Start to finish, roughly 25 minutes — a true 30-minute dinner.
Make the seasoning. If you’re using your own blend, stir the ingredients together in a small bowl. If you’re using a store-bought packet, just measure out 3 Tbsp and skip to the next step.
Brown the beef. Heat a large skillet over medium-high heat, add the ground beef, and cook, breaking it up with a spatula, until it’s mostly browned — about 4 minutes.
Add the onion and cook for 3 to 4 minutes, until it’s softened and the beef is fully browned. Stir in the garlic and cook for 30 seconds, until fragrant. If the pan is greasy, spoon off most of it, leaving about 1 Tbsp — that’s where the flavor lives.
Add the 3 Tbsp taco seasoning and 1 Tbsp tomato paste. Stir and cook for 1 minute so the beef is evenly coated and the seasonings toast a little.
Pour in 1/2 cup water, lower the heat to medium-low, and simmer uncovered for 3 to 4 minutes, stirring occasionally. You want the mixture juicy and lightly saucy — never dry, but no pooling liquid either.
Warm your shells or tortillas (see below), fill each one with taco meat, and top to taste.
Warming the tortillas
This is the step people skip, and it’s the one that makes the tacos feel proper.
Corn or flour tortillas: warm in a dry skillet over medium heat for 20 to 30 seconds per side, until soft and pliable. Stack them and cover with a towel. In a hurry? Wrap a stack in a damp paper towel and microwave for 30 to 45 seconds.
Store-bought hard taco shells: toast on a baking sheet in a 325°F (about 165°C) oven for 4 to 6 minutes, until lightly toasted.
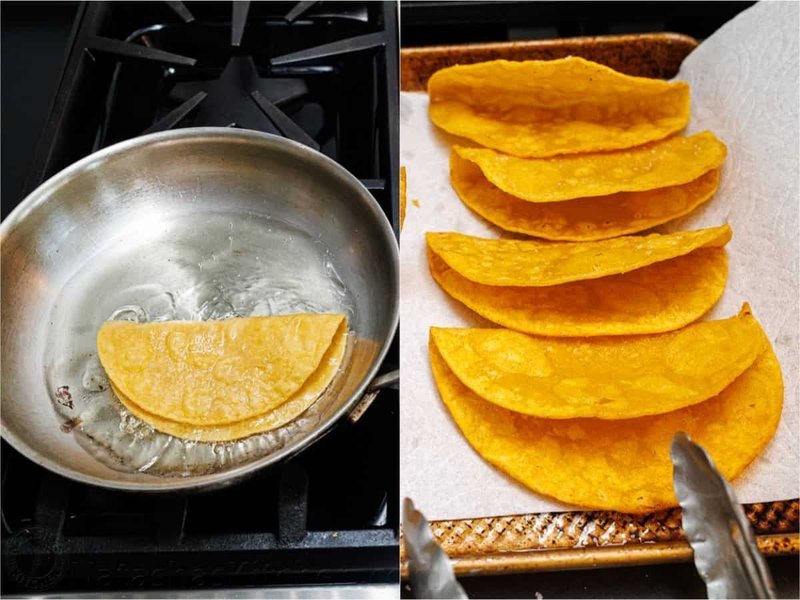
For homemade crispy shells, you only need tortillas, oil, and kosher salt — fry, drain, and salt until crisp.
Build a taco bar
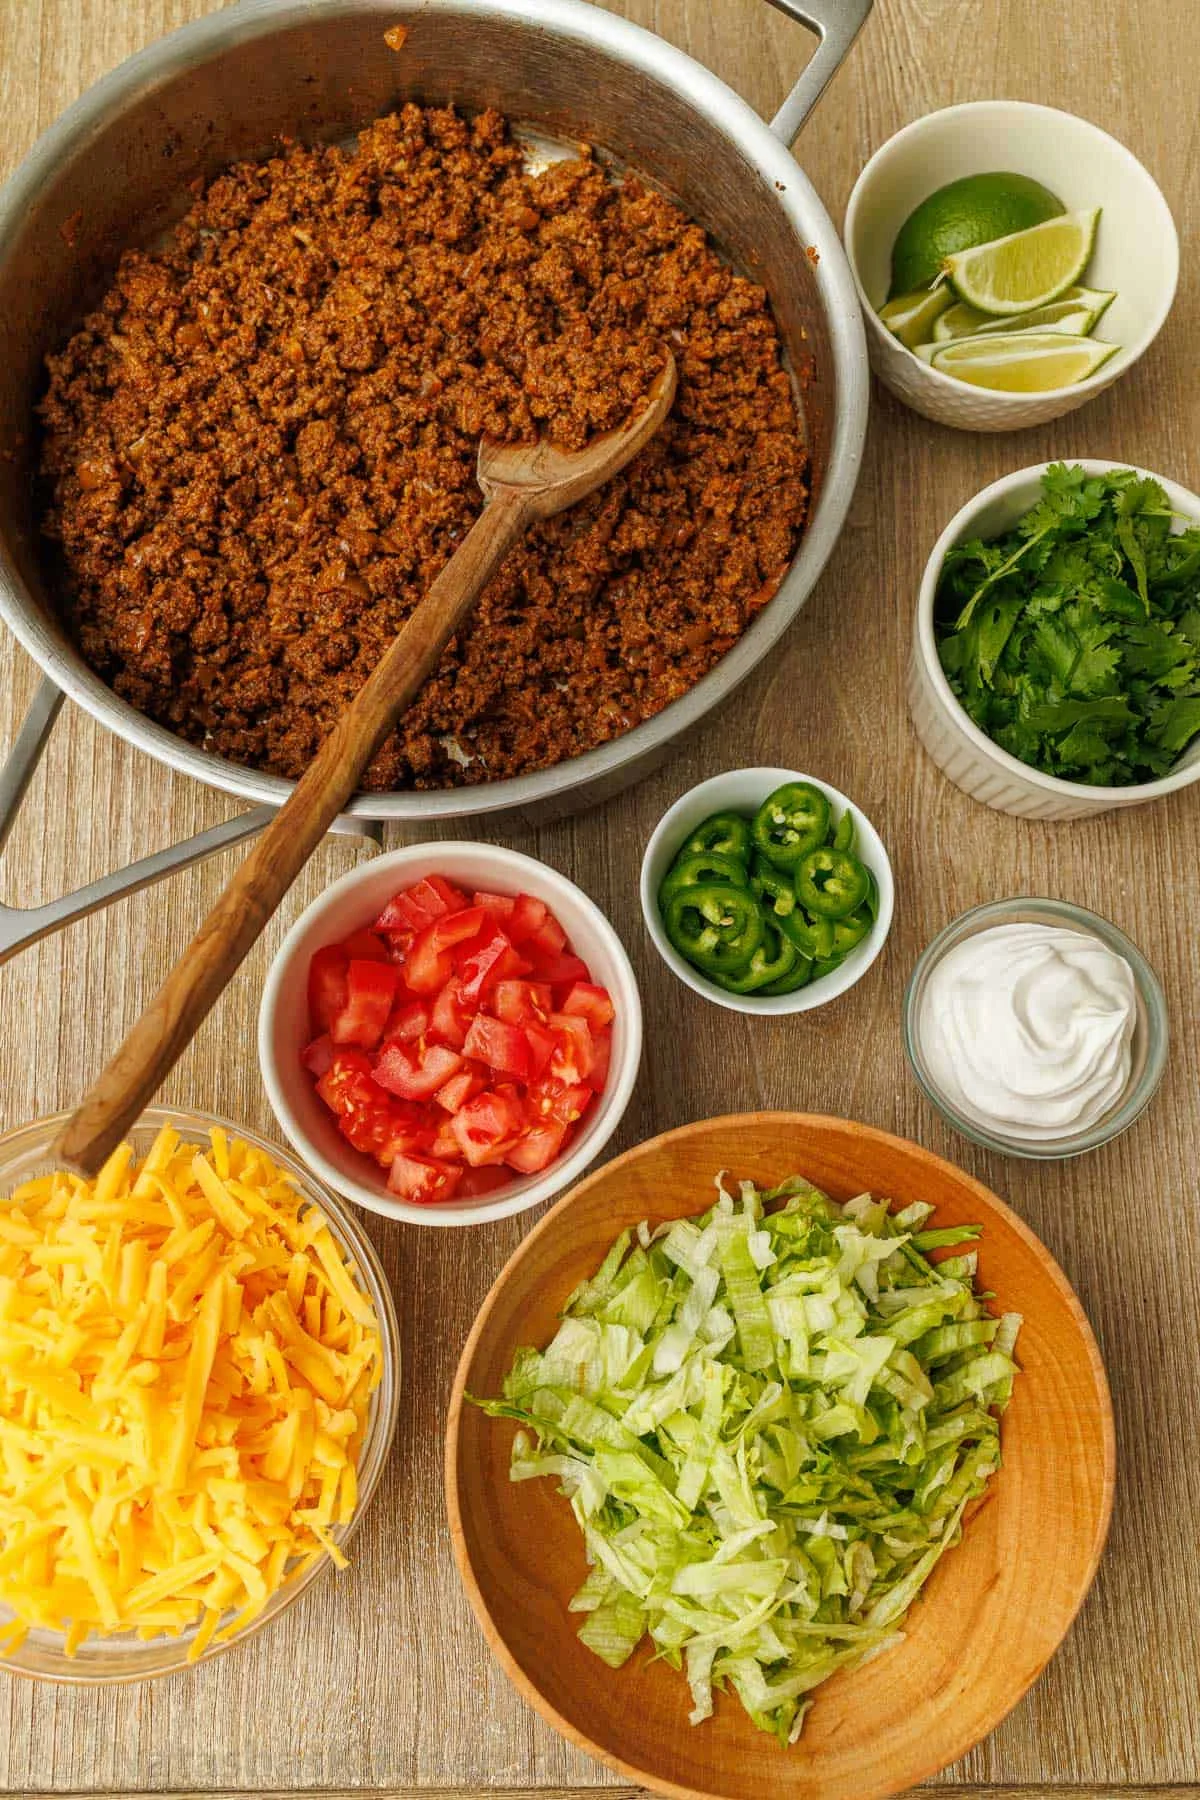
My kids love a good taco bar because everyone customizes their own plate, and nobody complains about their portion. Set the toppings out in small bowls or cups — you can prep almost all of them a day ahead and keep them in the fridge (the avocado is the exception).
Shredded lettuce
Diced tomatoes, pico de gallo, or salsa
Shredded cheddar or Mexican blend cheese
Sour cream and hot sauce
Guacamole or sliced avocado
Jalapeños, cilantro, and lime wedges
Cilantro-lime rice and black beans, if you’re feeling ambitious
It’s also a great recipe to double for a crowd, or to repurpose — the same meat works in burritos, over a taco salad, or as the base for tacos the next night.
Make-ahead, storage, and reheating
Make ahead: cook the taco meat, let it cool, and refrigerate it in an airtight container for 3 to 4 days.
Freezing: pack it in a freezer-safe container for up to 3 months, and thaw it in the fridge overnight.
Reheating: put the meat in a skillet with a splash of water and heat, stirring, until it reaches 165°F (about 74°C). The water is what keeps it from drying out.
Gluten-free? Check the labels on your seasonings and swap the tortillas for lettuce wraps or gluten-free tortillas.
The first time I made these, I used whatever ground beef was on sale — the lean stuff — and the meat came out a little dry. Lesson learned, noted in the recipe above: 85/15 if you can find it, and don’t drain the pan all the way. Last week Sam asked me to make them again for the second time in a month, and our daughter carried a lime wedge to her seat like it was a very important business tool. That’s about all the review I need.