Category: Recipes

  • 36 Mexican Recipes for Your Next Fiesta at Home

    36 Mexican Recipes for Your Next Fiesta at Home

    The other evening, Sam walked through the kitchen door and stopped dead in his tracks. “Is it Cinco de Mayo already?” he asked, sniffing the air like a golden retriever who just caught wind of bacon.

    It wasn’t even May yet, but I had spent the afternoon testing a batch of carnitas for a recipe roundup, and the house smelled exactly like the taqueria we love on Division Street. That is when it hit me: Mexican food does not need a calendar excuse. It just needs a hungry family and a willingness to let the kitchen get a little chaotic.

    So I gathered every Mexican recipe I have tested, retested, and served at my own table. Thirty-six dishes in total—dinners, tacos, sides, drinks, all of them real enough for a Tuesday night and festive enough for a party. Here is what made the cut.

    The Best Mexican Dinners
    36 Mexican Recipes for Your Next Fiesta at Home - photo 3

    Photo credit: Gayle McLeod

    36 Mexican Recipes for Your Next Fiesta at Home - photo 7

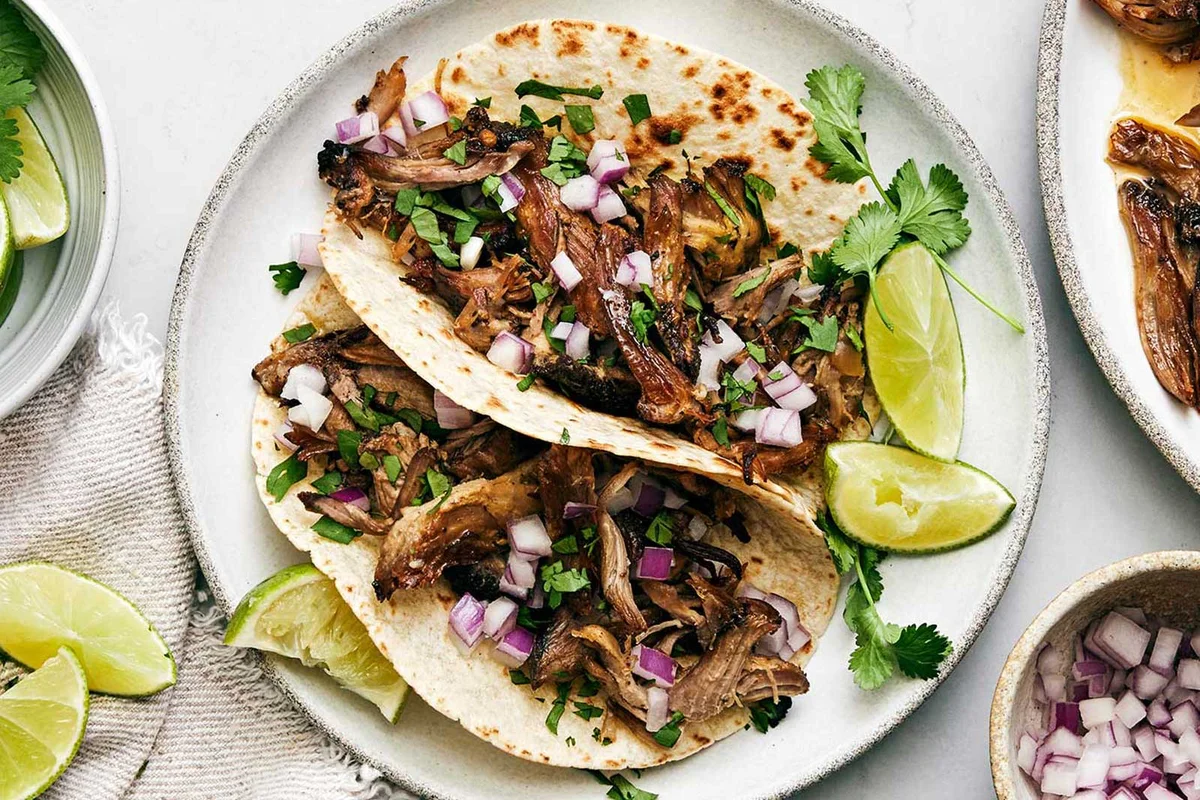
    Carne Asada. This tried-and-true recipe gets its flavor from a fresh marinade that reminds me of every street-side grill I have ever stood in line for. The meat comes back for seconds without fail.
    36 Mexican Recipes for Your Next Fiesta at Home - photo 4

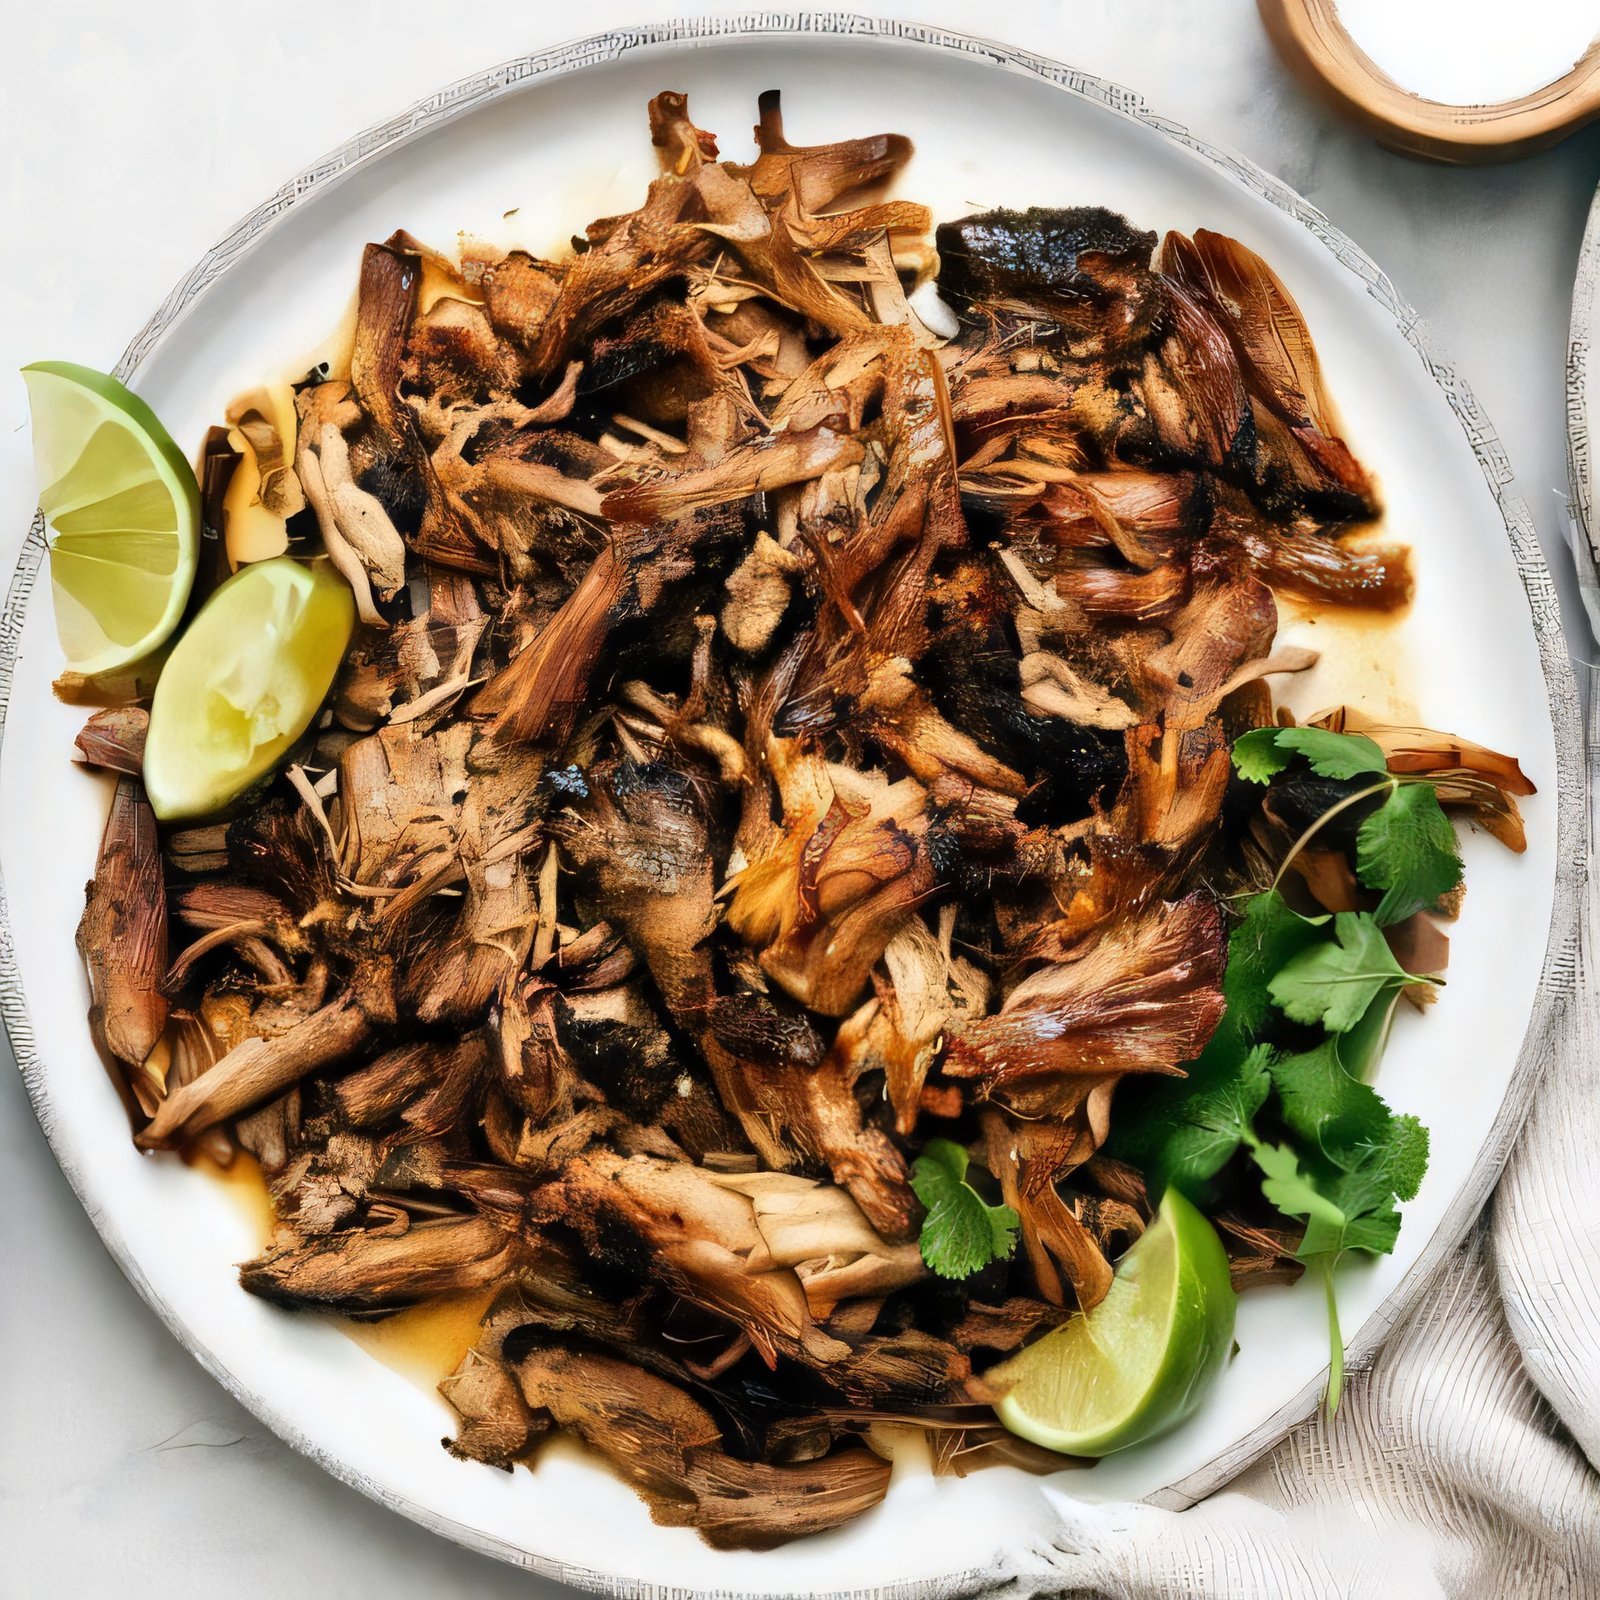
    Carnitas. If you love pork, this slow cooker method is the one. Juicy and tender, with crispy edges if you pop it under the broiler at the end. This one passed the Tuesday test easily—set it and forget it until dinner smells incredible.

    36 Mexican Recipes for Your Next Fiesta at Home - photo 8

    Birria. Rich, spicy, slow-cooked beef that has become a family favorite. I make cheesy quesabirria tacos with the shredded meat, and even my daughter asks for seconds.
    36 Mexican Recipes for Your Next Fiesta at Home - photo 6

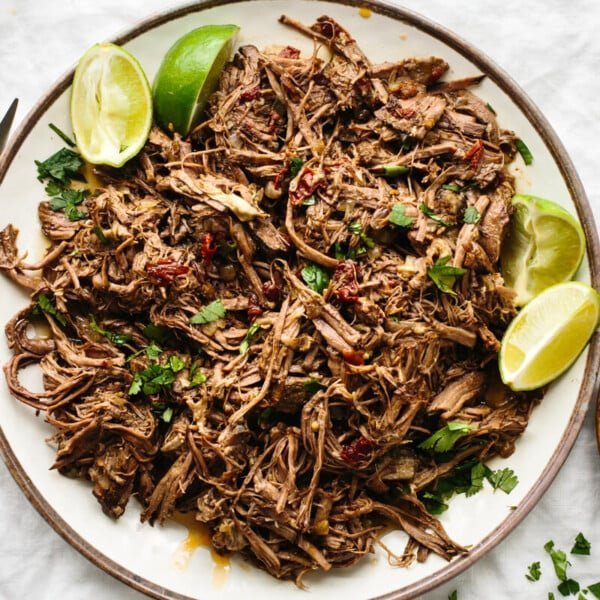
    Barbacoa. So many home cooks have made this recipe without a single miss. The beef is perfectly tender and juicy—ideal for tacos, bowls, or even tossed into salads.

    36 Mexican Recipes for Your Next Fiesta at Home - photo 1

    Cilantro Lime Chicken. Cilantro lime flavors are my jam. This marinade blends fresh cilantro, zesty lime juice, garlic, bold spices, and just a touch of honey. Sear the chicken, finish it in the oven, and you have golden, juicy thighs on the table.

    36 Mexican Recipes for Your Next Fiesta at Home - photo 5

    Chicken Tinga. The sauce here is smoky, slightly spicy, and layered with real depth. I love it in tacos, but it also works beautifully on tostadas when I want something a little different for dinner.

    Chipotle Chicken (Copycat Recipe). If you are craving that Chipotle flavor at home, this is the one. Bold, smoky, extra juicy, and charred to perfection. Chop it up and build your own bowl, burrito, or taco—no delivery app needed.

    Taco Soup. It tastes like a ground beef taco, only better. Pantry staples come together quickly, and a good homemade taco seasoning amplifies everything.

    Black Bean Soup. I will be honest—this soup is more flavorful than I expected. Layered with spices, savory and warm. My favorite way to eat it: topped with diced red onion, fresh cilantro, and creamy avocado slices.

    The Tacos

    36 Mexican Recipes for Your Next Fiesta at Home - photo 2

    Carne Asada Tacos. Dice the steak small, top with guacamole, cilantro, red onion, and cotija cheese. You cannot go wrong here.

    Carnitas Tacos. Meltingly tender pork, chopped cilantro, diced red onions, a squeeze of fresh lime. Simple ingredients, perfect result.

    Birria Tacos. These are like mini quesadillas—melty Oaxacan cheese, shredded birria, onion, and cilantro, dipped in a rich, spiced consommé. My daughter calls them “dippable tacos” and I cannot argue with that.

    Shrimp Tacos. A Baja-style favorite with a special cilantro lime bacon slaw and a drizzle of lime crema. If fish tacos are more your speed, grilled Alaskan wild cod works beautifully too.

    Barbacoa Tacos. The best way to enjoy barbacoa is simple: diced red onions, freshly chopped cilantro, and a generous squeeze of lime juice. Feel free to add whatever toppings catch your eye from the list below.

    Fajitas That Actually Sing

    Chicken Fajitas. A good fajita seasoning makes all the difference, and this one gives every dish an authentic touch. Juicy chicken, sweet bell peppers, fresh lime juice—I make these any day of the week.

    Shrimp Fajitas. They cook quickly and the flavors are hard to beat. If you love shrimp, you will fall for this version instantly.

    Steak Fajitas. The marinade on this grilled flank steak is incredibly delicious. Tossed with fajita veggies, it becomes the ultimate summer dinner.

    Fajita Veggies (Chipotle Copycat). This is the one I reach for when I want those perfectly seared peppers and onions without the meat. Add them to tacos, bowls, salads—wherever you need a side of smoky vegetables.

    Sides and Appetizers

    Best Guacamole Recipe. I am not exaggerating when I say this is the best guacamole I have ever made at home. Creamy, chunky, full of fresh ingredients. Sam will eat it with a spoon if I let him.

    Pico de Gallo (Easy and Authentic). The classic chunky salsa that belongs on almost every Mexican meal. It adds a crunchy, refreshing bite to everything.

    Ultimate Nachos. These loaded nachos disappear fast. Seasoned ground beef, tomatoes, onion, avocado, jalapenos—plenty of room to customize depending on who is coming to the table.

    Ceviche. My favorite summer appetizer. Chop everything up, let it marinate, and make sure you buy good quality fish since it is the star ingredient here.

    Restaurant-Style Salsa. I love a bowl of salsa and chips to start any meal, and this recipe mimics the ones I order at my favorite Mexican restaurants. Except this version tastes even better at home.

    Simple Salsa Verde. This roasted tomatillo salsa is probably the one I reach for most often. I use it for chicken, chilaquiles on Sunday mornings, and as a green sauce for tacos.

    Black Bean Dip. Almost like my black bean soup in chunky, creamy dip form. A wonderful appetizer that everyone at the table seems to love.

    Mango Salsa. When mangoes are in season, this fruit-forward salsa is a given. Sweet and fresh with a little kick—perfect alongside any seafood dish or fish tacos.

    Creamy Chipotle Sauce. Made with chipotles in adobo sauce, it is creamy, smoky, and perfect for adding a little heat to anything on the plate.

    Lime Crema. Refreshing, zesty, perfectly tangy. My favorite sauce for dolloping onto tacos before serving.

    Elote (Mexican Street Corn). Grilled corn on the cob slathered with limey mayo and fresh lime juice, then finished with a generous sprinkle of cotija cheese, chili powder, and cilantro. Biscuit always manages to steal a kernel or two.

    Best Mexican Rice. Rich with tomato flavor, perfect alongside black beans and grilled meats. You cannot go wrong with this side.

    Cilantro Lime Rice (Chipotle Copycat). If you prefer something lighter on the rice front, this is my go-to. Refreshing and tastes just like the bowl-shop version.

    Drinks

    Classic Margarita. When in doubt, make a margarita. It is the perfect refreshing cocktail for tequila lovers and taco nights alike.

    Fresh Mango Margarita. When mangoes are ripe and juicy, this one is worth trying. Naturally sweet and lovely to sip outside with a spread of Mexican food on the table.

    Easy Strawberry Margarita. A frozen fan favorite, especially during summer. Toss everything into a blender for multiple servings in a pinch.

    Easy Horchata. This creamy, cinnamon-spiced rice drink is my personal favorite non-alcoholic option. Refreshing and perfectly sweet—the kids always ask for it.

    Agua Fresca (Several Flavors). The best way to use up summer fruit. Blend everything together for a light, refreshing juice. Watermelon is my go-to flavor.


    A note from Nora

    Last week I made birria tacos for dinner and forgot to buy Oaxacan cheese, so we used pepper jack instead. It was not traditional, but nobody at the table minded one bit. My daughter dipped her taco in the consommé with both hands like a child who has never heard of napkins, and Sam declared it the best Tuesday night we have had all month.

    Maybe that is the real gift of cooking food from another culture in your own kitchen: you do not need perfection. You just need good ingredients, a little patience, and people you love to share it with.

    Keep Reading

  • Tofu Satay That Actually Tastes Like Chicken

    Tofu Satay That Actually Tastes Like Chicken

    A few weeks ago, I was scrolling through Thai restaurant menus at 6:30 p.m., half-hoping someone would pick for me again. Sam wanted pad thai. Our daughter wanted something with peanut sauce. And Biscuit just wanted anything that fell on the floor.

    Then it hit me — why not make tofu satay? I grew up ordering chicken satay every time we went to our favorite Thai spot, and when I switched to cooking more plant-based meals at home, I kept missing those smoky, sweet-savory skewers. So I figured out a way to make them that actually works on a weeknight.

    Tofu Satay That Actually Tastes Like Chicken - photo 3

    The secret is in the prep: freeze the tofu, thaw it completely, then press it dry. It sounds like extra work, but this simple process changes the texture entirely — the tofu gets firmer and more porous, so it soaks up marinade instead of just sitting there looking polite. The result has a chewy, chicken-like quality that even Sam couldn’t tell apart from the real thing.

    Why This Works Better Than Takeout

    Vegan satay is harder to find than you’d think. Most Thai restaurants serve it with chicken, and the occasional tofu version tends to be soft, pale, and under-seasoned. Making it at home lets you control the marinade, the bake time, and that caramelized finish.

    This one passed the Tuesday test. The tofu sits in the freezer overnight anyway, so by the time you’re thinking about dinner on Wednesday morning, the hardest part is already done.

    Tofu Satay That Actually Tastes Like Chicken - photo 2

    What You Need

    The skewers:

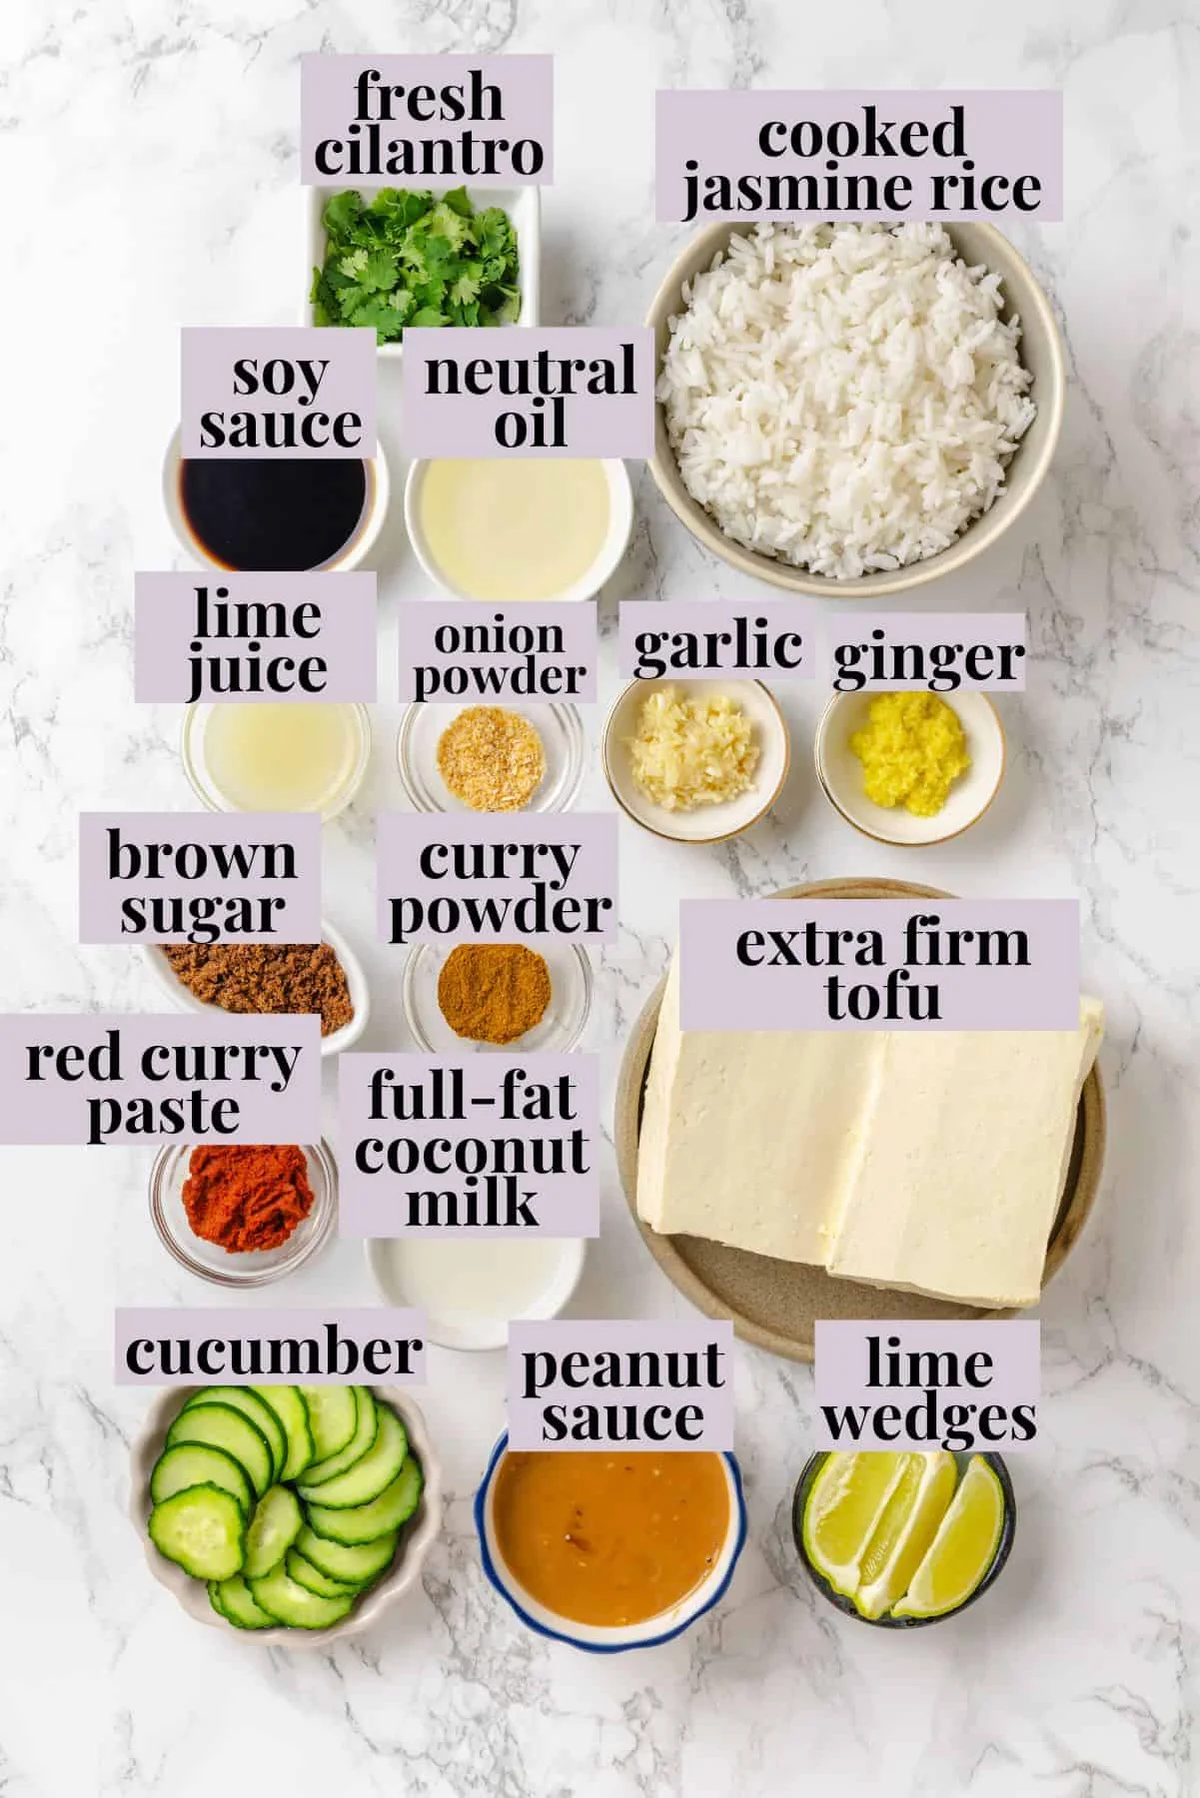
    • Extra-firm tofu — one 14-ounce block (about 400 grams). Do not skimp on firmness; anything softer falls apart when you thread it.
    • Neutral oil — peanut, avocado, or refined coconut oil. Something with a high smoke point for baking at 400 degrees.
    • Soy sauce — light or dark, whatever you have in the cabinet.
    • Full-fat coconut milk — from a can, not the carton kind. It adds creaminess and depth to the marinade.
    • Red curry paste — one tablespoon is plenty for mild heat. Use more if your family likes it spicy.
    • Curry powder, garlic, ginger, onion powder — the warm backbone of the marinade.
    • Brown sugar — just a tablespoon to balance everything out.
    • Fresh lime juice — brightens up all that richness.

    To serve:

    • Cooked jasmine rice (optional but recommended)
    • Peanut sauce — store-bought is totally fine, or make your own if you have time
    • Sliced cucumber, fresh cilantro, lime wedges

    How to Make It

    1. Prep the tofu. Freeze a whole block of extra-firm tofu until solid — I just stick it in the freezer a few days ahead and forget about it. Thaw it completely in the fridge or on the counter, then wrap it in a clean kitchen towel and press gently to remove excess water.

    2. Soak your skewers. If you’re using bamboo skewers, soak them in water for 20 to 30 minutes so they don’t burn in the oven. Metal skewers skip this step entirely.

    Tofu Satay That Actually Tastes Like Chicken - photo 4

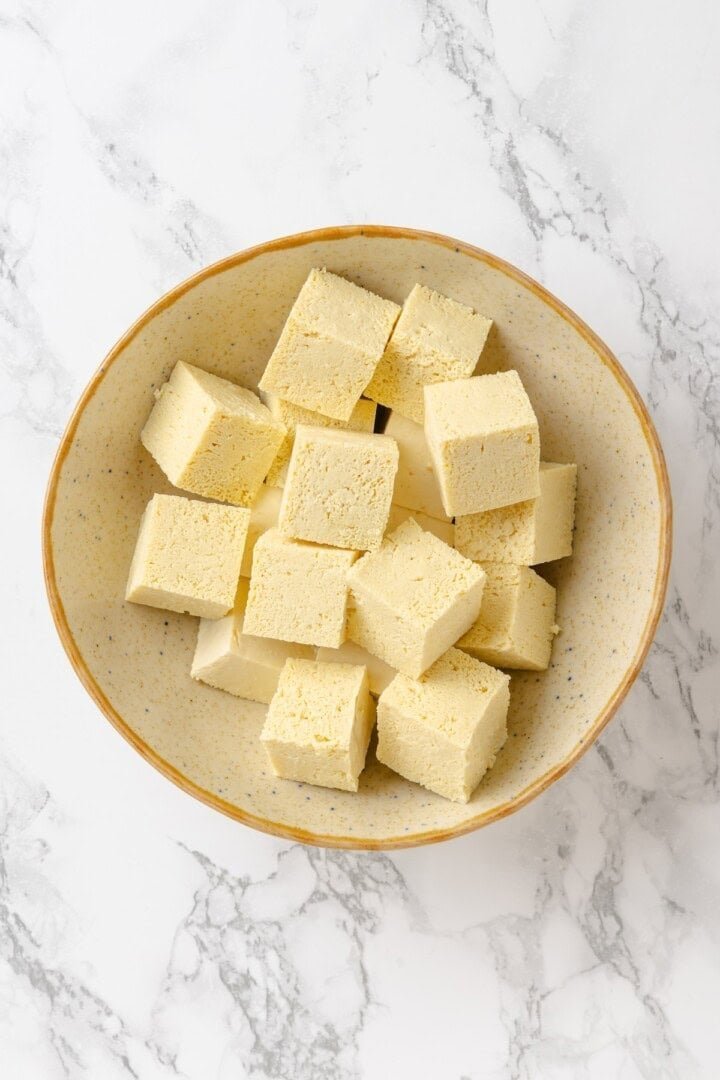
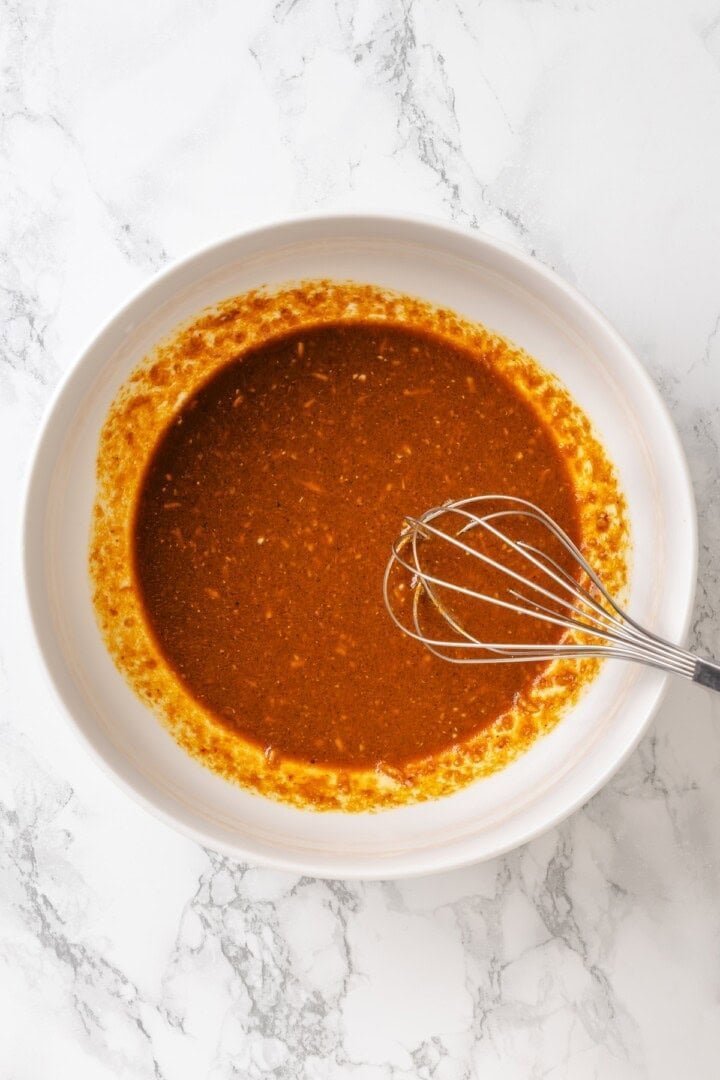
    3. Cut and marinate. Slice the pressed tofu into large cubes — about one inch on each side, sturdy enough to thread without breaking. In a bowl, whisk together the oil, soy sauce, coconut milk, red curry paste, curry powder, grated garlic, grated ginger, onion powder, brown sugar, and lime juice until smooth. Add the tofu and toss gently to coat every piece.

    Cover and let it sit for at least 30 minutes. If you plan ahead and marinate overnight, the flavor deepens in a way that’s genuinely worth the extra time.

    Tofu Satay That Actually Tastes Like Chicken - photo 7

    4. Thread the skewers. Slide the tofu cubes onto the soaked skewers, leaving just a tiny gap between pieces so heat can circulate. Set aside any leftover marinade — you’ll need it in a minute.

    Tofu Satay That Actually Tastes Like Chicken - photo 6

    5. Bake. Preheat the oven to 400 degrees Fahrenheit (200 Celsius) and line a baking sheet with parchment paper. Arrange the skewers on the sheet with a little space between each one — they should roast, not steam. Brush them lightly with half the reserved marinade.

    Bake for 10 minutes, flip carefully, brush with the remaining marinade, and bake for another 10 minutes until the edges are golden and slightly caramelized.

    Tofu Satay That Actually Tastes Like Chicken - photo 1

    6. Broil (optional). If you want deeper color and a hint of char on the edges, switch the oven to broil for one or two minutes at the end. Keep an eye on it — broilers work fast and tofu can go from golden to burnt in seconds.

    Tofu Satay That Actually Tastes Like Chicken - photo 5

    7. Serve. Bring the skewers to the table hot, alongside jasmine rice, a bowl of peanut sauce for dipping, sliced cucumber, fresh cilantro, and lime wedges. Let everyone dress their own satay — it feels like a little party.

    Tips That Actually Help

    Do not skip the freeze-and-thaw step. I know it sounds like one more thing to remember, but the texture difference is real. Frozen-then-thawed tofu absorbs marinade and holds its shape during baking in a way that fresh tofu just cannot match.

    Press it dry. Any moisture left on the surface dilutes the marinade. A five-minute press with paper towels or a clean towel makes a noticeable difference.

    Cut them big. If the cubes are too small, they’ll crumble when you thread them. Aim for about one-inch pieces — hefty enough to handle but not so large that the marinade doesn’t penetrate.

    Space matters on the baking sheet. Leave at least an inch between skewers. Crowded tofu steams instead of roasting, and you lose all that beautiful caramelization.

    Brush twice. The first brush goes on before baking; the second goes on after flipping. This keeps the tofu moist and builds flavor with each layer of glaze.

    Serving Ideas

    This works as a main dish for lunch or dinner alongside jasmine rice and a drizzle of peanut sauce. It’s also great as a starter before something heartier — Thai red curry, pad thai, even just a big salad with crunchy noodles.

    If you’re making a spread, pair it with fresh summer rolls. And when the savory part is done, mango ice cream (vegan or not) makes the perfect finish.

    Storing and Reheating

    Fridge: Cool the skewers completely, then seal them in an airtight container. They’ll keep for up to four days.

    Freezer: Once cooled, freeze the satay in a freezer-safe container for up to three months. Thaw in the fridge before reheating.

    To reheat: Lay the skewers on a baking sheet and warm them in a 375-degree oven (190 Celsius) for about five minutes, until heated through. You can also microwave two or three skewers at a time in 30-second intervals.

    A note from Nora: I made this on a rainy Tuesday last month and Sam took one bite before asking if it was chicken. I didn’t correct him immediately — let the moment linger for a second, which felt like a small victory in our kitchen. Our daughter loaded her skewer with more peanut sauce than tofu and said it tasted like something from a restaurant we once visited on vacation. Sometimes that’s all you want: a meal that feels like somewhere else, even if it started as a block of frozen tofu on your counter.

    Maybe that is the real gift of small rituals: they do not fix everything, but they remind us that even an ordinary Tuesday can hold something lovely.

    Keep Reading

  • Lemon Pepper Grilled Chicken (the one that saves my grilling season)

    Lemon Pepper Grilled Chicken (the one that saves my grilling season)

    There’s a window, maybe four weeks a year, where I don’t want to think about dinner. The grill is out, the evenings are long, and the last thing I want is a recipe that needs a second opinion from a sous chef. This lemon pepper chicken is what I reach for in that window — because it works with almost no decisions on my part.

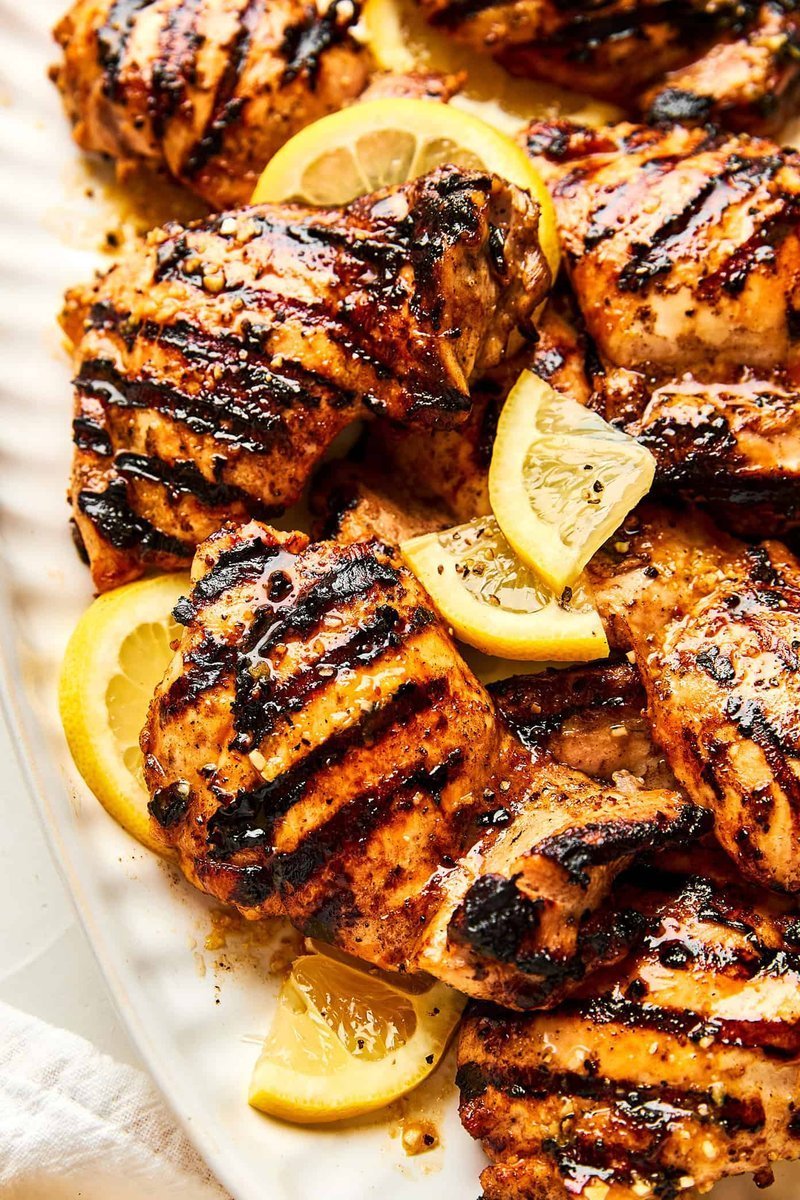
    Platter of char-grilled lemon pepper chicken thighs with lemon slices

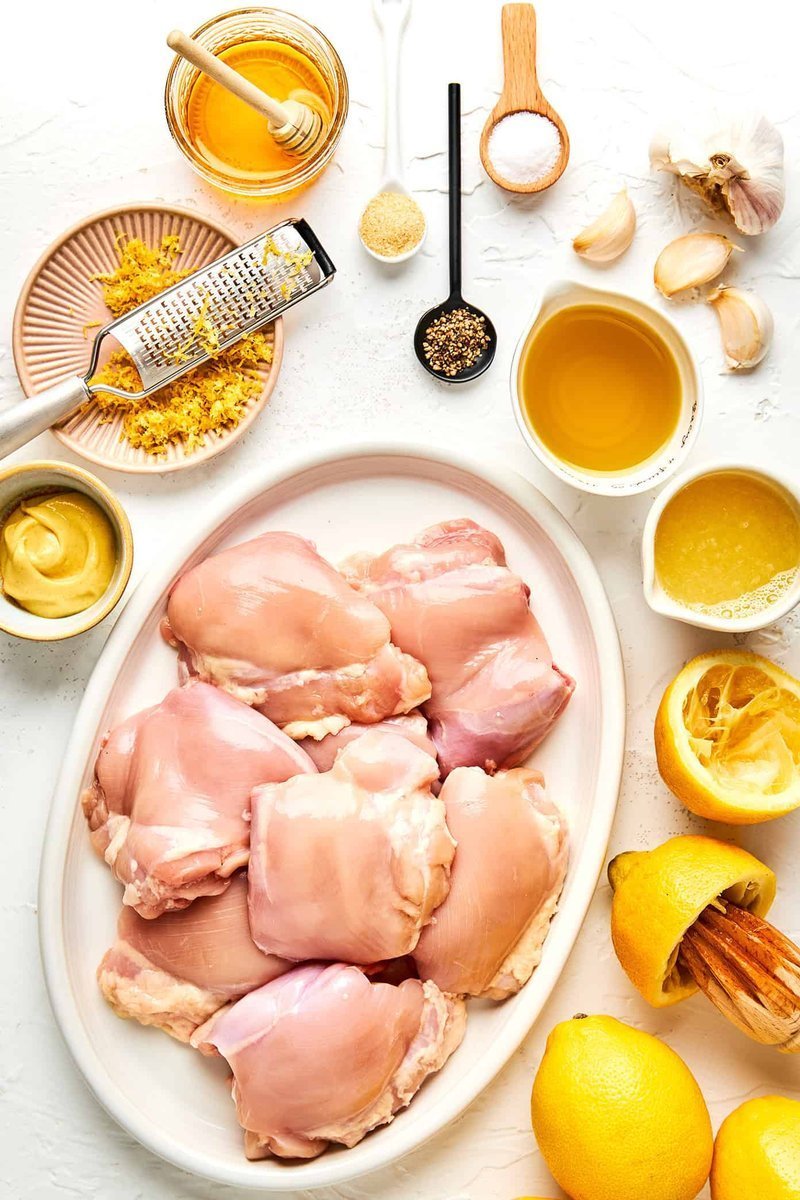
    The marinade comes together in about five minutes with things I always have on hand: fresh lemon zest and juice, a generous amount of coarsely ground black pepper, garlic, Dijon, and just a touch of honey to balance everything and help the chicken get those charred edges on the grill. Low effort. Big flavor. That’s the whole pitch, and it holds up.

    Flat lay of lemon pepper chicken marinade ingredients around raw chicken

    And here’s the thing I keep coming back to: chicken thighs are the way to go. They stay juicy on the grill, they char beautifully, and they’re far more forgiving than breasts if you get distracted for a minute — which, let’s be honest, happens. I also like that the chicken can just sit in the fridge marinating while I prep the rest of dinner, so it’s ready for the grill whenever I am. That’s the whole game for a weeknight.

    Why this recipe works

    It’s simple, bright, and unfussy — the kind of thing I want on repeat when the weather’s hot and I don’t feel like overthinking dinner. We’ve made it with a big green salad, grilled vegetables, rice, and potatoes. It goes in wraps, and the leftovers get sliced up into bowls the next day, which is basically a second dinner for free.

    Step-by-step collage of making and grilling lemon pepper chicken

    The recipe

    Ingredients

    • 2 pounds boneless skinless chicken thighs
    • 1 tablespoon lemon zest
    • 1/3 cup freshly squeezed lemon juice
    • 1/3 cup olive oil
    • 1 tablespoon Dijon mustard
    • 1 tablespoon honey
    • 3 cloves garlic, pressed or finely minced
    • 1 teaspoon coarsely ground black pepper
    • 1 teaspoon fine sea salt
    • 1/2 teaspoon onion powder

    Timing: 10 minutes prep, 15 minutes on the grill, 30 minutes marinating, 55 minutes total. Makes 6 servings.

    Instructions

    1. Make the marinade. In a medium bowl, whisk together the lemon zest, lemon juice, olive oil, Dijon mustard, honey, garlic, sea salt, black pepper, and onion powder until combined.
    2. Marinate the chicken. Add the chicken thighs to a large bowl or zip-top bag. Pour the marinade over the chicken and toss until evenly coated. Cover or seal and refrigerate for at least 30 minutes, or up to 8 hours.
    3. Heat the grill. Preheat the grill to medium-high heat, around 400°F. Clean and oil the grates.
    4. Grill the chicken. Remove the thighs from the marinade, letting any excess drip off, and discard the remaining marinade. Place the chicken on the grill and cook for 5 to 7 minutes per side, with the lid closed between flips, until nicely charred and cooked through.
    5. Rest the chicken. Transfer to a clean plate and let it rest for 5 minutes before serving.
    Close-up of glossy grilled chicken thighs with lemon wedges

    Tips before you fire up the grill

    Don’t skip the zest. The lemon juice adds brightness, but the zest is where the fragrant lemon oils live. It makes a real difference, so zest that lemon before you juice it.

    Give the marinade time, but not too much. Thirty minutes works in a pinch, but 2 to 4 hours is the sweet spot. I wouldn’t go much longer, since the acidic lemon juice starts to break down the texture and can make the meat mealy.

    Grind that pepper coarsely. Freshly cracked, coarse black pepper gives this recipe its signature bite. Fine pre-ground works if that’s all you have, but it doesn’t have the same punch.

    Oil the grill grates. A clean, well-oiled grill is the secret to good grill marks and chicken that doesn’t stick.

    Don’t move the chicken. Let it sear undisturbed for the first 5 to 7 minutes so it develops a char and releases naturally from the grates.

    Use a meat thermometer. Thighs are technically done at 165°F, but honestly they’re better around 175°F, once more of the connective tissue has rendered. An instant-read thermometer takes all the guesswork out.

    Let it rest. It’s tempting to dive right in, but five minutes of resting lets the juices redistribute so every bite stays juicy.

    Overhead plates of grilled chicken with charred vegetables and salad

    Ways to make it yours

    Use chicken breasts. Swap in boneless skinless breasts if you prefer — just pound them to an even thickness first and keep a close eye on the grill time, since breasts dry out faster than thighs.

    Make it spicy. Add a pinch of crushed red pepper flakes or a spoonful of Calabrian chile paste to the marinade for some heat.

    Add fresh herbs. Toss in a tablespoon of chopped fresh rosemary, thyme, or oregano, or sprinkle the grilled chicken with fresh basil or parsley just before serving.

    Go extra lemony. Grill a few lemon halves alongside the chicken and squeeze the sweet, caramelized juice over everything right before serving.

    Swap the honey. Use maple syrup or brown sugar in its place if that’s what you have on hand.

    Add a briny kick. Whisk a teaspoon of capers or a splash of their brine into the marinade for a subtle piccata-style vibe.

    Grilled chicken platter styled with lemon and pepper garnish

    Questions, answered

    Can I use bone-in chicken thighs? Definitely. Bone-in, skin-on thighs work beautifully here — they’ll just need a longer cook time, usually closer to 10 to 12 minutes per side. If the skin starts to char too quickly, move them to indirect heat.

    Can I use chicken breasts instead? Yes. Pound the breasts to an even thickness before marinating so they cook evenly. They’ll cook a bit faster than thighs, so keep an eye on them and pull them once they reach 165°F.

    Can I bake this instead of grilling? Yes. Bake the thighs on a parchment-lined baking sheet at 425°F for about 20 to 25 minutes, or until cooked through. If you want more color on top, broil for the last minute or two.

    Can I make this on a grill pan? Absolutely. Heat a grill pan over medium-high heat, brush it lightly with oil, and cook the chicken for about 5 to 7 minutes per side, until nicely charred and cooked through.

    A note from Nora

    The first time I made this, I went long on the marinating — like, overnight long — and the texture turned a little mealy, exactly like I was warned. Since then I’ve kept it in the 2 to 4 hour window and it’s never missed. Sam eats it with the grilled vegetables, our daughter takes the softest pieces, and Biscuit waits by the grill in the way only a golden retriever can. This one passed the Tuesday test, and I’ll probably be making it every grilling season from here on.

    Keep Reading

  • Microwave Corn on the Cob: Ready in 3 Minutes

    Microwave Corn on the Cob: Ready in 3 Minutes

    One Tuesday in late July, I came home with two ears of corn from the farmers’ market, a dinner to plate by seven, and zero desire to stand over a boiling pot of water. So I did the thing I should have done years ago: I microwaved them, husk and all.

    Fresh corn on the cob with husk on wooden cutting board

    Here’s the thing nobody tells you. The husk isn’t the problem. It’s the oven bag of your corn. It traps the steam, keeps the kernels plump, and when the corn is done, the whole cob just slides out of the husk. Most of the silk stays behind. You do almost no shucking, no boiling, no babysitting.

    This one passed the Tuesday test. It’s the fastest way I’ve found to get sweet, juicy corn on the table when you only need a couple of ears.

    What you need

    The entire ingredient list is this:

    • 1 ear of corn on the cob, husked, up to 4 ears (in the husk)
    • Butter and salt, for serving (or whatever you like to put on corn)

    That’s it. When you’re picking corn at the store, look for ears with bright green husks and brown, sticky-looking silk on top. And when you get home, keep any uncooked ears in their husks in the fridge — it keeps the kernels moist and plump for a few days.

    How long does it actually take?

    Here’s the chart I use. Times vary a little with ear size and your microwave’s wattage, so I start at the lower end for smaller ears and give bigger ones the full range:

    • 1 ear: 3 minutes
    • 2 ears: 4 to 5 minutes
    • 3 ears: 6 to 7 minutes
    • 4 ears: 7 to 9 minutes

    The corn is done when the kernels are plump, steaming hot, and crisp-tender. If your ears are on the really big side, add 30 seconds.

    How to microwave corn on the cob

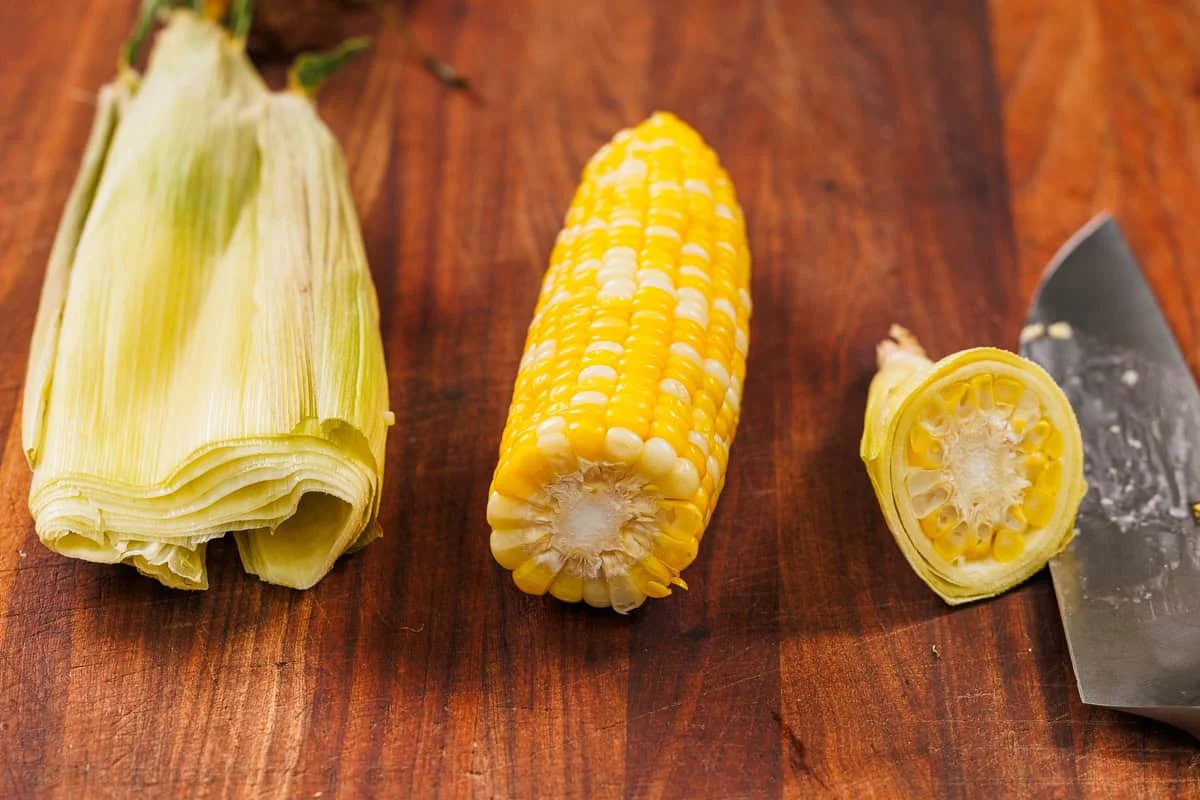
    Corn cut crosswise showing kernels and cob on cutting board
    1. Microwave the corn. Place the ears in a single layer, husks still on, and microwave on high using the times above. For 3 to 4 ears, rearrange them halfway through if your microwave cooks unevenly. Use tongs to move the corn — it will be hot.
    2. Let it rest. Leave the corn on the counter for 1 to 2 minutes. The husks and the steam inside them are very hot, and a short rest makes the next step much more pleasant.
    3. Cut off the stem end. Using a sharp knife, cut straight off the bottom end — about 1 inch, cutting right through the bottom row of kernels. This releases the cob from the stem.
    4. Push the cob out. Hold the silk end with a clean kitchen towel and squeeze gently downward toward the cut end. The cob slides right out, leaving the husk and most of the silk behind. If it resists, trim a little more off the stem end and try again.
    5. Serve. Warm, with butter and salt. Done.

    Can you microwave corn without the husk?

    Yes. If the corn is already shucked, or the husk is papery and dry, wrap each ear in a damp paper towel before microwaving. The towel does the same job the husk does — it holds moisture in around the kernels. With fresh, green husks you don’t need it at all.

    What to serve it with

    Microwaved corn is my default summer side, and it goes with nearly everything we cook in the warmer months — a surf-and-turf dinner, grilled steak kabobs, a smash burger, honey-glazed salmon, Instant Pot ribs, or a simple cilantro-lime chicken. If you’re feeding a crowd and want a bigger side to go with it, my favorite easy summer salads take a few minutes and keep well in the fridge.

    Storage and reheating

    Corn like this is best eaten right away, but it keeps well if you need it to. Refrigerate cooled leftovers in an airtight container for up to 4 days. To reheat, wrap the cob in a damp paper towel and microwave in 20-second intervals until warm. For the freezer, cut the kernels off the cob and store them in a freezer-safe container for up to 3 months.

    I keep this method in my back pocket for every summer. No pot of water, no shucking over the sink, no waiting. Just two ears of corn, a few minutes, and the smell of something fresh filling the kitchen.

    A note from Nora: the first time I tried this, I pushed the cob out with my bare fingers and learned exactly why a kitchen towel is in the instructions. It was fine. Mostly. If I can make it on a Tuesday, it’s a keeper.

    Keep Reading

  • 15 No-Bake Mother’s Day Dessert Recipes That Save the Day

    15 No-Bake Mother’s Day Dessert Recipes That Save the Day

    I’ve been thinking about Mother’s Day lately. Not the flowers-and-breakfast version (though we do those), but the real one: the day Mom gets to do absolutely nothing, which means someone else has to cook something a little special without losing their mind.

    No-bake desserts solve that problem. No oven warming up, no preheating anxiety, no 40-minute timers beeping while everyone waits. You assemble, you chill, you serve. And here’s the part nobody tells you: kids can do most of the work, which is the whole point.

    These 15 recipes are a mix of my own kitchen-tested favorites and a few from friends’ blogs I trust (I’ve marked them). I made a few of these for my own Mother’s Day tables and I’ll be honest about where I fumbled.

    Layered chocolate trifle in a glass pedestal bowl

    Why no-bake wins on Mother’s Day

    Quick to prepare, easy for kids to help with, no oven heat on warm spring days, elegant enough for the big table, and stress-free for the family that actually has to serve. That’s the whole pitch, and it works.

    One note before you scroll: this post may contain affiliate links. If you buy something through them, I earn a small commission at no extra cost to you. I only link recipes I’d actually serve.

    The lemon and citrus side

    Lemon Lush Dessert

    Slice of lemon lush no-bake layered dessert on a white plate

    Buttery cookie crust, tangy cream cheese layer, a smooth lemon pudding center, and a cloud of whipped topping on top. This is the make-ahead dessert that impresses every single time, and it comes together in about 30 minutes of real work (the rest is chilling). The first time I made it I over-softened the crust layer and it got a little crunchy-soggy, so I now press the crust in firm and let it set before the cream cheese goes on. Passed the Tuesday test.

    Full recipe via Wonky Wonderful.

    Strawberry Cheesecake Cups

    Strawberry cheesecake parfait cups with fresh strawberries

    Layers of strawberries, cheesecake filling, and graham crackers in individual cups. Individual servings are the cheat code for holiday parties: nobody fights over the last slice, and the kids can each build their own. These are my default for anything that includes a grill, because they travel well and don’t need a serving spoon. I serve these on a tray and let everyone grab one; by the end of the afternoon there’s usually one cup left and a very quiet argument about it.

    Full recipe via Wonky Wonderful.

    Raspberry Lemon Mint Possets

    Raspberry, lemon, and mint possets served in edible lemon bowls, for a presentation that looks like you ordered from a restaurant. A posset is honestly one of the most forgiving desserts there is: simmer cream, sugar, and fruit, pour it cold, wait for it to set. No eggs to scramble, no tempering, no stress. The lemon bowls are the showpiece, and they double as part of the dessert. I’ve only made these twice and both times a guest asked for the recipe. That’s the review that counts.

    Full recipe via TastyCue.

    The chocolate side (for the serious chocolate people)

    Death by Chocolate Trifle

    The name is doing a lot of work, and it’s earned. Layers of chocolate cake and cream in a glass trifle bowl, with chocolate sauce working its way through every layer. This is the crowd-pleasing dessert, the one that works for birthdays, holidays, picnics, and the time you just needed dessert for no particular reason. If your table has at least one person who takes chocolate seriously, lead with this one.

    Full recipe via Get Inspired Everyday.

    Oreo Layered Dessert

    Oreo crust, cream cheese filling, chocolate pudding, whipped topping, and crumbled Oreos on top. I’ll be honest: I call this dessert “cheat code lasagna” in my house because the layers look like lasagna and the effort is nowhere near as much. The 2-year-old helped with the crumble step, which is the only step a 2-year-old can do without making a mess, and she was very serious about it. It’s a layered dessert with an Oreo crust, cream cheese filling, chocolate pudding, Cool Whip, and crumbled Oreos.

    Full recipe via Wonky Wonderful.

    Easy Tiramisu

    Ladyfingers soaked in Baileys and coffee, layered with mascarpone whipped cream. This is the one I recommend when someone says “I want a real dessert, not a snack.” It takes a little more care than the other no-bakes here, mostly because the mascarpone needs to be cold and the layering needs patience, but there’s still no oven involved. I’ve made it three times now, and the second time I forgot to chill it long enough and it wept a little. Third time: an hour in the fridge before serving. No regrets.

    Full recipe via Wonky Wonderful.

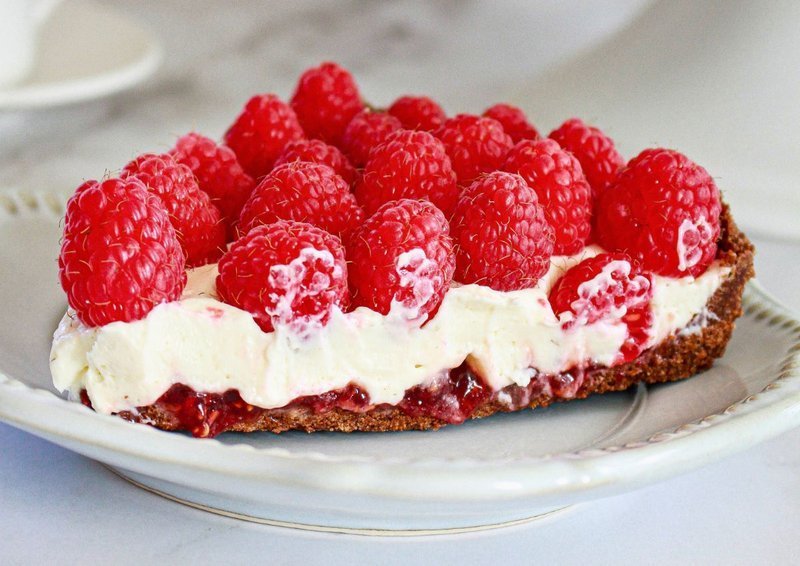
    Chocolate Raspberry Cream Tart

    Chocolate raspberry cream tart with fresh raspberries

    Rich chocolate, luscious cream, and tangy raspberries in a tart shell. This is the French-inspired one on the list, and it’s the one I reach for when I want the dessert to look like I planned the whole evening. The contrast between the bitter chocolate and the bright raspberries is what makes it work; neither flavor alone would do it. I made this for a dinner party last spring and it was the last thing left on the table, which I’ll take as a win.

    Full recipe via Thriving in Parenting.

    The strawberry side

    Strawberry Shortcake Trifle

    Every layer of everyone’s favorite strawberry dessert, stacked in a trifle dish. Show-stopping is doing a lot of work in this name, but the layers do earn it: sponge, cream, fresh strawberries, repeat. This is the ultimate summer dessert and it’s also the one that disappears fastest at a party, which is the real test. I keep a backup in the freezer for exactly this reason.

    Full recipe via Wonky Wonderful.

    Strawberry Pretzel Salad

    A pretzel crust, a sweet cream cheese layer, and a strawberry topping. The name “salad” confuses people the first time, and then they stop talking because it’s gone. This is always a hit at any get-together, and the pretzel base gives it a little crunch that plain graham cracker versions don’t have. I’ve served this at two different parties and both times someone asked if I “made the crust myself.” I did. It’s crushed pretzels and butter.

    Full recipe via The Cookin’ Chick’s.

    Deviled Strawberries

    Filled strawberries that work as a sweet appetizer or a snack, and they’re incredibly easy. “Deviled” is a fun name for what is basically a cream cheese filling pushed into a strawberry, but it’s also accurate, because they’re the kind of thing that disappears when you leave the room. I make these the night before a big family dinner so I’m not standing at the counter with a piping bag while everyone else eats. They keep well in the fridge and the strawberries stay firm for a day.

    Full recipe via Recipes from a Pantry.

    Edible Sugar Cookie Dough

    Cookie dough made without eggs, loaded with white chocolate chips and sprinkles. This is the dessert the kids fight over, and the one I keep in the freezer for “suddenly need a sweet thing” moments. No eggs means you can technically eat it raw without the tiny voice in your head asking questions, which matters more than it should when you’re making dessert for a toddler. It’s a small batch, it comes together fast, and it’s the kind of thing you make in a bowl while something else is going.

    Full recipe via Wonky Wonderful.

    Quick, easy, and actually no-fuss

    No-Bake Coconut Cream Pie

    Quick, easy, no-fuss pie that works for holidays or any afternoon you’re craving pie without turning the oven on. Coconut cream pie has a reputation for being fussy because of the classic version with the meringue, and this one skips all of that. It’s a no-fuss dessert recipe, and “no-fuss” is the highest compliment I can give a pie. I made mine on a Sunday with a few hours’ notice and it held up fine through a long, warm afternoon.

    Full recipe via Wonky Wonderful.

    Salted Caramel Cheesecake Dip

    A last-minute dessert that takes about 5 minutes. If Mother’s Day morning turns into a scramble and you realize the dessert is still a mystery, this is the fix. Salted caramel and pecans in a cheesecake dip, and it’s tasty enough that nobody notices it wasn’t planned. I keep a bag of pecans and a block of cream cheese in the fridge for exactly this purpose, and I’m not sorry. 5 minutes is the whole point.

    Full recipe via Wonky Wonderful.

    Oreo Sundae Banana Split

    Oreo banana split sundae with cherries and whipped cream

    Bananas, ice cream, Oreos, whipped topping, and cherries. This is the one that requires the least thought of anything on the list, which is why it’s a good plan B. You don’t need to prep it the night before; you assemble it in about 10 minutes when you’re ready to serve. The 2-year-old gets to choose the topping order, which is the most important decision on the plate. I’ve made this on a hot weekend afternoon with zero planning and it still landed as a hit.

    Full recipe via Wonky Wonderful.

    Ambrosia Salad

    Creamy ambrosia fruit salad in a wooden bowl

    Light, fluffy, and creamy, with a blend of fruit, marshmallows, coconut, and walnuts. I know, I know: ambrosia salad is the recipe that divides the internet. Some people think it’s a classic and some people think it’s a crime. Here’s my honest take: it’s a perfect summer dessert if you like it, and it’s not for everyone, and that’s fine. I made mine with a little less marshmallow than the original recipe calls for, and it came out better for it. If you’re serving a table with mixed opinions, make a small batch and let people decide for themselves.

    Full recipe via Wonky Wonderful.

    A note from Nora

    I’ve made about a third of these on my own kitchen table in the last few years, and I’ll tell you what I’ve learned: the best Mother’s Day dessert is the one that doesn’t make Mom feel like she has to do anything. Pick the one that fits your kitchen and your family, and if it comes together a little messier than the photos, that’s the one that counts. If I can make it on a Tuesday, it’s a keeper. And these, all of them, are Tuesday-proof.

    What are you making for Mom this year? Tell me in the comments — I’m always collecting the ones that actually work.

    Keep Reading

  • Sourdough Discard Focaccia Without Yeast (Flexible, Forgiving, Golden)

    Sourdough Discard Focaccia Without Yeast (Flexible, Forgiving, Golden)

    The fridge light comes on at 6:40 every night when I’m grabbing a glass of water, and every single time, the sourdough starter jar is in there. It has been sitting for a week. It looks tired. I feel a little guilty about it, the way you do about a plant you forgot to water.

    Turns out that tired, forgotten jar is exactly what this focaccia wants.

    Slices of golden sourdough discard focaccia with crisp crust

    A note on the title: yes, sourdough starter contains wild yeast. “No yeast” here means no commercial yeast — no packet, no pinch from the bakery aisle. The slow wild fermentation does the work on a long, forgiving timeline, which is why this recipe is so lenient with busy people. The discard does need to be healthy and recently fed, though — not a sad, flat one that’s been in the back of the fridge for three weeks.

    Why this one made it into my rotation

    Focaccia is the bread I make when I want the kitchen to smell like an Italian trattoria but don’t want to pay the price. Light, open crumb, big air pockets, olive oil doing all the talking, and a crisp golden top that shatters when you tear off a piece. It goes with pasta, soup, a simple cheese plate — or just honest butters up all day long.

    It’s also one of the most forgiving recipes I own. You can start it in the morning, go do your entire life, and bake it at whatever hour you actually care about. That matters when your weekdays are swim sets, dry cleaning and a plate of leftovers at 7. If I can make it on a Tuesday morning and still have it to eat for Thursday breakfast, it’s a keeper.

    What you need

    Flour, salt and sourdough starter lined up on counter

    • 500 g bread flour (about 4 cups) — all-purpose works fine
    • 150 g unfed sourdough starter (about ⅓ cup), healthy and recently fed — a fed-up starter works too, if that’s what you have on hand
    • 400 g water (about 1⅔ cups)
    • 10 g salt (about 2 tsp)
    • ¼ cup olive oil, good quality — the flavor lives here, so don’t skimp

    Tools: a large bowl, a kitchen scale, and a 9×13 baking dish. That’s the whole shopping list.

    High-hydration warning: this dough is wet. It will feel loose and sticky, and that is the point — the steam from that water is what puffs up those big bubbles. Don’t panic-add flour.

    How to make it

    There are about ten minutes of active work in the whole recipe, spread out over a day. The clock is on your side.

    1. Mix. In the large bowl, stir the flour, starter, water, and salt together until fully combined and a shaggy dough forms. Cover and let it rest 30 minutes.
    2. Fold. Do one set of stretch and folds (wet your hands if it’s too sticky — it will be). Cover, rest 30 minutes, then do a second set. The folds are optional but they’re what keep the crumb open.
    3. Bulk ferment. Cover and let the dough rise 6 to 8 hours, until it’s very bubbly and has a soft, airy feel. The rising time will depend on how warm your kitchen is — cooler means longer. Slightly over-fermented focaccia bakes just fine, so this one is very forgiving.
    4. Prep the pan. Pour about 2 tablespoons of the olive oil into the 9×13 dish and spread it across the bottom and up the sides.
    5. Shape. Transfer the dough to the pan and spread it out gently with your hands. Cover and let it rise 1 to 2 hours, or longer if needed, until doubled and full of bubbles. Craving a slower route? Cover the pan, put it in the fridge overnight, and bake in the morning — the cold ferment deepens the tang.
    6. Dimple. Preheat the oven to 425°F. Drizzle the remaining olive oil over the top and press it in with your fingertips to make the classic dimples. Add your favorite toppings.
    7. Bake. 25 to 35 minutes, until deep gold and brown. Pull it out when it sounds hollow where you tap the crust — this is a bread that performs best fresh out of the oven.

    Serve it warm, torn into rough slices, with plenty extra olive oil for drizzling.

    Toppings and variations

    The basic version is a blank canvas. I’ve made it:

    • flaky salt and fresh rosemary — my default, and the one that never needs a second opinion
    • garlic and olive oil, just before baking
    • halved cherry tomatoes, sunk into the dimples
    • caramelized onions, for depth that turns sweet
    • shaved parmesan, added in the last few minutes
    • everything bagel seasoning — Sam’s favorite, and I’ve stopped fighting it
    • cinnamon sugar — the sweet version that disappears by lunch

    Roasted garlic or carmely onion stirred into the dough itself works too, and this leftover dough is secretly a pizza base if you ever want a Monday pizza night.

    What I’ve learned

    • Don’t worry about perfect timing. Let the dough tell you — it should be giggly and bubbly. Over-fermented focaccia is fine.
    • Rise time follows temperature. Cool kitchen, more patience. Warm kitchen, less. Watch the dough, not the clock.
    • Use plenty of olive oil. That’s where the flavor and the texture come from.
    • Bubbles are the signal. When you see them, the dough is ready.
    • The discard already gives this a tangy flavor, so skip the long cold ferment if you don’t need the sourness.
    • Sticky is normal for a high-hydration dough. Wet hands, calm hands, keep going.

    Storing leftovers

    Focaccia is best the day it’s baked, but it keeps better than you’d expect if you handle it right.

    • Room temperature: once it’s completely cool, wrap it tightly in plastic wrap or an airtight container. It’ll keep for up to two days. The crust softens, but the inside stays moist. To bring back the crunch: reheat slices in a 350°F oven for 5 to 7 minutes, or toast them cut-side down in a dry skillet.
    • Freezer: slice it, wrap each piece in plastic, and bag it all up. Keeps for up to three months. From frozen, 10 to 12 minutes in a 375°F oven until warm through and crisp at the edges.
    • Skip the fridge. The cold dries bread out faster than the counter does. If it won’t get eaten within two days, it’s going straight to the freezer.

    FAQ

    Per serving (makes about 10 slices): 242 kcal · 39 g carbs · 6 g protein · 6 g fat (1 g saturated) · 391 mg sodium · 1 g fiber.

    Can I use active sourdough starter instead of discard? Yes, easily. Discard is what makes this recipe fast and keeps the pantry tidy, but a fed-up, healthy starter works just the same.

    Can I make this ahead? That’s the whole point. After step 5, cover the pan, refrigerate it overnight, and bake in the morning. The cold ferment adds a slower, deeper tang.

    Why is my dough so sticky? It’s a high-hydration dough, so stickiness is normal — that’s the texture, not the mistake. If it claws at your hands, wet them. Only add a little more flour if you really must, or you’ll tighten up the crumb.

    Do I need to do the stretch and folds? Not strictly. The dough is forgiving and will work even if you keep it simple. But the folds build structure, and they’re how you get that open, airy crumb — so I always do them.

    A note from Nora

    The first time I made this, I pulled it out of the oven maybe ten minutes early because the house had gone quiet and I wanted to see what was happening under that crust. It was still beautiful. My daughter took the largest piece. Sam took the second largest. The kitchen smelled like it had hosted a small celebration, and the fridge was one fewer guilty jar for the week.

    Maybe that’s what small rituals are for — they don’t fix anything, but they remind you that even an ordinary Tuesday can hold something lovely. If I can make it on a Tuesday, it’s a keeper.

    Keep Reading

  • 10-Minute Breakfast Bagel

    10-Minute Breakfast Bagel

    I was standing at the counter yesterday morning with one foot already out the door, trying to figure out what we could eat that would not take all day. Sam had coffee in both hands and our daughter was somewhere between her shoes, and I needed something fast enough for a weekday but still worth chewing on.

    This bagel is what happened when I stopped overthinking it.

    Bacon, avocado, a fried egg that cooks right around the bread halves, tomato pesto, Swiss cheese — all flipped in one pan in about 10 minutes. It passed the Tuesday test, which means you do not need three trips to the store or a food processor or any kind of patience beyond what you already have at 7:30 AM.

    10-Minute Breakfast Bagel - photo 2

    Why it works

    The trick is that the egg and the bread cook in the same skillet at the same time. You pour whisked eggs around the toasting bagel halves, let them set at the edges, then flip everything together. The overhanging egg folds inward like a wrap, holding all the fillings in place. One spatula. Two layers of cleanup instead of four.

    I tested this with regular ketchup first and it tasted too sweet, so I switched to tomato pesto and the whole sandwich changed — the tang cuts through the melted cheese and pairs with bacon like it was always meant to. If you do not have tomato pesto on hand, chunky tomato relish or a sun-dried tomato spread works just fine.

    What you need

    • 1 bagel, sliced in half — any kind holds up, though sesame adds nice texture. Sourdough slices or an English muffin work as substitutes.
    • 2 large eggs, whisked with 1/4 tsp garlic powder, 1/4 tbsp onion powder, and a pinch each of salt and pepper
    • 3 slices bacon, cooked crispy beforehand (thin-cut works best — thick-cut ham gets lost under the bread)
    • 1/2 avocado, sliced or lightly mashed
    • 1 tbsp tomato pesto (or tomato relish / sun-dried tomato spread)
    • 1 slice Swiss cheese
    • A drizzle of ranch sauce
    • A light spray of cooking oil for the pan

    How to make it

    1. Cook the bacon first. In a skillet over medium heat, fry the bacon in a little olive oil until crispy. Set it aside on a paper towel.
    2. Toast the bagel halves. Keep the same pan (or swap to another one). Spray with cooking oil and place the bagel halves face down for about 15 seconds — just enough to get them lightly golden.
    3. Pour the eggs around the bread. Whisk together the 2 large eggs, garlic powder, onion powder, salt, and pepper in a small bowl. Pour the mixture into the skillet so it surrounds both bagel halves. Let the edges set before touching anything.
    4. Flip everything at once. When the outer edge of the egg lifts away from the pan, slide your widest spatula under the center where the two bread halves meet and flip in one confident motion. Do not hesitate — hesitation tears eggs.
    5. Fold and layer. Fold the overhanging egg edges inward onto the bagel. Spread tomato pesto on both cut sides of the bread, then stack: Swiss cheese (so it starts melting from residual heat), crispy bacon, avocado slices, and a drizzle of ranch.
    6. Warm through and serve. Let the sandwich sit in the pan for just a few seconds so everything melds together. Close it, slice if you like, and eat.
    10-Minute Breakfast Bagel - photo 1

    A few things I learned

    The flip is the hardest part. Wait until the egg edges actually pull away from the pan before you try to turn it. Use the widest spatula in your drawer, slide it exactly under where the two bread halves meet, and commit to one quick motion.

    Medium heat only. Too hot and the bagel cut sides burn before the egg sets. Too low and the egg sticks. Find your stove’s sweet spot once and remember it.

    Poke out a little bread if needed. If your bakery bagel is especially thick, pinch away some of the soft inner crumb from each half before cooking. It creates a shallow pocket that keeps the fillings from spilling out every time you take a bite.

    10-Minute Breakfast Bagel - photo 3

    Ways to customize it

    This bagel started as a breakfast-burger idea, and I think that is why it bends so easily. Here are the variations my kitchen has tested:

    • Spicy: A few dashes of hot sauce on the eggs while they cook, plus thin ham slices layered under the bacon.
    • Burger style: Swap Swiss for cheddar, add a couple tomato slices and some red onion. It tastes like a diner counter.
    • Fresh and green: Sautéed bell peppers and spinach instead of bacon, cream cheese as the base, gouda melted on top.
    • Lighter version: Whisk egg whites instead of whole eggs, use turkey bacon cooked until firm, and spread a thin layer of plain cream cheese in place of the ranch and pesto.

    Frequently asked questions

    Can I make this if my skillet is too small? Yes. If your pan cannot fit both bagel halves side by side for the flip, cook scrambled eggs separately in a small pan and fold them into a neat square while they set. Toast the bread in the toaster instead. You get one extra dish to wash but the same flavor.

    How do I store leftovers? Eat it straight from the pan if you can — that is when the texture is best. But half a sandwich reheated in a skillet over low heat, or in an air fryer for two minutes, works well. Skip the microwave; it turns the bread rubbery.

    Can I prep ahead? Cook a batch of bacon on Sunday and keep it sealed in the fridge for up to four days. During the week, you only need to toast, pour eggs, and flip — the rest is just stacking.

    A note from Nora

    Biscuit nosed his way under my leg while I was flipping this bagel last Tuesday, hoping I would drop a piece of bacon. He got lucky. Sam said it tasted like something you would order at a place with vinyl booths and jukeboxes, which is exactly the kind of compliment that makes me want to make it every morning.

    Maybe the best breakfasts are not the ones that take forever — just the ones that bring the whole family to the table before anyone has lost their patience.

    Keep Reading

  • Roasted Sweet Potatoes with Apples, Avocado, and Tomatoes

    Roasted Sweet Potatoes with Apples, Avocado, and Tomatoes

    I’ve been thinking lately about how often I walk into the grocery store with a craving on my mind and come home with a recipe I didn’t plan to make. Last month was one of those times. I was craving sweet potatoes so badly I was almost annoyed about it, and on my way to the produce aisle I grabbed an apple, an avocado, a pint of cherry tomatoes, and feta without really thinking. By the time I’d loaded the cart, the dish had basically written itself.

    Colorful roasted sweet potato salad with apple, avocado, and tomatoes in a bowl

    It’s a hearty side dish with roasted sweet potatoes, apple, avocado, cherry tomatoes, red onion, feta, pistachios, and a quick balsamic vinaigrette. There’s sweet and savory and a little bit of tang, plus soft, crisp, and crunchy all in one bowl. It went with a roast chicken one night and with plain grilled salmon the next. Honestly, it pairs with almost any main dish.

    I modeled it on a roasted sweet potato salad I make all the time, then swapped out the additions and the dressing for something with more going on. I wasn’t sure how a salad like this would actually land, but it just works. Even if you aren’t running a craving marathon, I’d bet you’ll enjoy the whole rainbow display as much as I did.

    Why this one passed the Tuesday test

    Here’s the deal with my kitchen: I’m not a trained cook, and most of my evenings are a race against the clock. If a recipe needs three trips to the store or a sauce that has to reduce for an hour, it’s not staying. This one is different. The potatoes do the bulk of the work in the oven, and while they roast you can chop the rest in about 20 minutes. Total time is 45 minutes, and the dressing takes seconds.

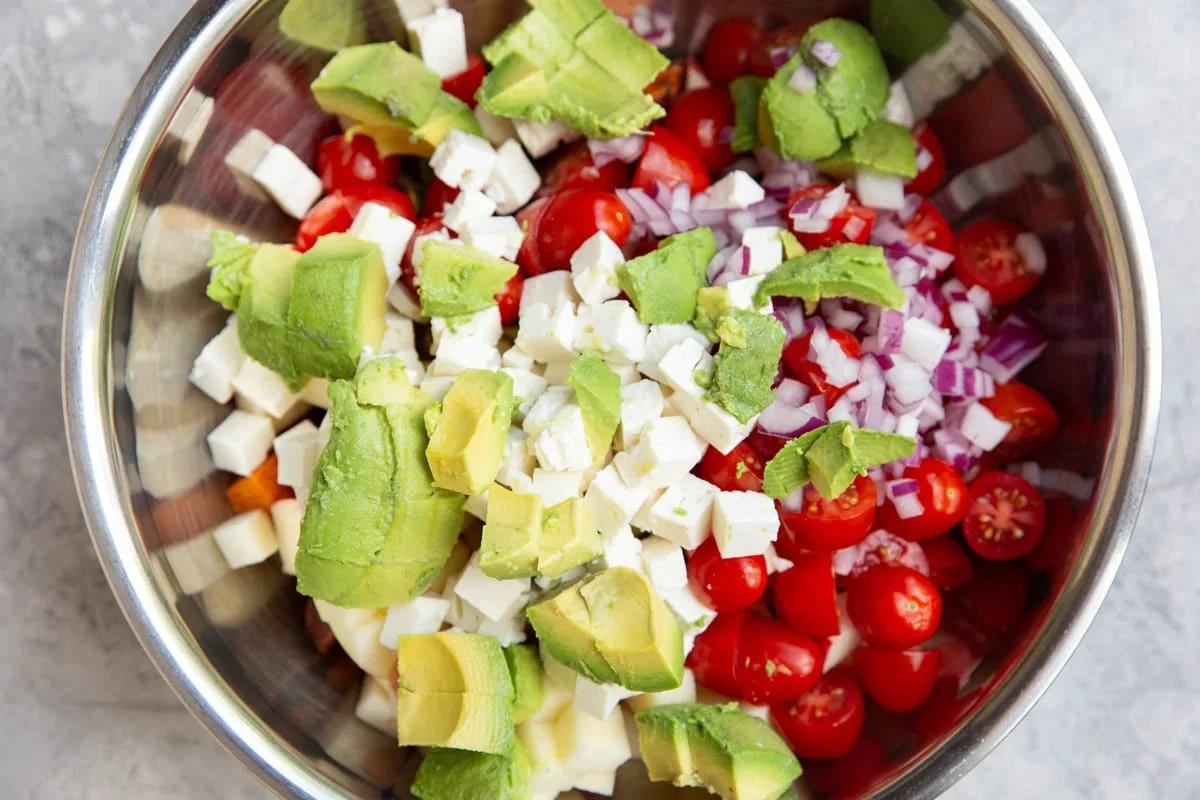
    Chopped avocado, feta, cherry tomatoes, and red onion ready in a mixing bowl

    What goes in it

    Sweet potatoes are the backbone of the dish. They bring the carbohydrates, a whole lot of vitamins, and a soft, buttery texture once they’re roasted until golden.

    The apple adds natural sweetness and a crisp bite. I use Honeycrisp because it’s both sweet and a little tart, but honestly, whatever apple you like works here.

    Cherry tomatoes bring juiciness and a little acidity. Avocado adds creaminess and rounds everything out. Feta is where the tang lives, and it’s the part of this dish I can’t stop thinking about. If feta isn’t your thing, goat cheese, gorgonzola, or parmesan all work in its place.

    Pistachios give it a nutty crunch. I love a little crunch in just about everything, and they do a great job here. Walnuts, pecans, pumpkin seeds, or sunflower seeds are fine swaps.

    Red onion adds a bright, slightly spicy note. If you like your onion milder, swap it for 4 chopped green onions instead.

    For the dressing: quality oil (I use avocado oil or extra virgin olive oil), balsamic vinegar for the sweet-tangy backbone, a spoonful of Dijon mustard for earthy depth, and a little minced garlic. That’s it.

    Make it your own

    This salad is genuinely flexible, so a few directions I’ve tried or love the idea of:

    • Add 2 teaspoons of pure maple syrup or a touch of brown sugar to the dressing if you want more sweetness.
    • Season the roasting potatoes with black pepper, garlic powder, cayenne, Italian seasoning, or chili powder for a more savory direction.
    • Stir in cooked, cooled brown rice and/or a drained can of black beans, plus extra dressing, to make it a more substantial meal.
    • Add other seasonal vegetables, like Brussels sprouts, broccoli, cauliflower, carrots, or butternut squash.
    • Toss in some rotisserie chicken or leftover roast chicken for a complete dinner.
    • Finish with a handful of parsley, cilantro, or mint for a bright herbal lift.

    How to make it

    Preheat the oven to 400°F. Chop 3 to 4 small to medium sweet potatoes into bite-sized pieces, for a total of 6 cups. Spread them in a single layer on a large rimmed baking sheet, drizzle with avocado oil, and sprinkle with sea salt. Toss with your hands until every cube is coated, and make sure they’re in a single layer so they roast evenly.

    Roast on the center rack for 20 minutes, then use a spatula to stir them underneath. Roast for another 5 minutes, until golden brown on the outside and soft in the center. This is the part that takes patience: set the potatoes aside on the sheet pan and let them cool completely to room temperature before anything else happens.

    While they cool, get the rest of the bowl ready. In a large mixing bowl, combine the chopped apple, diced avocado, cherry tomatoes, red onion, and pistachios with the cooled roasted potatoes.

    Roasted sweet potato and apple salad tossed with balsamic dressing overhead

    In a small bowl, whisk together the avocado oil, balsamic vinegar, Dijon mustard, and minced garlic. Pour the dressing over the salad and toss well until everything is evenly coated.

    Serve it at room temperature or chilled, alongside whatever you’re cooking for dinner.

    Storage

    Leftovers keep in an airtight container in the refrigerator for up to 1 day. This one is best eaten the same day you make it, because the avocado and apple both turn a little brown as they sit.

    Notes for next time

    If you’re meal prepping this, wait until serving time to add the apple and avocado. It keeps the whole bowl brighter.

    Want more crisp on the potatoes? Bake them 5 to 8 minutes longer in an even layer until you get some crisp edges and tender centers. The total time will depend on how big your cubes are.

    Next time you’re in the mood for a big mix of flavors and textures, this is the one to make. It’s a perfect weeknight side no matter the season, and in my opinion it would hold its own at Thanksgiving dinner, too.

    More numbers for the curious: prep is about 20 minutes, cooking is 25 minutes, and it makes 6 servings. One serving comes in around 260 calories, 43 grams of carbs, 7 grams of protein, and 10 grams of fat (auto-calculated, so treat it as an approximation).

    A note from Nora

    My first version of this dish came together on a random afternoon, and I powered through a very generous portion for lunch right after I finished. Sam asked if we could make it for dinner that week, which is about as close as this family gets to a standing ovation. If I can make it on a Tuesday, it’s a keeper. What’s in your produce bin that you never get around to using? I’d love to hear your combinations.

    Keep Reading

  • My Energy Ball Recipe

    My Energy Ball Recipe

    A friend taught me this recipe about six years ago, on an afternoon when she showed up at my door with a Tupperware container and zero instructions. Just try them, she said. I tried one and was immediately hooked. That container disappeared by dinner.

    Since then, these energy balls have lived in our fridge almost every week. The daughter grabs two before school. Sam takes a batch to work when he forgets lunch on purpose (so he has an excuse to eat snacks instead). Even Biscuit knows the sound of them unwrapping and gives that hopeful look from across the kitchen.

    They are simple in the way that matters: six ingredients, no cooking, about fifteen minutes start to finish. This one passed the Tuesday test easily.

    The Ingredients

    You will need:

    • 1 cup (about 150 g) pitted dates
    • 3/4 cup (about 75 g) almond flour
    • 1/2 cup (about 45 g) shredded coconut
    • 2 tablespoons chia seeds
    • 1 tablespoon coconut oil, softened
    • 1 rounded tablespoon crunchy peanut butter

    That is it. Nothing fancy, nothing you need a second trip to the store for.

    How to Make Them

    1. Pulse everything together. Add all six ingredients to a food processor and blend until the mixture starts to stick when you press it between your fingers. If your dates are on the drier side, you may need an extra teaspoon of peanut butter or coconut oil — just add it a little at a time.
    2. Roll them up. Scoop out portions and roll into balls. You should get about twelve evenly sized ones. They will feel sticky at first but firm up in the fridge.
    3. Chill and store. Place the balls in an airtight container and refrigerate. They keep well for up to two weeks, though that is more of a theoretical maximum than what usually happens in my kitchen.
    My Energy Ball Recipe - photo 1

    A Few Tips From My Kitchen

    Soften the dates first. If your dates are firm, soak them in warm water for ten minutes and drain them well before adding to the processor. It makes blending smoother and saves you from scraping the sides three times.

    Swatch ideas if you want variety. I have swapped the peanut butter for almond butter when Sam was in the mood, and once I added a teaspoon of vanilla extract just because. Both worked fine. Rolled oats (about 1/4 cup) also make a nice addition if you want something chewier.

    They freeze well too. If you end up with extras — or if you are making a batch for meal prep — lay them on a baking sheet, freeze until solid, then transfer to a freezer bag. They thaw in ten minutes on the counter.

    Nutrition (per ball, approximate)

    Each energy ball clocks in at roughly 90 calories, with about 3 grams of fiber and 2 grams of protein. Not a meal replacement, but a solid bridge between breakfast and lunch when you are running late.


    A note from Nora: The first time I made these, I rolled them into uneven shapes that looked more like pebbles than balls. Sam ate three without comment, which I took as the highest praise. They do not need to be pretty. They just need to taste right — and they always do.

    Maybe that is what makes small kitchen rituals worth keeping: they are forgiving enough for busy afternoons and good enough to make you feel like you did something kind, even on an ordinary Tuesday.

    Keep Reading

  • Honey Soy Steak with Cherry Tomato Salad

    Honey Soy Steak with Cherry Tomato Salad

    One Tuesday night, I pulled the marinade I’d made that morning off the fridge door and told Sam I wasn’t going to fight the grill about it. An hour later we were eating sliced honey-soy steak over a bowl of cherry tomato salad, passing grilled ciabatta around like it was the main event. Our daughter asked for seconds. Biscuit got a piece of bread. Nobody complained about a single thing, which in this house is basically a five-star review.

    Sliced honey soy steak over cherry tomato salad with grilled ciabatta

    I make some version of this meal every other week. If it’s not this exact recipe, it’s a variation of it. I made it again the night before this and served it with a pot of broccoli rice pilaf, and everyone loved it. It’s one of those dinners that feels a little special but comes together with very little effort. I think that’s the whole trick: the steak does the working, the salad is five ingredients, and the bread just shows up late and soaks up everything.

    Summer here has been wonderfully busy. There have been slower days, but somehow the calendar fills back up again. Because of that, I’ve been leaning into dinners with parts I can prep ahead. It makes the evening feel less rushed, and it gives me more time to actually enjoy sitting down to eat. This recipe is exactly that kind of meal: easy enough for a weeknight, but good enough to serve when friends come over. Add a couple of sides for a dinner party, or keep it simple with just the steak, salad, and bread.

    Honey soy marinated steak sliced on a serving platter

    Why This Dish Works

    The steak is marinated in a mix of tamari, ponzu, honey, citrus, and shallot, so it comes off the grill incredibly flavorful and tender. The real surprise, though, is the cherry tomato salad. Sweet summer tomatoes, fresh basil, and creamy, salty feta tossed with a bright champagne vinaigrette. It adds so much freshness, color, and flavor against the savory meat.

    I always serve it with thick slices of grilled ciabatta. That bread is perfect for soaking up the steak juices and the vinaigrette, and it is usually the first thing to disappear from the table.

    What You’ll Need

    You can use any cut you like. I’ve made this with flank steak, beef tenderloin fillets, and boneless beef short ribs, and I’ve swapped in grilled chicken when I had it on hand. Here’s the full list:

    Cherry tomato salad ingredients with basil, feta, and vinaigrette

    Steak and Marinade

    • 2 pounds (~907 g) flank steak, 4–6 beef tenderloin fillets, or 4 pounds (~1.8 kg) boneless beef short ribs
    • 1 loaf ciabatta, thickly sliced
    • 1/2 cup (~120 ml) tamari or soy sauce
    • 1/2 cup (~120 ml) ponzu sauce
    • 1/3 cup (~80 ml) rice vinegar
    • 2 tablespoons lemon juice
    • 2 tablespoons lime juice
    • 2 tablespoons honey
    • 3 tablespoons olive oil
    • 1 shallot, thinly sliced
    • black pepper

    Cherry Tomato Salad

    • 1/3 cup (~80 ml) extra virgin olive oil
    • 1/3 cup (~80 ml) champagne vinegar
    • 2 small shallots, thinly sliced
    • 4 cups (~1 kg) mixed sungold and red cherry tomatoes, halved
    • 1 cup (~100 g) baby basil
    • 2 cups (~200 g) watercress or arugula
    • 1 cup (~113 g) crumbled feta or goat cheese
    • flaky sea salt and black pepper

    Total time is about 30 minutes (20 minutes prep, 10 minutes cook), and it serves 6. Each serving comes in around 516 calories, give or take with your cut of meat. That’s an estimate, not a promise, but it’s a solid dinner.

    Charred grilled ciabatta slices ready to soak up the sauce

    The Steps

    1. Marinate the Steak

    In a glass baking dish or a large zip-top bag, whisk together the tamari, ponzu, rice vinegar, lemon juice, lime juice, honey, olive oil, shallot, and plenty of black pepper. Reserve about one-third of the marinade for serving, then add the steak to the rest. Let it sit for at least 20 minutes, but if you have the time, overnight is even better. The longer it sits, the more flavorful and tender the steak becomes.

    If you’re using flank steak or short ribs, I almost always marinate them the night before or first thing in the morning. Our favorite cuts, though, are New York strip (my sister’s favorite), ribeye, and tenderloin filets.

    2. Grill the Steak

    Take the steak out of the refrigerator about 30 minutes before cooking so it can come to room temperature. Grill over high heat or sear it in a hot cast iron skillet until it’s cooked just the way you like it. Let the steak rest for about 10 minutes, then slice it thinly against the grain and spoon the reserved marinade over the warm slices just before serving.

    Always slice against the grain. It makes every bite much more tender. That single habit is the difference between a good steak and a one that gets chewed out on the back porch.

    3. Grill the Bread

    Brush the ciabatta slices with olive oil, then grill until lightly charred with crisp edges and proper grill marks. Finish with a sprinkle of flaky sea salt.

    Grill a few extra slices. They always disappear first, and they’re perfect for soaking up the steak juices and the tomato vinaigrette.

    Cherry tomato salad tossed with basil and crumbled feta

    4. Make the Cherry Tomato Salad

    In a large bowl, whisk together the olive oil, champagne vinegar, and shallot. Season with flaky sea salt and black pepper. Add the cherry tomatoes and basil, then gently toss everything together. Finish with plenty of crumbled feta or goat cheese.

    If you can find sungold tomatoes, use them. They’re extra sweet and make the salad even more special. A mix of red and golden tomatoes also makes the plate look like it’s trying to have a good time.

    5. Assemble and Serve

    Arrange the sliced steak on a serving platter and spoon the tomato salad over the top. Finish with extra basil, black pepper, and a sprinkle of flaky sea salt if you’re feeling like it. Serve immediately, with the grilled ciabatta alongside.

    I love serving this with broccoli rice pilaf, grilled corn, or crispy potatoes, or simply as is. It’s just as good for a quiet weeknight as it is for having people over, and a glass of chilled white wine or rosé next to it makes the evening feel put-together without any effort.

    A Few Tips

    • Marinate the steak for as long as you can. Twenty minutes works in a pinch, but overnight gives you the most flavor. If you’re using tenderloin, New York strip, or ribeye, 10–20 minutes will do the trick.
    • Always slice the steak against the grain. It makes every bite more tender.
    • Use a mix of colorful cherry tomatoes if you can. Sungolds add incredible sweetness and make the salad more vibrant.
    • Don’t skip the grilled bread. It’s the best part for soaking up the juices and the vinaigrette.

    The original recipe I worked from is here if you want to see more of it: this honey soy steak post. I kept the ratios and just made the whole thing fit how our weeknights actually go.

    This is exactly the kind of dinner I crave in late summer. I love how the sweet tomatoes and fresh basil balance the savory steak, and I’ll keep making this marinade long after tomato season ends. It’s simple, it’s colorful, and it tastes like summer every time.

    A Note From Nora

    Our first attempt at this came out a little sad. I under-marinated the flank, the tomatoes were mealy, and the bread went from charred to charcoal in about four seconds of not watching it. The fix was boring and effective: marinade earlier, halve the tomatoes, and actually stand there while the bread is on the grill. This is the version that works, the one I’ve made again and again since. If I can make it on a Tuesday, it’s a keeper.

    Keep Reading